
Service Protocol Connector Settings
Last updated
How a service protocol is created
The preparation of the protocol begins with a template provided by the client. The client usually sends a scan of the paper protocol, which they currently complete by hand, or a draft showing how the protocol should look. The template is converted into a digital form within the NETGRIF system. A NETGRIF connector is then added in CDESK, complete with access data and form identification; the form fields are loaded, and each field is assigned data from CDESK – for example, the name from the Requested For field, the serial number from the ‘Devices’ field, or the work description from the ‘Work performed’ field. When the report is generated, CDESK sends the data to NETGRIF, which uses it to create a PDF and returns it to CDESK.
- The name of the button to start generation is set in the connector in the Name of the button to start generation field. The same name is viewed on the website and in the mobile app.
- If the fields for a CI type contain a description—for example, the unit bar or kW—this can be viewed in the protocol alongside the value by enabling the Add property description to value option during field pairing.
- Different departments may have their own custom connectors and protocols. They are distinguished by the Place of use field, for example, for requests created from a specific template only.
Creating a connector
- In the Global Settings → Connectors, API menu, click the + Add connector button.
- In the Connector Type field, select Custom Reports for NETGRIF and click the Continue button. The connector form will appear.
- Enter your NETGRIF access data and form ID, and configure the fields described in the list below.
- Enable the connector and save it by clicking the Save button.
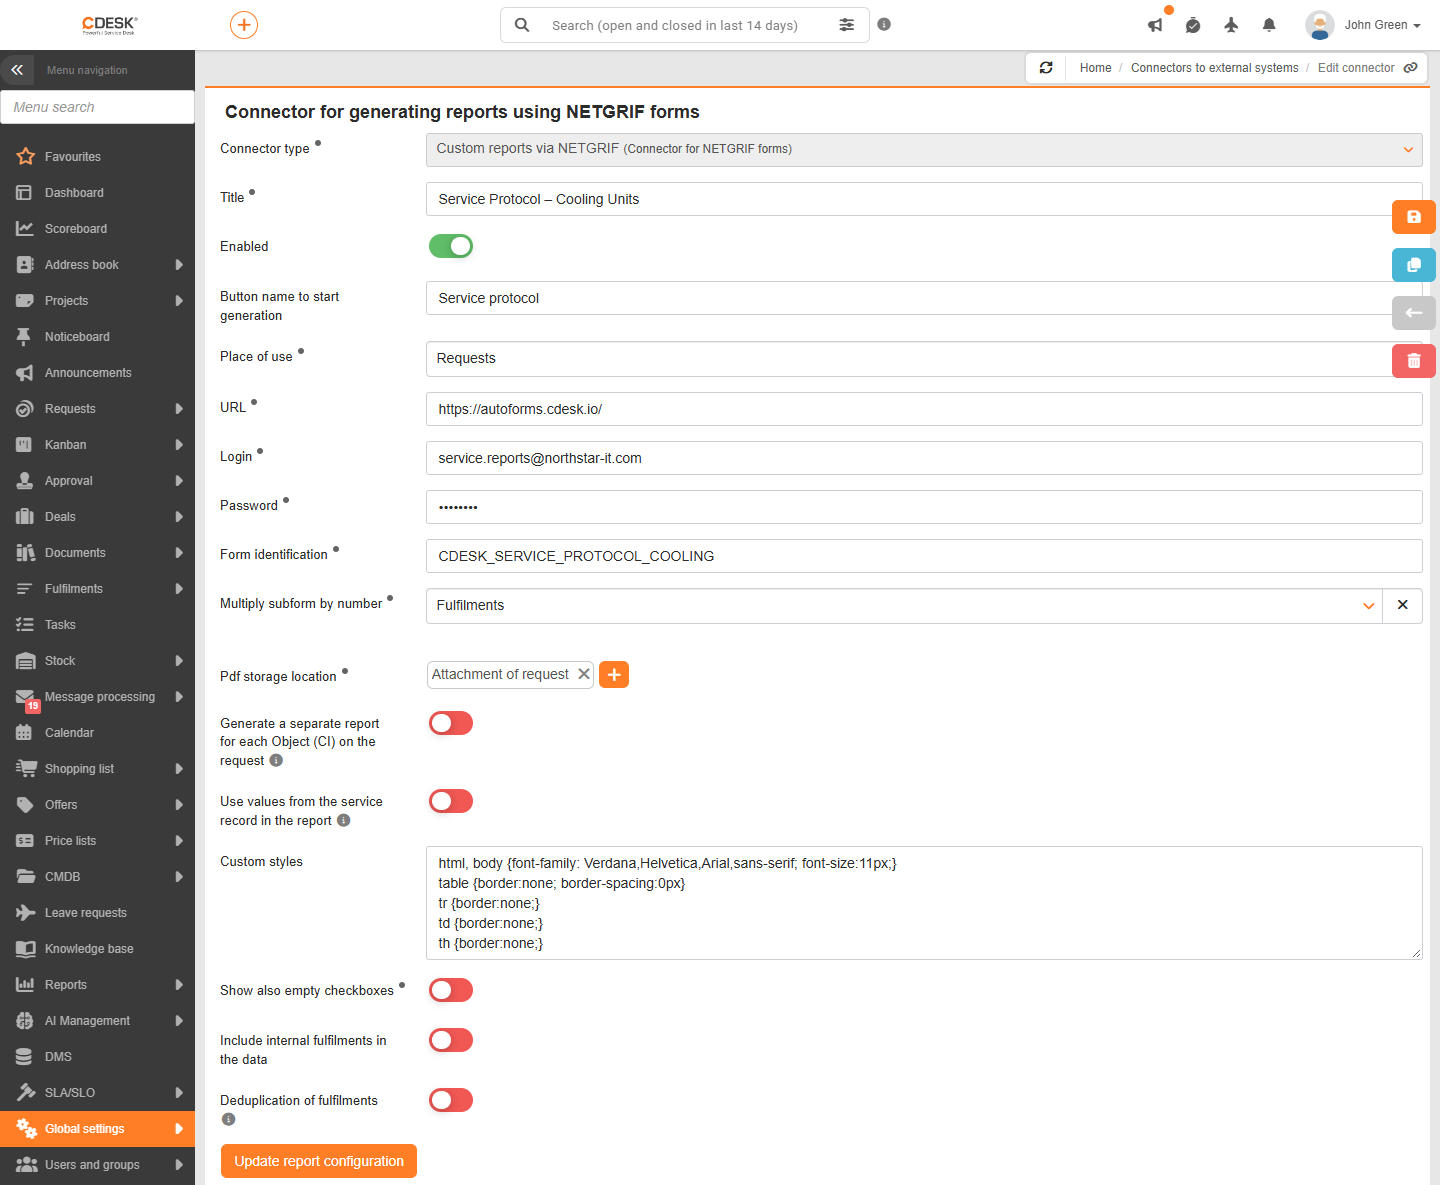
Service protocol connector fields
The following list sets out the connector fields that are essential for service reports. A description of the other fields and field pairing can be found in the documentation section Print Forms → Netgrif Print Report Connector.
- Usage – Specifies in which record details the button for generating a report will be displayed. For service reports, the most common option is Requests created from a selected template, which allows a separate report to be set up for each type of service task. Other options include, for example, Requests, Device repair requests, Fulfilments or Requests and Fulfilments. For service records on CI, the restriction described on the Connector for Service Records page applies.
- Request template – Only viewed where ‘Requests created from the selected template’ is used. Specifies the request template from which the request must be created for the button to appear. This allows you, for example, to set up a separate protocol for the servicing of refrigeration equipment and another for the servicing of compressors.
- Button name for starting report generation – The text of the button used by the technician to generate the report in both the web interface and the phone app, for example ‘Generate Protocol’. If the field is left blank, the connector name will be viewed on the button. If multiple connectors are used for the same request, multiple buttons will be viewed; it is therefore advisable to name them in such a way that they can be distinguished from one another.
- Multiply subform by quantity – Specifies the basis on which the subform is repeated in the protocol, i.e. the recurring part of the protocol. For service protocols, the most commonly used options are CI objects (the section is repeated for each device in the request), Tabs of user-defined CI Object fields (for each device properties tab, for example, for the circuits of a cooling unit) and Fulfilments (for each record of work done).
- PDF storage location – Specifies where the generated protocol will be saved. The options are: Request Attachment, Fulfilment Attachment, Attachment to linked CI object, Service Record Attachment and Offer for download. For service protocols, ‘Attachment to Request’ is usually selected so that the protocol is available directly within the request.
- Generate a separate report for each CI object in the request – This option is only displayed at the places where ‘Request’ or ‘Requests created from the selected request template’ is selected as the usage type, and at the places where ‘Request Attachment’ is selected as the storage location. If this option is enabled and the request relates to multiple devices, a separate protocol is generated for each device.
- Include only fulfilments linked to the given CI in the report – This is only displayed when the previous box is enabled. Only fulfilments directly linked to that specific piece of equipment will be included in the report for that equipment.
- Apply values from the service record in the report – The report retrieves the device’s values from the service record for the CI (status on the date of the service), rather than the current values on the CI. This field is only used with service records; a detailed description can be found on the Service Records Connector page.
- Deduplication of service entries – This is useful when several technicians are working on a single service task and each of them records the same job. If enabled, duplicate fulfilments with the same description and start-to-end times will be included in the log only once. Where there are multiple matching fulfilments, the fulfilment performed by the assignee who resolved the request will be applied.
- Include internal fulfilments in the data – If enabled, internal fulfilments will also be included in the protocol.
The button name set in the connector is viewed in both the web interface and the mobile app. If more than one connector is set up for a single request, multiple buttons will be viewed.
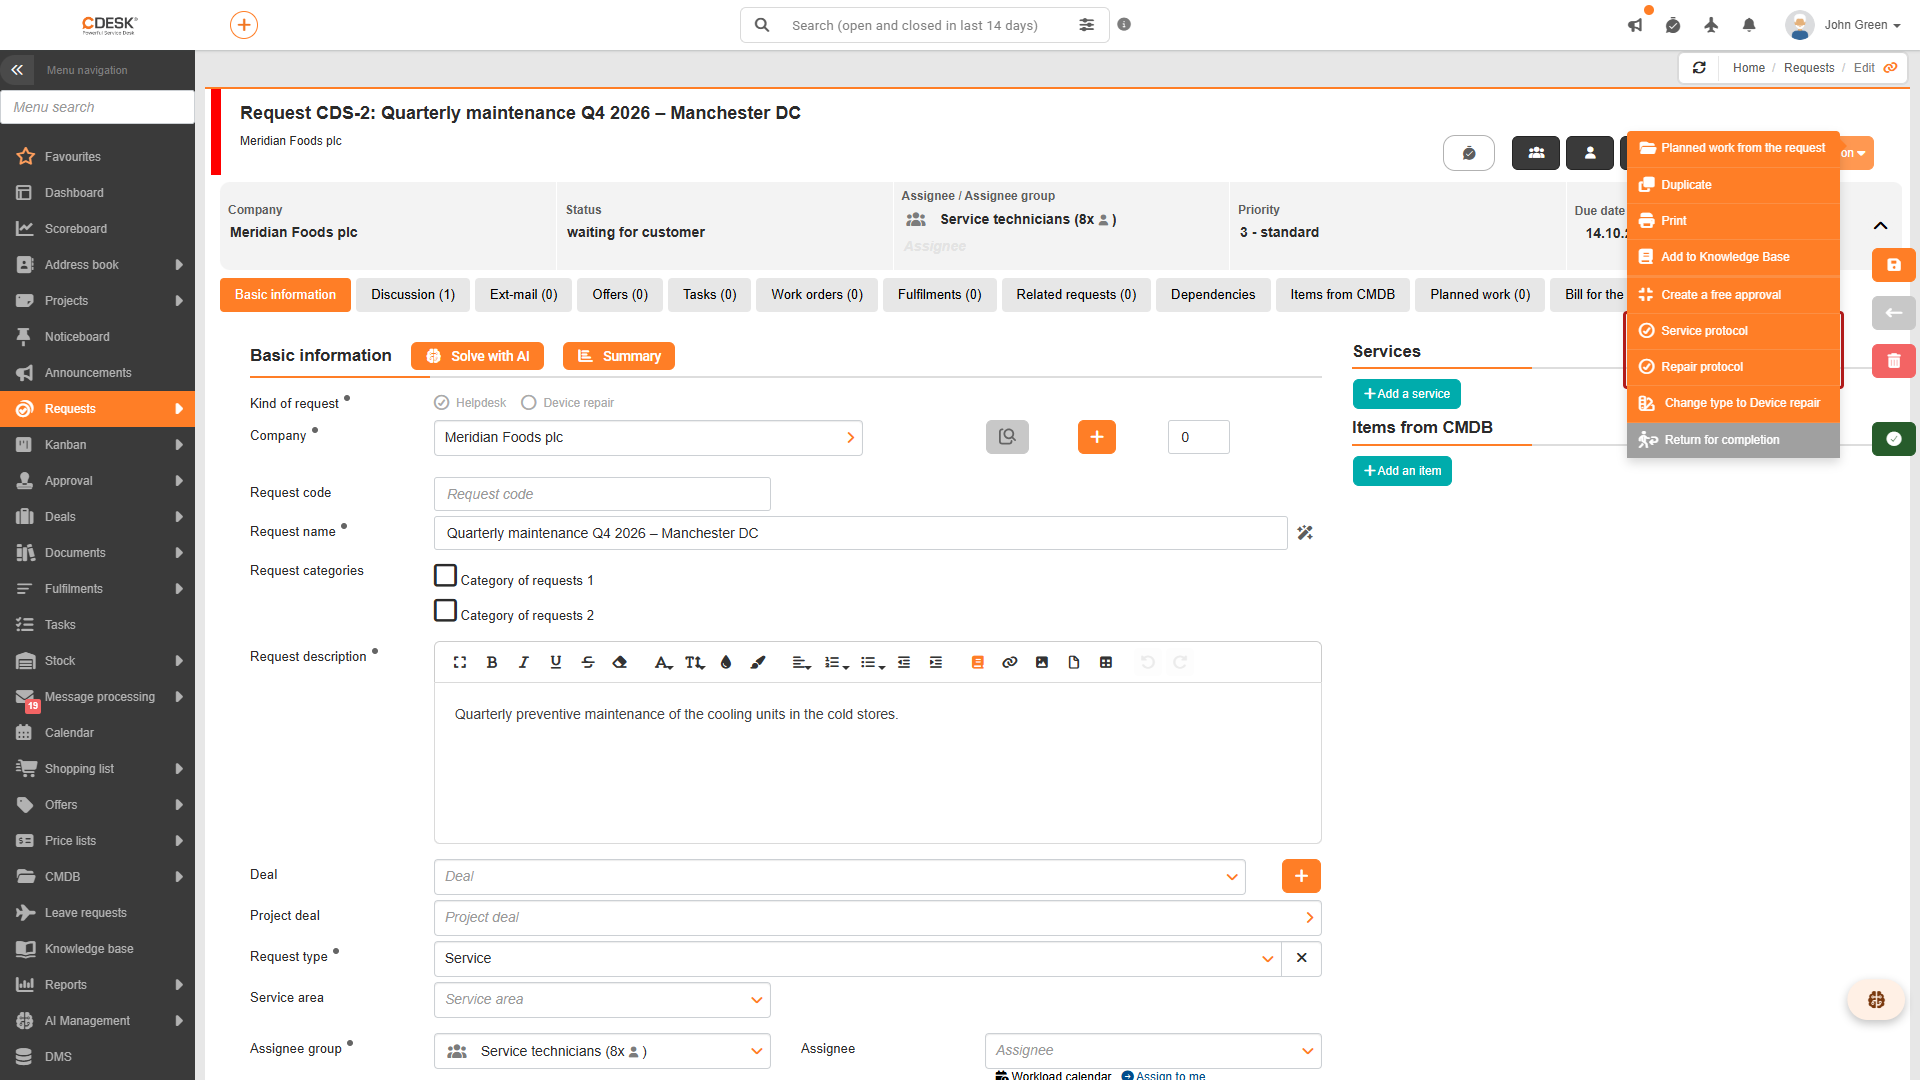
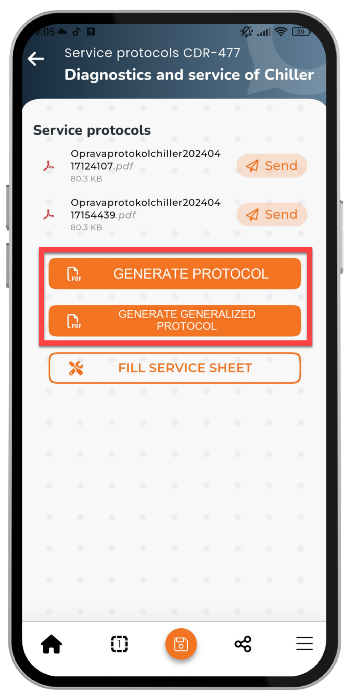
Price as recorded in the protocol
The price of the work carried out is entered into the report from the accounting item selected in the Accounting item field of the order. Accounting items are managed in the menu Orders → Accounting items, and the price is calculated based on their rate and the VAT rate. When performing form field pairing, the following properties can be applied, for example:
- Fulfilments -> Hourly rate (without VAT) – the hourly rate of the fulfilment’s billing item.
- Fulfilments -> Labour cost (incl. VAT) – the hourly rate multiplied by the quantity of fulfilments, including VAT.
- Fulfilments -> Summary -> Labour cost (incl. VAT) – the total labour cost for all fulfilments in the protocol.
- Statement of labour and materials – the complete table of the statement of labour and materials, showing prices without VAT and including VAT.
The cost of the work is calculated only for billing items with an hourly rate. If no billing item has been selected for the task, the price field will remain blank in the protocol.
Was this page helpful?
Thank you for your feedback.