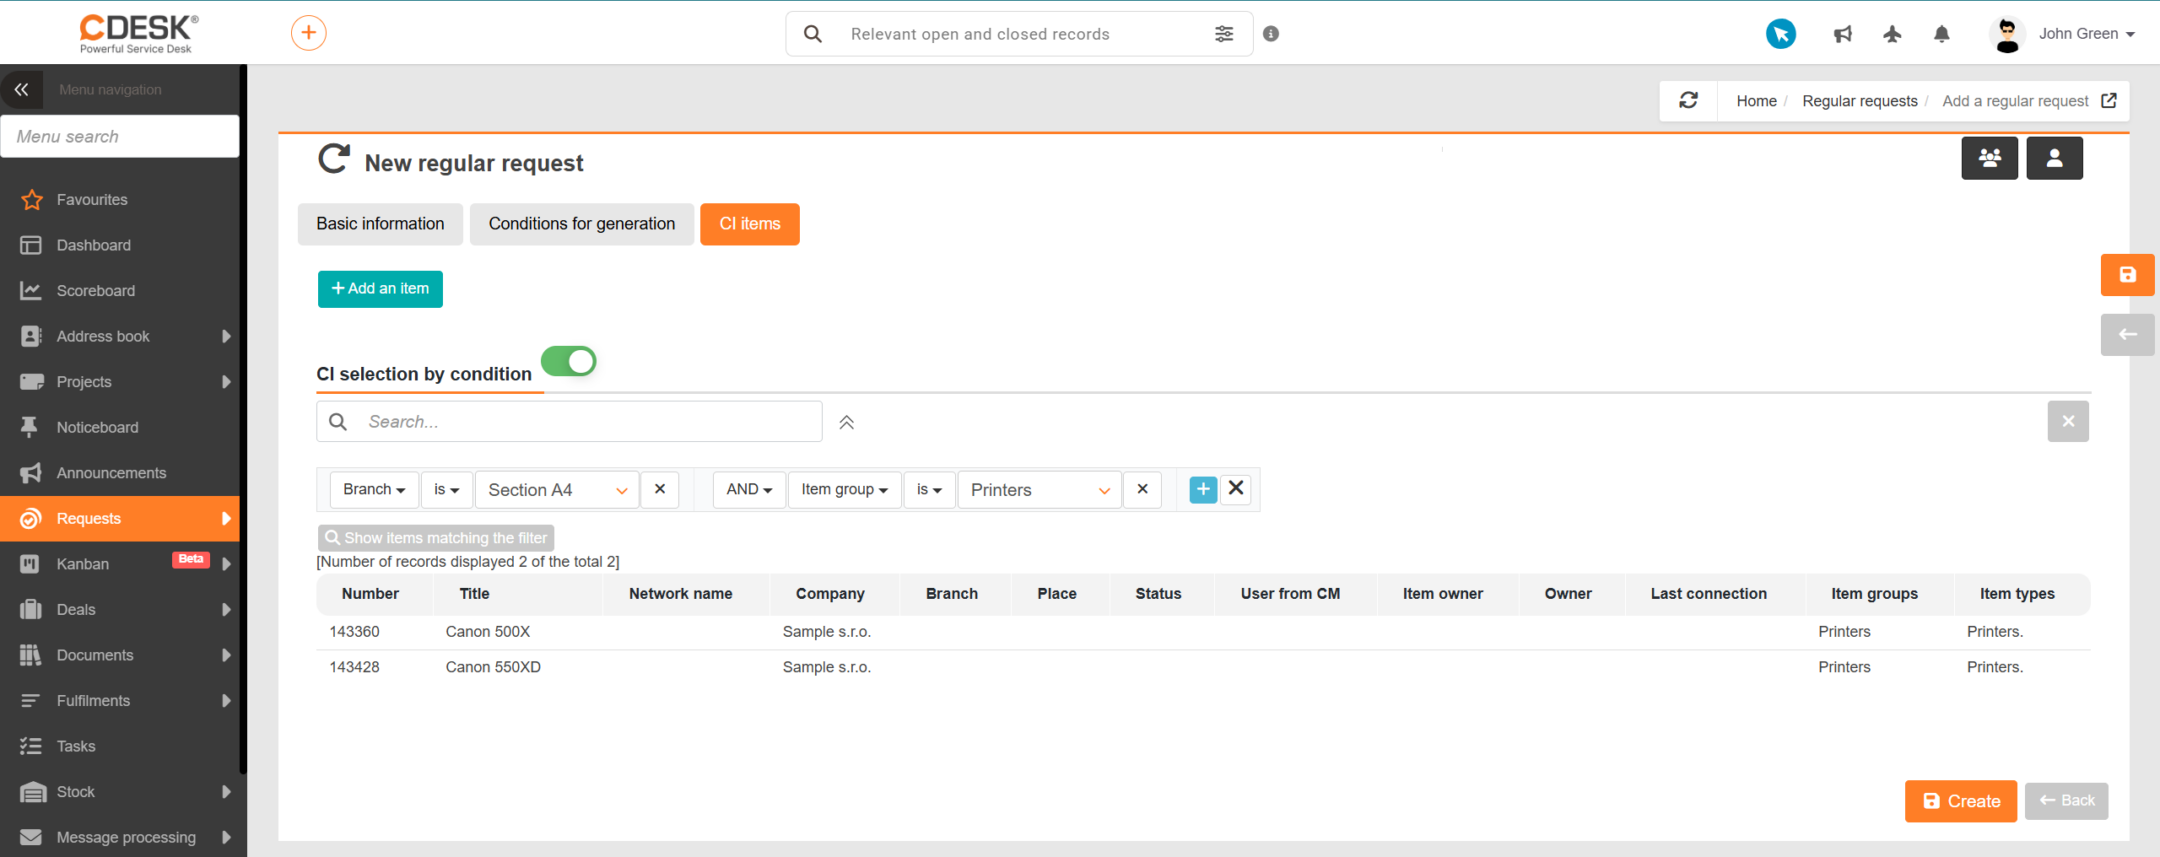


You can create a regular request, from which specific solution requests will be generated, by clicking the +Add regular request button in the Requests → Regular requests section.
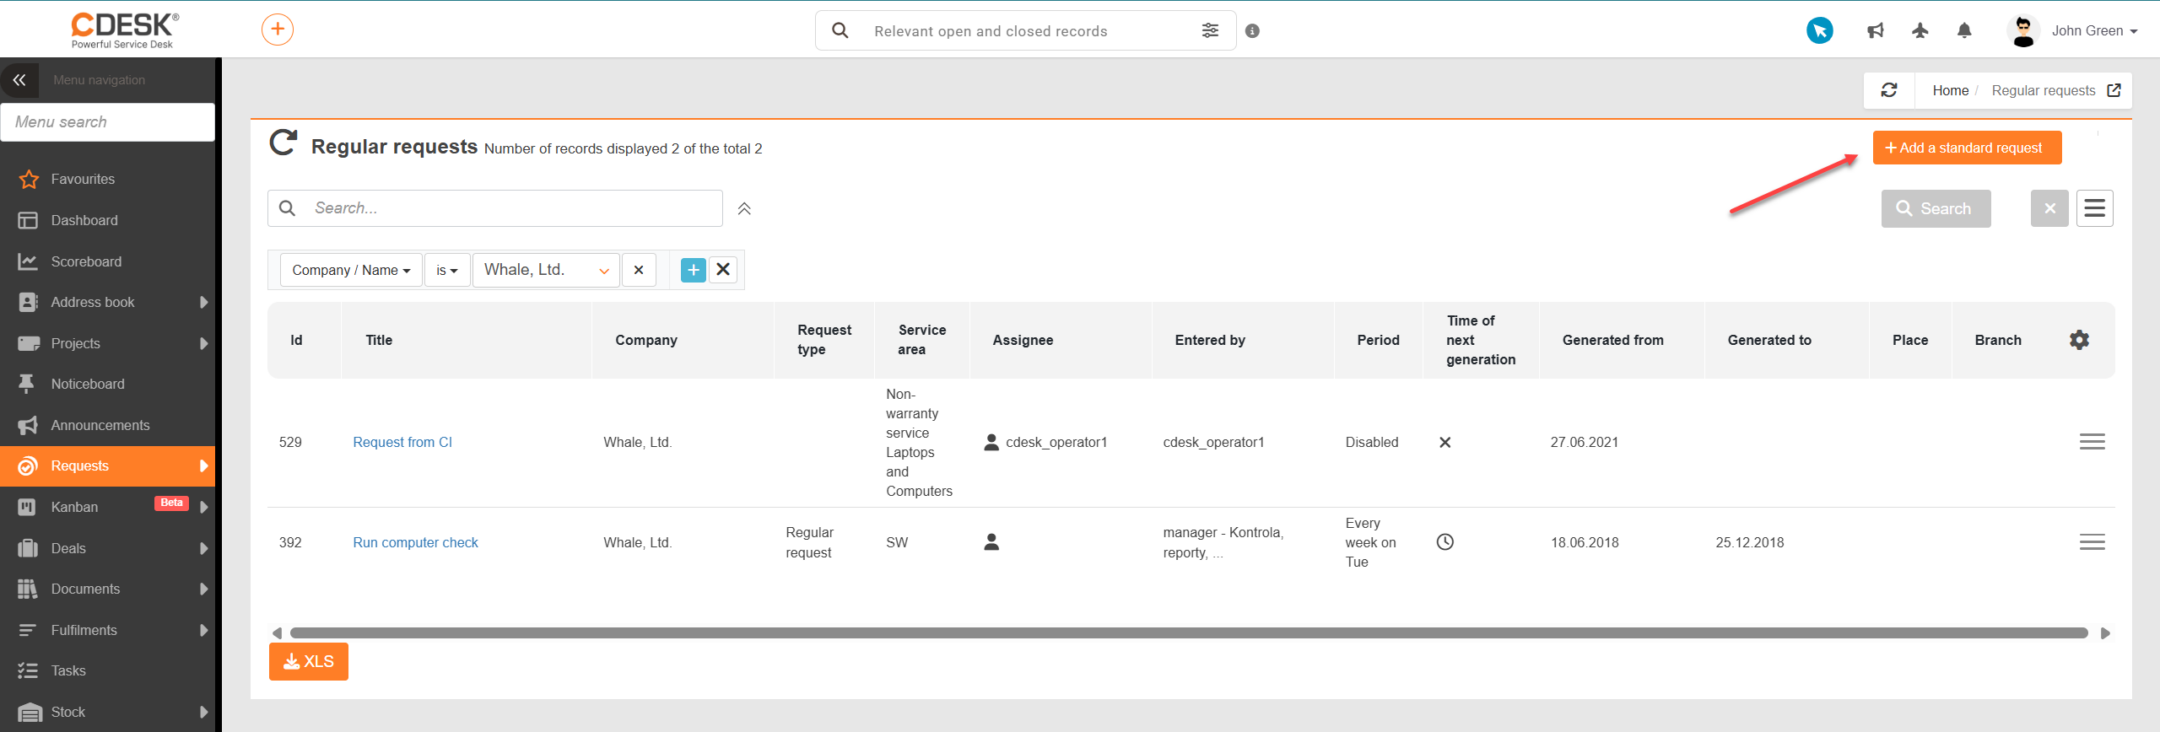
Clicking this will open a form for request entry. The purpose of each field in the form is explained below in the section ‘Purpose of the fields in the regular request form’.
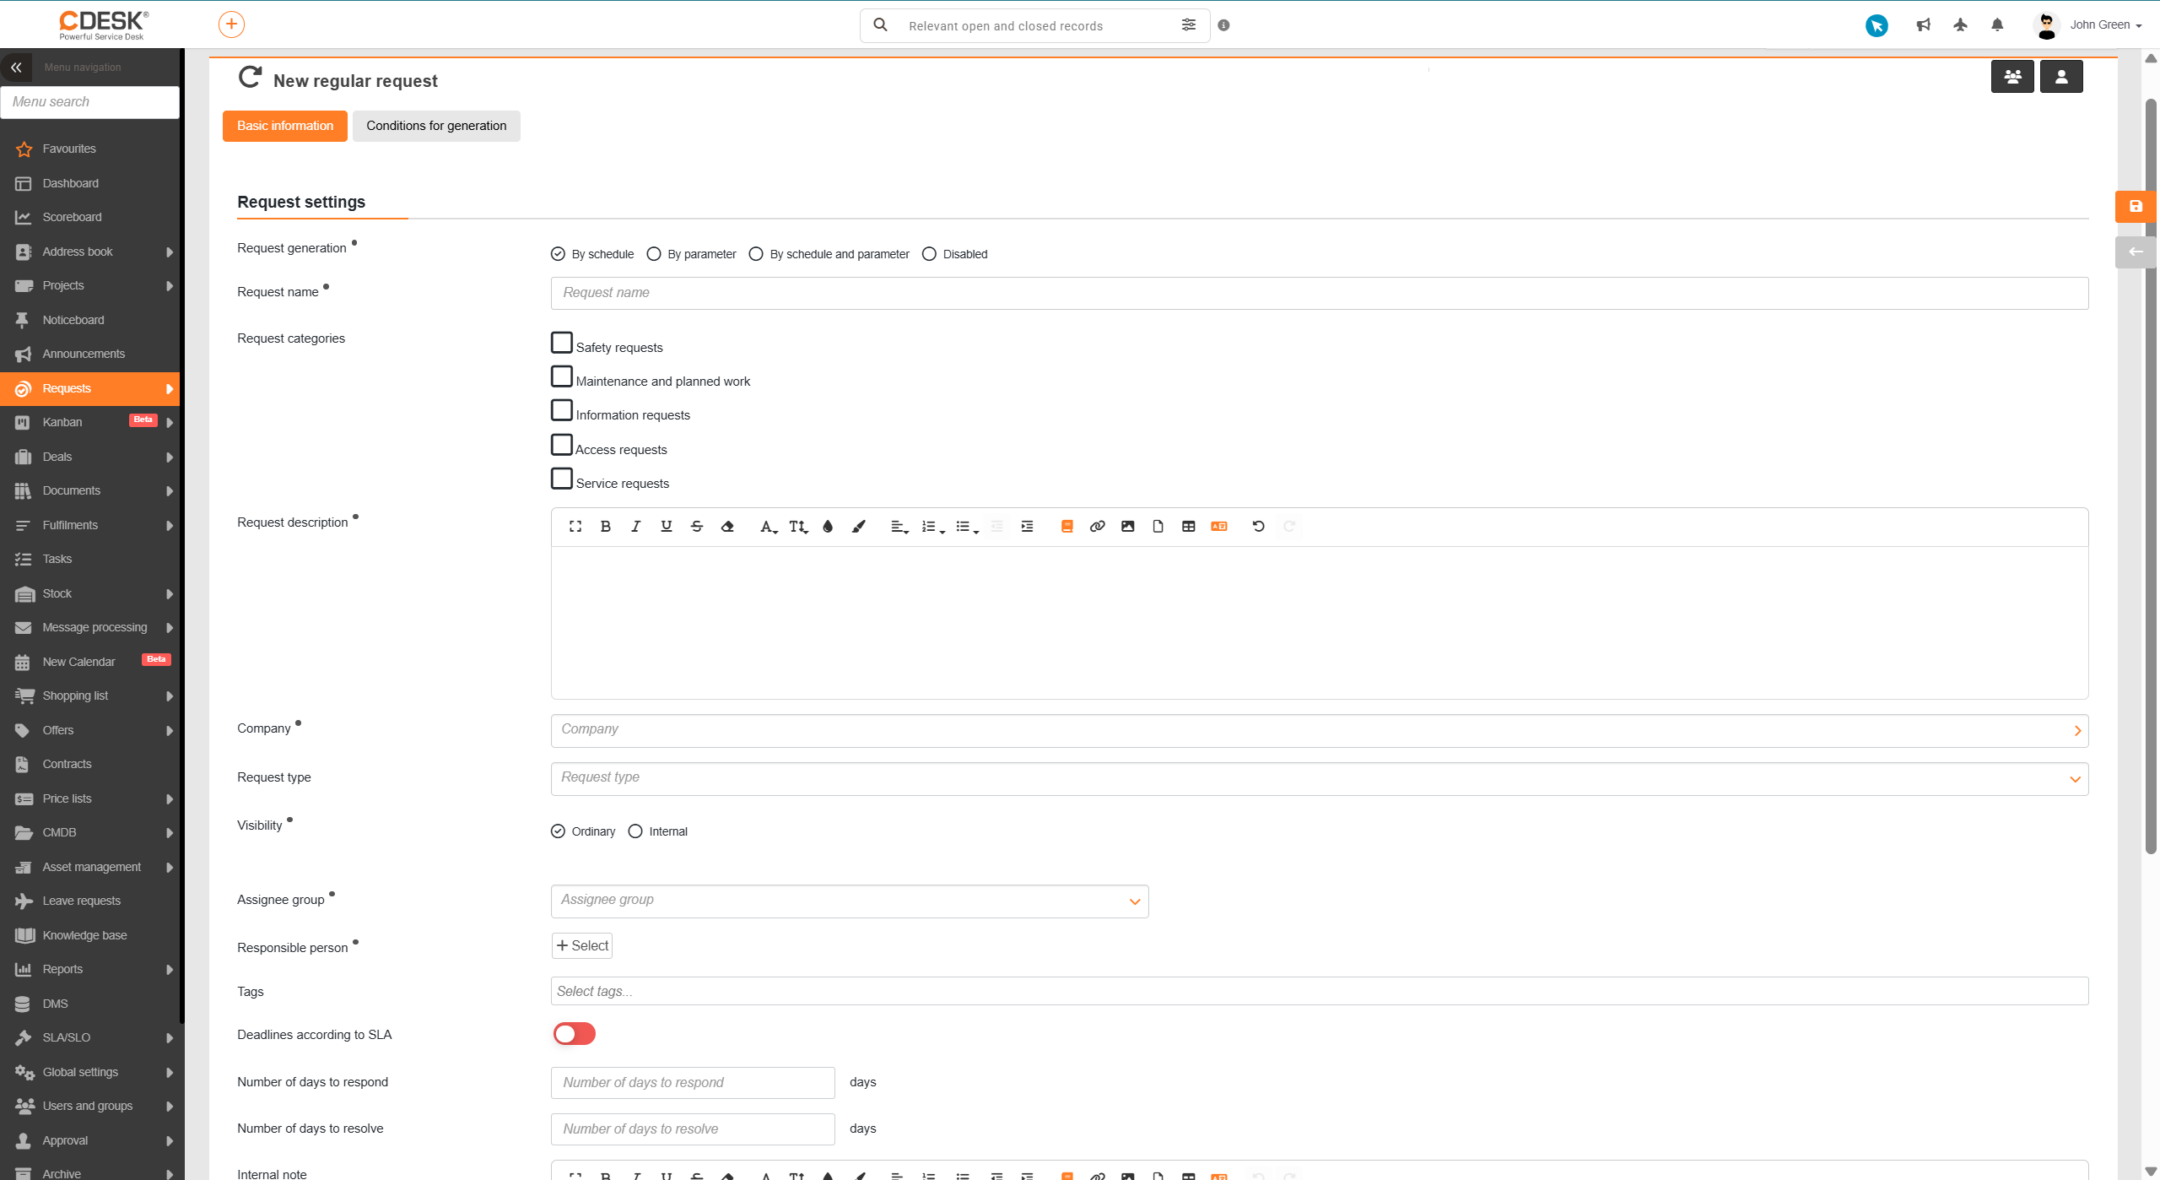
To create a regular request, click the ‘Create’ button.
Meaning of the fields in the regular request form
The regular request form consists of mandatory and optional fields of various types; mandatory fields are selected with a full stop next to the field name. The form is divided into several sections, which are accessible via separate tabs,
- Basic details
- Condition of generation – this part of the settings is covered in detail in a separate section of the documentation: Conditions of generation for regular requests
- Object (CI)
Once a new regular request has been saved, the ‘Requests’ tab becomes available, viewing a list of requests generated to date.
Key figures
The ‘Basic Data’ tab contains the information required to create a regular request record, in the same way as when creating a new request. The content of the form is subject to system configuration; most fields have the same meaning as those in the request form. The parameters specific to regular requests are listed below.
- Request generation – the method by which requests will be generated
- According to schedule – on the Condition of Generation tab, this option makes fields available for setting the schedule for generating requests.
- By parameter – on the Condition of generation tab, this provides fields for setting the generation of requests based on the parameters of the selected object.
- By schedule and parameter – on the Condition of Generation tab, this enables fields for setting the schedule for generating requests, as well as fields for setting request generation based on the parameters of the selected object
- Disabled – if this option is selected, only the fields for specifying the start and end times for request generation will be displayed on the Condition of Generation tab.
- Request type – offers a selection of those request types that are defined and enabled in Global Settings → Requests → Service Types and Areas, and which are also marked in the ‘Regular request’ column
- Priorities – Informs the assignee of the importance of the regular request. For requests generated from Regular requests, the SLA does not apply, and both response deadlines and resolution deadlines are specified precisely in the ‘Number of days for response’ and ‘Number of days for resolution’ fields.
- Number of days to respond – specify the number of days within which the assignee must respond to the request.
- Quantity of days to resolve – specify the quantity of days within which the request must be resolved.
User-defined fields
Custom fields for a regular request can be defined globally within the settings for regular requests or individually for a specific regular request.
Detailed instructions on how to configure custom fields are provided in the ‘Regular Request Settings’ section of the documentation.
Object (CI)
This tab is viewed if the Global Settings → Requests → Basic Settings option ‘Select items from CMDB’ is enabled. These are objects located in the configuration database. To be able to select from these objects, you must first define at least one group from the ‘Devices’, ‘Service catalogue’ or ‘General’ categories for the selected company.
If the company has defined objects, they can be added to the request by clicking the + Add item button. Upon clicking, a window will appear allowing you to select objects by object type and group. You can assign items to the request by ticking the selected items and clicking the Add button.
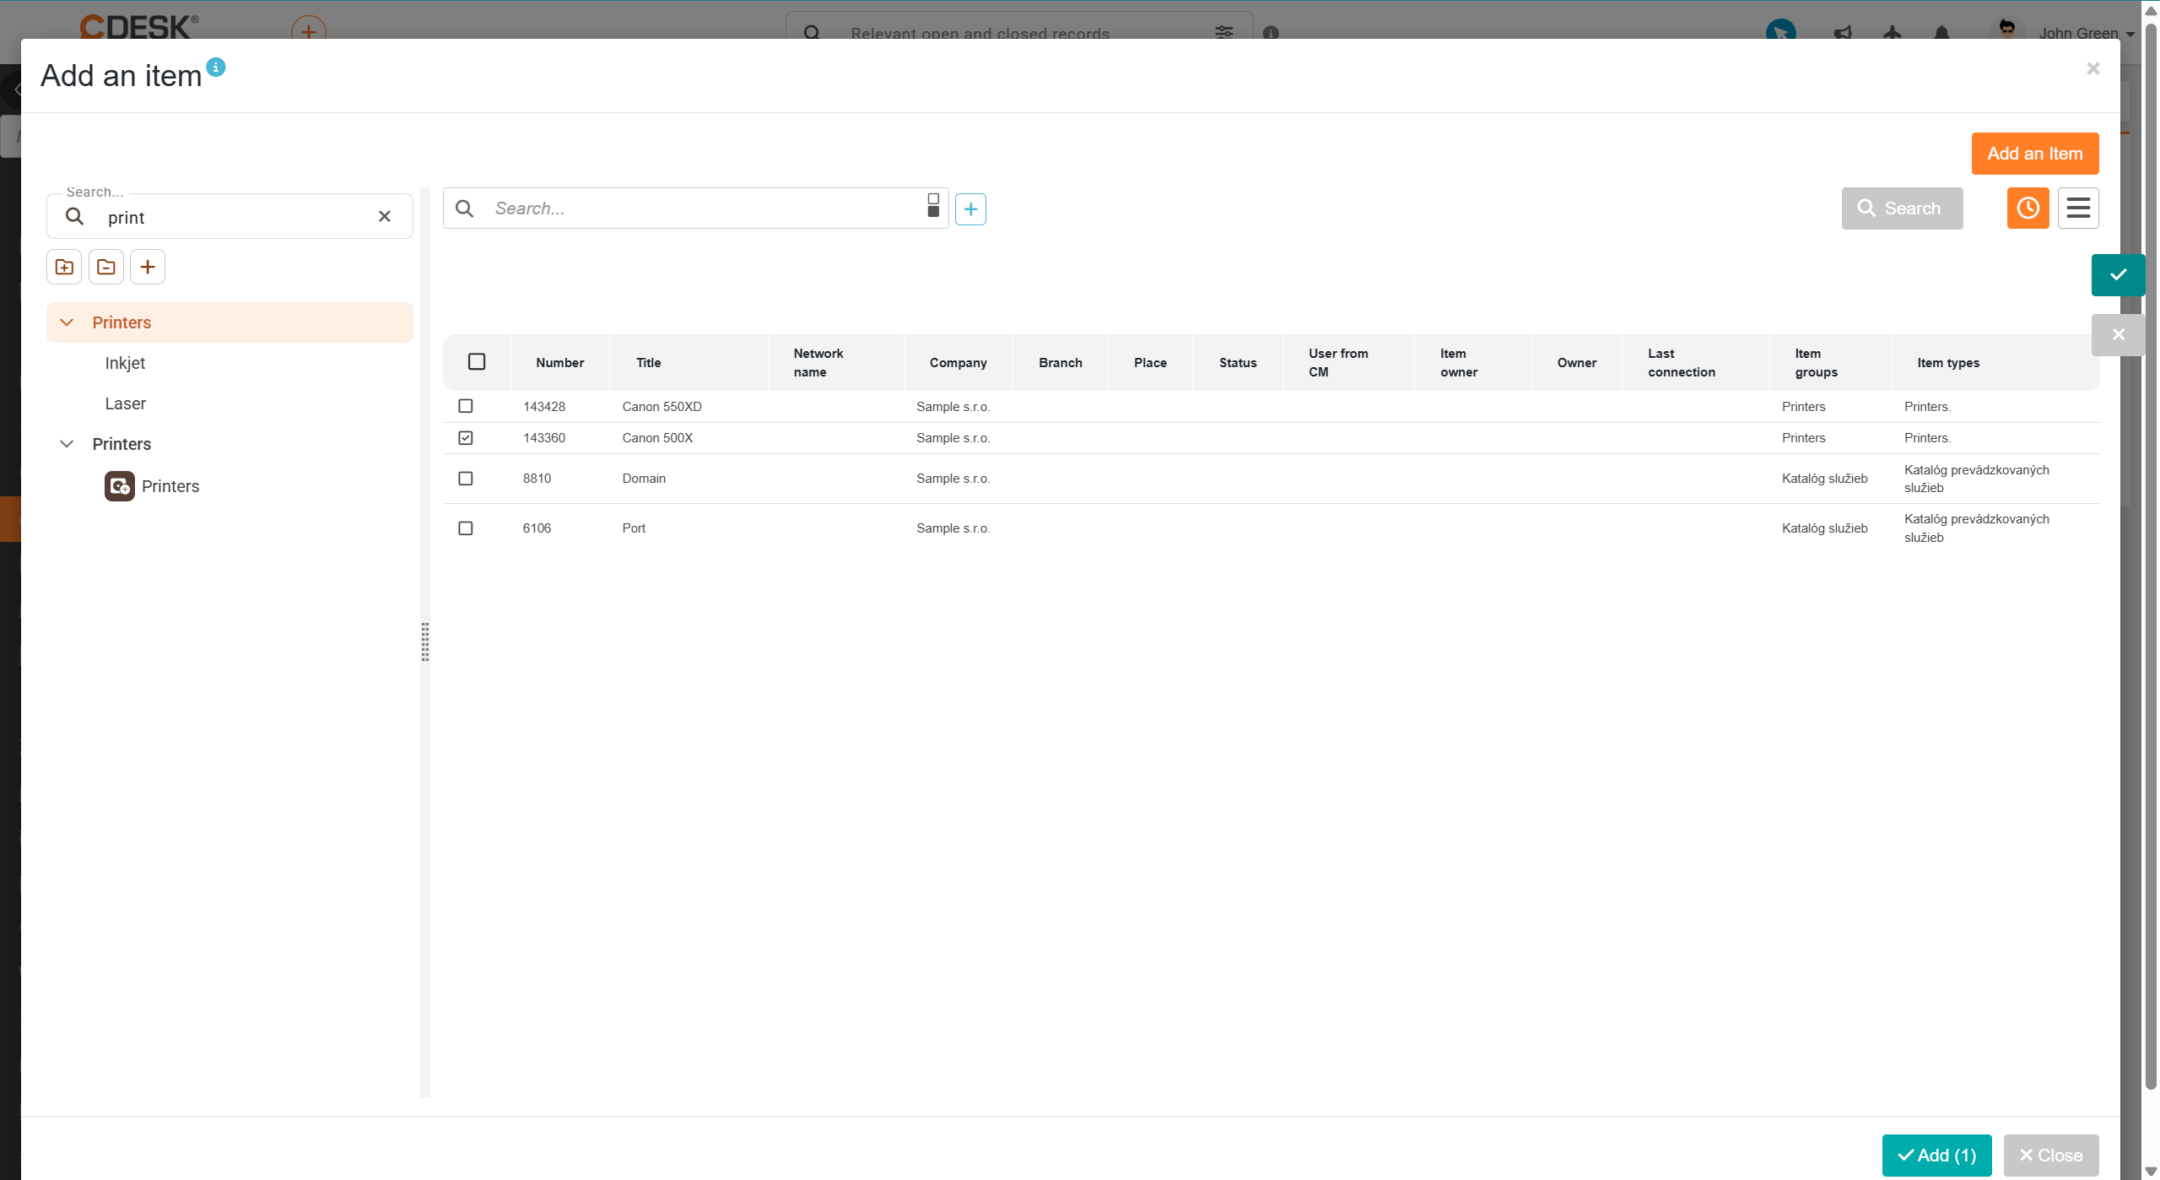
If the client has defined objects but these do not appear in the selection, please check whether the objects are assigned to the same branch as specified in the request. Objects can be removed from the request by clicking the ‘Delete’ button in the context menu on the row containing the relevant object.
The selection of CI objects in a regular request can also be filtered by conditions. Once conditions have been defined, all CI objects that meet the specified conditions will be included in the regular request, without the need to manually select specific CI objects. The condition is set using the advanced filter; the filter results can be confirmed by clicking the ‘View items conforming to the filter’ button.