Beta verzia novej dokumentácie.

List of regular requests

The list of regular requests can be found under Requests → Regular requests, provided that the Requests module is enabled in Global Settings → Requests → Basic Settings.

If the module still does not appear in the menu, check your access permissions for this module. You can set permissions under Users and Groups → Users → details of a specific user → Permissions tab → Requests → Regular requests. You must also have access to the Requests module itself. Authorizations for the Requests module are set in Users and Groups → Users → a specific user’s details  → Permissions tab → Requests.

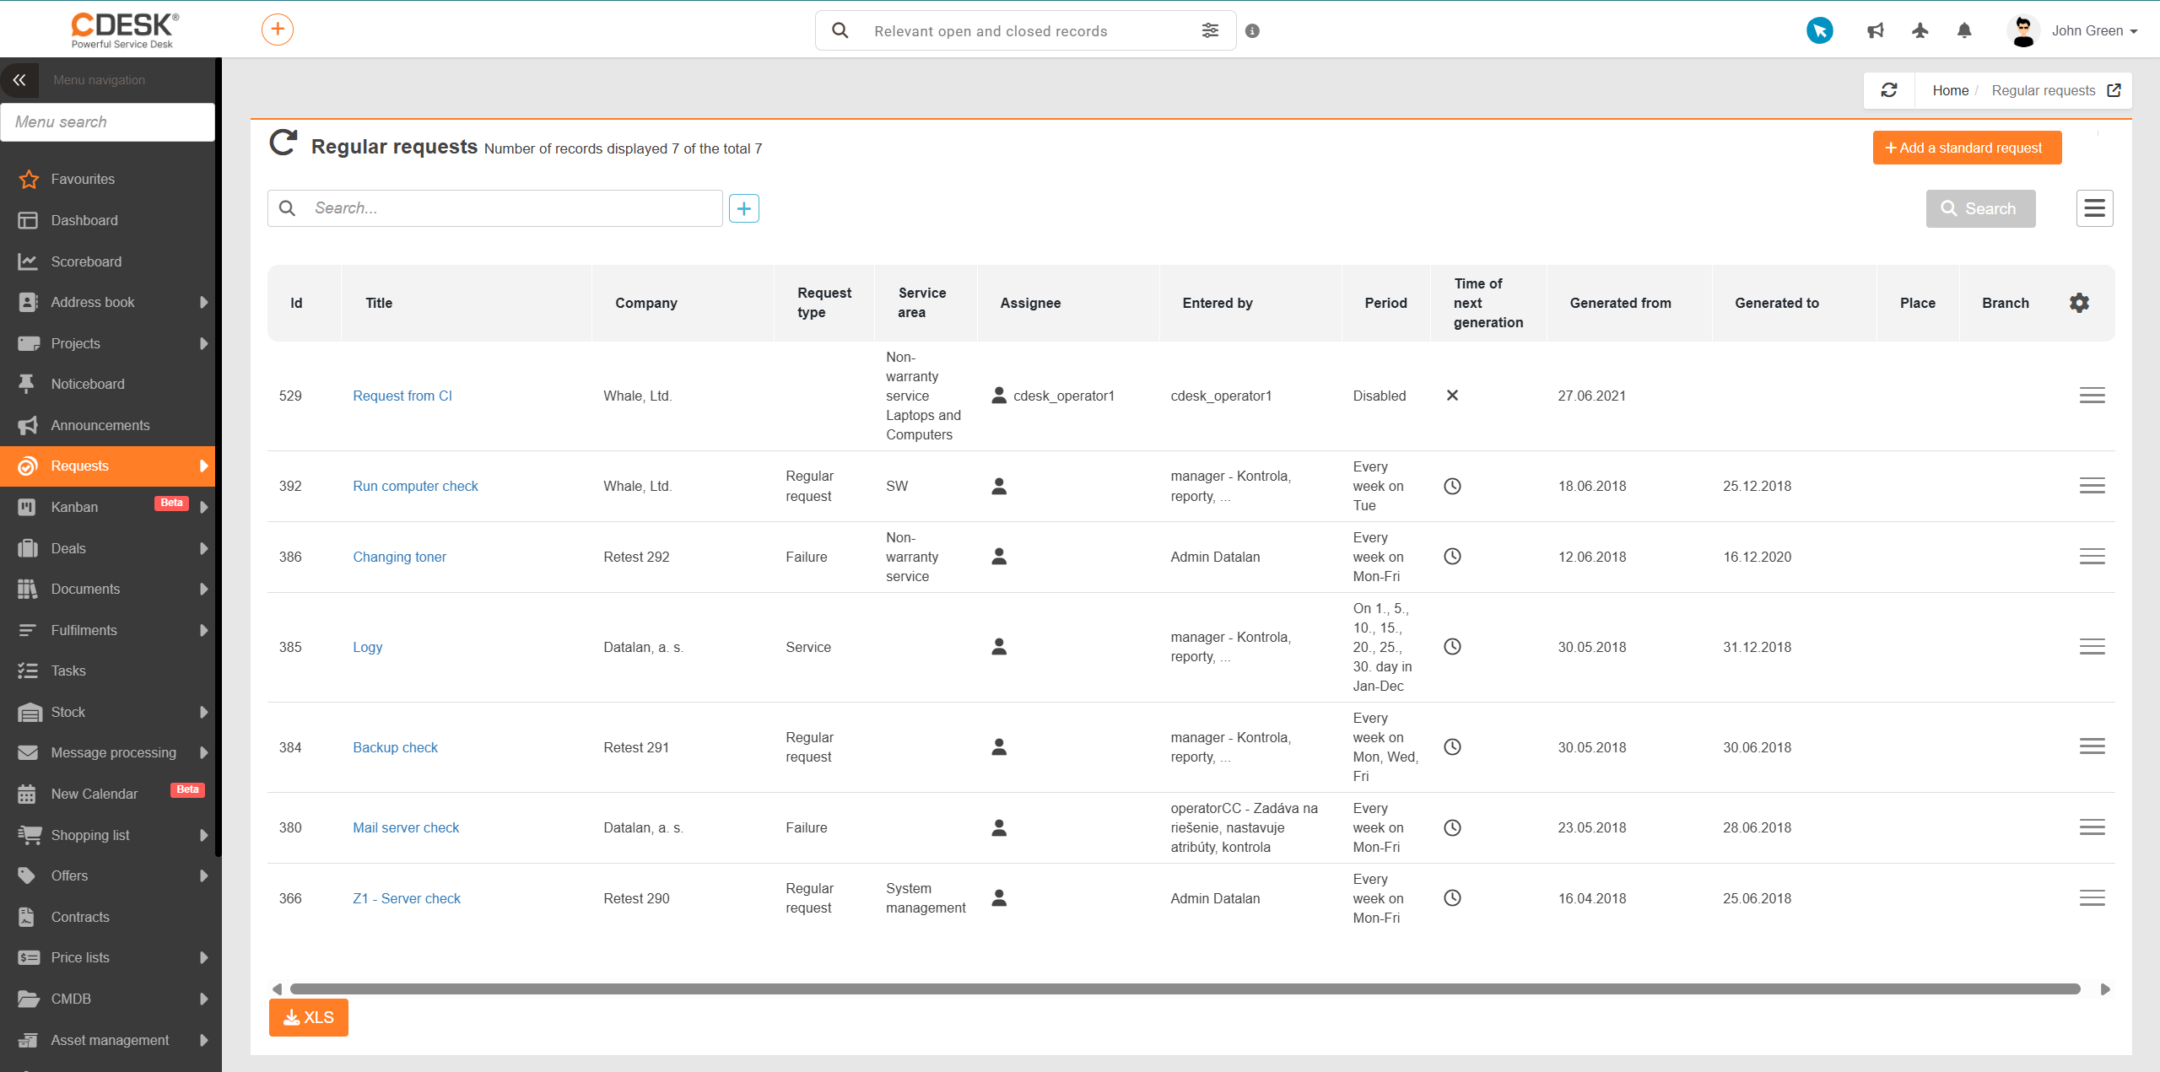
In the list of regular requests, you can search, create a new regular request and export the list of existing ones.

Figure: List of regular requests

Searching and filtering in the list of regular requests

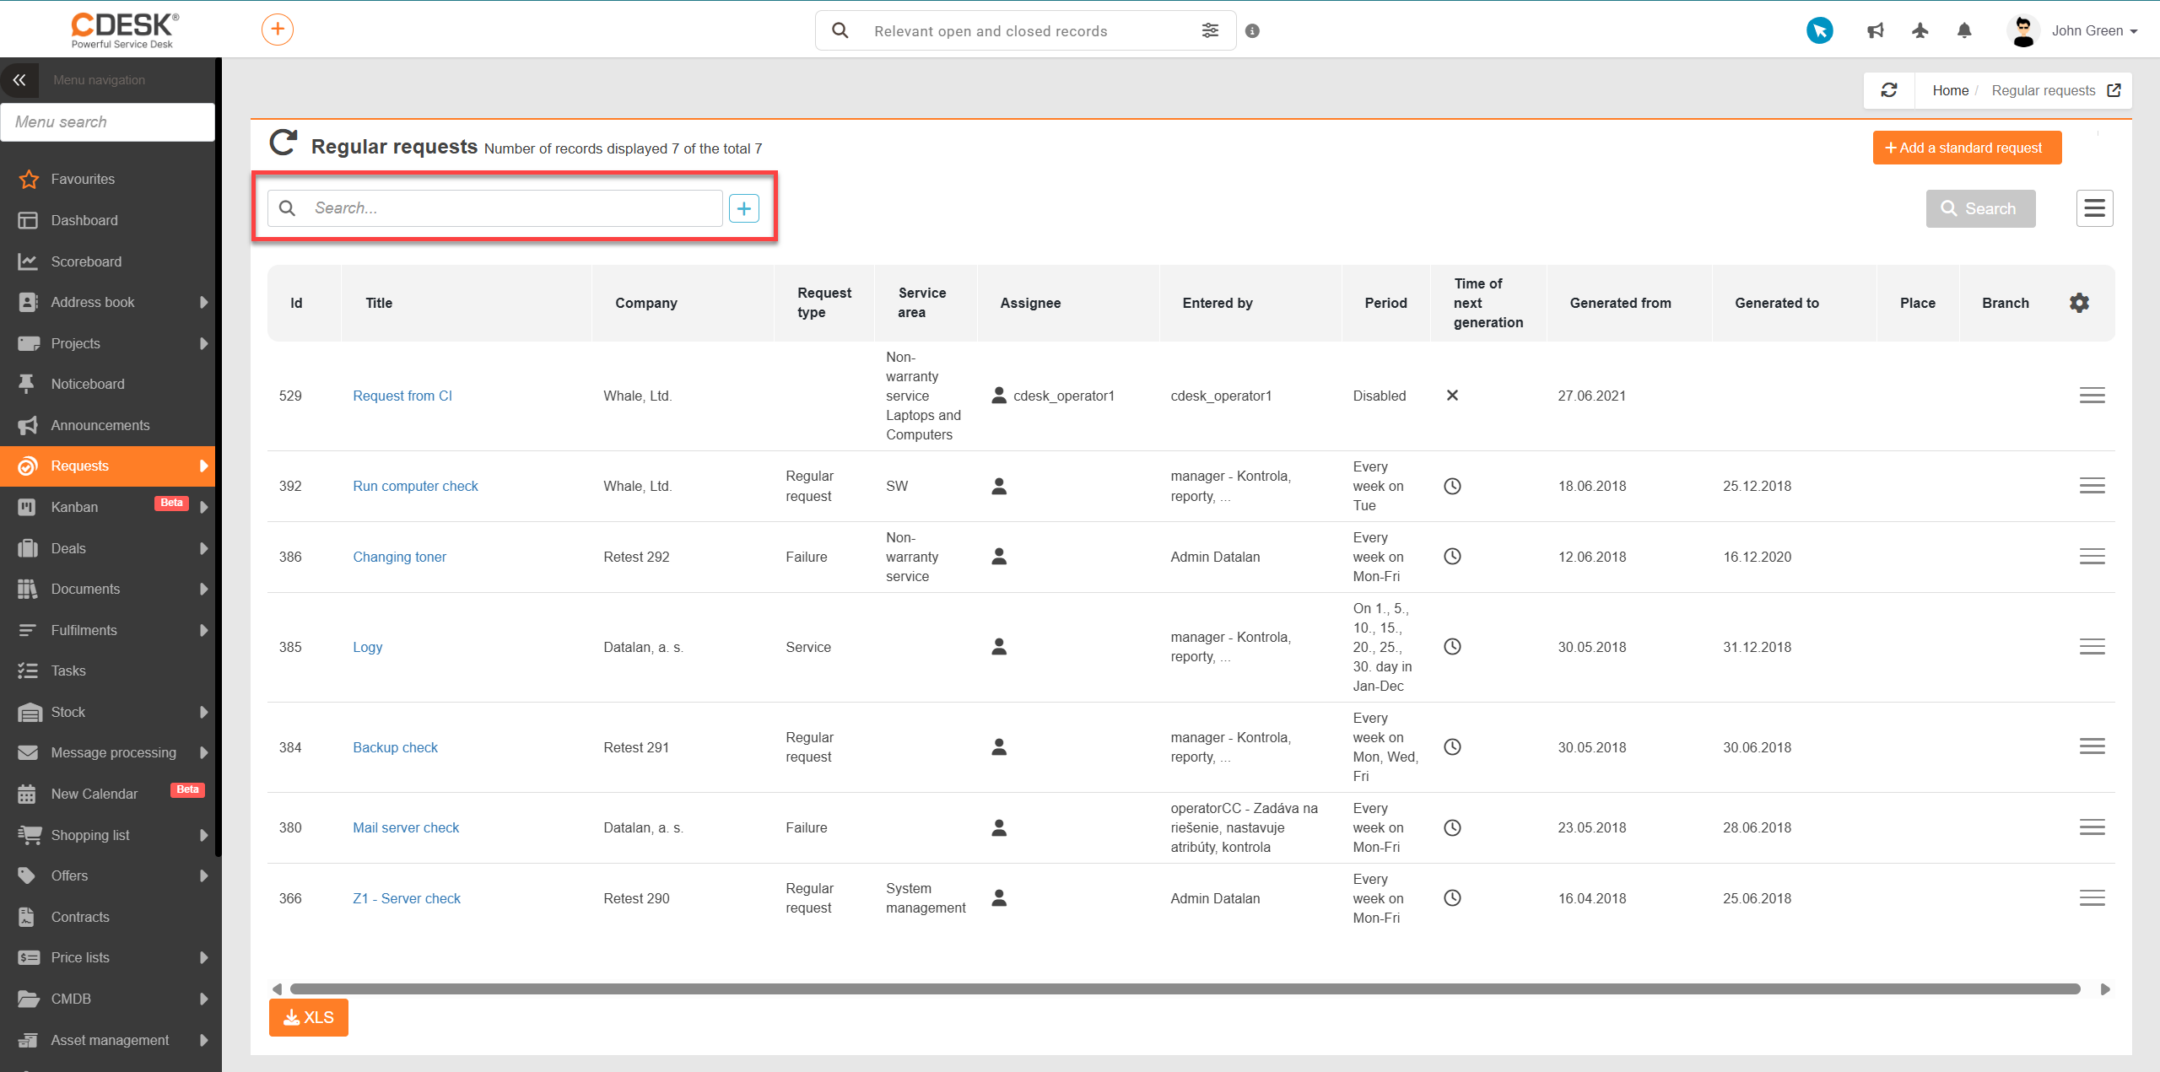
At the top of the list of regular requests is a full-text search bar. You can search the list using the following criteria:

  • ID
  • Name
  • Company
  • Assignee
Figure: Full-text search in the list of regular requests

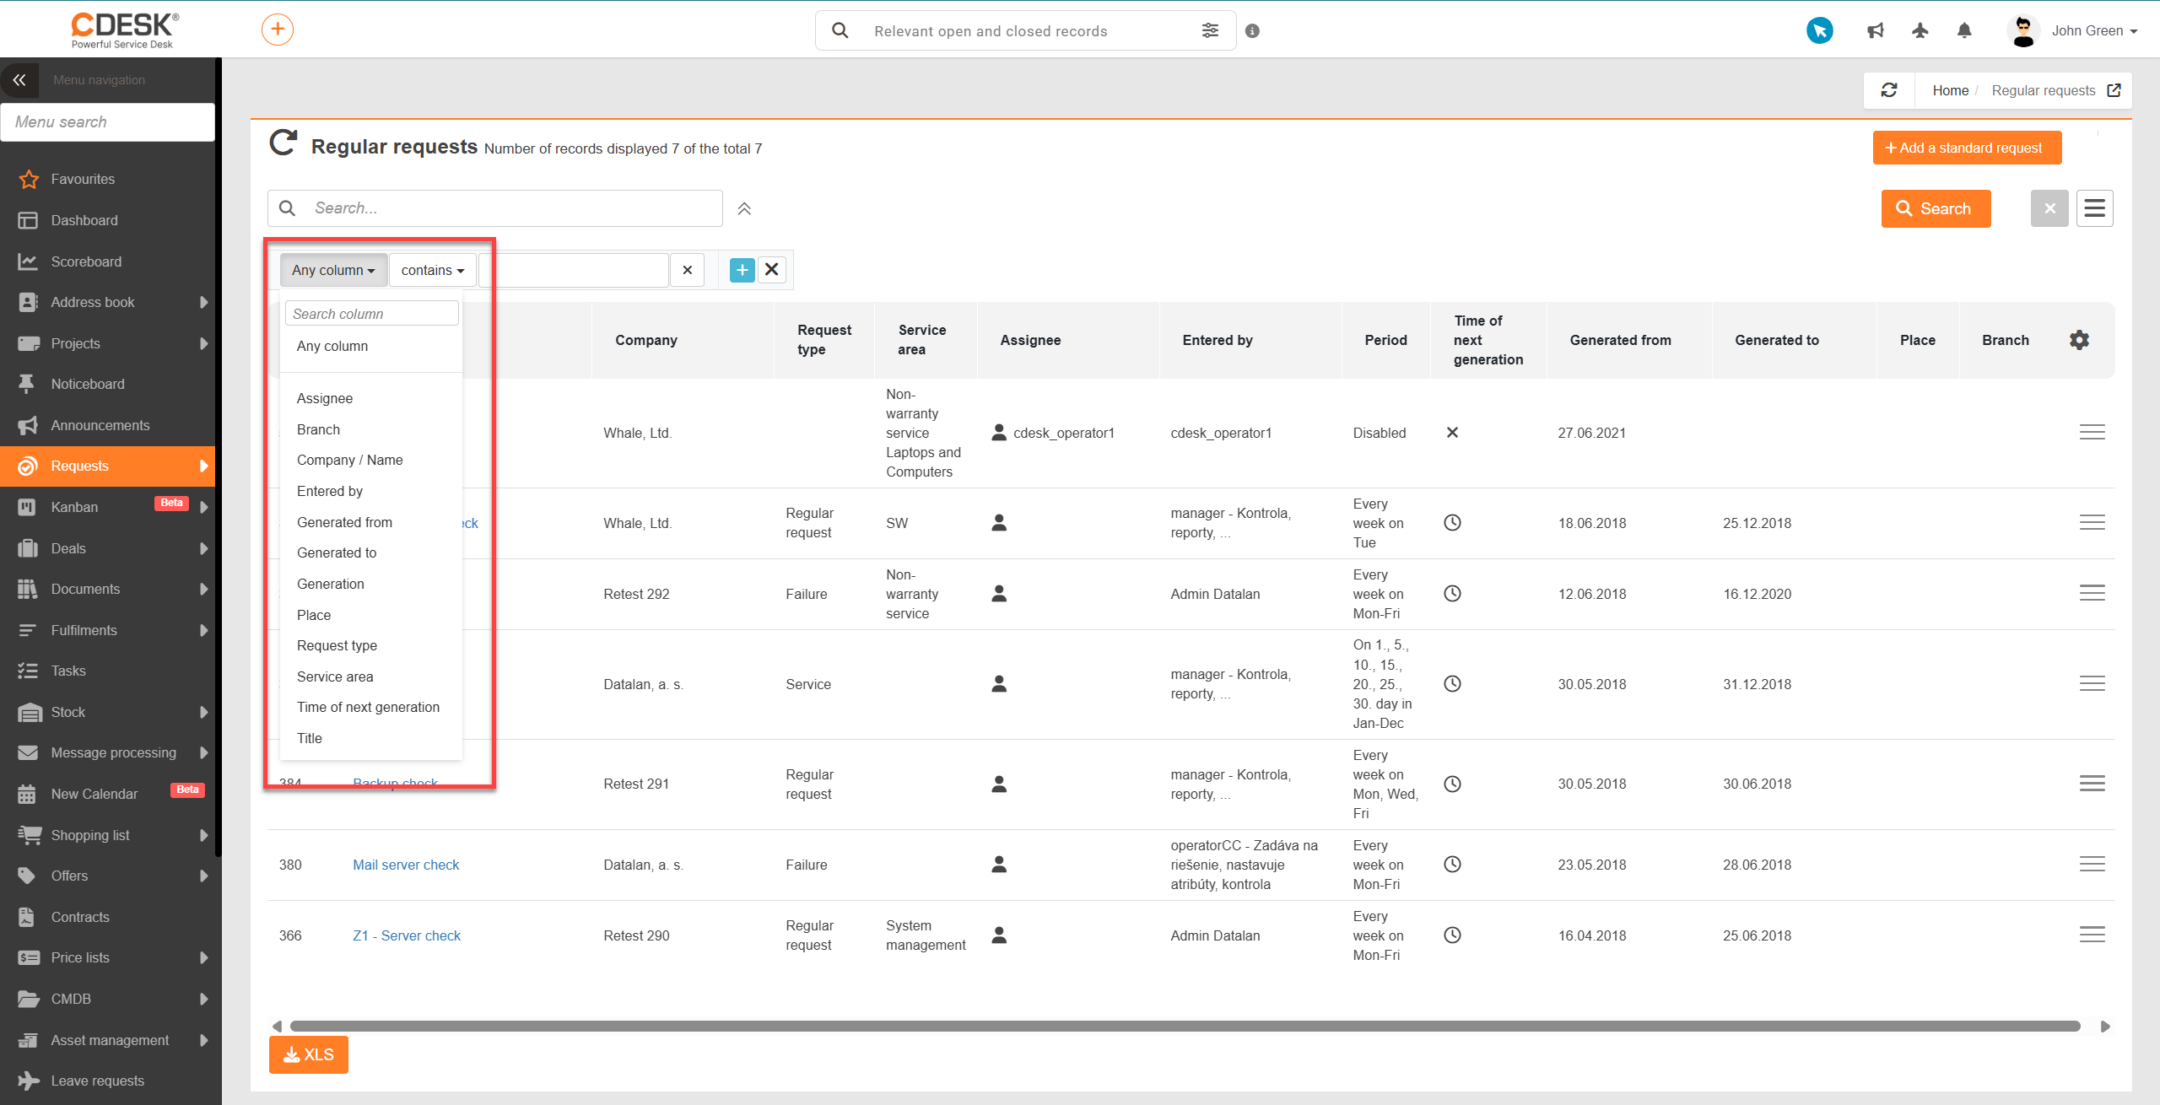
In the advanced filter, you can filter by the following criteria:

  • Any column
  • Generation
  • Generate to
  • Generate from
  • Place
  • Next generation
  • Name
  • Service field
  • Branch
  • Assignee
  • Company / Name
  • Request type
  • Submitted by originator
Figure: Advanced filter in the list of regular requests

Details on how to use full-text search, as well as how to save and send filters, are set out in the Search and Advanced Filtering section of the documentation.

Export of regular requests

To export the list of regular requests, click the XLS button below the list of requests. Once you have clicked it, a new window will open in which you can select the columns to export. If you wish to export all columns, you do not need to select them individually. Clicking the  icon in Dostupné stĺpce section will move all columns in one go to Zvolené stĺpce section. The order of the columns in this list determines their order in the export. You can change this order as you wish. If you wish to keep the columns in their default order, click the  icon above the list of columns and the columns will be sorted.
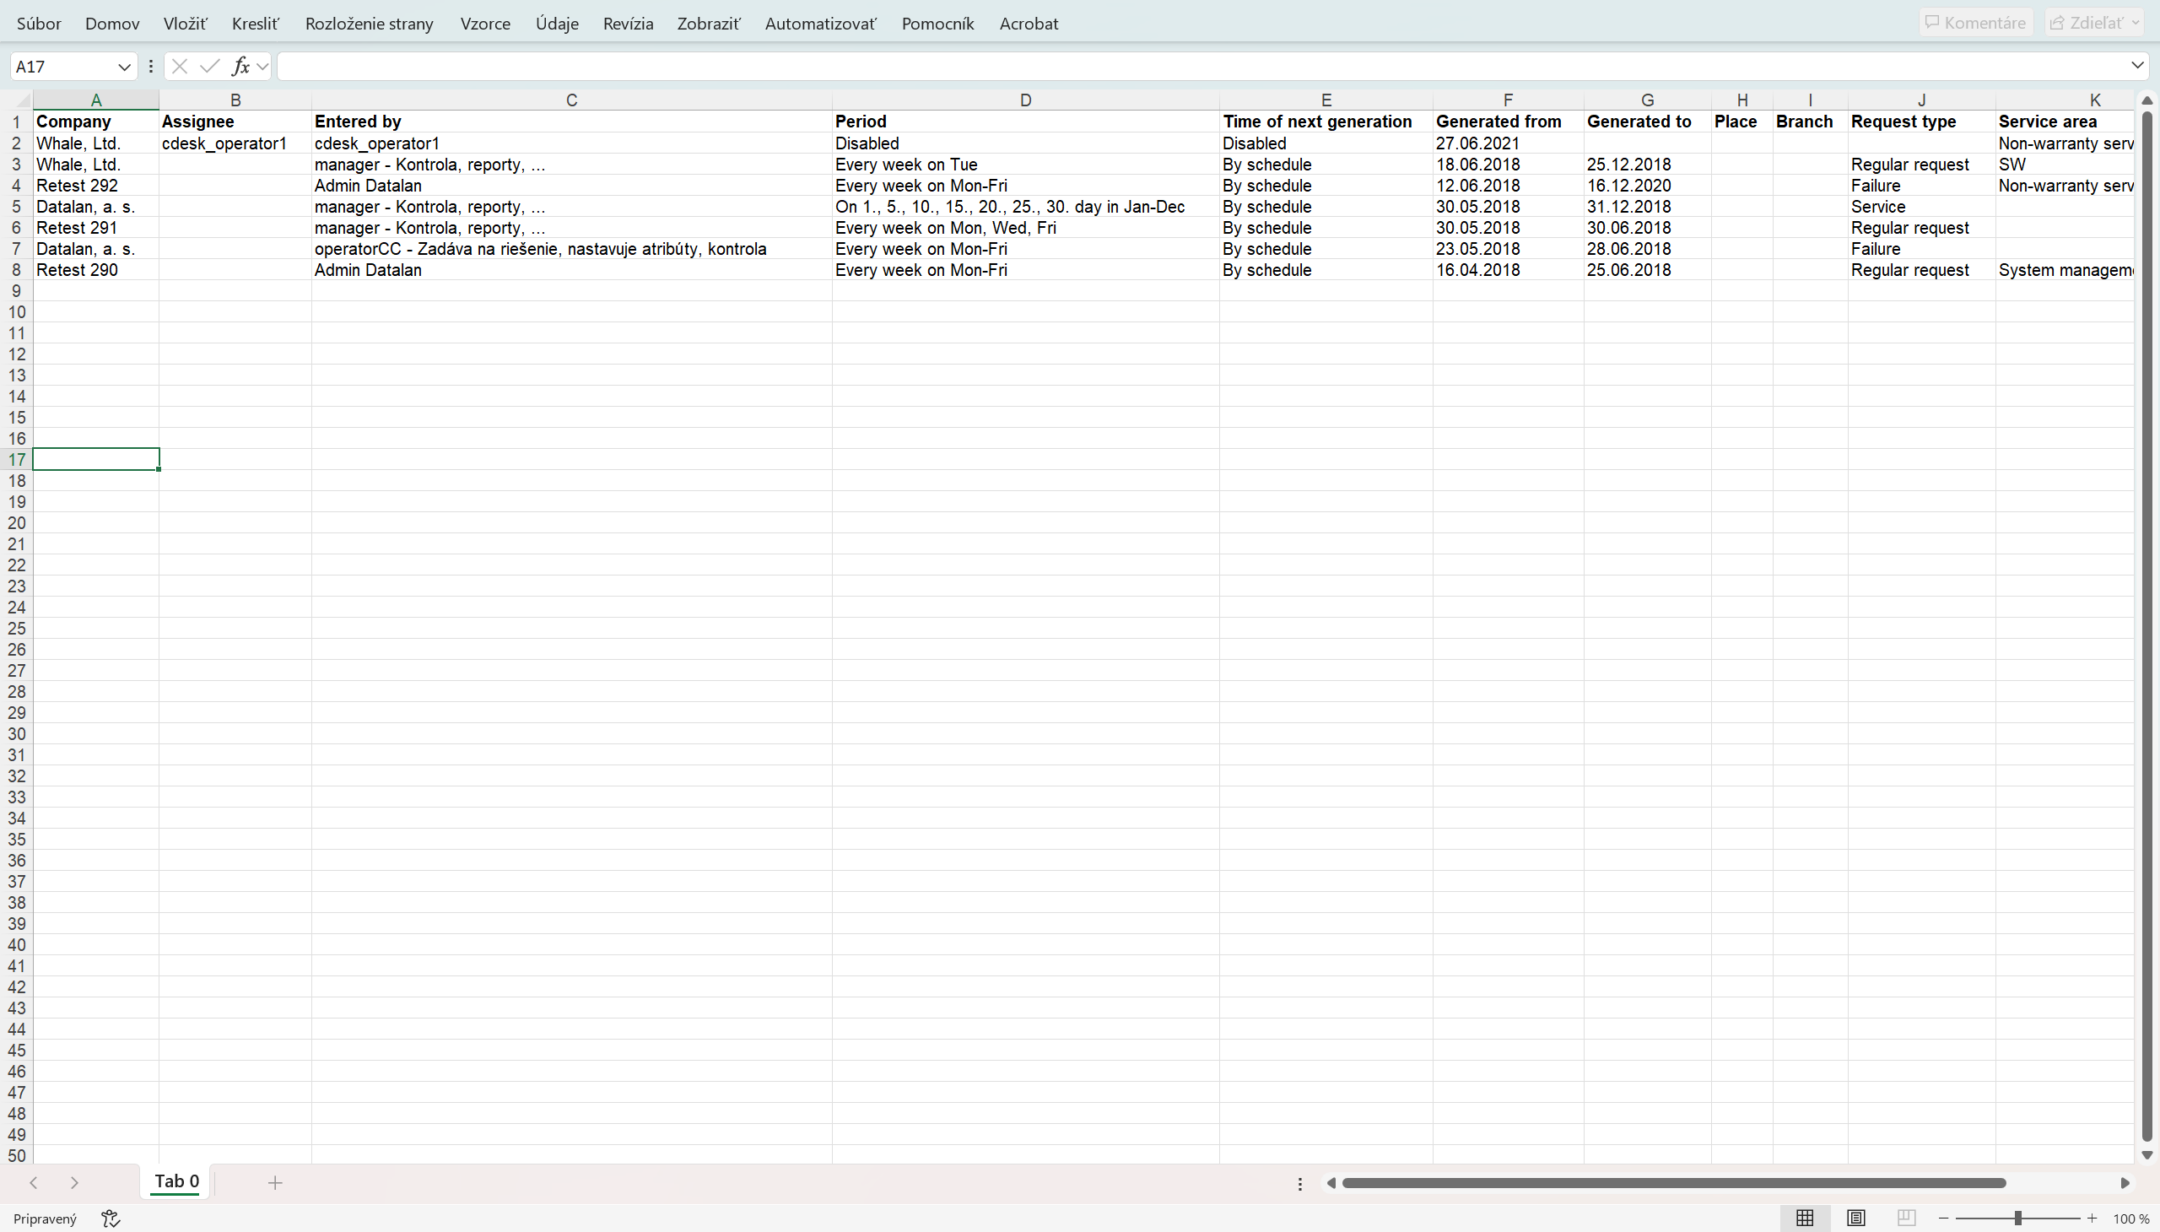
Figure: Advanced filter in the list of regular requests

Once you have selected the columns, create the export using the ‘Export’ button in the bottom left-hand corner of the window. Select ‘Cancel’ to return to the list without creating the export.

Figure: XLS export of regular requests

Importing regular requests

The import function allows you to create regular requests in bulk from a spreadsheet (XLS/XLSX) rather than creating them manually. This feature is available in the list of regular requests (Requests → Regular requests) and requires permission to import regular requests.

Import procedure

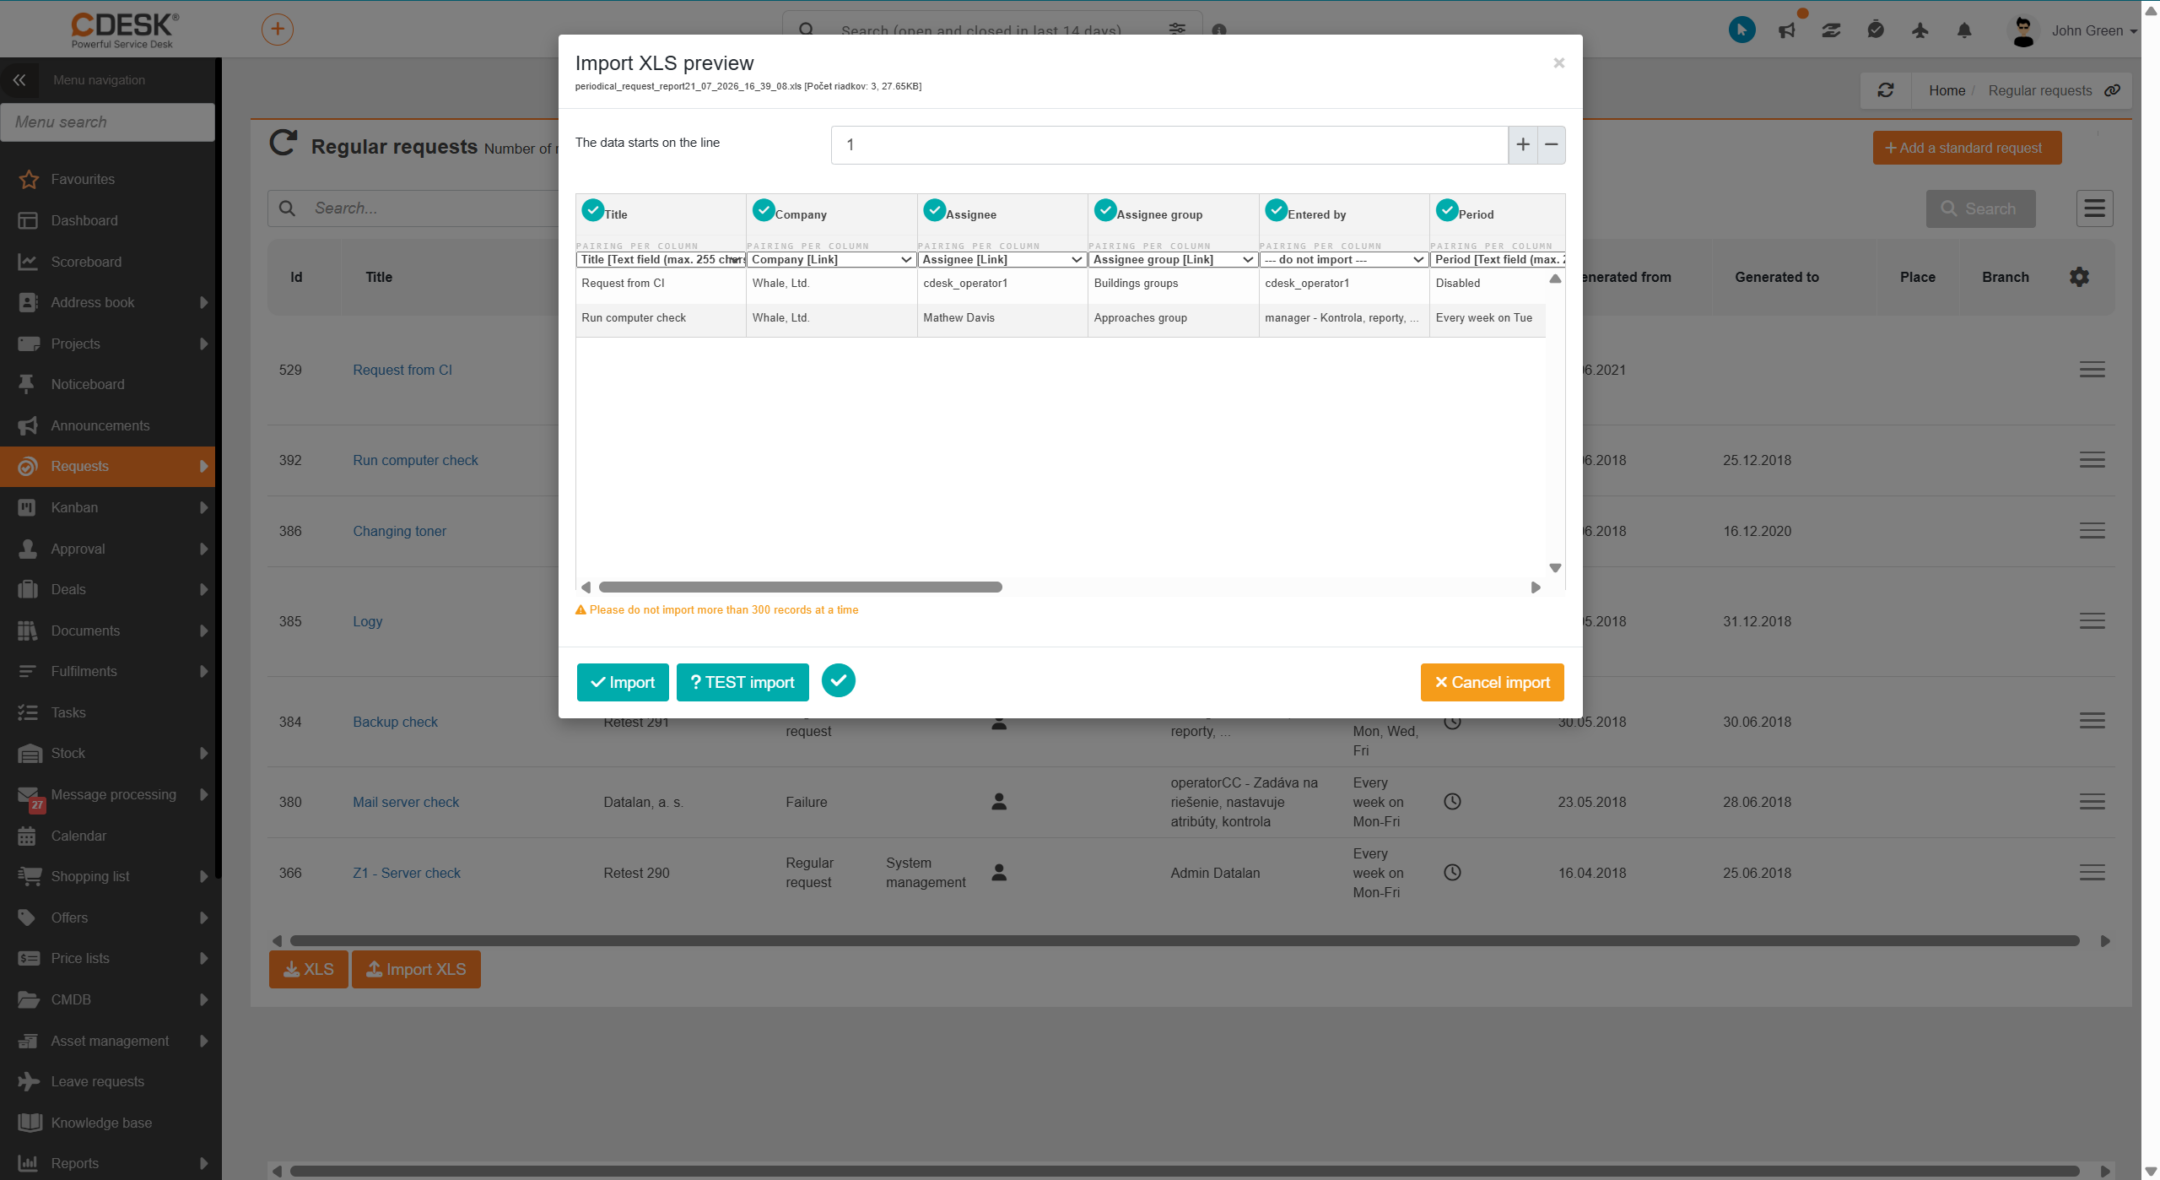
      1. In the list of regular requests, run the import and upload the prepared file (XLS/XLSX), where each row represents one regular request and the first row contains the column names.

      2. Map the columns from the file to the fields for the regular request in CDESK.

      3. Run a data check (the ‘TEST import’ button) — CDESK will confirm the values and select those that are invalid (e.g. an unrecognised period, an incorrect time format, or a value that does not match any record in CDESK).

      4. Once the check has been successfully completed, complete the import. The rules created will appear in the list of regular requests.

Figure: Importing records from an XLS file

The following fields can be imported:

  • Required fields:

    • Name — the name of the regular request.

    • Company — the customer to whom the request is assigned.

    • Assignee — the person handling the request.

    • Period — a text description of the generation period.

    • Generation from — the start date from which generation is to commence.

  • Optional fields:

    • Description, Team of assignees, Priority, Generation time, Quantity of days to respond, Quantity of days to resolve, Generation until, Branch, Location, Request Type, Service Field, Visibility (Ordinary / Internal), and, if the relevant functions are Enabled, Who is requesting and For whom.

    • It is also possible to import custom fields assigned to a regular request.

Pairing of values and recommended formats:

  • Values such as Company, Assignee, Assignee Group, Priority, Request type, Service Area, Location and Branch are matched by name – in the file, they must correspond exactly to the names of existing records in CDESK. If a value is not found, the field is left blank.

  • Enter dates (Start date, Generation to) as dates. Enter the generation time in the format HH:MM (default 00:00).

  • The period is specified as text that corresponds to the wording of the period displayed for existing rules. If the text is not recognised, the row will be selected as incorrect during the check. We recommend copying the wording from an existing regular request.

  • Specify the visibility as ‘Ordinary’ or ‘Internal’ (default: ‘Ordinary’).

After import, rules are created with generation disabled. The generation method (by schedule / by parameter) is determined according to the specified Period. If the period is recognised and Generation from is filled in, the date of the next generation is calculated.

Any optional fields that have not been completed will be completed with default values (e.g. default priority, visibility set to ‘Ordinary’, and 0 days for response and resolution).