


You can create a new user account in the user list by clicking the ‘+ Add user account’ button in the top right-hand corner. A new account form will open, divided into several tabs – the presentation of individual tabs depends on the environment configuration, account type and permissions (e.g. Leaves Requests, Request Categories, Organisational Structure or CM IT Monitoring will only be viewed if the relevant functions are enabled). The purpose of the individual fields and settings on all tabs is described in the section ‘User Settings Tabs’.
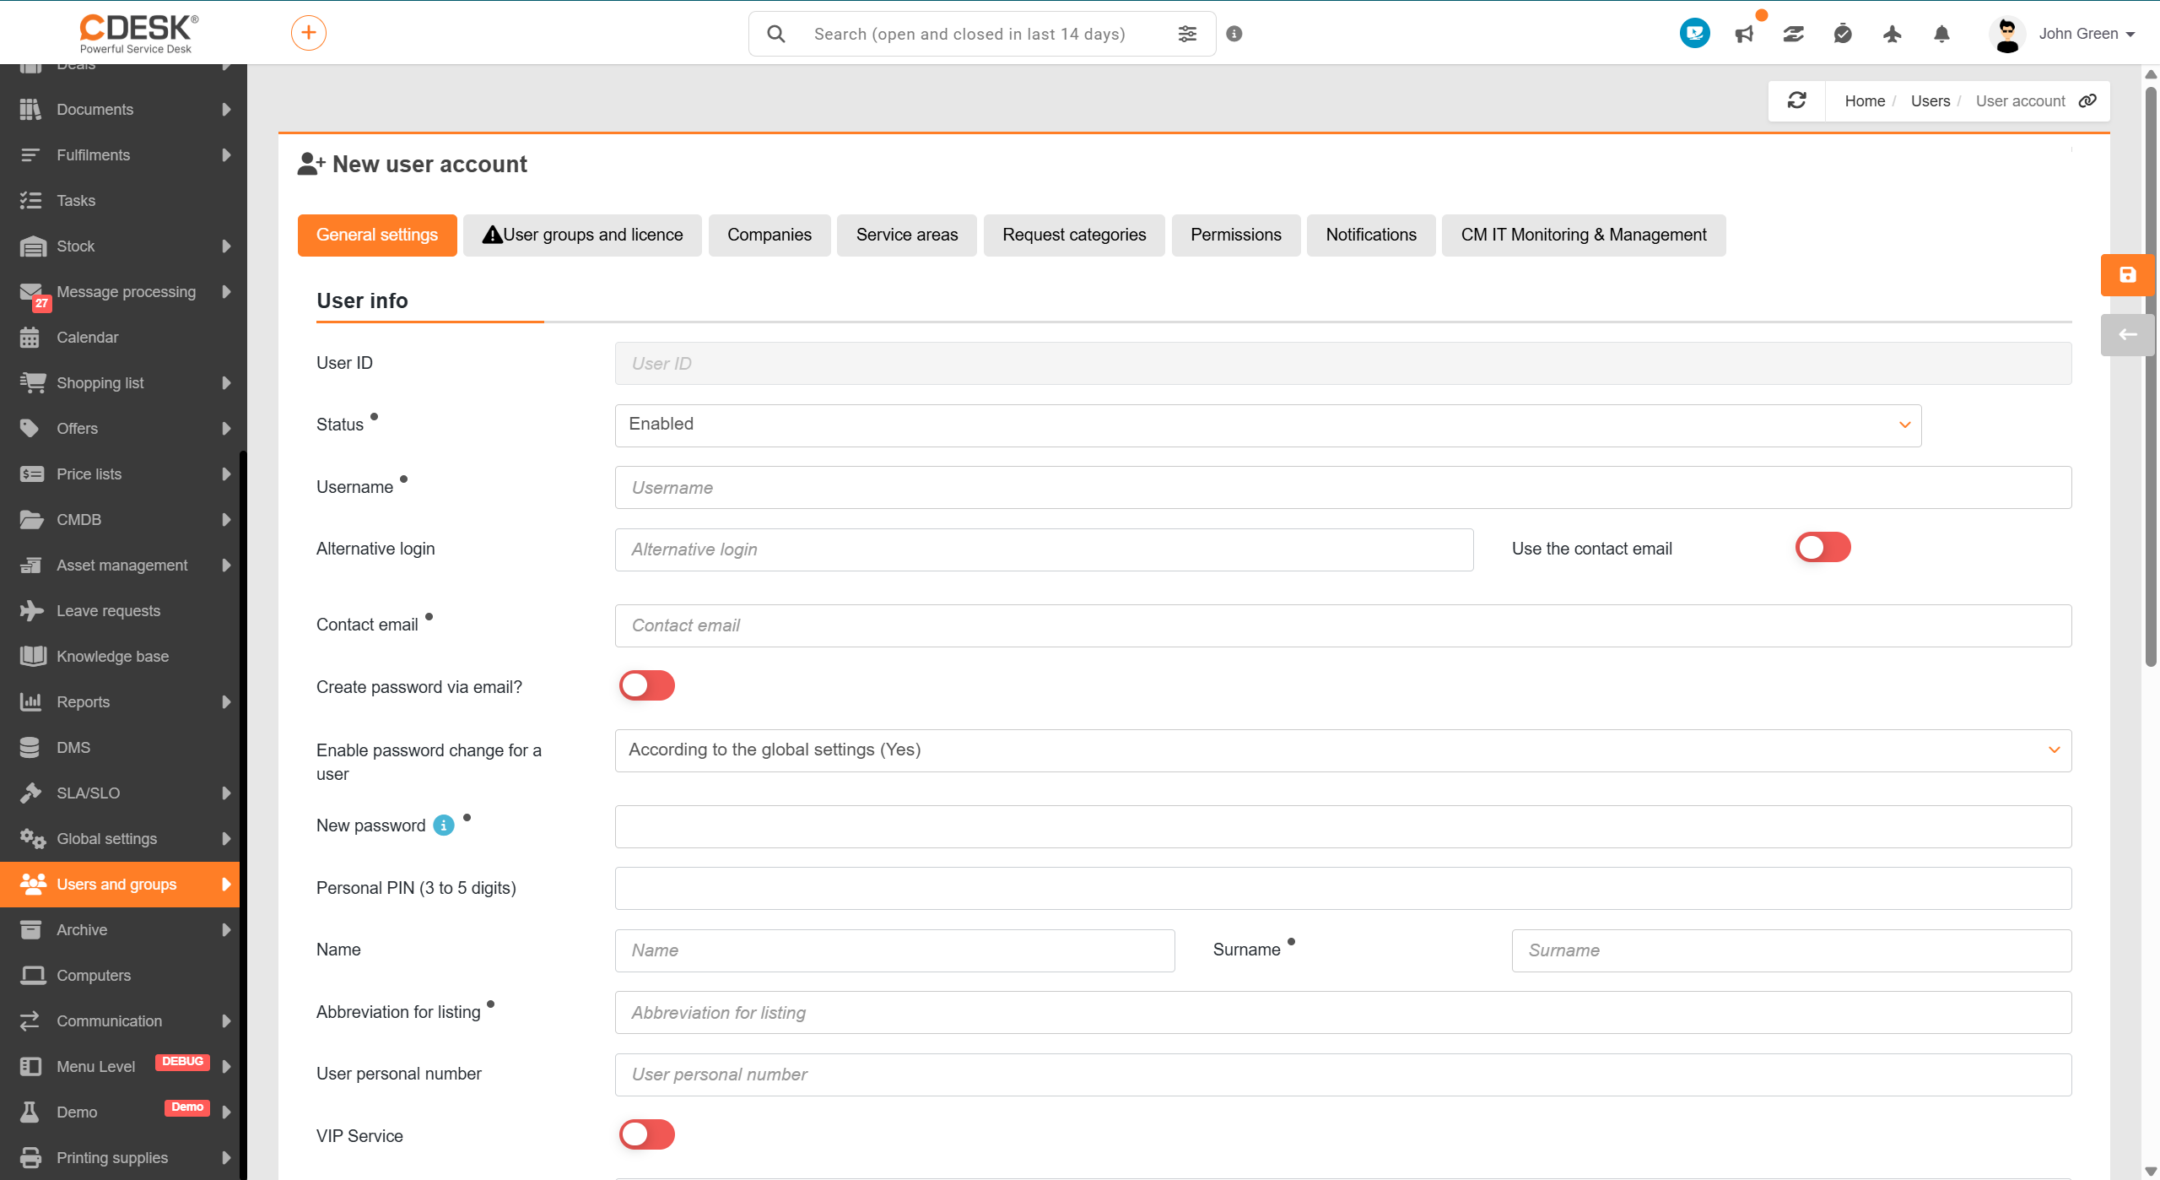
Creating an account involves several sequential steps. First, on the General Settings tab, you fill in the basic account details, such as your name, username, contact email address, password and job title. Required fields are selected with the relevant symbol. This information forms the account’s identity – the user logs in using their username and password, the contact email address is used for notifications and to reset access, and the full name is viewed in all system modules. Without this information, it would not be possible to uniquely identify the account or grant access to its owner.
You can then assign the account to one or more user groups on the ‘User Groups and Licence’ tab. Assignment to a group is essential because the account inherits permissions from that group — rather than setting access rights for each person individually, the user is granted rights collectively according to their role (for example, operator, assignee or client). The assigned licence also determines the range of functions available to the account. You can read more about licences in the ‘Licences’ section of the documentation.
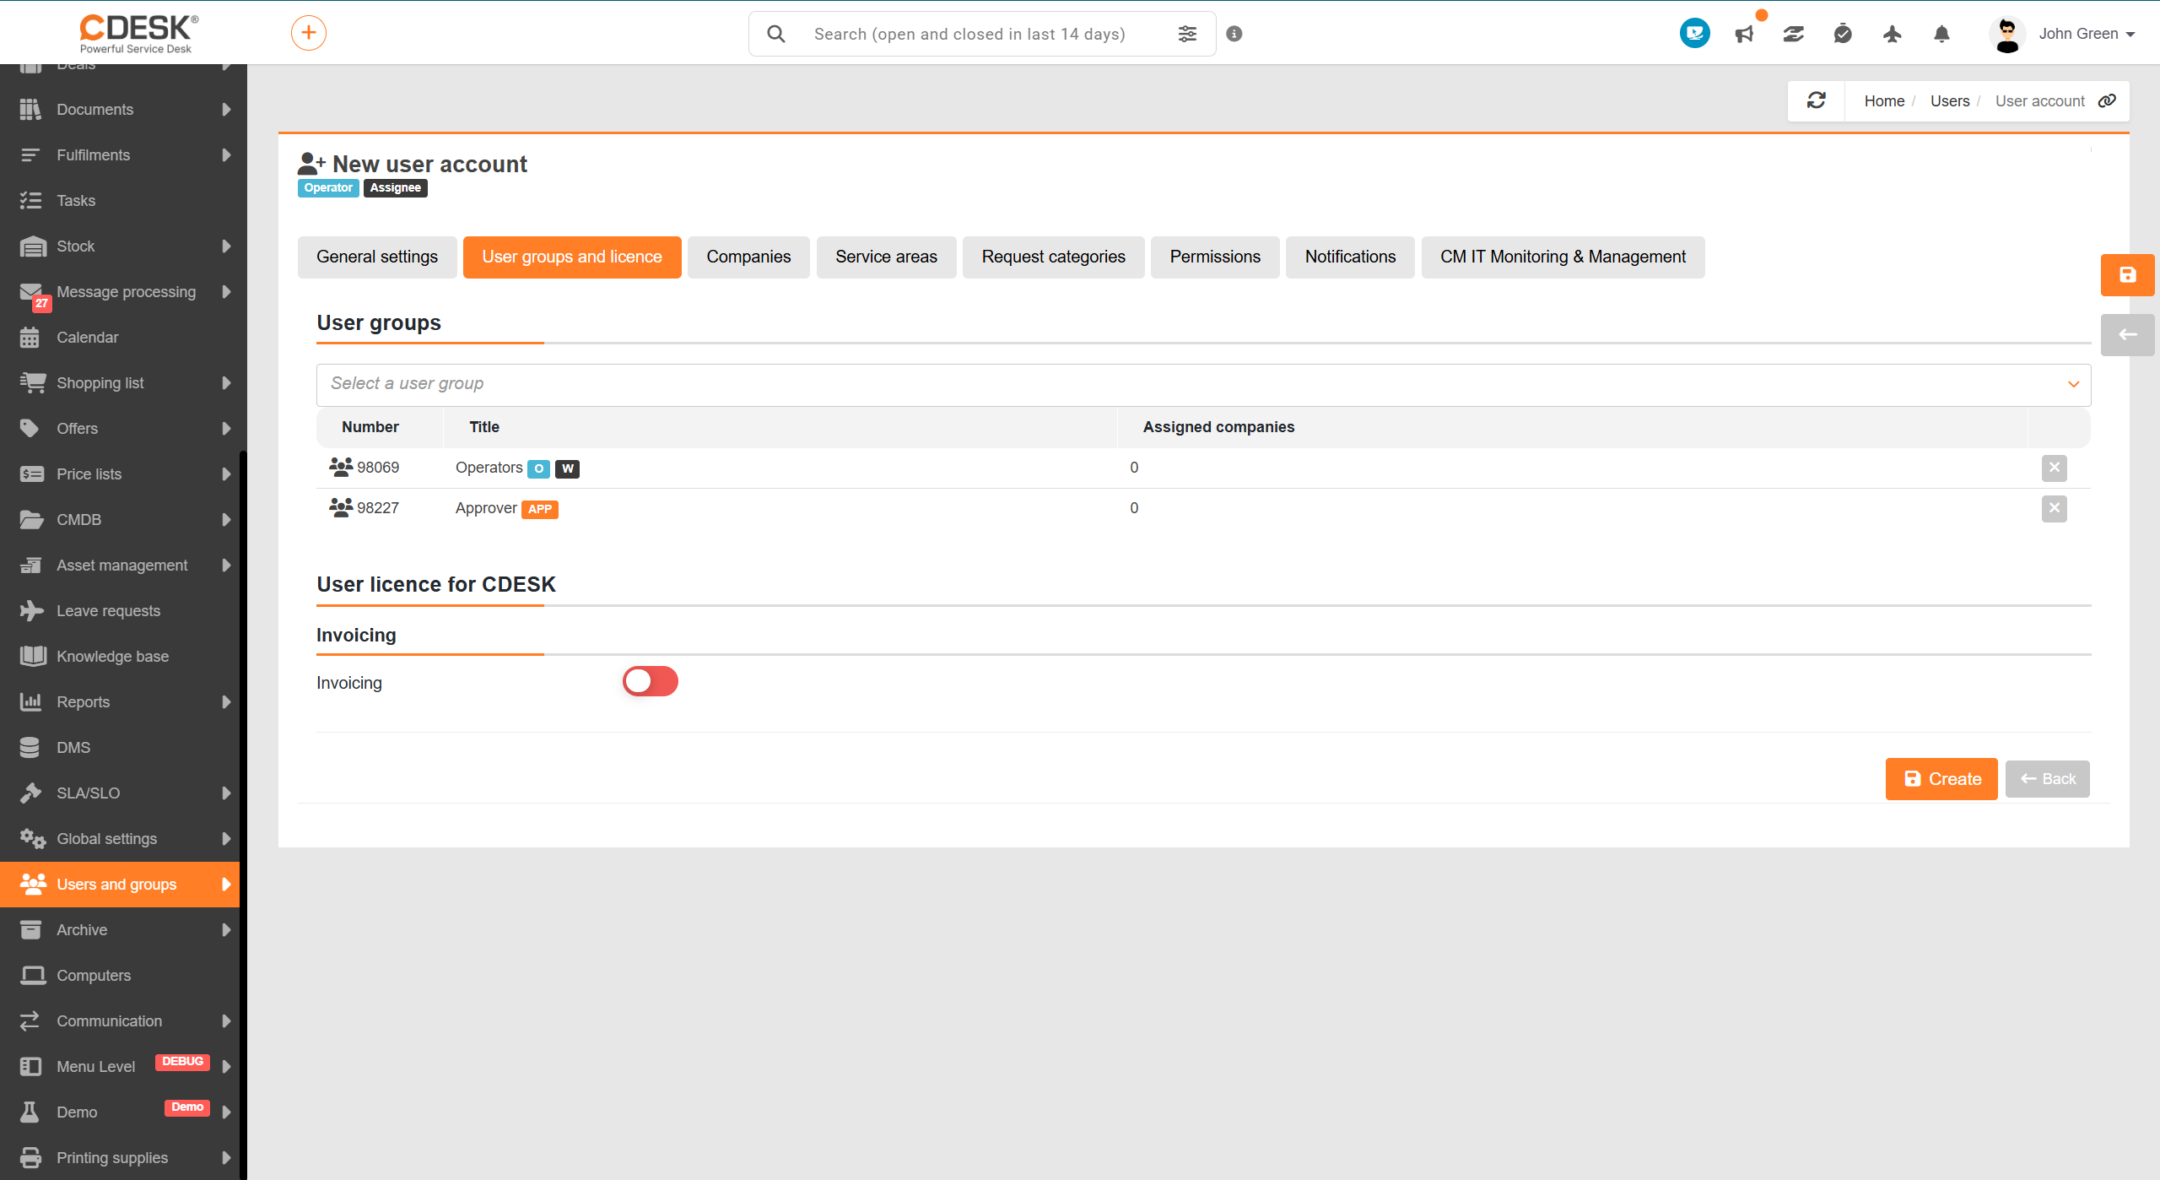
Once you have filled in the details, click the ‘Save’ button to create your account. Some sections of the form will only become available once the account has been created, as they are linked to an existing account — this mainly concerns individual authorizations and visibility settings. You should therefore first create and save the account, and only then proceed to configure its more detailed settings. On the ‘Authorizations’ tab, you can set individual authorizations beyond those taken over from groups. The ‘Companies’, ‘Branches’ and ‘Places’, ‘Request Service Areas’ and ‘Request Categories’ tabs control the visibility of records and individual data for the account. The ‘Supervisors and Subordinates’, ‘Deputy Arrangements’ and ‘Notifications’ tabs complete organisational relationships and how the user is notified. Each tab is described in detail in the ‘User Settings Tabs’ section of the documentation.