Beta verzia novej dokumentácie.

List of users

The user list is available in the main menu under Users and Groups → Users. If the menu item is not visible, you should check whether the user has been granted access permissions for this module.

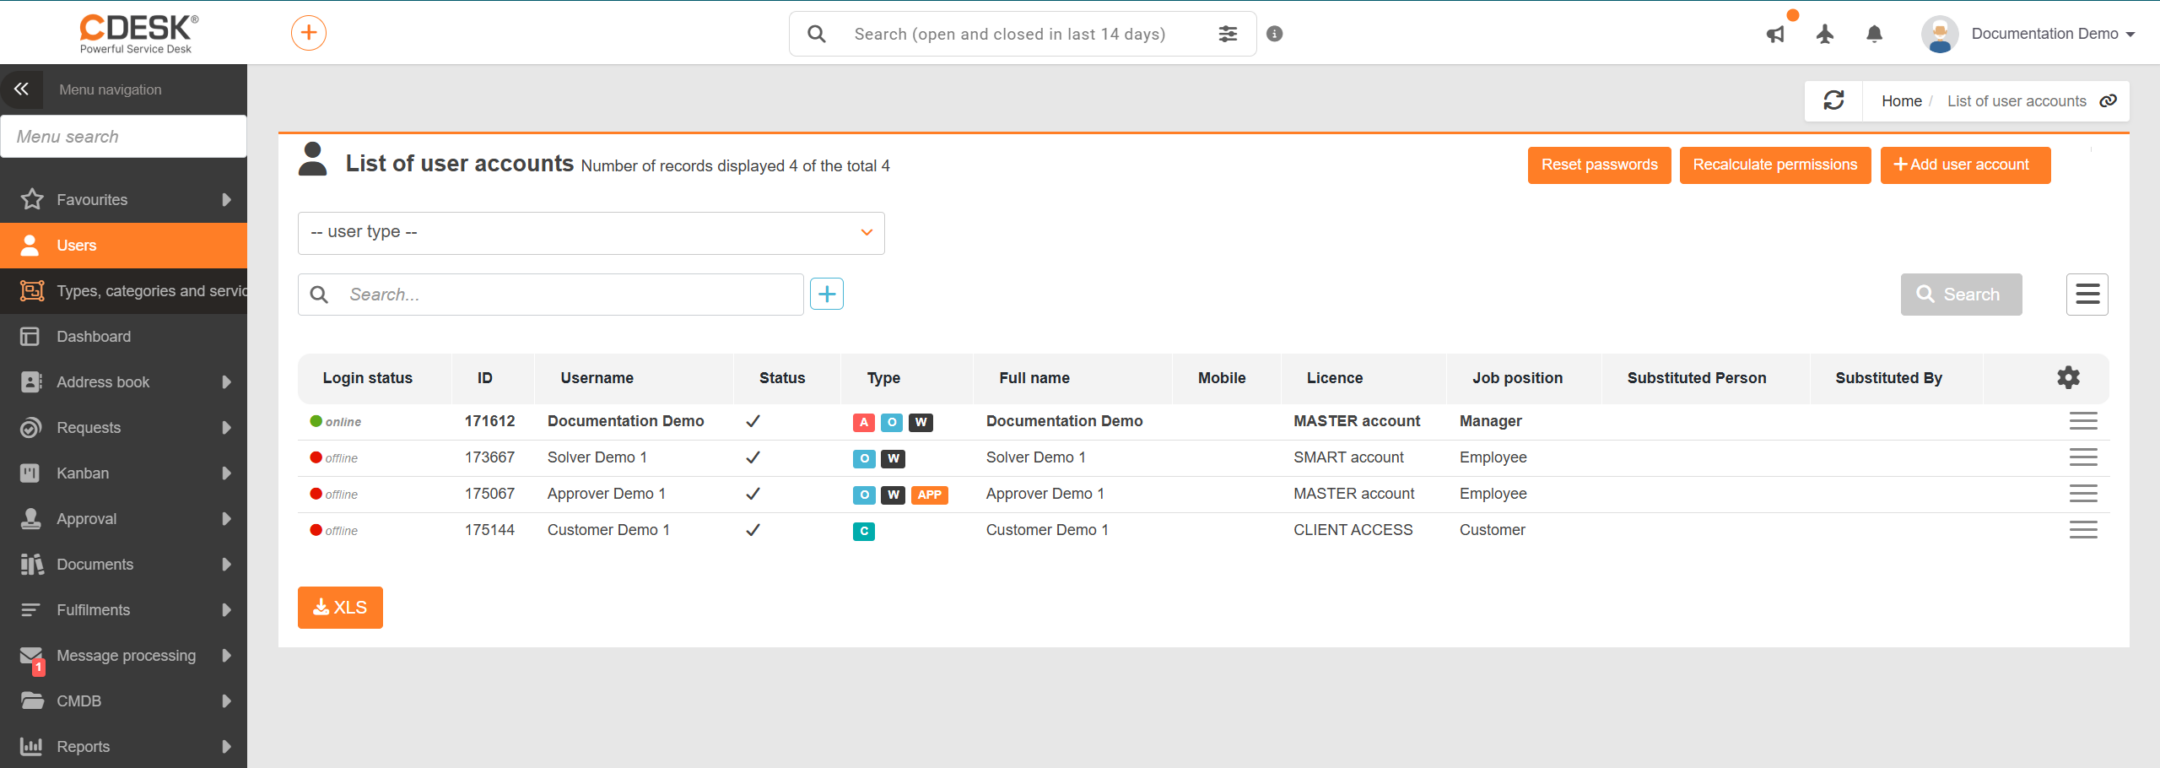
The header of the list window shows the quantity of records displayed out of the total number; it also contains controls for creating a new record, searching using an advanced filter (with the option to save the filter), and exporting the list.

Image: List of users

The following is a list of accounts based on the currently selected filter or, where applicable, the search results. Using the ‘’ icon in the last column of the list table, you can customise the column presentation by selecting which columns will appear in the list and specifying their order.

There are currently 22 columns to choose from:
  • ID
  • Username
  • First name
  • Surname
  • Full name
  • Status
  • Type
  • Phone
  • Licence
  • Job title
  • External ID
  • Personal number of the user
  • Date and time of last login
  • Method of last login
  • Allow password change
  • Organisational unit
  • CM Access Level
  • Substituted Person
  • Substitutes
  • Assigned companies
  • Visible companies
  • Enforce login via an identity authentication service

Note: The list of columns expands depending on the environment configuration – when the Microsoft Entra ID connector is enabled, an ‘Azure Email’ column is added, and custom fields assigned in the ‘Global Settings → Users’ section can also be viewed in the list. The ‘Organisational Unit’ column is only available if organisational structure tracking is enabled.

Below the list is a button for XLS export of the list of users. In the bottom right-hand corner, there is pagination to make the list easier to view and navigate.

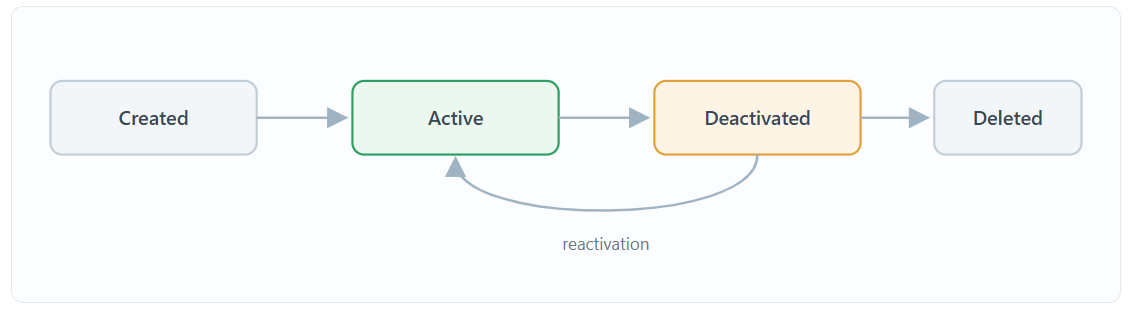
Figure: The lifecycle of a user account

Searching and filtering in the user list

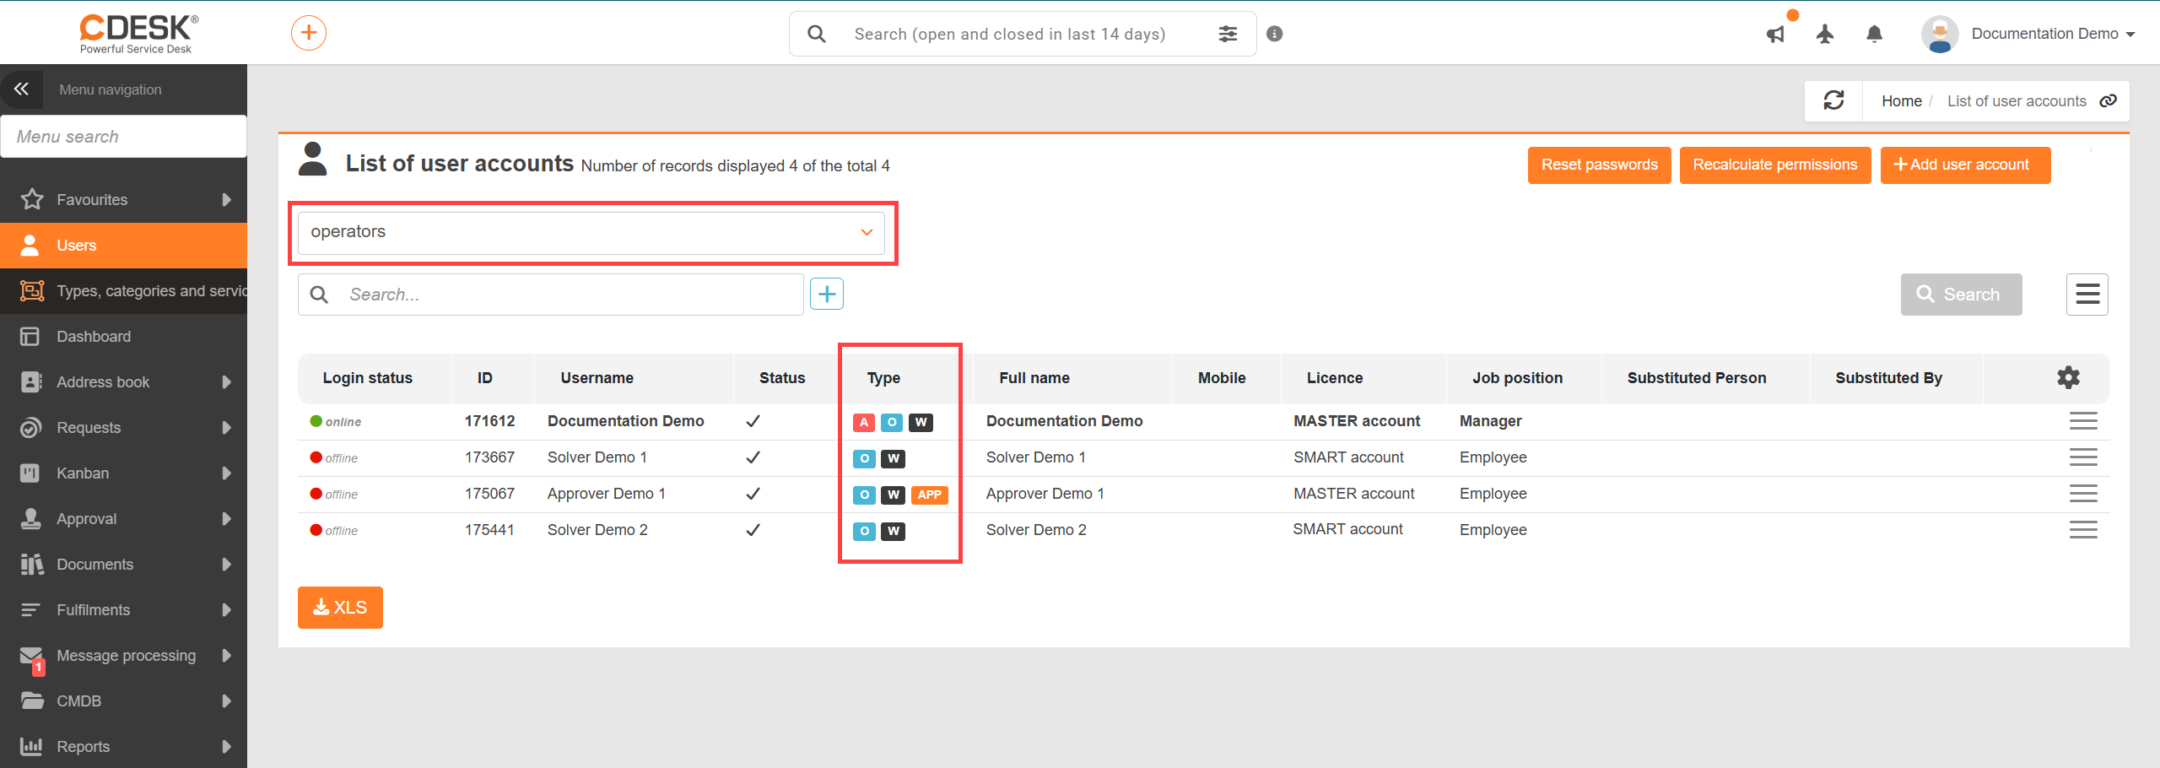
There are three different ways to search for or filter records in the user list. Above the Search field, there is a quick filter to restrict the list by account type, which allows you to narrow down the results without setting any settings in the advanced filter. The options available are: all user types (except easyclick), administrator, operators, customer accounts, approvers, easyclick accounts and assignees.

Figure: Quick filter by user type

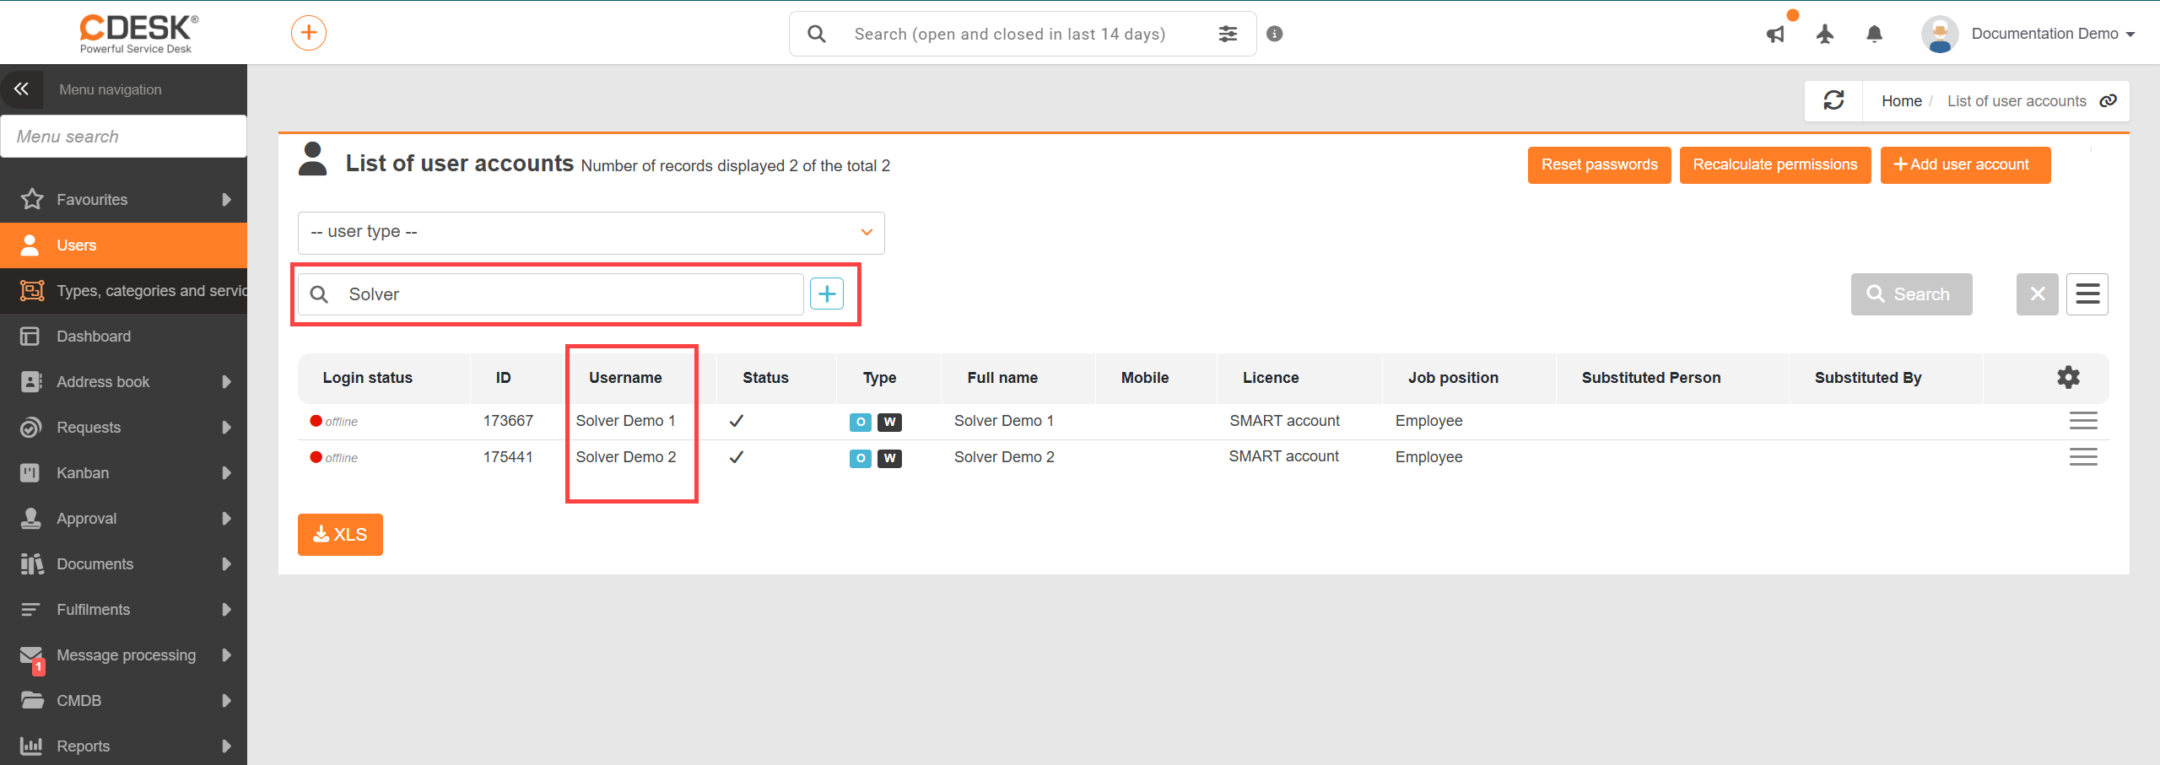
To search by entering a specific term, you can apply the Search field located above the list of users. This ‘full-text search’ searches the following columns:

  • Username
  • First name
  • Short name for listing
  • Email
  • Telephone
  • Phone
Image: Searching the list of users

If you need to search for accounts using multiple criteria, you can use the advanced search filter, which can be applied by clicking the ‘’ button next to the ‘Search’ field. In this filter, you can specify specific search conditions for the columns:
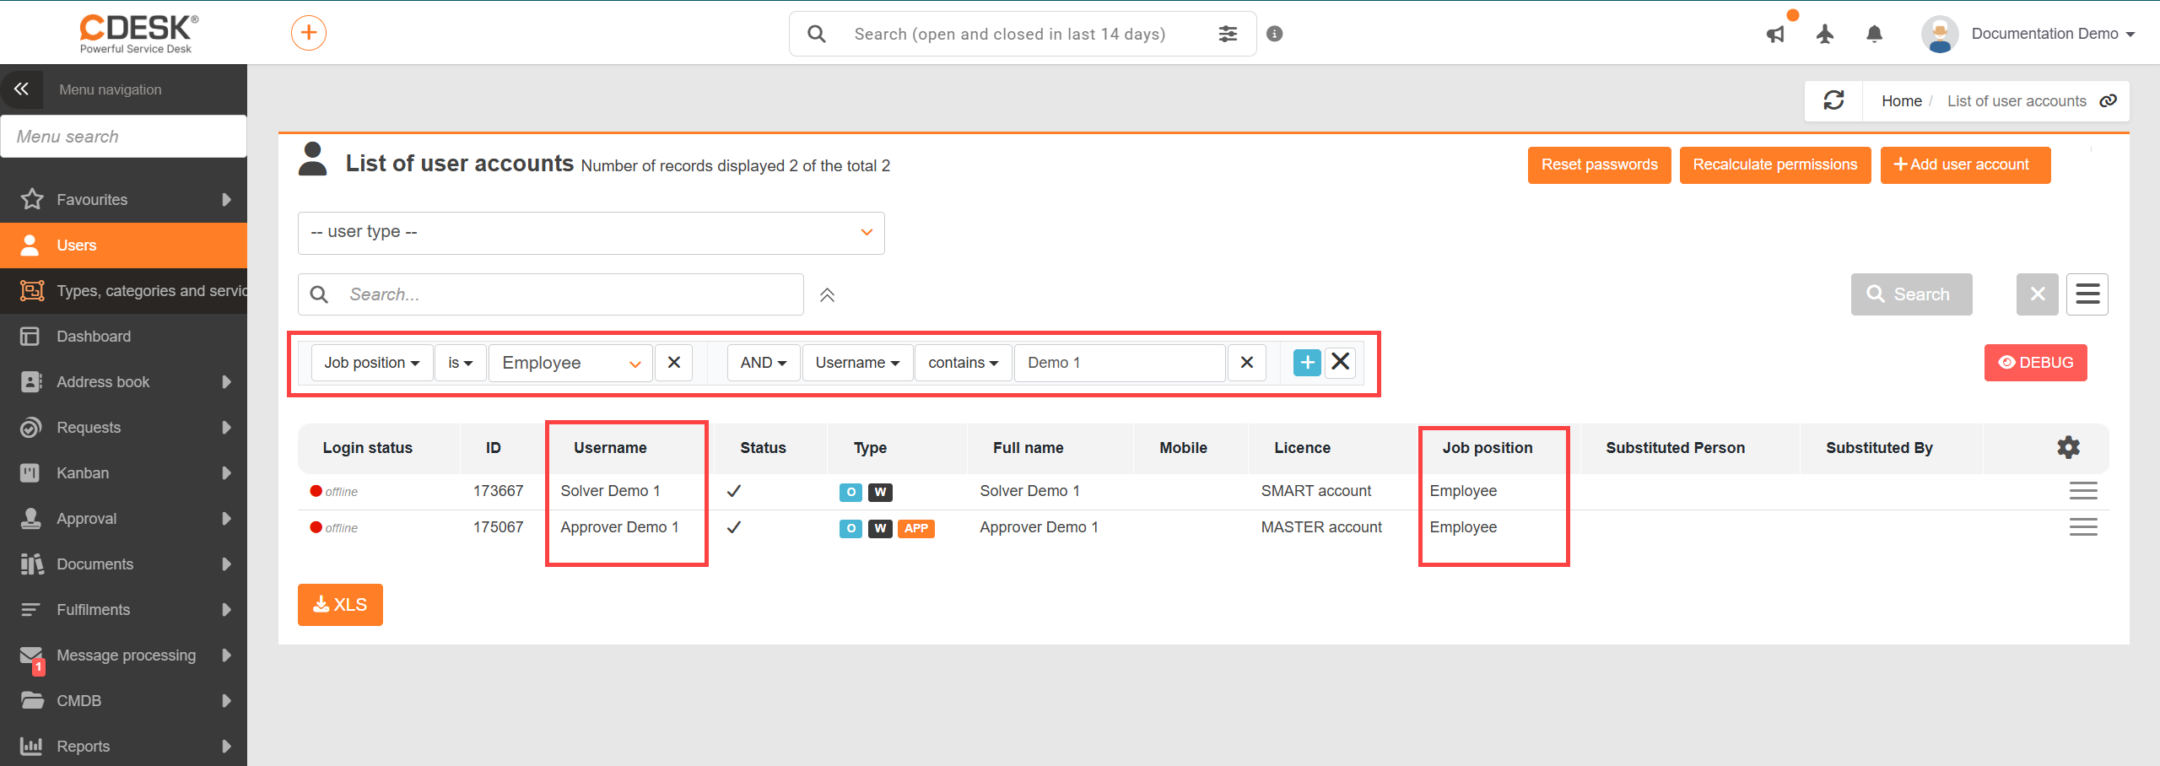
  • Full name
  • First name
  • Surname
  • Username
  • Date of last login
  • Method of last login
  • Email
  • Phone
  • Licence
  • Status
  • Login status
  • Job title
  • Assigned company
  • Visible company
  • External ID
  • Substituted Person
  • Substitutes
  • Personal number for users
  • CM Access Level
  • Organisational unit (if organisational structure tracking is enabled)
Figure: Filtering criteria in the user list

Depending on the column type, you can choose between ‘contains’ or ‘does not contain’ the search term or part of it; in the case of selection lists, select one of the values provided. Search conditions can be freely linked and expanded by applying the logical operators AND (and) and OR (or). Frequently used or otherwise specific filtering conditions can be saved under a chosen name and will be available with a single click above the list of users the next time they are needed.

You can find more information on working effectively with filters in CDESK in the section ‘Searching and Filtering’.

Bulk editing of user accounts

Bulk editing allows you to change the same settings for multiple accounts at once. You can use this, for example, when you need to set the same default module for a large group of users upon login, or to enable or disable changes to passwords for all of them at once — without having to open each account individually.

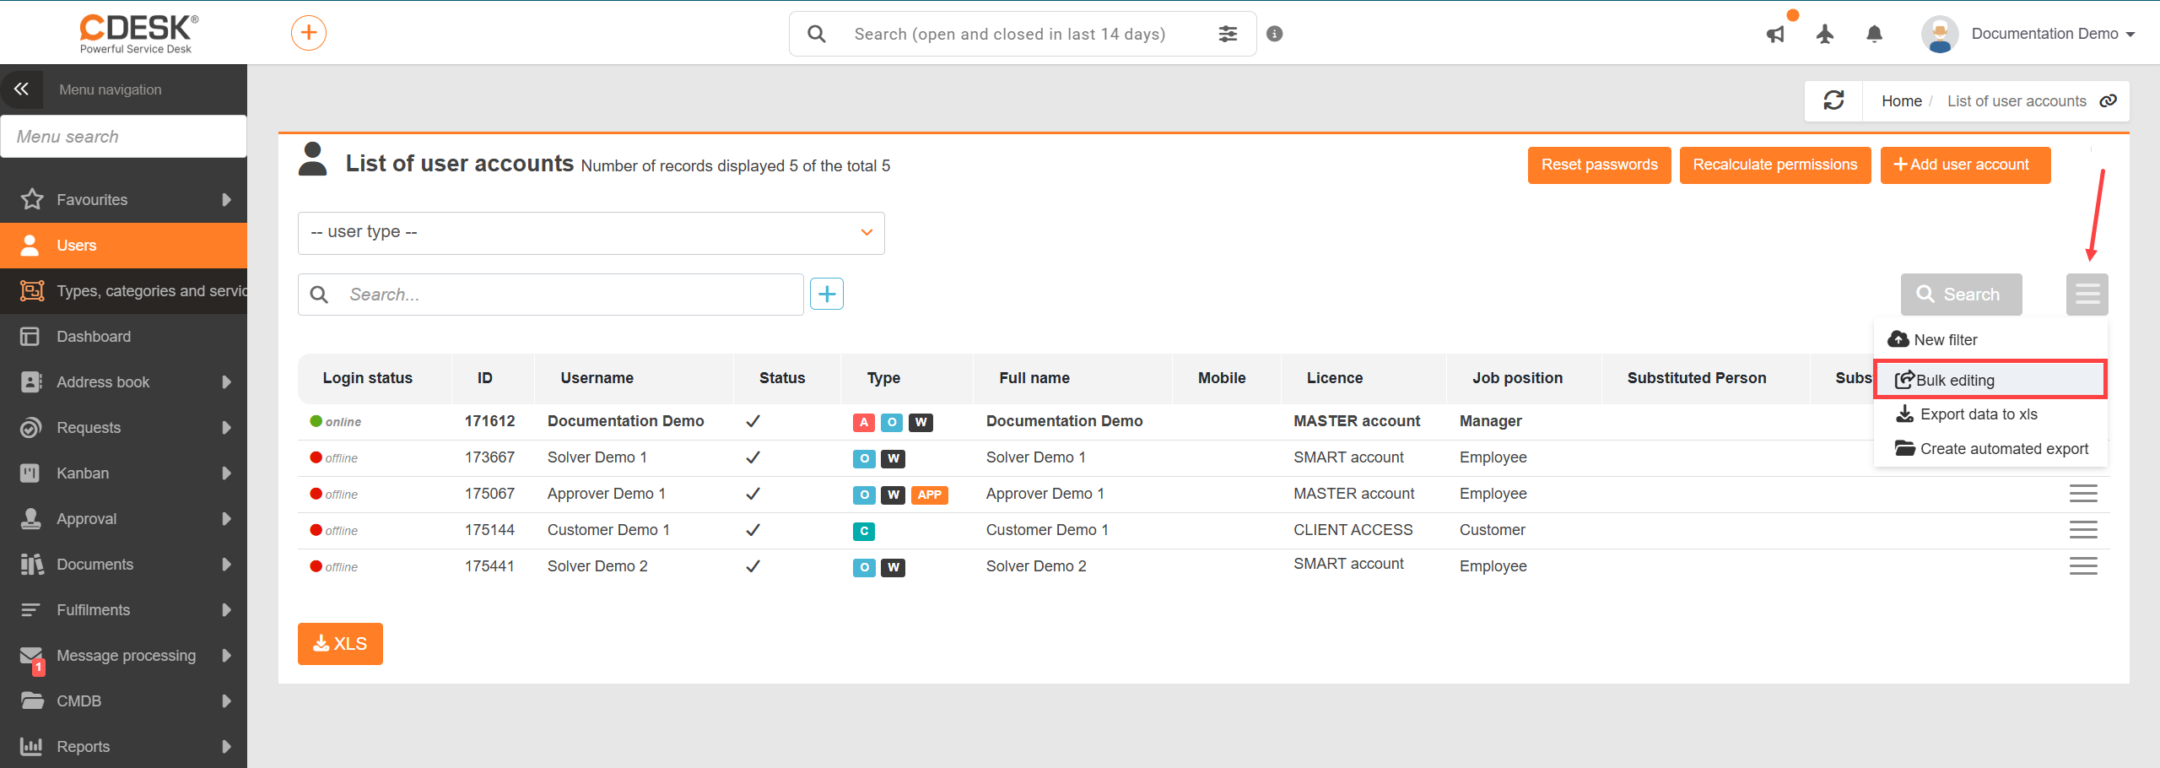
To activate bulk editing mode, click the context menu above the list of users and select ‘Bulk editing’.

Image: Button to activate batch edit mode

An ‘‘ icon will then be viewed in each row containing a record to select that user. Clicking the icon in the header of the first column will select all displayed records at once. Select the accounts you wish to edit and click the Edit button. Clicking this will open a window listing the columns that can be edited in bulk. Select the required columns (by moving them to the Selected columns column) and confirm your selection.
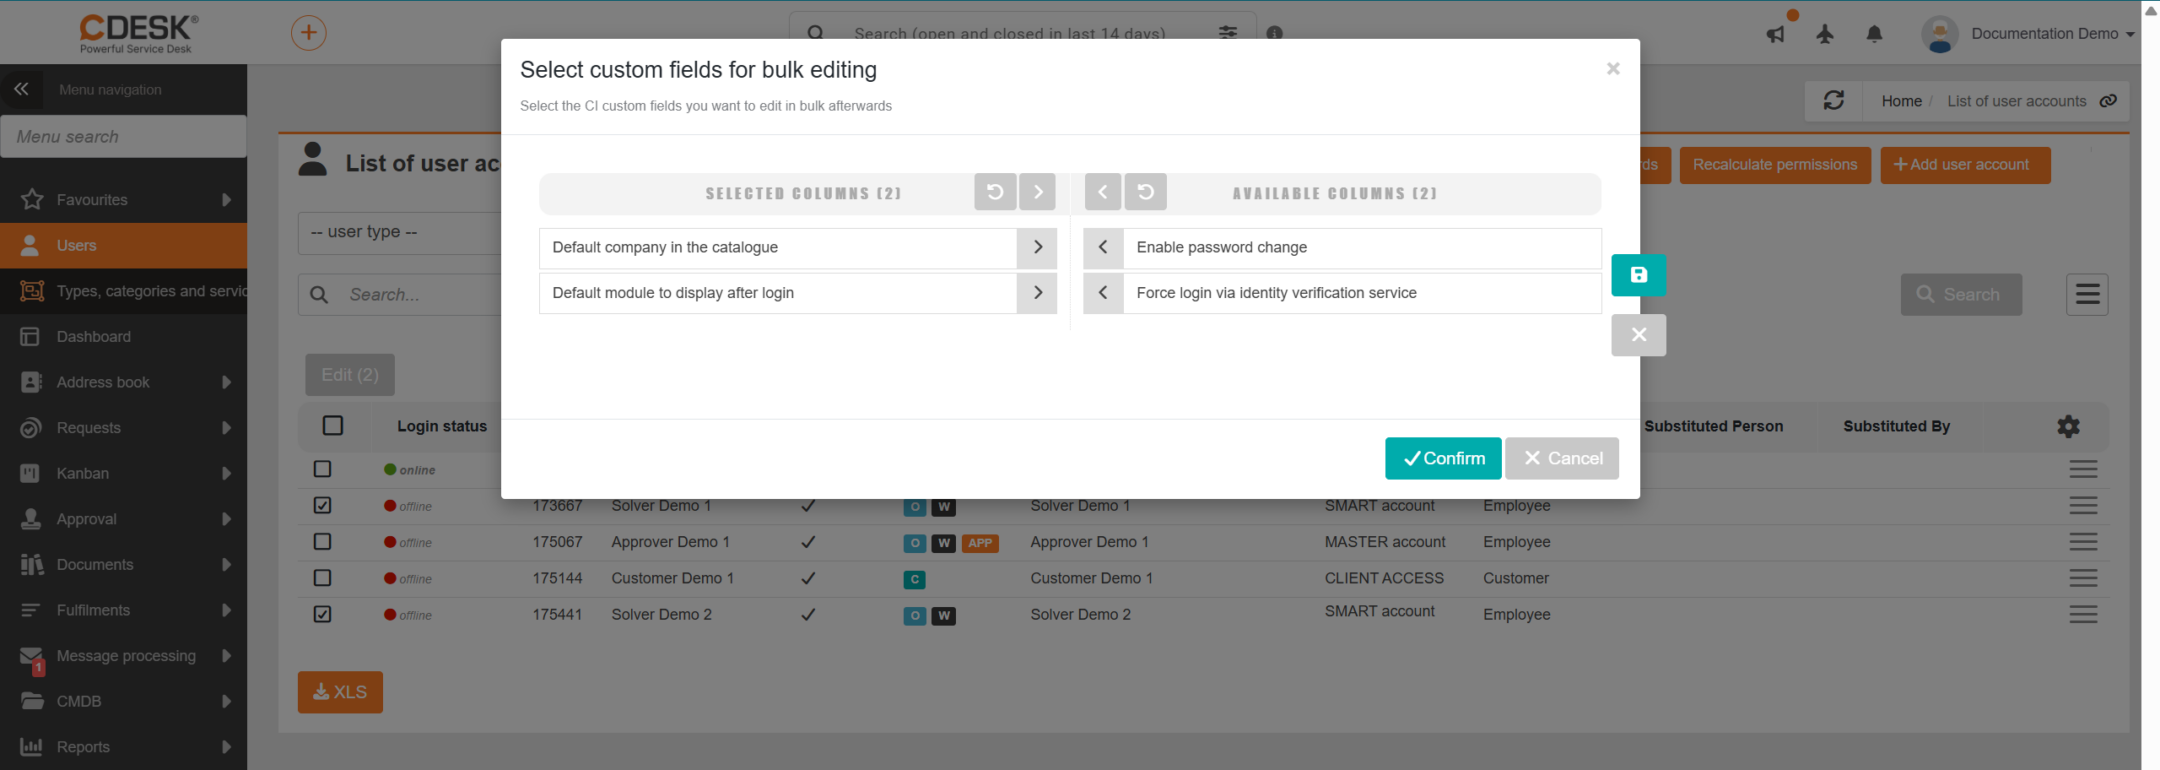
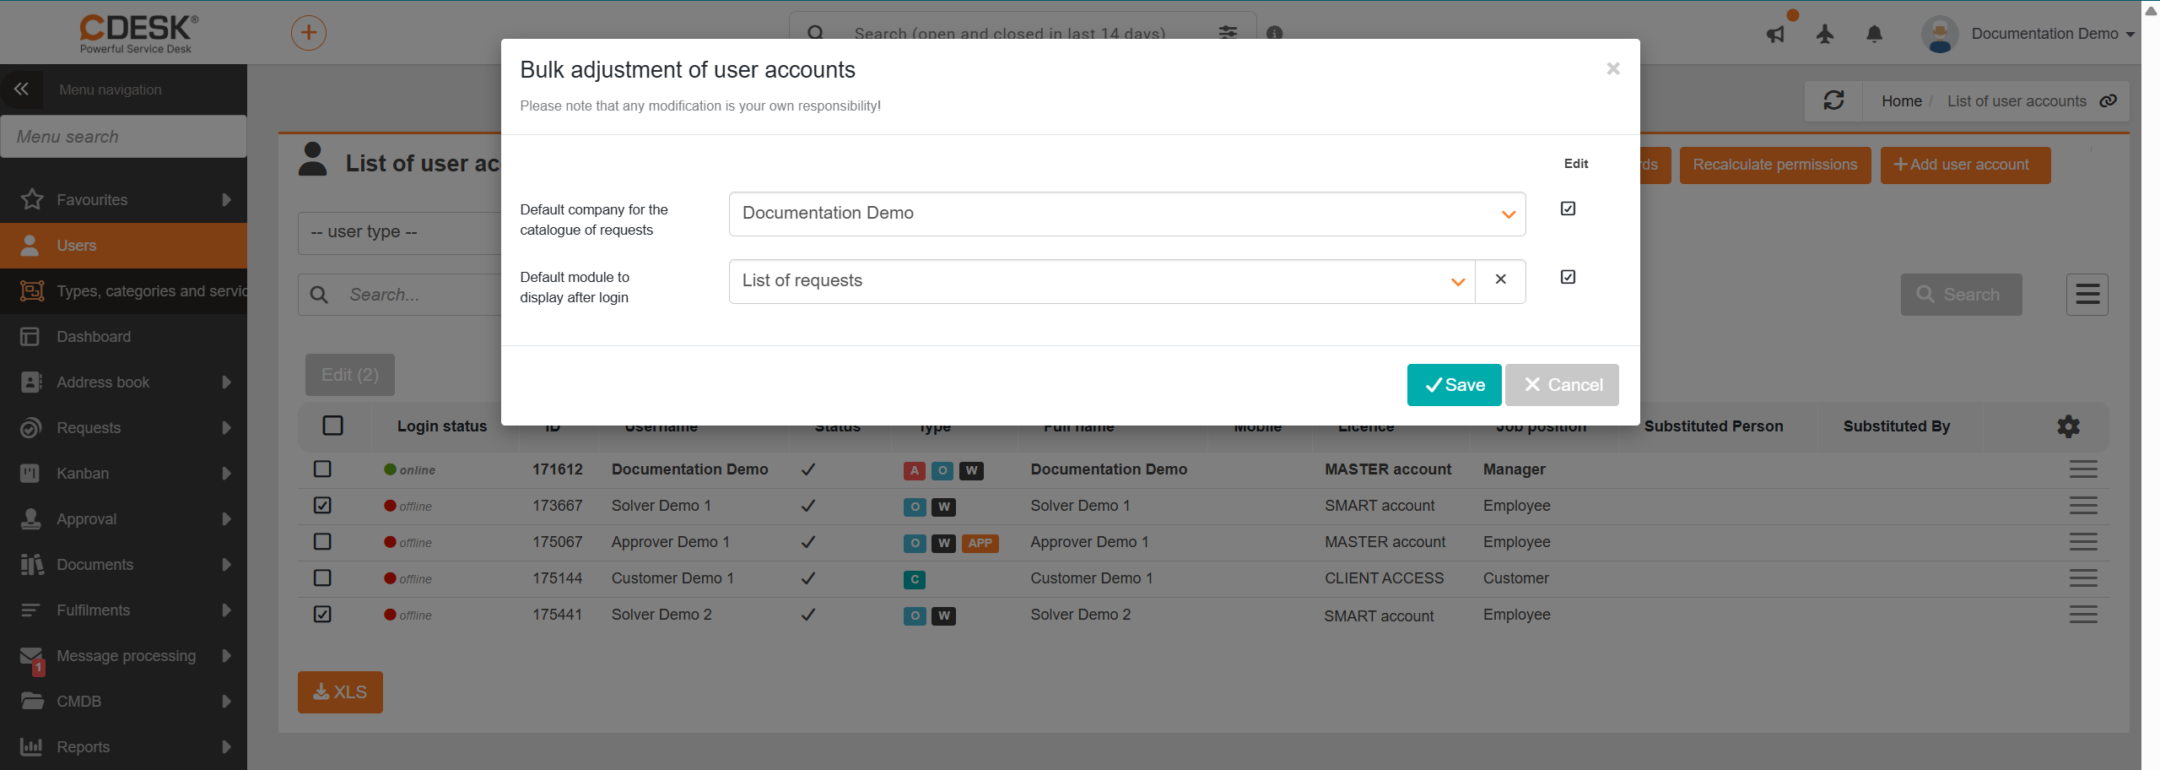
Figure: Selecting columns for bulk editing

A window will then open for you to enter values for the selected columns. For each setting you wish to change, enter a new value and tick the box in the ‘Edit’ column. Only the settings you select in this way will be changed – the others will remain unchanged in the individual accounts. Confirm your changes by clicking the Save button.

Figure: Entering a new value for the selected columns

Notice: Bulk editing will change the settings for all selected accounts at once, and the changes done by the editing cannot be undone in a single step. Before saving, therefore, please check which accounts you have selected and which settings are ticked in the ‘Edit’ column.

Export user list

To export the user list, click the XLS button below the list. This will open a new window where you can select the columns to export. If you wish to export all columns, you do not need to select them individually. Clicking the ‘‘ icon in Available columns section will move all columns to Selected columns section in one go. The order of the columns in this list determines their order in the export. You can change this order as you wish. If you wish to keep the columns in their default order, click on the ‘‘ icon above the list of columns and the columns will be sorted.
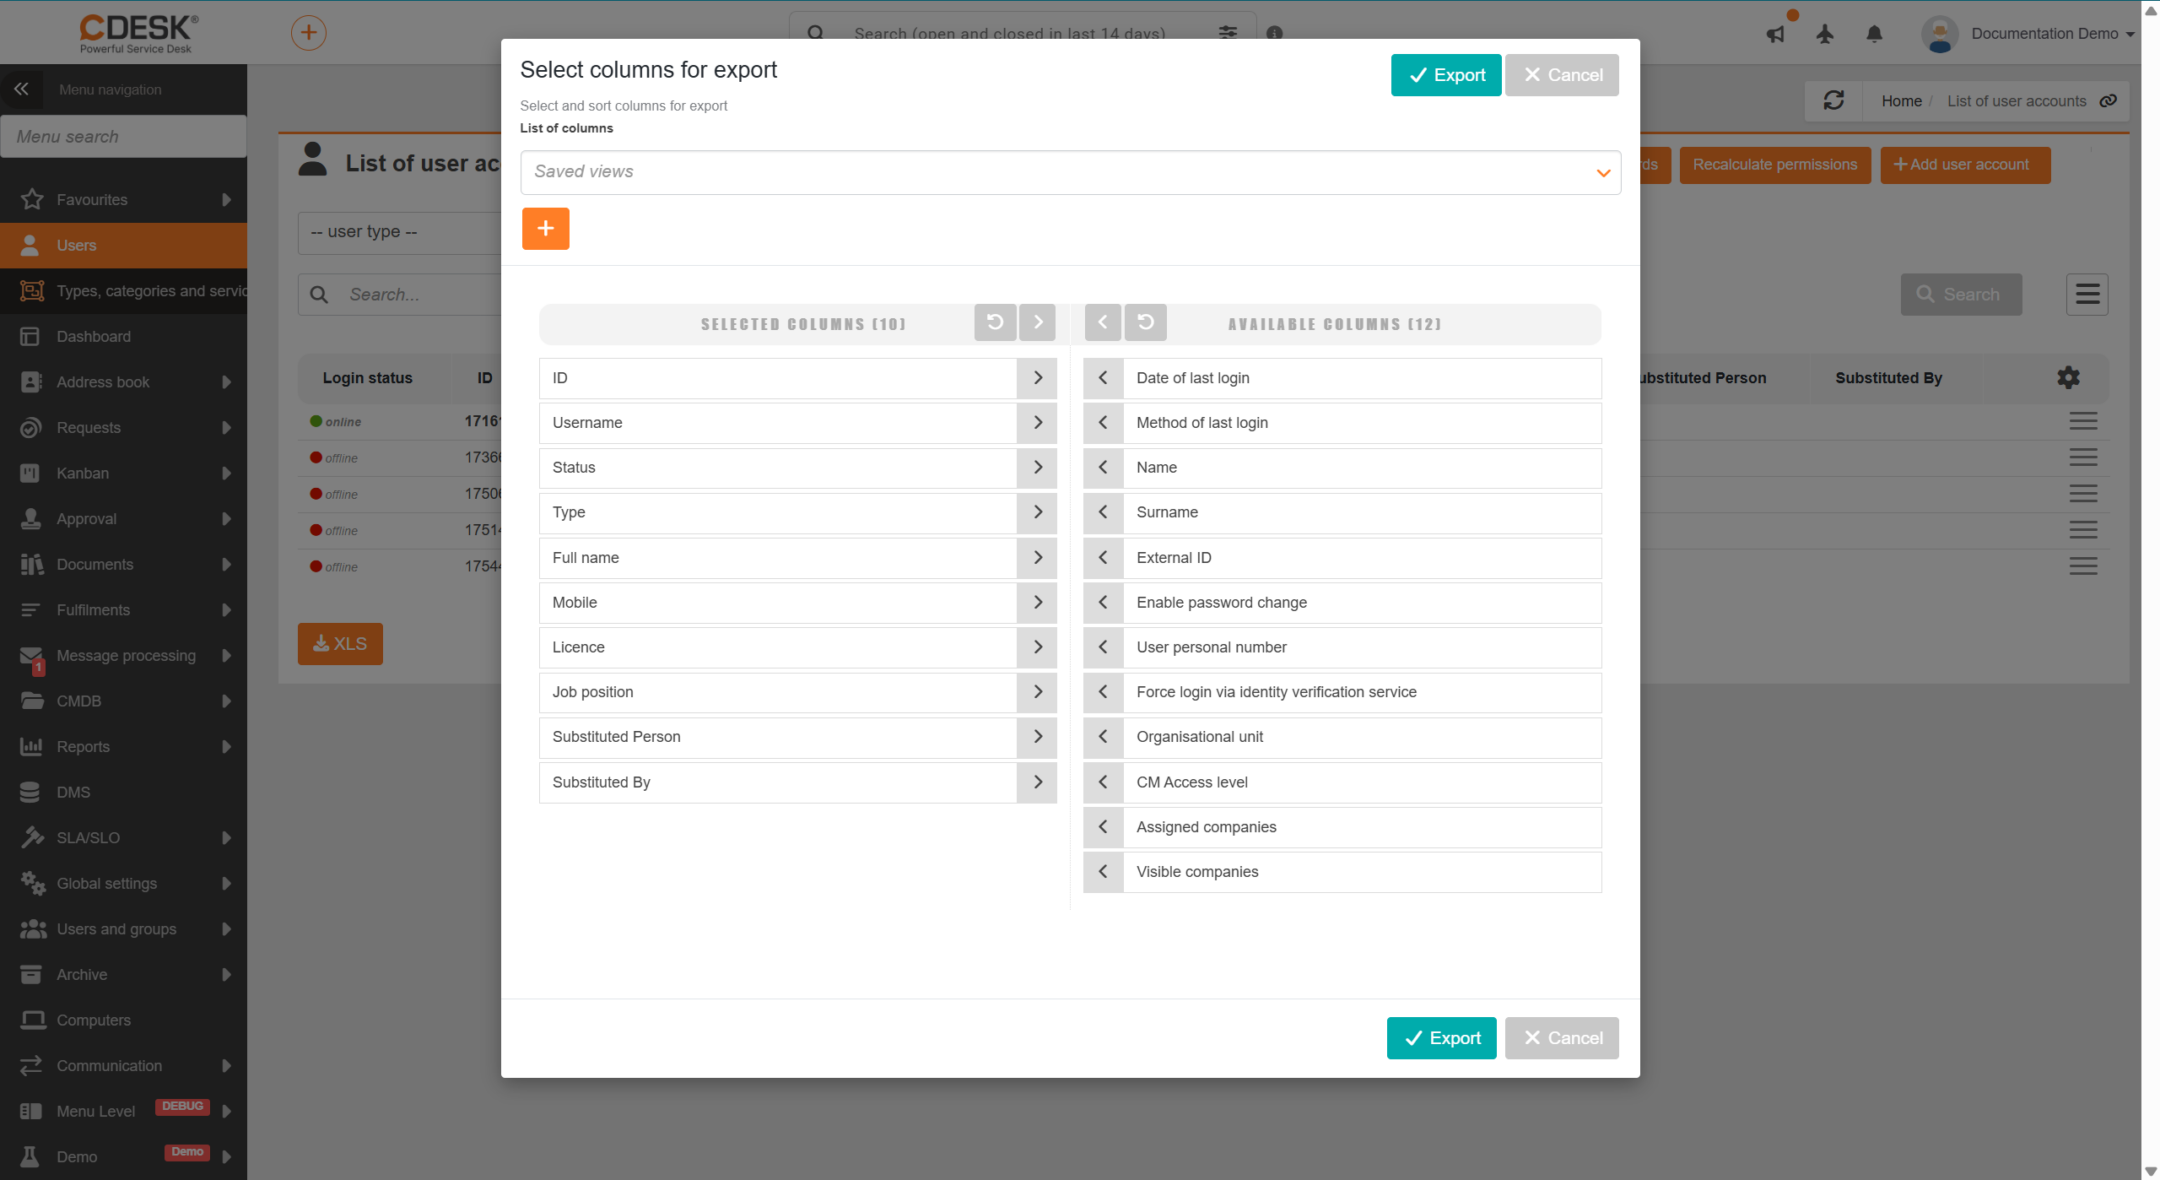
Figure: Selecting columns for exporting a list of users

It is currently possible to export 22 columns: 

  • ID
  • Username
  • First name
  • Surname
  • Full name
  • Status
  • Type
  • Phone
  • Licence
  • Job title
  • External ID
  • Personal number for users
  • Date and time of last login
  • Method of last login
  • Allow password change
  • Organisational unit
  • CM Access level
  • Substituted Person
  • Substitutes
  • Assigned companies
  • Visible companies
  • Enforce login via an identity authentication service

Once you have selected the columns, click the ‘Export’ button – located in both the top-left and bottom-left corners of the window – to generate the export. When you click it, you will be prompted to select a location for the file on your local device. Selecting the Cancel option will return you to the list of users without creating the export.

Image: XLS export of the user list