

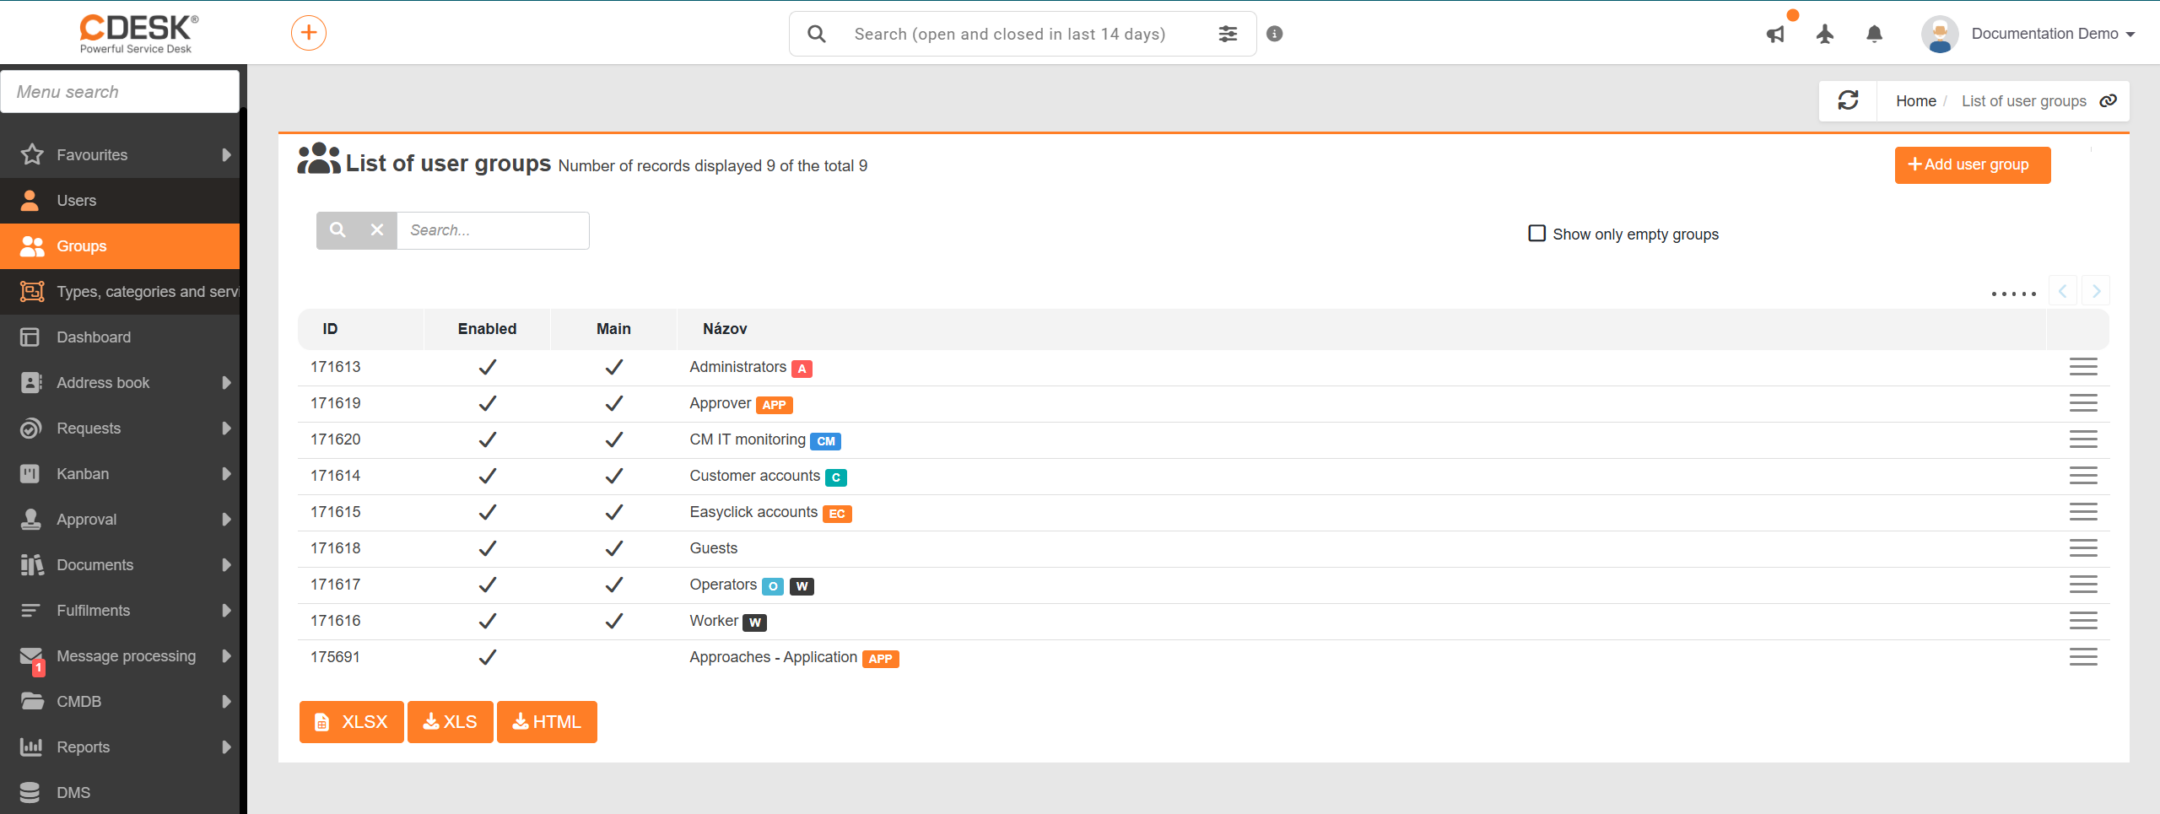
Coloured labels are displayed next to the group name, indicating the nature of the group, i.e. which system group it belongs under. The abbreviations used are  (Administrator),
  (Operator),
  (Customer account),
  (EasyClick),
  (Assignee),
  (Approver) and
  (CM IT monitoring). The full name is displayed when you hover the cursor over the label.
You open the group details by clicking its name or by double-clicking the row. Below the list there are buttons for exporting the list of groups, and in the bottom right-hand corner there is pagination to make the list easier to view and navigate.

Below the list there are the XLSX, XLS and HTML buttons, which can be used to export the currently displayed list of groups to the chosen format. The availability of these buttons can be configured in the user’s permissions.
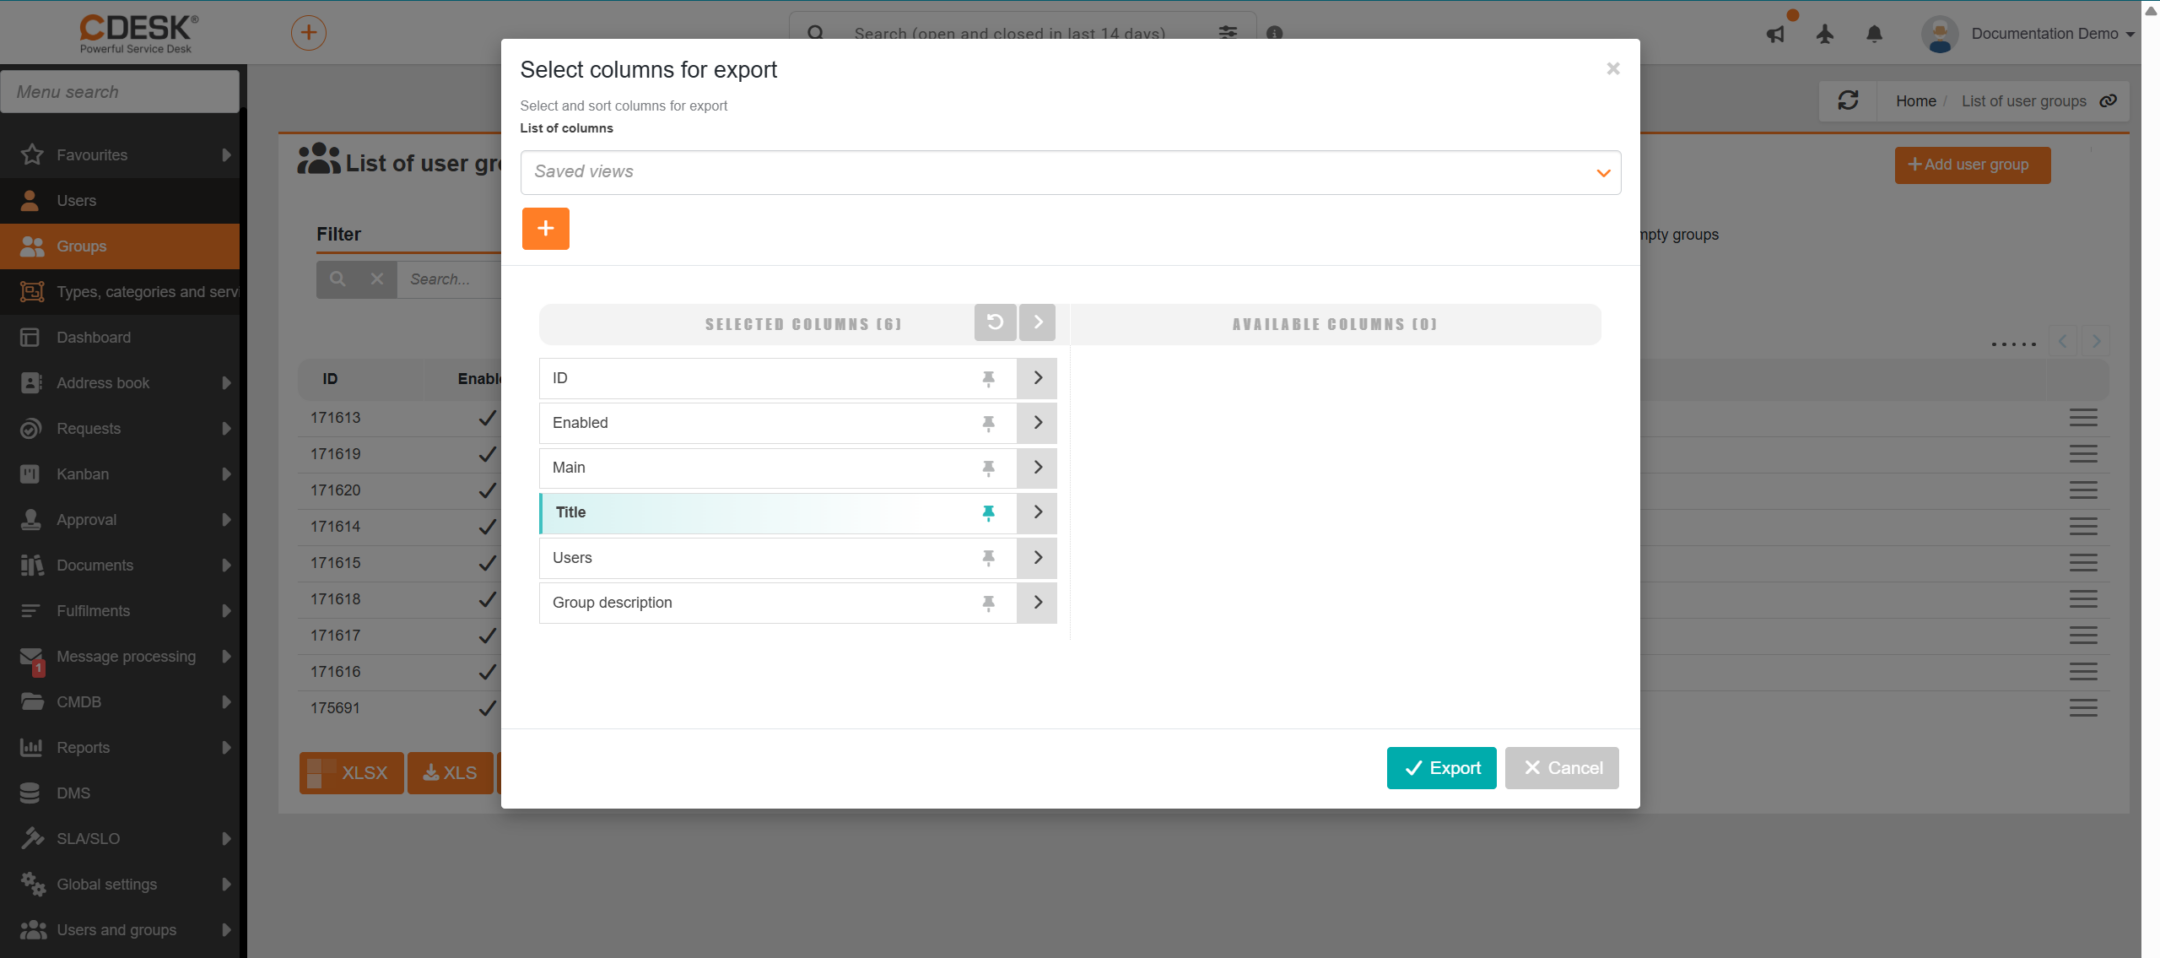
To export the list of users, click the XLS button below the list. This will open a new window where you can select the columns to export. If you wish to export all columns, you do not need to select them individually. Clicking the  icon in the Available columns section moves all columns to the Selected columns section in one go. The order of the columns in this list also determines their order in the export. You can change this order as you wish. If you want the columns in their default order, click the
  icon above the list of columns and the columns will be sorted.
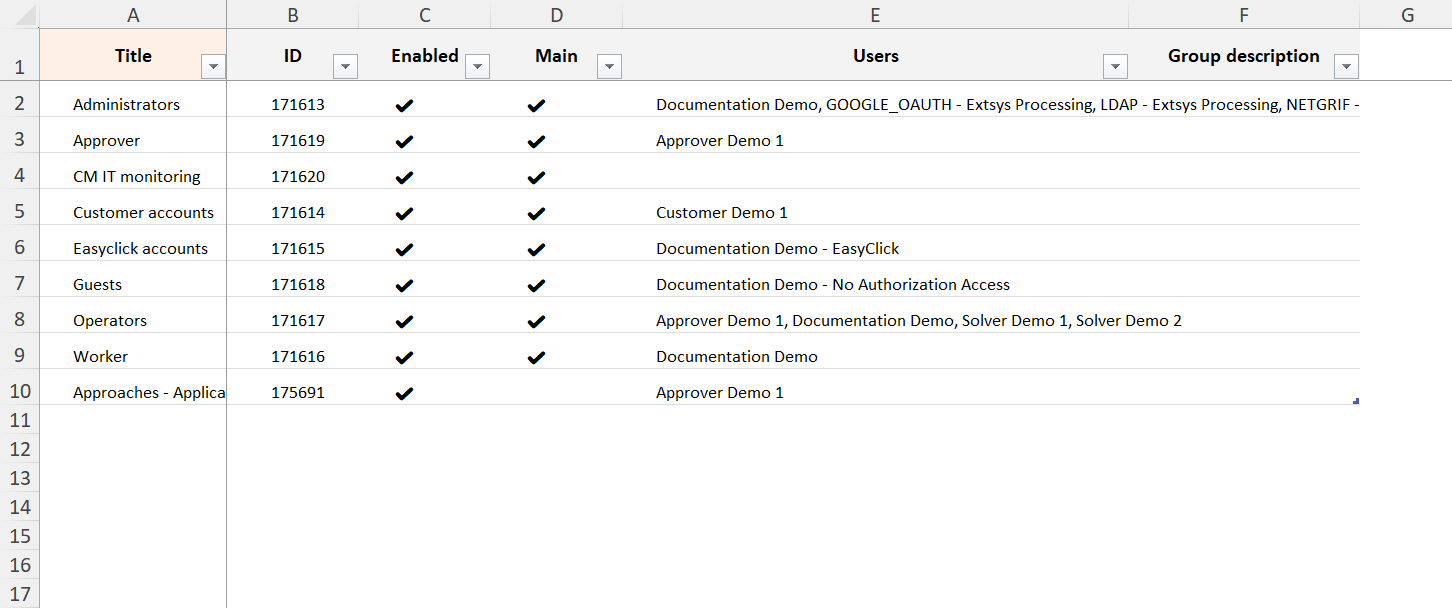
After clicking, a new window opens in which the columns for the export are selected. Six columns are available – ID, Enabled, Main, Name, Users and Group description. The export can therefore also contain data that the list itself does not show as columns, for example the list of assigned users. The order of the columns in this list also determines their order in the export. Once the required columns have been selected, the export is started by clicking the Export button. If the export is not needed, you can return to the list of groups by clicking the Cancel button.