Beta verzia novej dokumentácie.

Group settings tabs

The group settings are divided into tabs according to the area they relate to. On the Basic properties tab the group is given its name; required fields are marked with the relevant symbol. The remaining tabs determine what the group provides to its members — its place in the hierarchy, the list of members and the scope of visible companies and request categories. The History and Audit tabs have a special position, as they serve for overview only.

Unlike the settings on an account, the values entered here apply at once to all members of the group and to the members of its child groups. A change of a permission or visibility therefore takes effect for everyone who has the group assigned, without any further intervention in their accounts. Which tabs are displayed depends on the environment configuration and permissions; some of them are available only after the group has been created. Changes are saved by clicking the Save button.

Basic properties

The tab contains the group’s identification details and is filled in first. Without a name, the group could not be assigned to an account or selected when setting permissions. The name is also displayed in the selection fields of other modules, for example when specifying the assignee group on a request. The form contains the following fields:

  • Enabled – determines whether the group is active. A disabled group remains in the list, but its permissions are not applied to its members.
  • Group name – the name under which the group is displayed throughout the system. The name must be unique. If it is already taken, the system will notify you and you need to choose another one.
  • Short name for listing – a short label for the group in listings. The field is displayed only when IT monitoring is enabled.
  • Group description – additional text that can describe the purpose of the group in more detail. It is also shown in the list of groups below the group name.

Groups

The group’s position in the hierarchy is handled in two sections — Parent groups and Child groups.

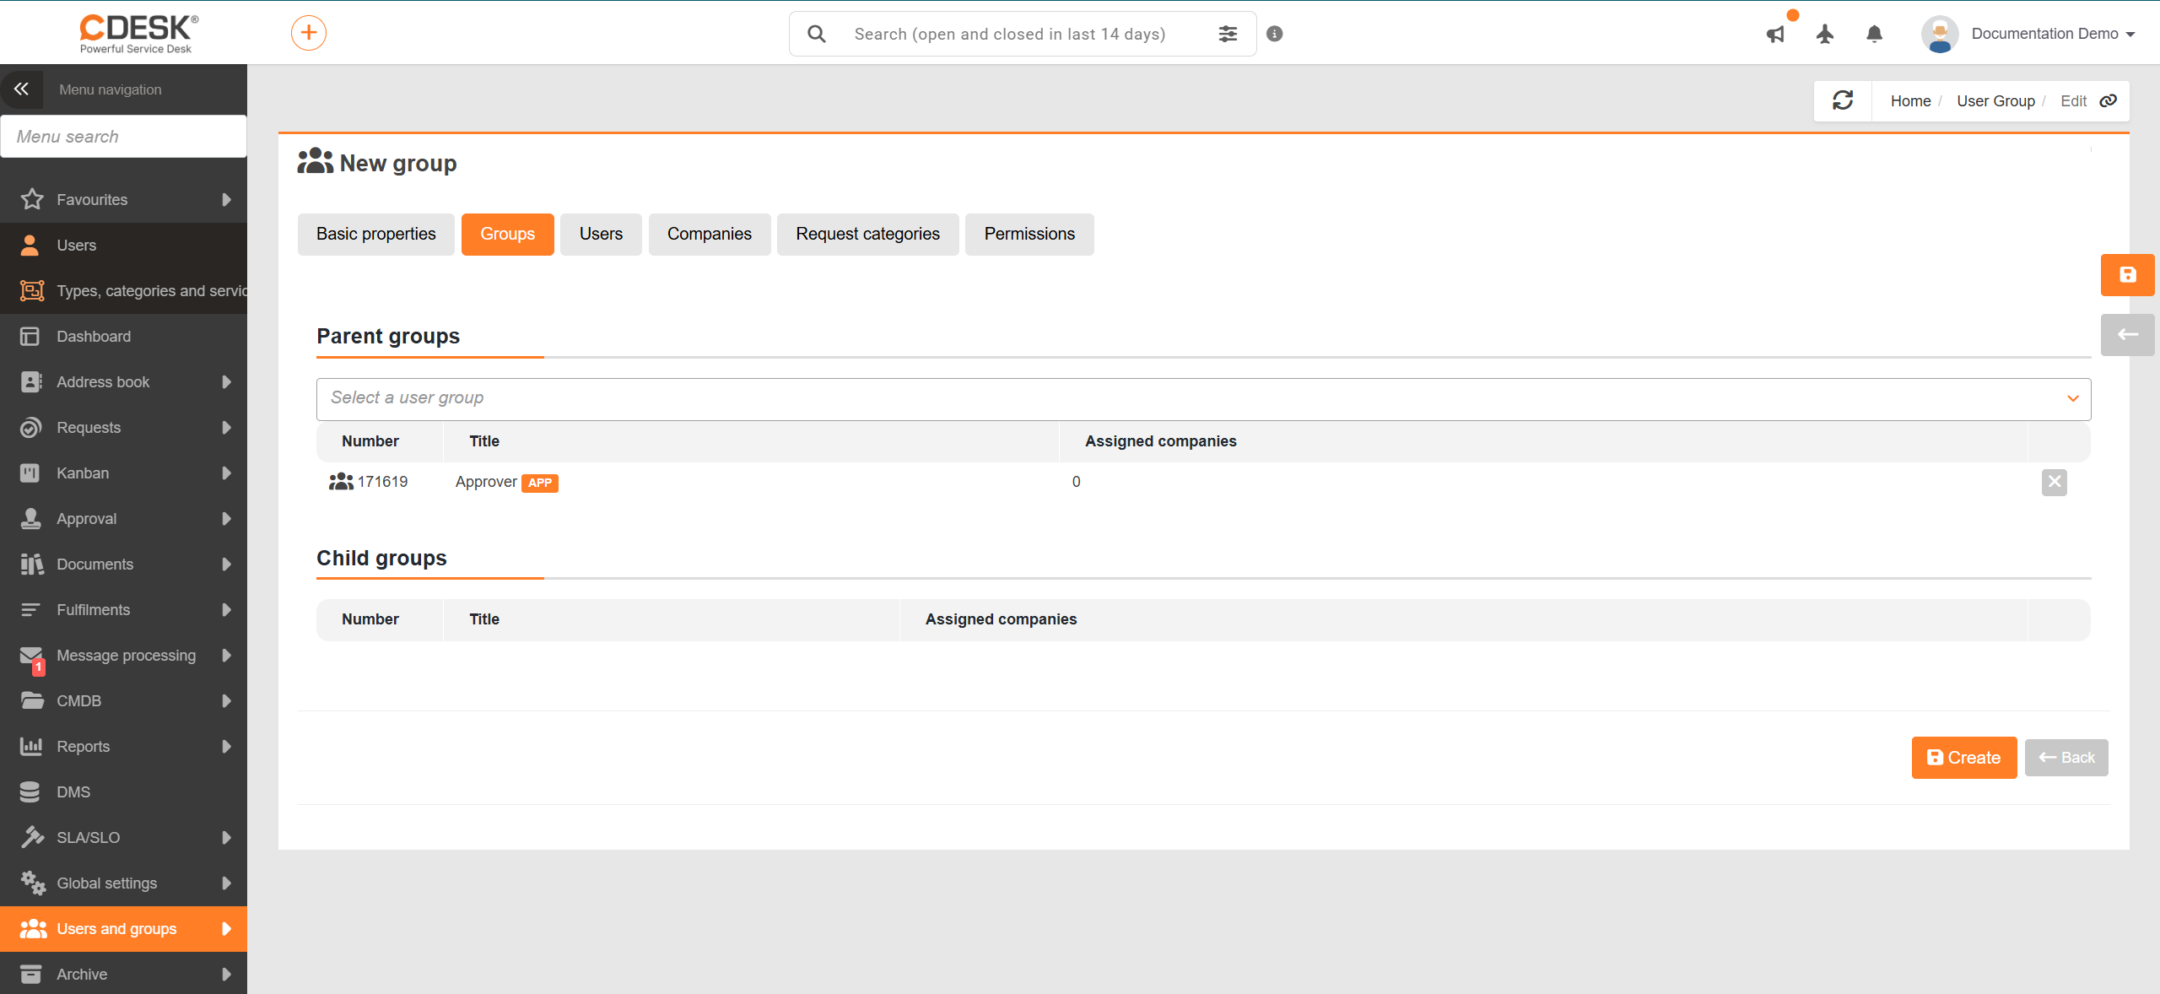
In the Parent groups section, you select the groups under which the group belongs and from which it takes over permissions. This is how permissions are built up in layers — a group for a specific team is placed under a general assignee group and only adds what that team needs on top. It is therefore not necessary to go through the entire scope of permissions from scratch for every new group.

The Child groups section is read-only and shows which groups belong under the group. The assignment is set from the opposite side, i.e. on the relevant child group in its Parent groups section.

Figure: The ‘Groups’ tab in the group details

Since permissions are passed down the hierarchy, members of a group also take over the permissions of all its parent groups. For the main group, the Parent groups section is missing – the main group stands at the top level of the hierarchy and has no other group above it.

Users

Group membership is managed in the Assigned users section, which also serves as the complete list of members. A user becomes a member of the group by being selected in the list of available accounts and, once saved, takes over the group’s entire set of permissions.

The same result can be achieved from the opposite side — by assigning the group directly in the user details on the User groups and licence tab. The only difference is whether you are assigning several users to one group, or several groups to one user.

Figure: The ‘Users’ tab in the group details

If you remove a user from a group, the permissions inherited from this group no longer apply to them. However, they keep the permissions from the other groups they belong to and the permissions set individually on their account. When a user’s role changes, removing them from a group alone may therefore not remove all of their access.

Companies

The range of companies that group members can work with is determined on this tab. Access obtained in this way is marked in the user details as inherited from group, so it can always be distinguished from access set directly on the account.

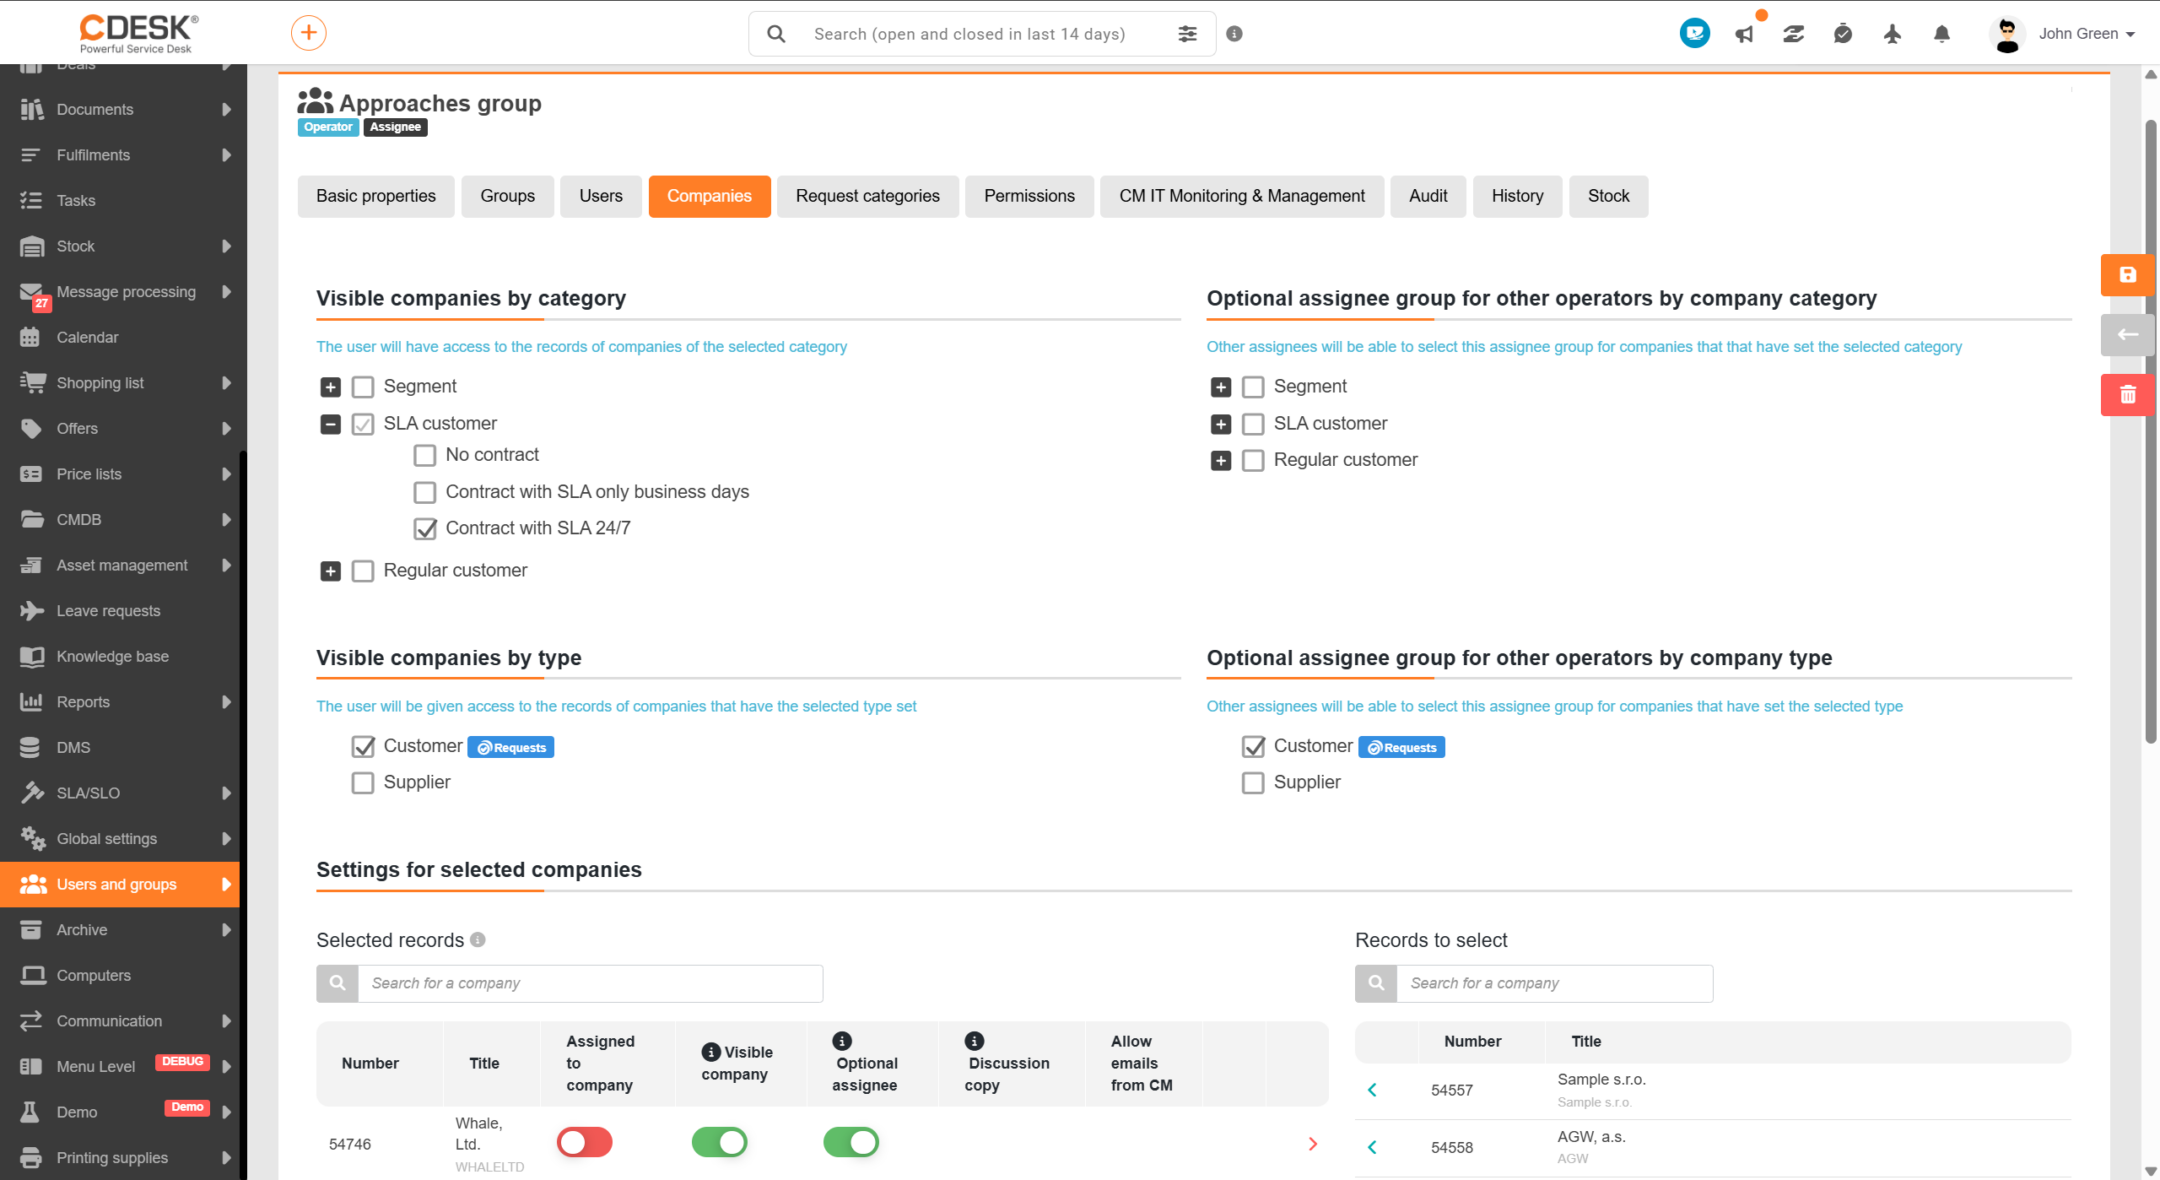
Specific companies are assigned in the Settings for selected companies section. A bulk alternative is provided by the options Visible companies by category and Visible companies by type – group members gain access to all companies of the given category or type respectively. This approach is useful in environments with a large number of companies, where assigning them one by one would be impractical.

Assignee and operator groups additionally have the sections Optional assignee group for other operators by company category and by company type. These options do not determine access to data but the content of selection fields – they allow other assignees to choose this group as the assignee group on records of companies of the given category or type.

Figure: The ‘Companies’ tab in the group details
Please note: For groups of customer accounts, the setting by category or type should be used with care – it makes the records of all companies of the selected category or type accessible.
Note: The tab is not displayed for a group intended for EasyClick accounts. The option by category is available only when company categories are enabled.

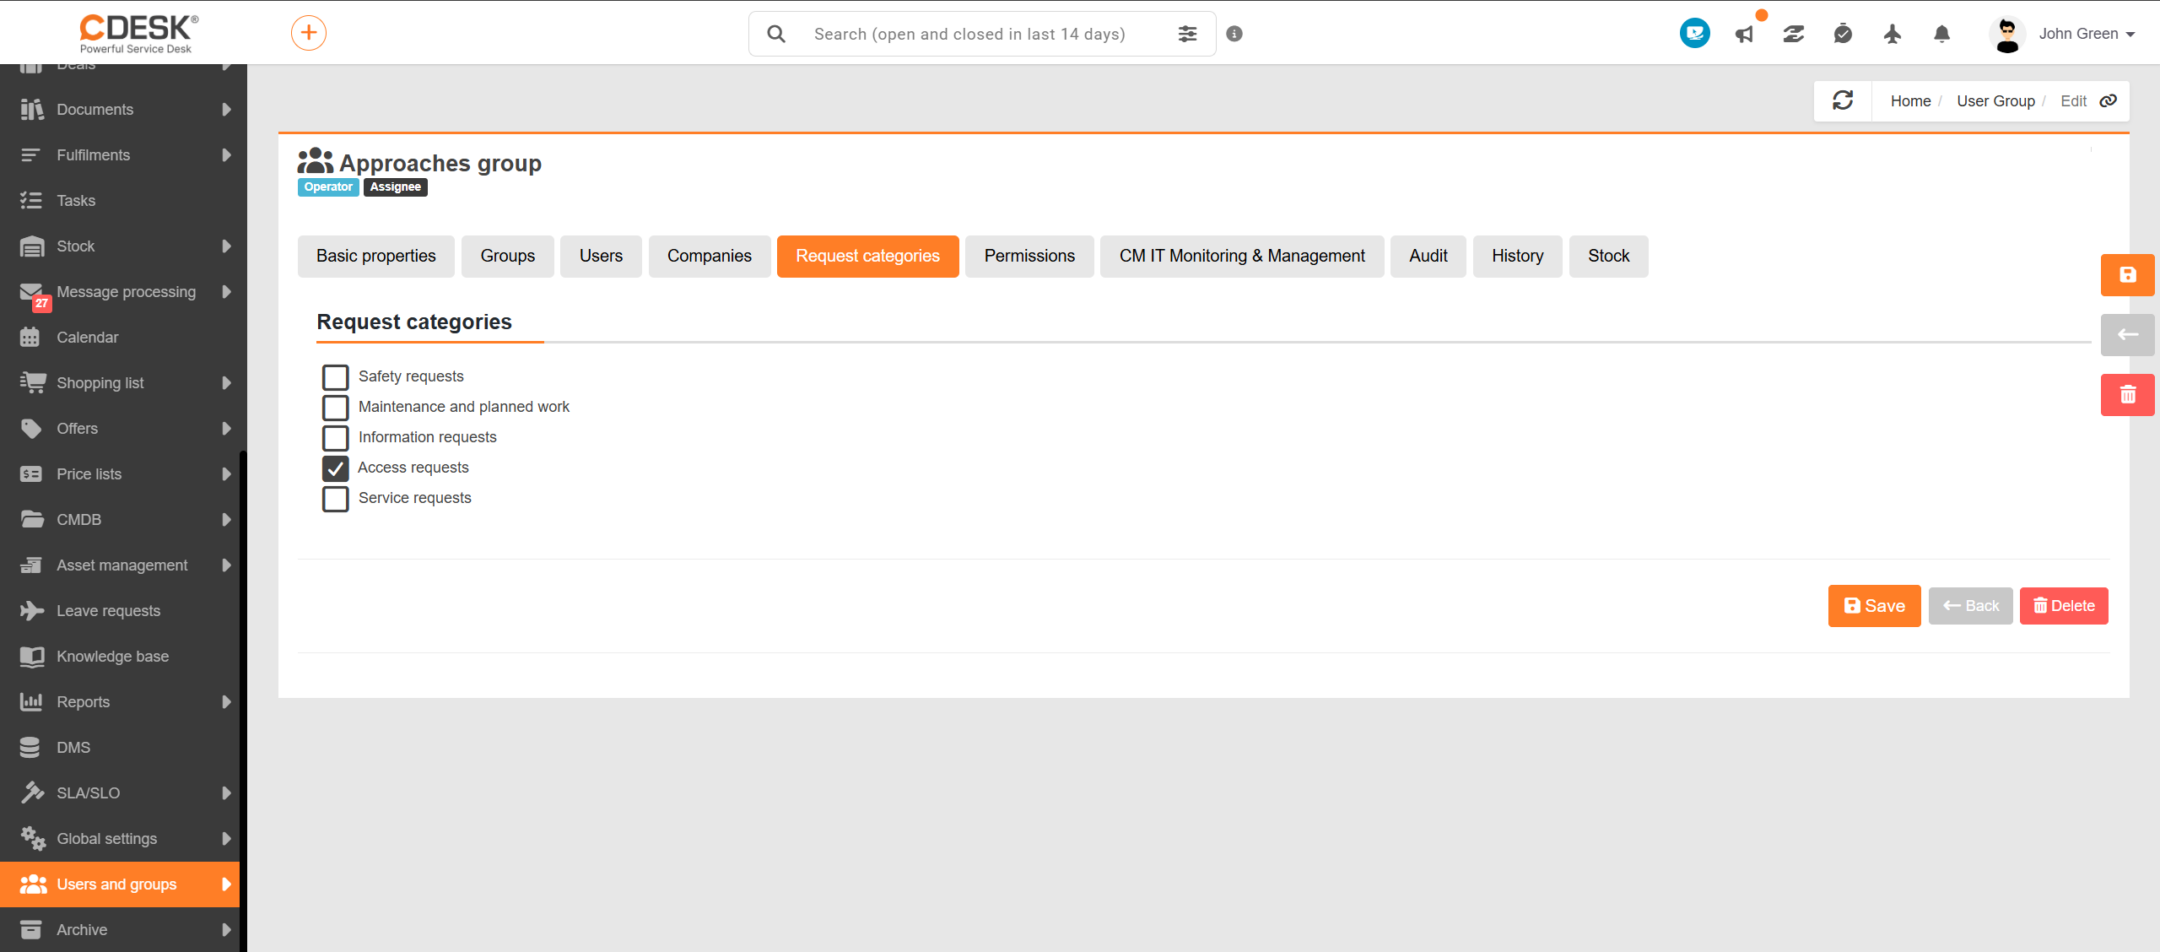
Request categories

Selecting categories on this tab makes requests of those categories accessible to the group members. If the selection remains empty, members see requests in all categories of the environment – the restriction applies only once at least one category is selected.

The setting is useful where individual teams work only with a selected part of the requests, for example when service requests are handled by a different team than change requests. The tab is available only if request categories are enabled in your environment.

Figure: The ‘Request categories’ tab in the group details

Permissions

This tab is the core of the whole group — it defines the set of permissions that all its members inherit automatically, so access does not have to be set on each account separately.

Detailed information can be found in the separate Permissions chapter.

Permissions are arranged in a tree by modules and individual record types. For each item, Access , Add , Edit , Delete and Special permissions are allowed or denied separately. Only the permissions assigned directly to the given group can be changed. Those that the group inherits from its parent groups are visible at the individual items so that the resulting scope of access is clear, but they are set on the relevant parent group.

Above the permissions tree there is a search field and a drop-down filter that narrows the listing by permission state. The options are All, All explicitly allowed, All explicitly denied, All inherited, All inherited, allowed, All inherited, denied and All licence permissions. The filter is useful when checking the configuration – the All inherited option shows what the group takes over from its parent groups, while the All explicitly allowed option shows what is assigned to it directly.
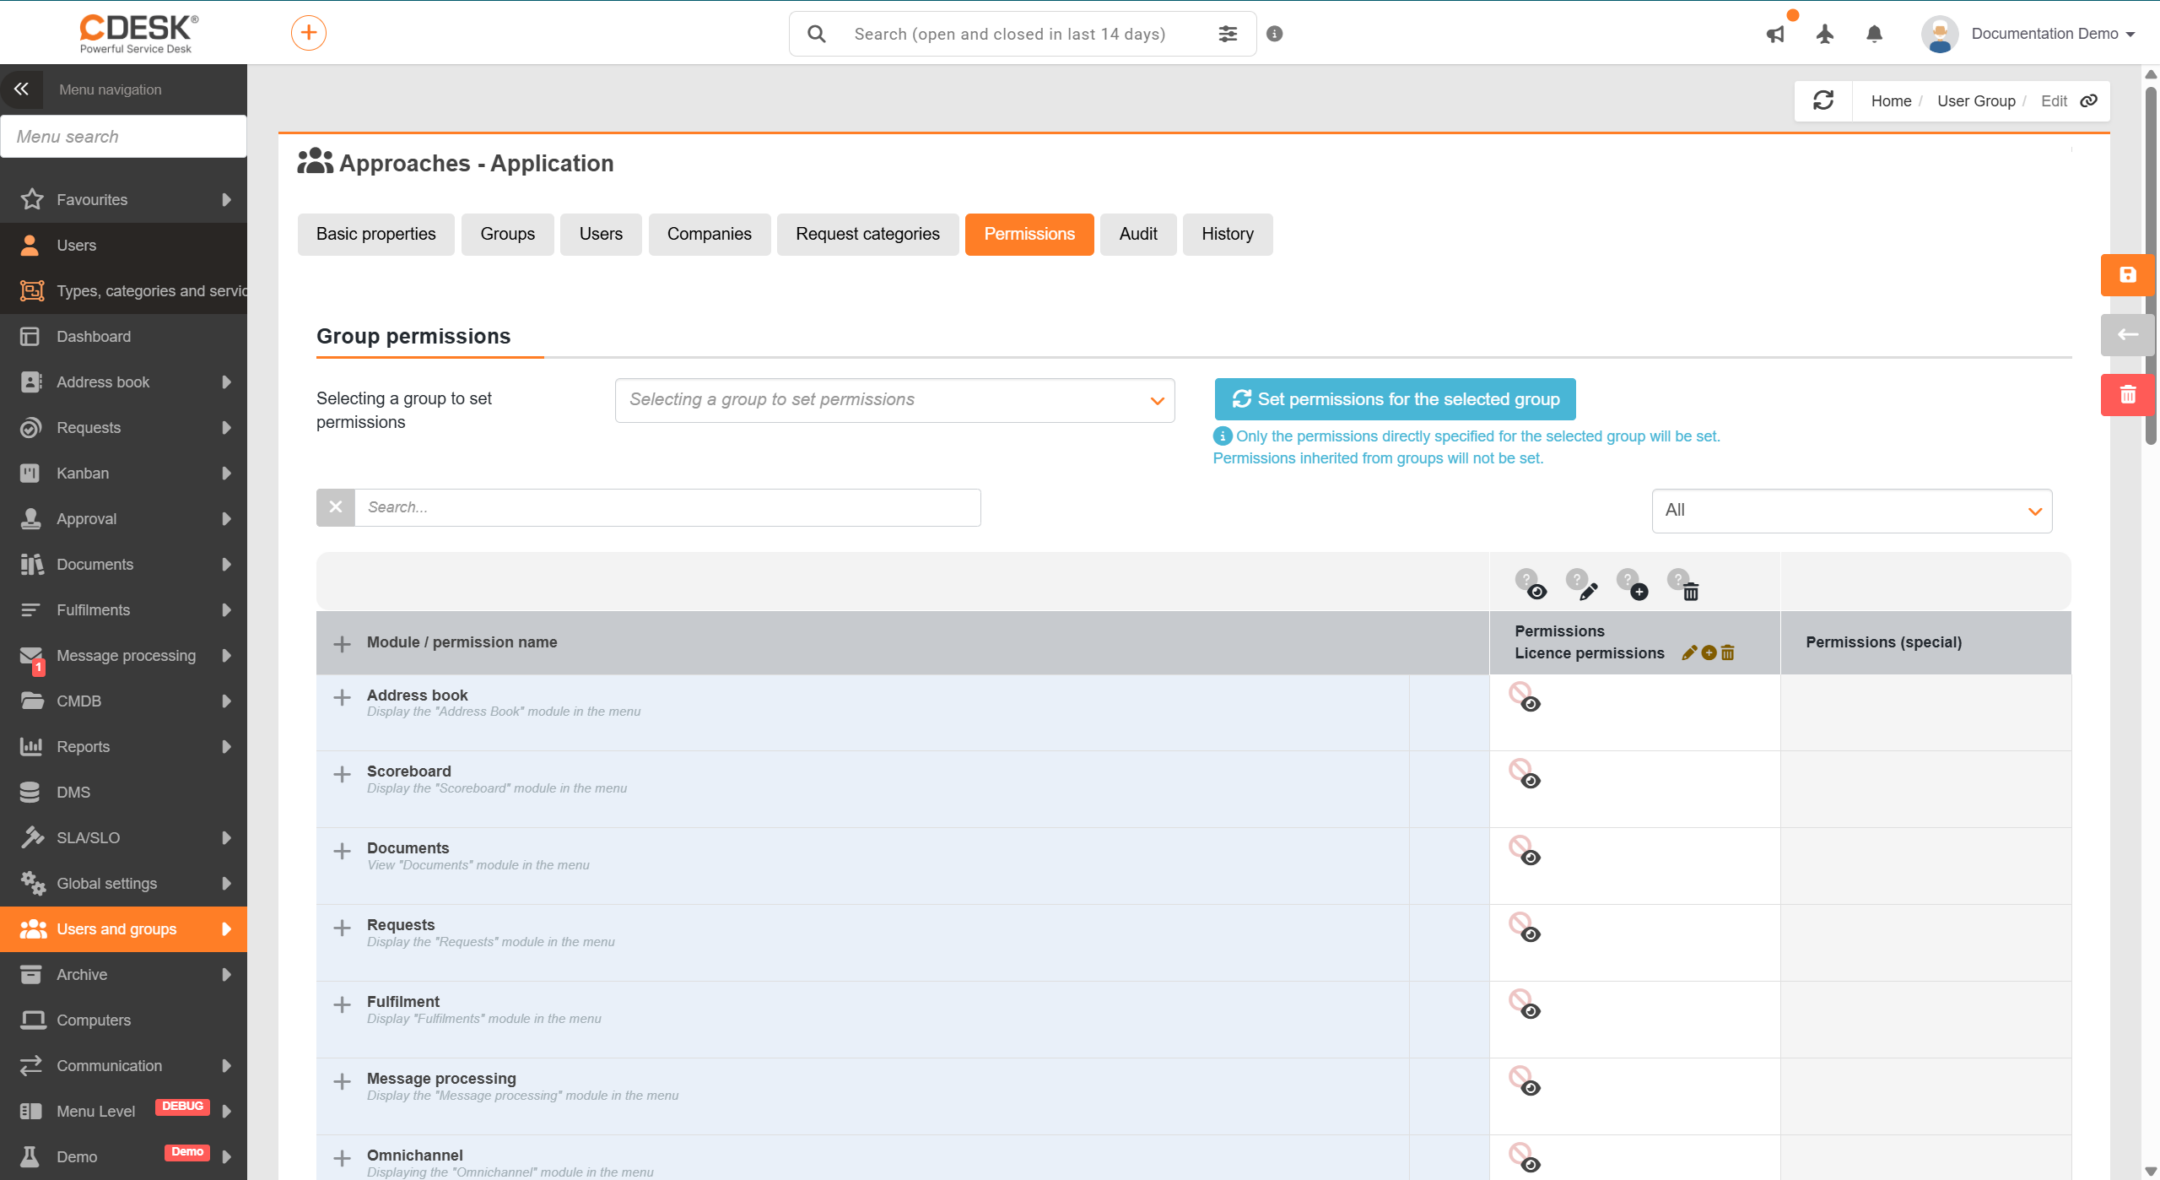
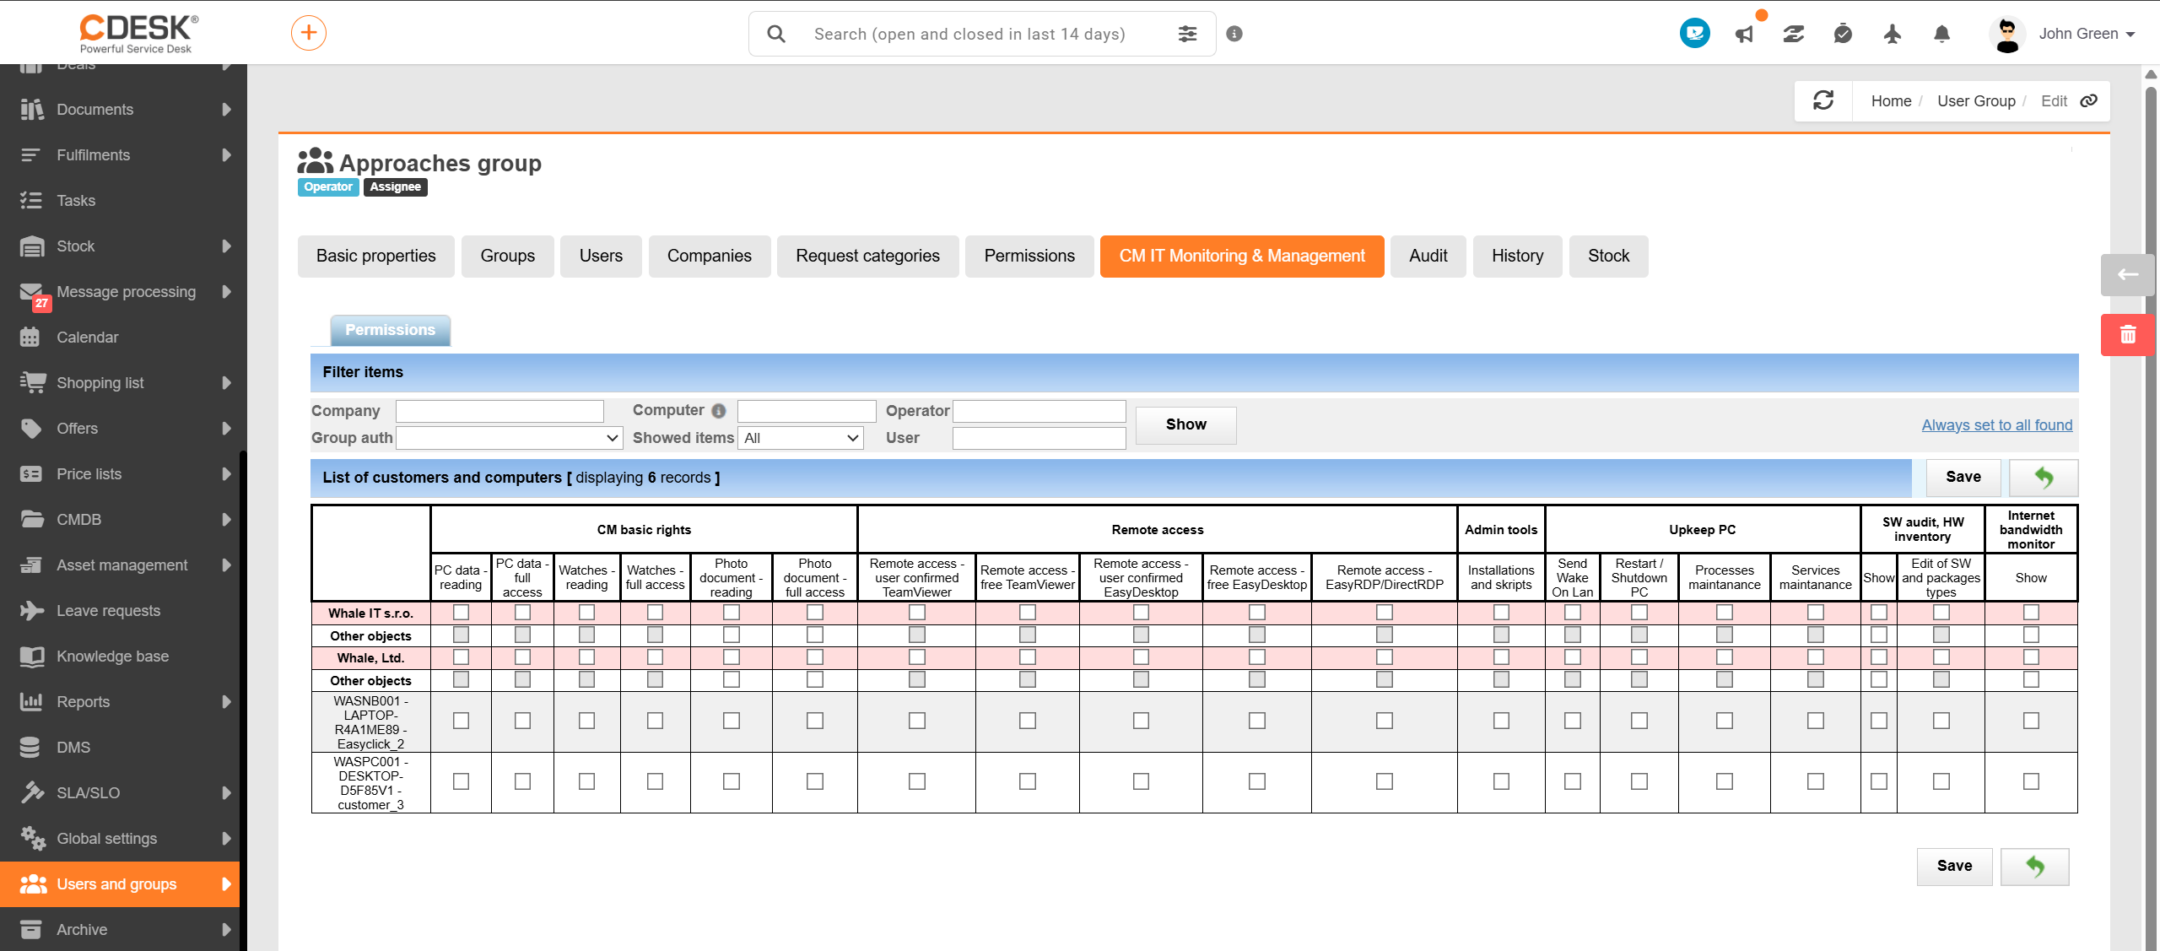
Figure: The ‘Permissions’ tab in the group details

Permissions do not have to be entered from scratch; they can be copied from another group. In the Group selection for setting permissions field, choose the template group and start copying by clicking the Set permissions of the selected group button. Only the permissions assigned directly to the selected group are copied, not those it has inherited itself. This procedure is useful when creating a group with a similar scope of access to an existing group – after copying, you only need to fine-tune the differences.

Note: The permission settings are displayed only after the group has been saved, because they are bound to an existing record. For system groups, the permissions are read-only and cannot be changed; the system indicates this directly on the tab.

CM IT Monitoring & Management

The group’s access to IT monitoring (C-Monitor) is set on this tab – the access level and related permissions are specified here and applied to all members. Monitoring access is thus handled at once for the whole group instead of being set on individual accounts.

The tab is available only in environments with access to IT monitoring and is displayed only after the group has been created.

Figure: The ‘CM IT Monitoring & Management’ tab in the group details

Audit

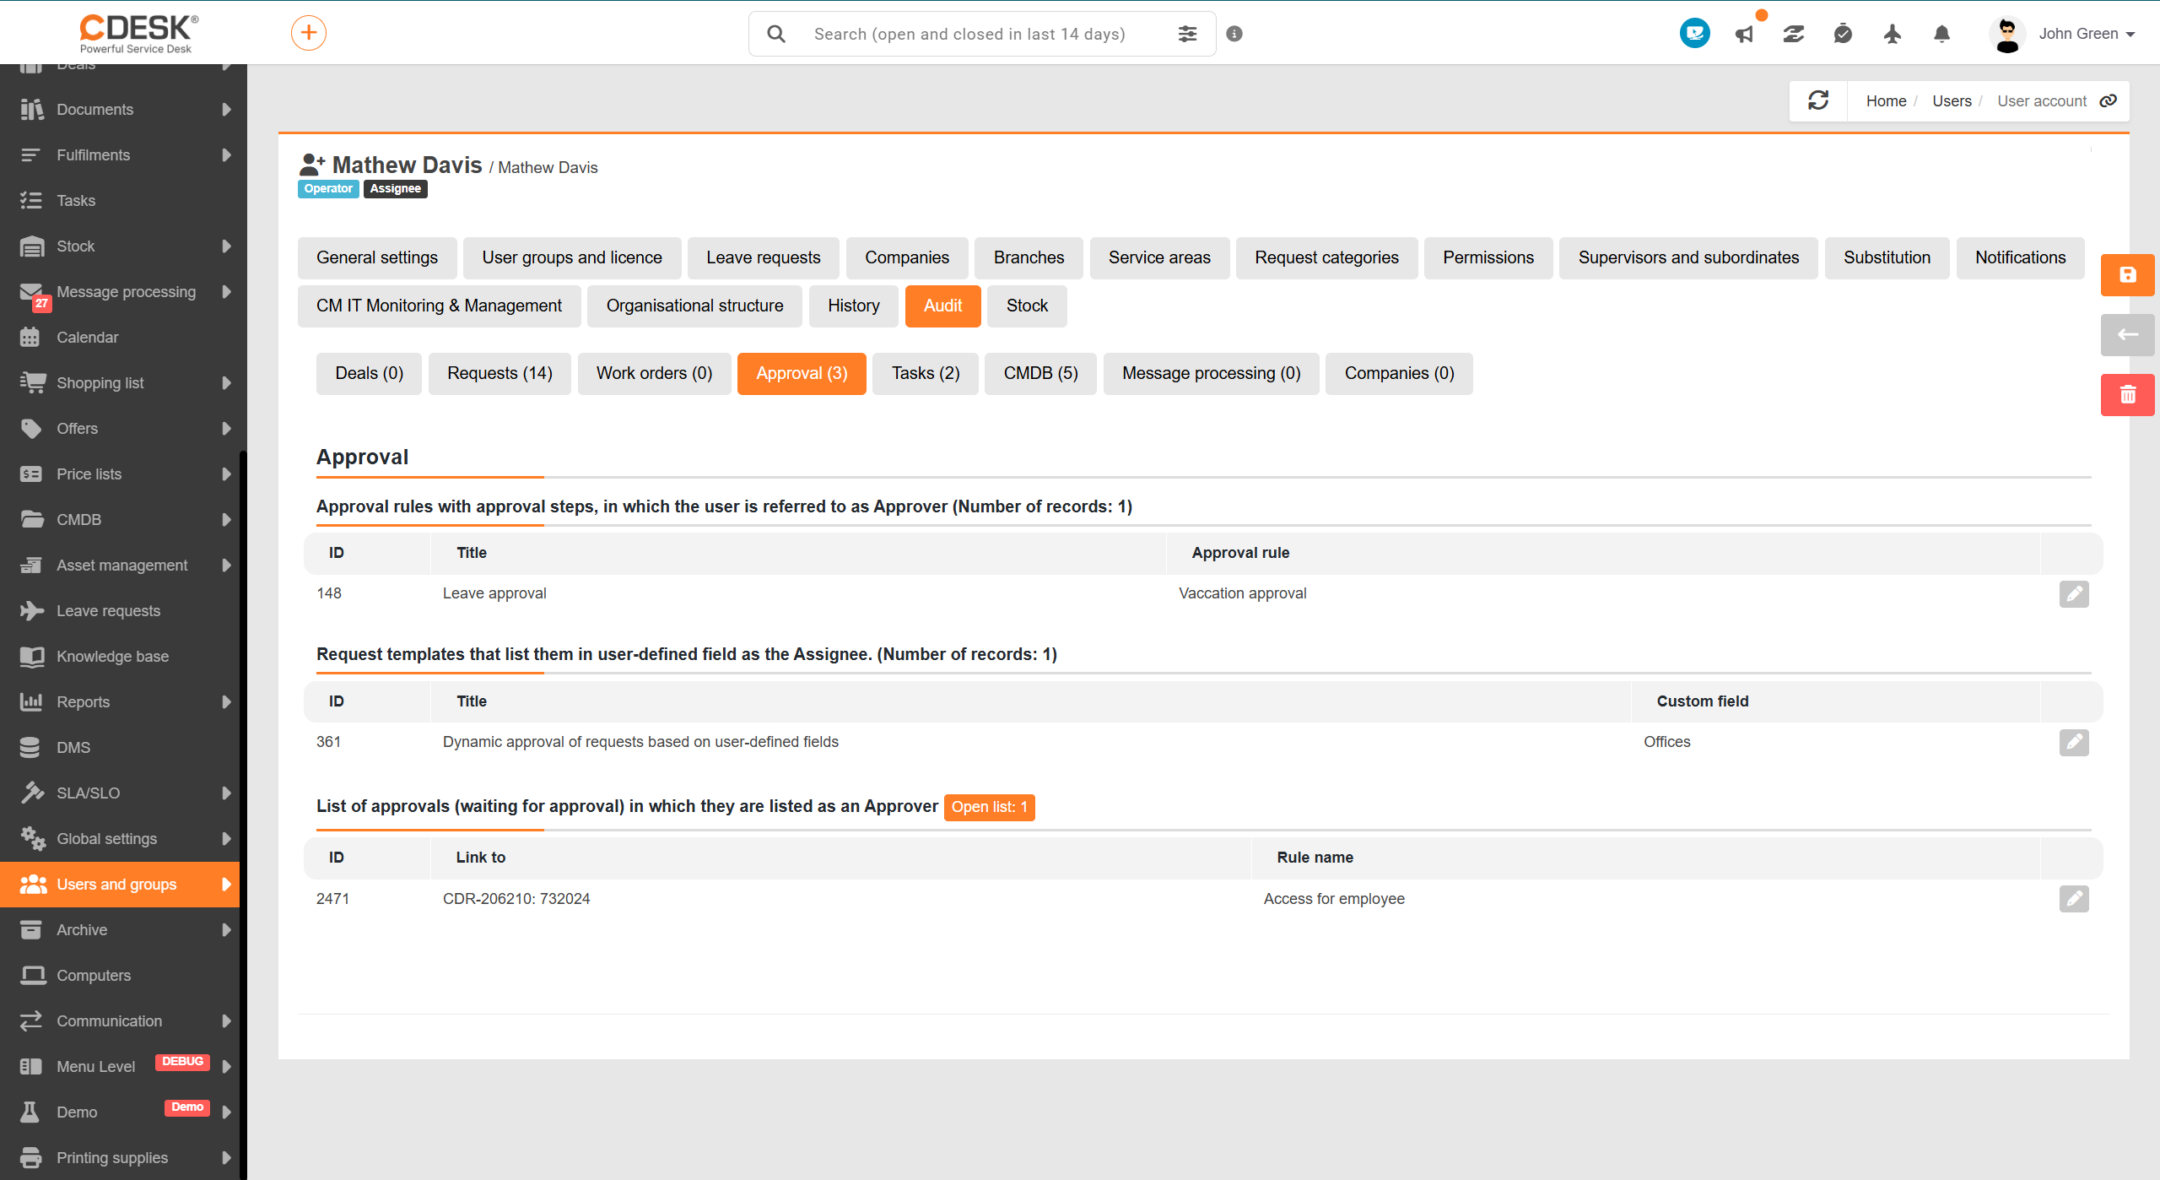
The audit answers the question of where the group is used in the system – in which settings and open records it is listed, for example as an assignee group or as an approver group. It therefore does not list the activity of the group members, but the links of the group itself.

Figure: The ‘Audit’ tab in the group details

Records are divided into sub-tabs according to where the group is listed, and each shows the number of records found:

  • Requests
  • Work orders
  • Approval
  • Tasks
  • CMDB configuration database
  • Message processing
  • Companies

The range of sub-tabs depends on the environment configuration — for example, Work orders are displayed only when the work orders module is enabled, and CMDB configuration database only when assignee groups are in use. The tab is displayed only after the group has been created.

Tip: Audit is especially useful before deleting or disabling a group. It shows you in which settings and records in progress the group is listed, so you can prevent records from being left without an assigned assignee or approver after the group is removed.

History

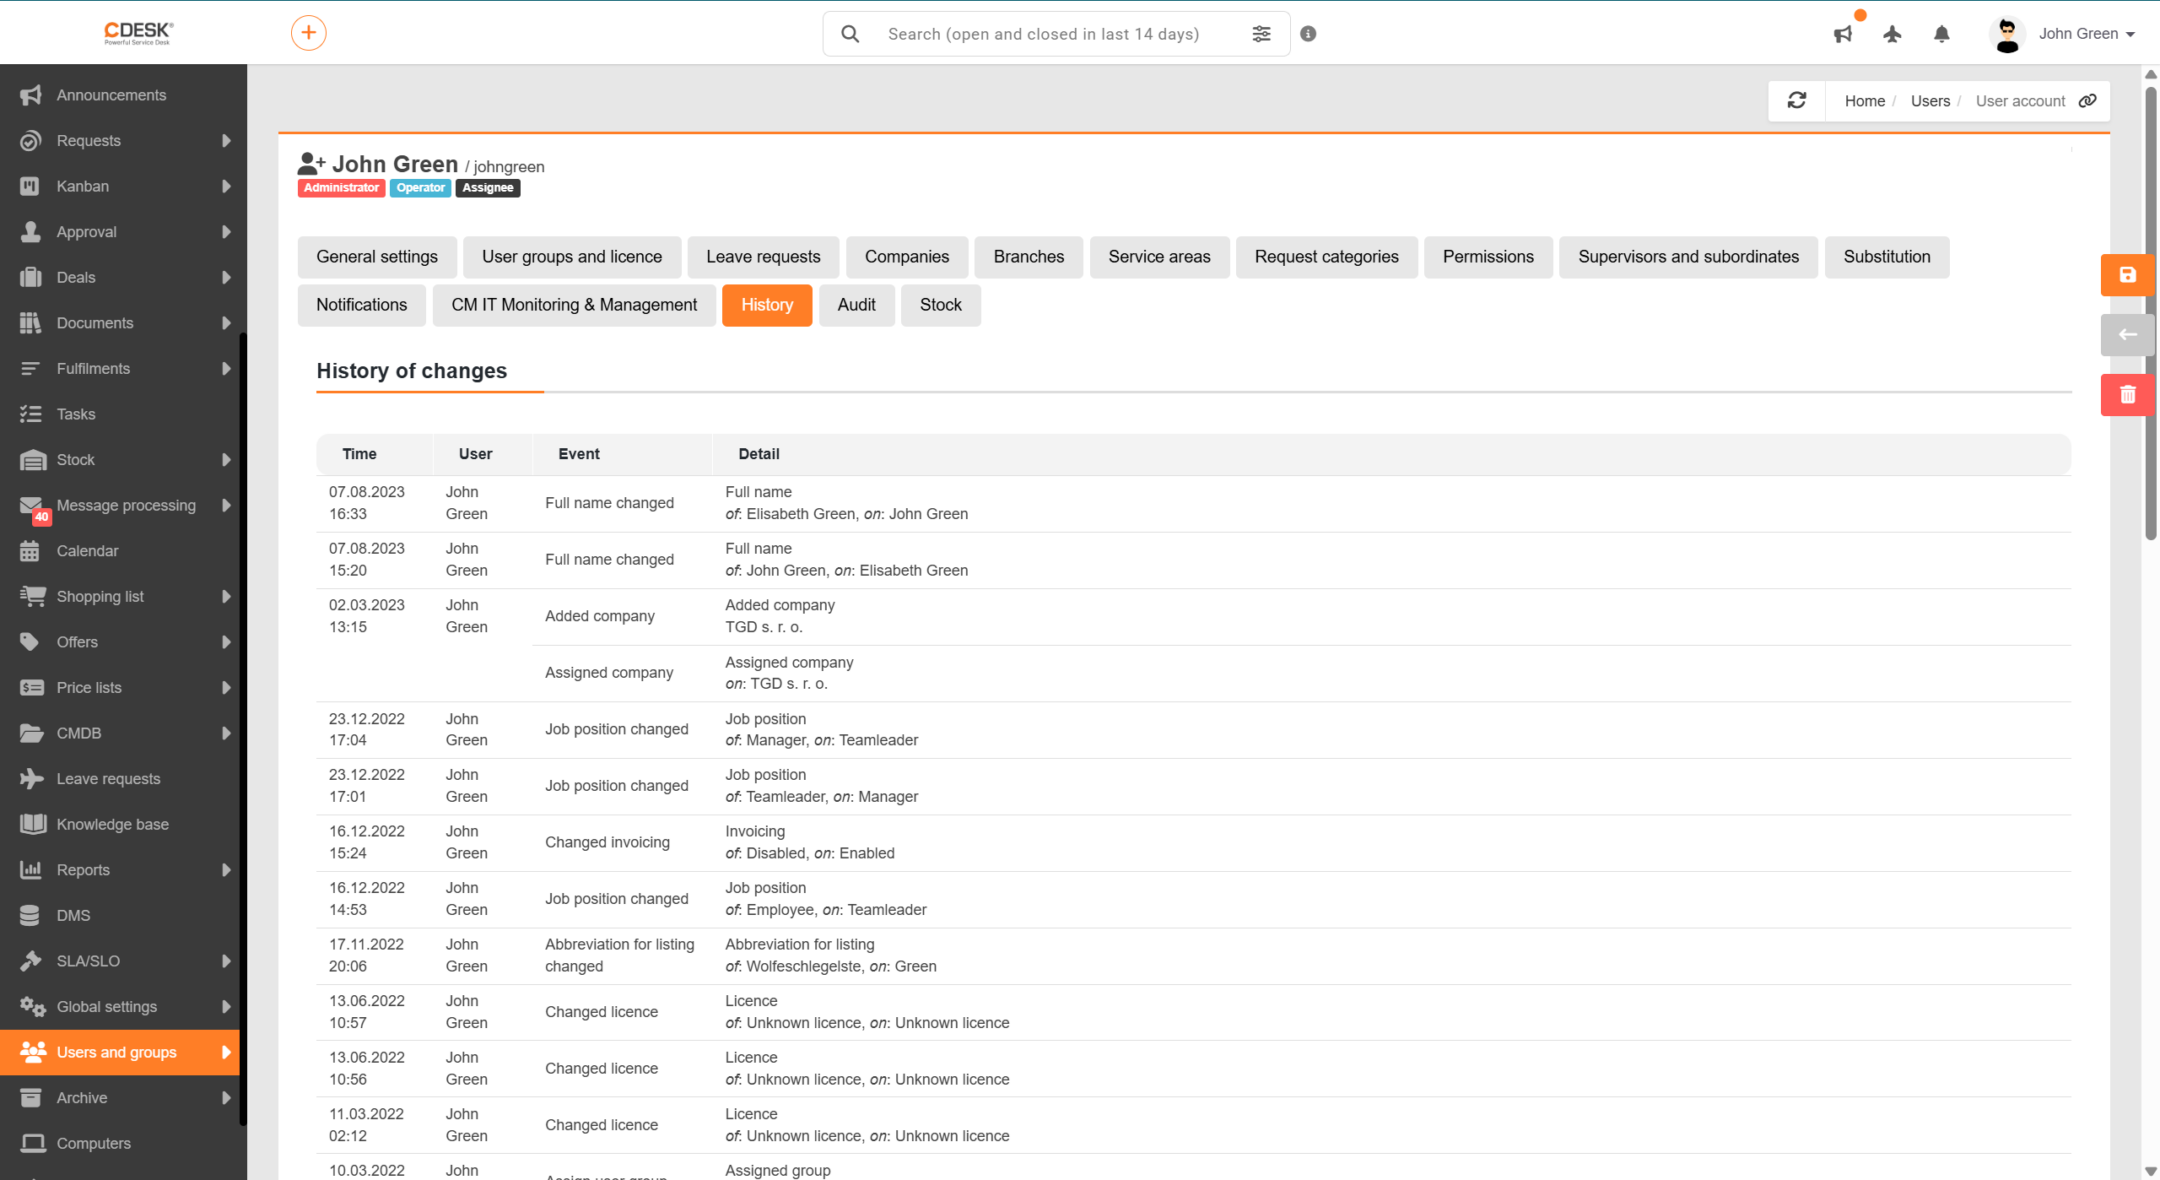
The tab lists the changes made to the group in chronological order. For each change, it shows who made it, when it was made, what event it was and what the original and new values were. Permission changes are listed as well, so you can trace back when and by whom the scope of access was changed. The tab is displayed only after the group has been created.

Figure: The ‘History’ tab in the group details

Warehouse

Selecting stock card categories determines which parts of the warehouse the group members can work with.

Categories assigned to the group are inherited by its members and marked as inherited in their accounts, so it is clear whether an account obtained access individually or through a group. The tab is displayed only if the Warehouse module is enabled in your environment, and it is available only after the group has been created.

Figure: The ‘Warehouse’ tab in the group details