


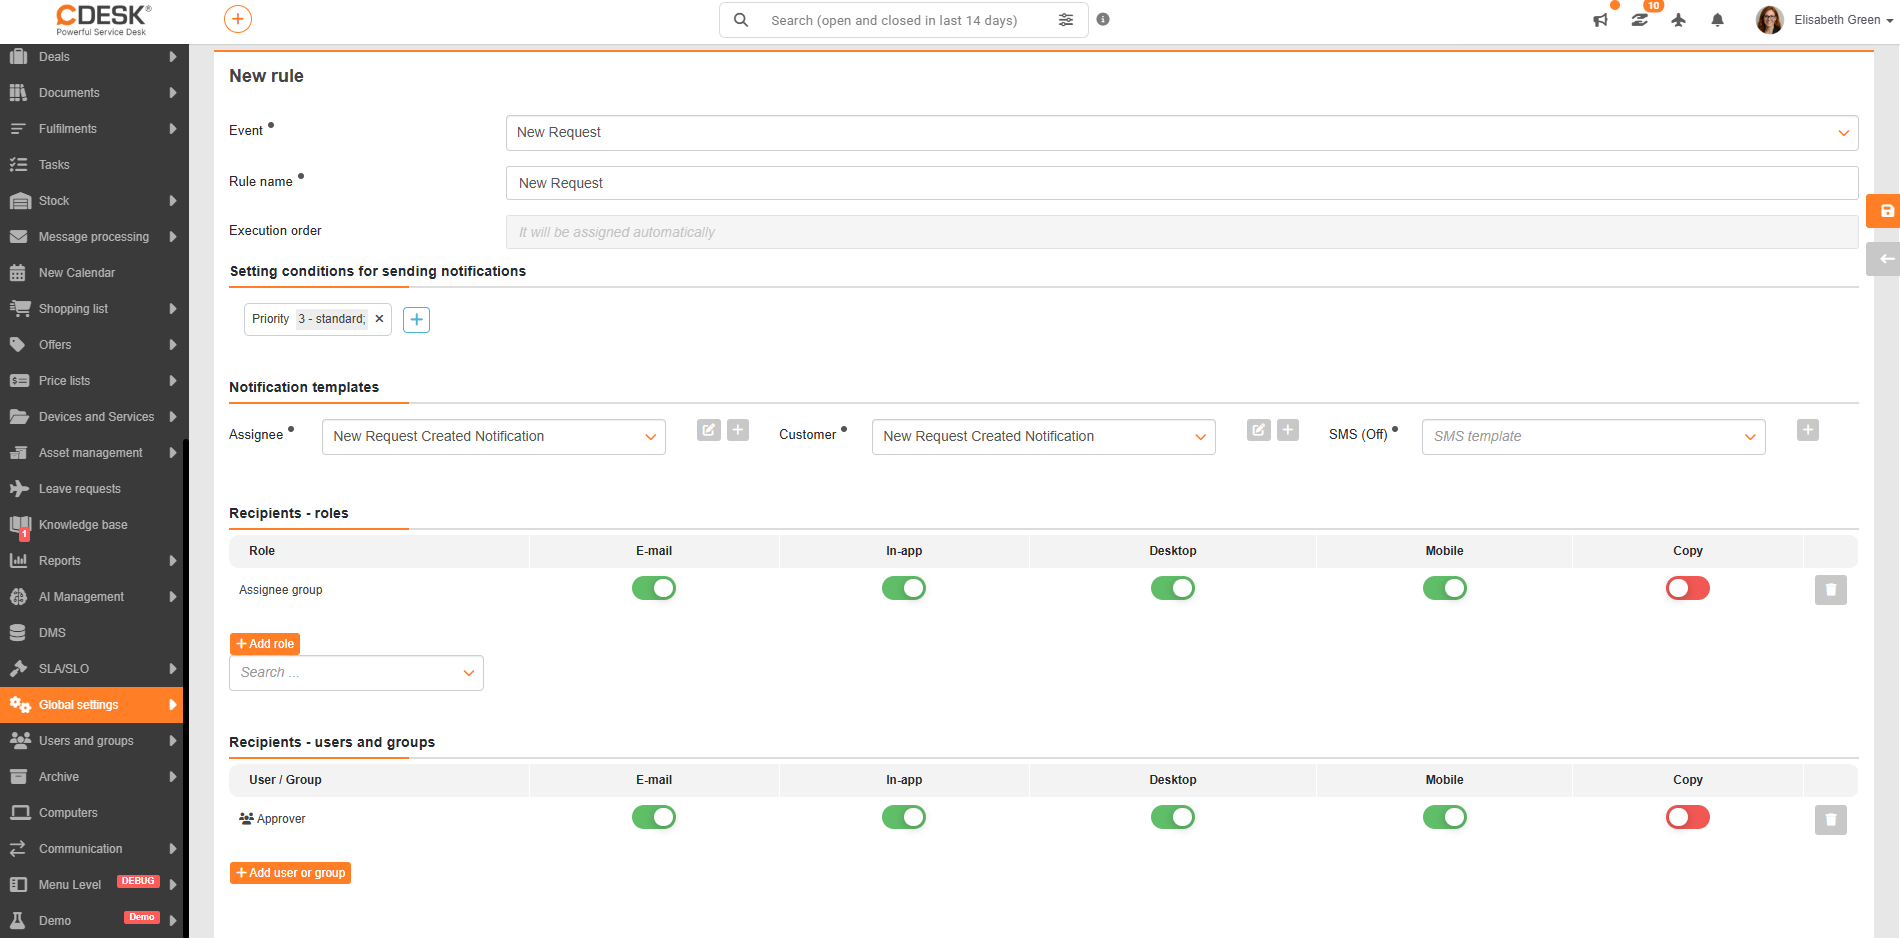
Setting the condition for sending notifications
This section sets the conditions by which the system determines whether a notification is to be sent. If no condition is set, the notification is sent to all recipients every time a record is saved on which the notified event occurs.
Conditions are set using the  button, which works as a simple filter. Several values selected within one parameter are evaluated with the OR operator, while the individual parameters or filter attributes are evaluated with the AND operator. For example, with the setting Status: In progress, Waiting for customer; Priority: High, the notification is sent only if the request is in the In progress or Waiting for customer status and at the same time has High priority.
Notification templates
Three types of templates can be displayed in this section – Assignee, Customer and SMS. A new template can be added by clicking the + button.
Recipients – roles
An option to add a role that is to be notified when the rule is met. If several roles are set, notifications for all the listed roles can be turned on or off at once in the top row of the setting. Different types of notifications can be set for individual roles according to how they are delivered:
- E-mail – a notification delivered by electronic mail to the specified e-mail address
- In-app – a notification displayed directly in CDESK – the bell icon in the page header (
 )
) - Desktop – a system notification displayed as a pop-up within the desktop environment – the CDESK Desktop application
- Mobile – a push notification in the CDESK Pro mobile application
- Copy – an e-mail notification sent to the recipient for information. The recipient list of the message shows the CC marking, which signals to the recipient that the notification does not concern them directly. Based on this marking, such messages can be filtered as needed using rules in the e-mail client.
 )
)
Recipients – users and groups
An option to select the notified persons either as individual users or as groups.
Custom contacts
If people outside the CDESK system need to be added, an e-mail address or phone number can be entered directly.
Copy to recipients – Custom contacts
Allows people outside the CDESK system to be added to the copy of an e-mail notification by entering their e-mail address. These recipients receive the notification for information.
After filling in the required fields, the changes must be saved with Save.
Using the hamburger menu ( ) on the right at the end of the row, a rule can be Edited, Duplicated or Deleted.
- Editing opens the same window as when creating it.
- Duplicating creates a copy of the rule – the entire setup is copied, including the recipients. By editing it afterwards, the rule can be adjusted as needed and saved as a new rule.
- Deleting removes an unwanted rule.