Beta verzia novej dokumentácie.

Navigating the permissions list

The permissions list shows not only what an account is permitted and prohibited from doing, but also where the value comes from – whether it is set directly or taken over from a group. The following sections describe the columns in the list, the permission levels, the meaning of the colours, and the tools to help you navigate the extensive tree structure.

List columns

The list has three columns. The first column contains the name of the module or permission, with a description listed in smaller text below it. The second column, ‘Authorizations’, contains checkboxes for common permissions, whilst the third column, ‘Authorizations (special)’, is populated only for those items that have special permissions.

Authorization levels

In the ‘Authorizations’ column, separate levels are set for each item. How many of these are viewed depends on the nature of the item – for some, only ‘Access’ is relevant, whilst for others all four are required:
Level Icon Meaning
Access / Read Makes the item available for viewing. Without this, the module or record will not be displayed at all.
Edit Allows you to edit an existing record.
Create Allows you to create new records.
Delete Allows you to delete records.

The levels build on one another. Editing alone, without access rights, serves no purpose; therefore, when configuring settings, one proceeds from access rights upwards – first, access is granted, then, as required, editing, creation and deletion.

Unwrapping the tree

Branches are expanded using the button with the plus icon next to the item name (). The button is only viewed for items that have subordinate permissions. The first button in the Module Name / Permissions column header expands or collapses the entire tree at once.
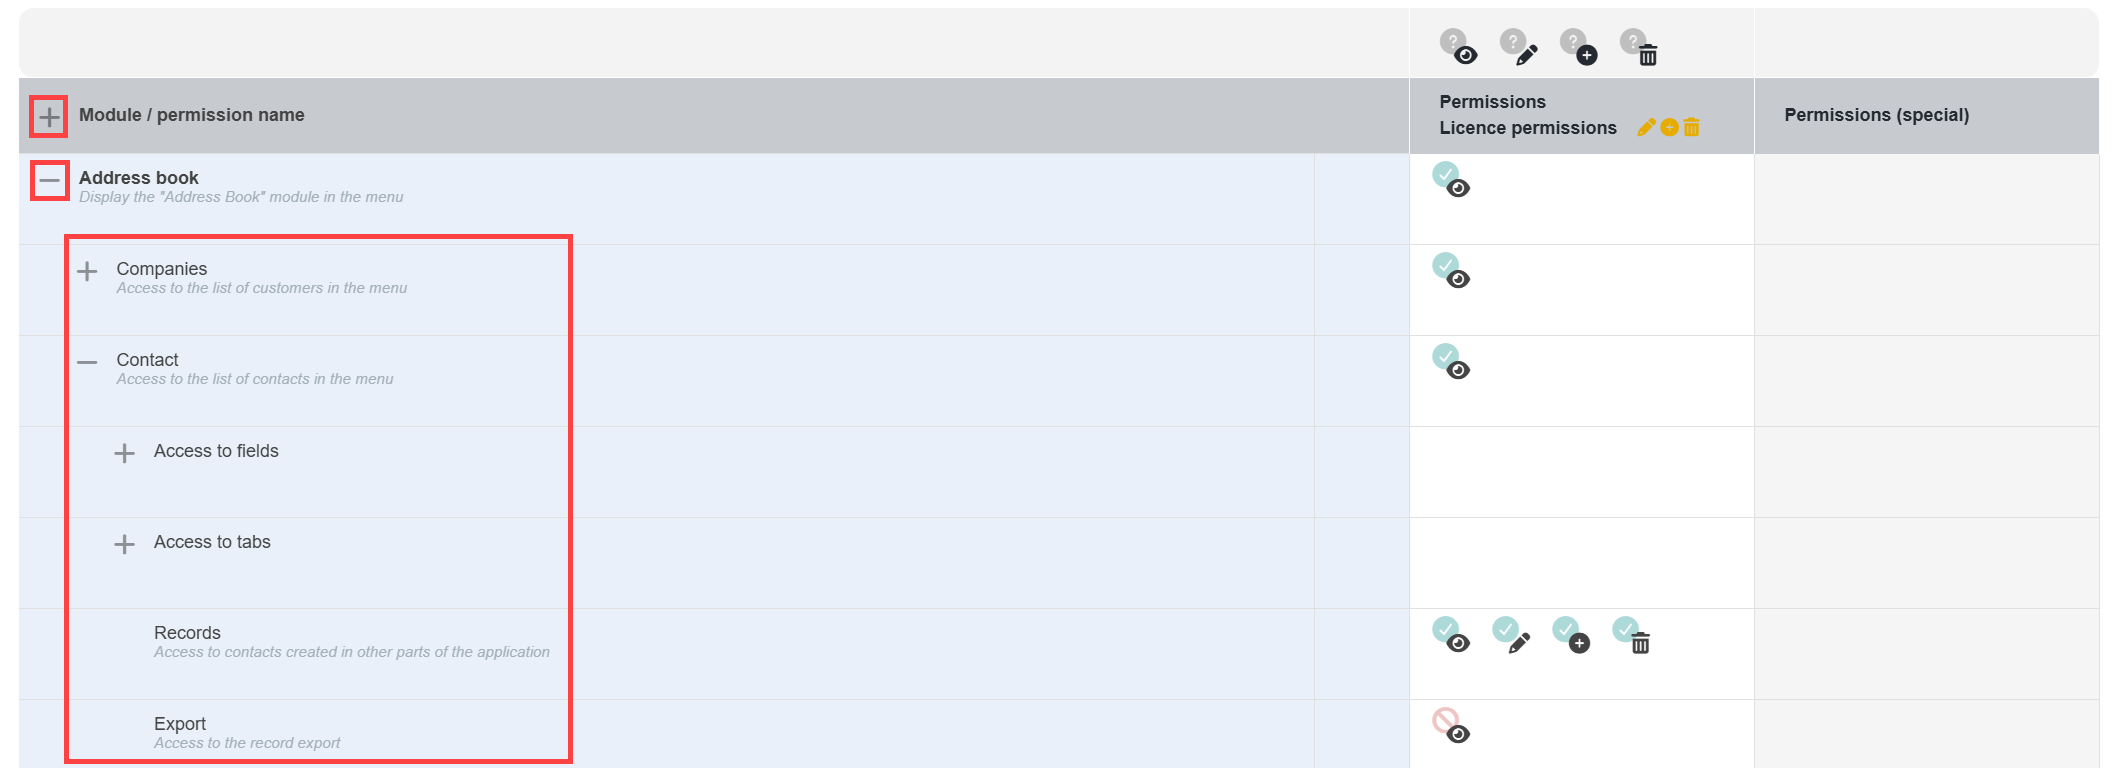
Comments: Expanding a branch reveals only one level at a time — its sub-branches remain collapsed and must be expanded separately. If you collapse a branch and then expand it again, the sub-branches will be collapsed once more, as the previous status is not remembered. You can view the entire hierarchy at once by clicking the ‘Expand All’ button in the header.

Figure: Button for expanding/collapsing the authorization tree

Permission statuses

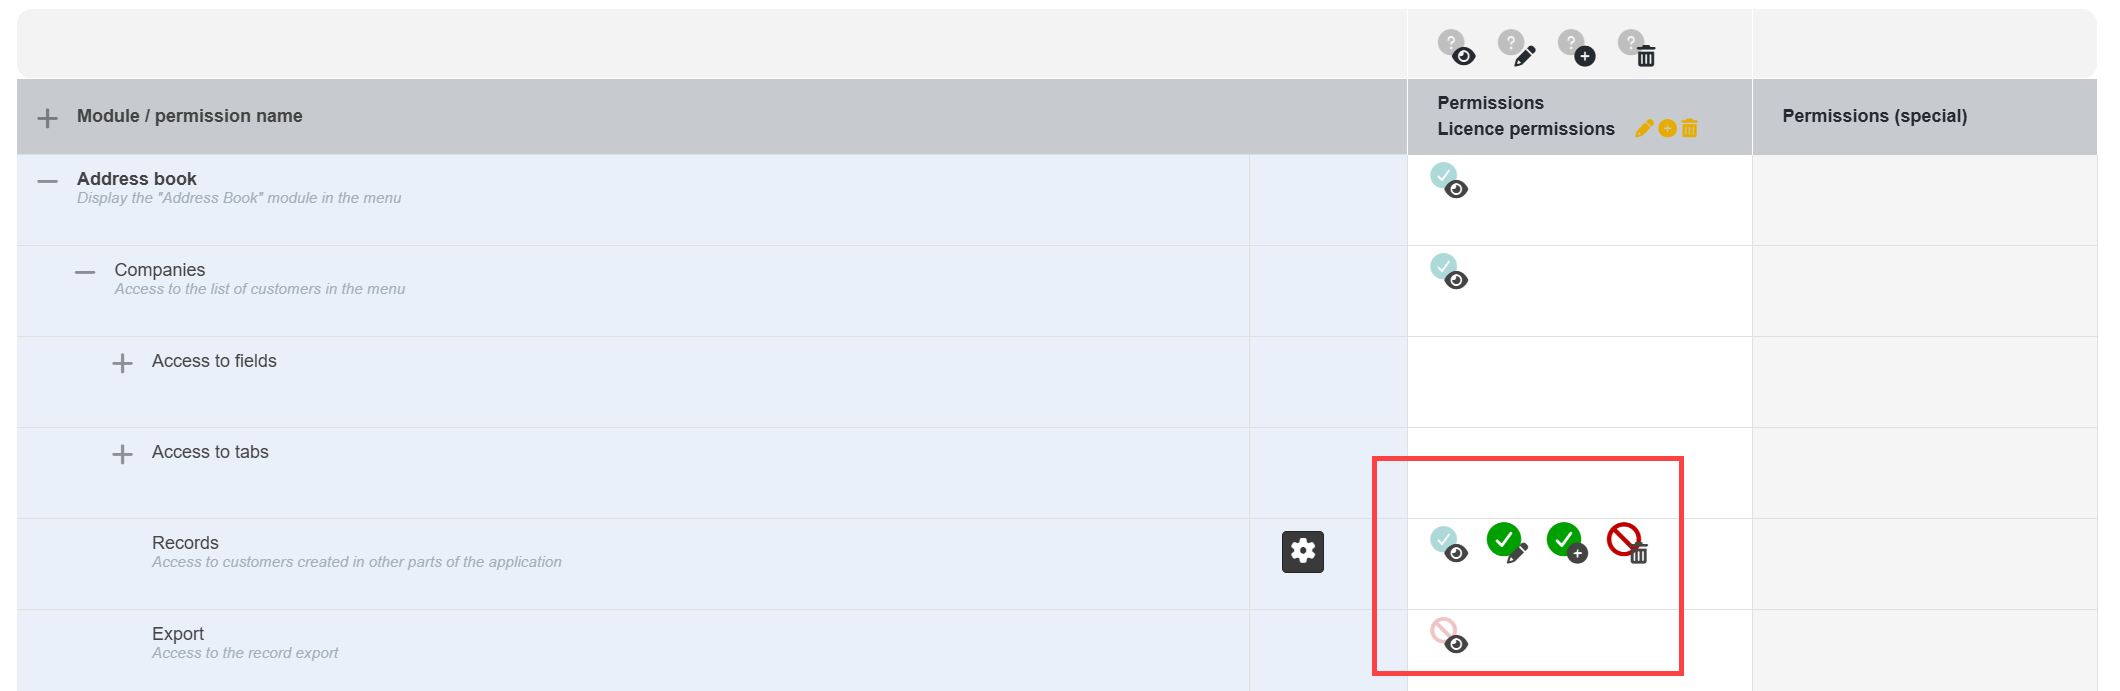
Each switch has three statuses, and clicking cycles through them in the order: taken over → enabled → disabled → taken over.

  • A bright green icon — the authorization is explicitly granted to the specified user or group.
  • A deep red icon — the authorization is explicitly disabled.
  • A pale icon — nothing is set for this item and the value is taken over. The colour indicates what the taken-over value is. A faded green means that permission is taken over, whilst a faded red means that a restriction is taken over.

A greyed-out icon therefore serves both as information and as settings. At a glance, the user can see what will apply if the settings are not changed.

Figure: Example of permission status settings

For some permissions, the icons for the ‘Write’, ‘Create’ and ‘Delete’ levels are highlighted in yellow. This does not indicate a different status, but rather signifies licence permissions, which are covered in the ‘Licence Permissions’ section of the documentation.

Inheritance chart

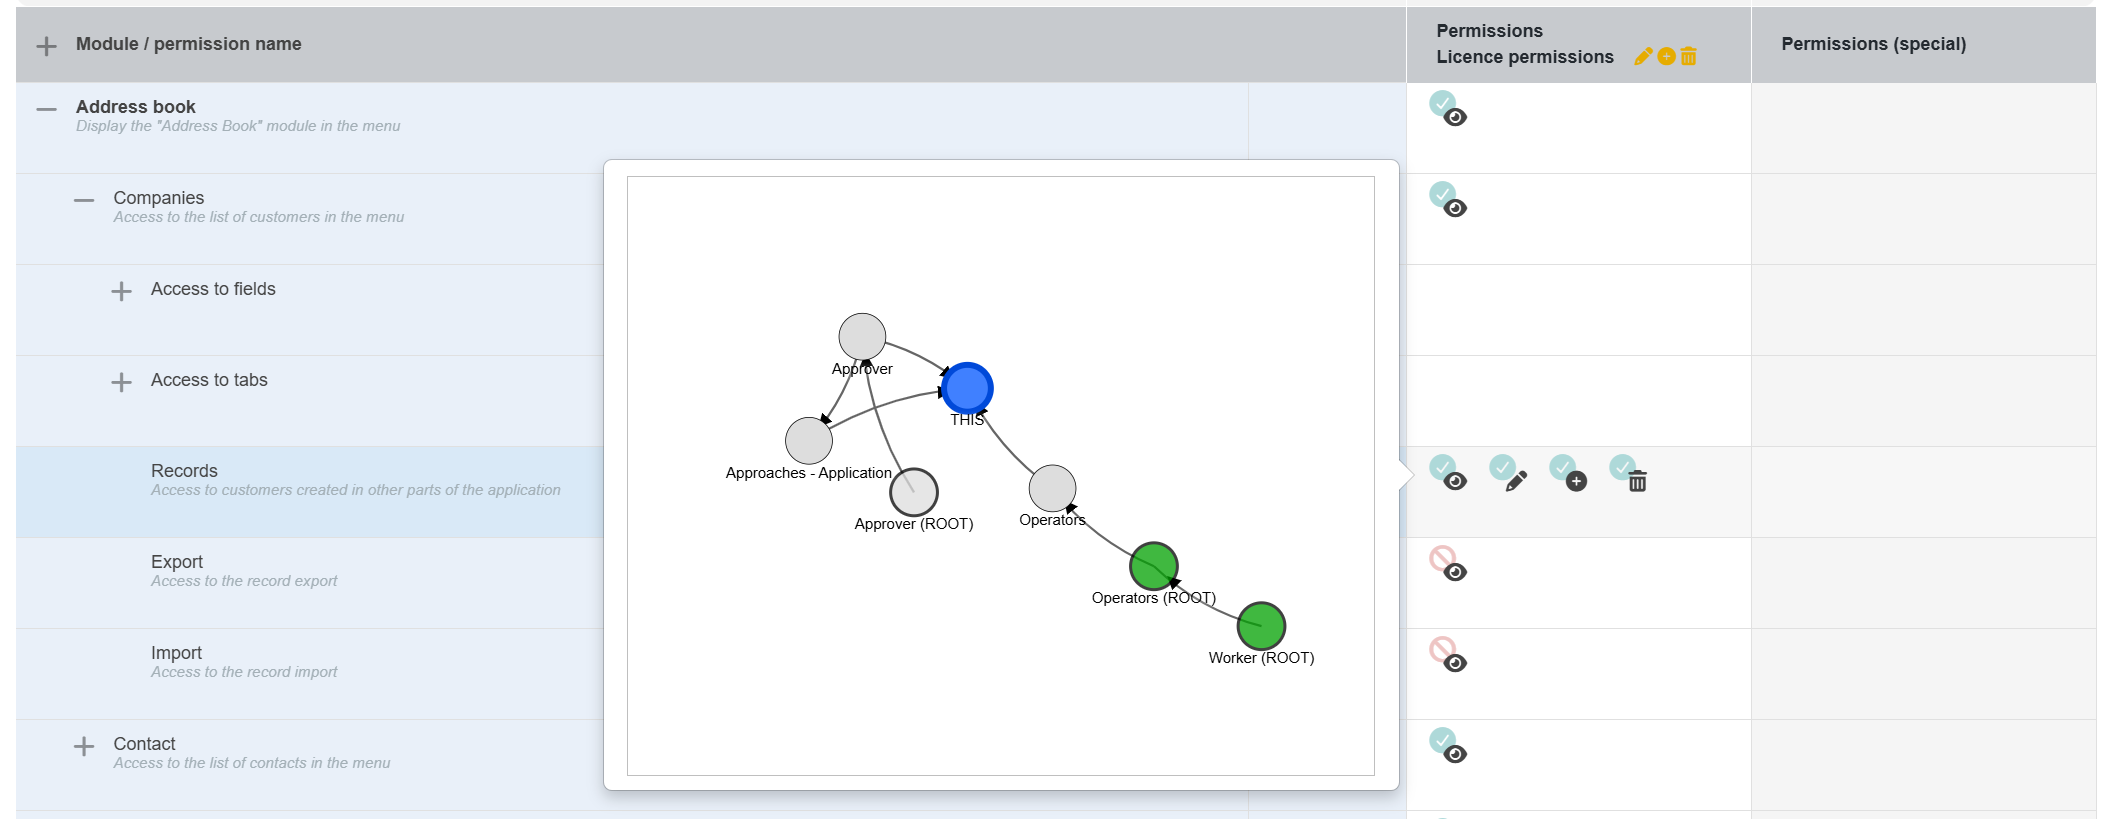
If you hover the cursor over the authorization status toggle, a chart for that item will be viewed. It illustrates the account’s entire classification within groups, from system groups through to other user groups and assignee groups, and for each of these shows how the relevant permission is set – i.e. enabled, disabled or not set. The top-level group is selected as ROOT, and the account or group you are editing is represented by a separate node in the graph.

Figure: Example of a permissions graph

Tip: The graph will only be viewed after you hover your cursor over the item for a moment. This is useful when you need to find out why permissions for an account are enabled or disabled, even though you haven’t changed any settings on the account itself.

Search and filter

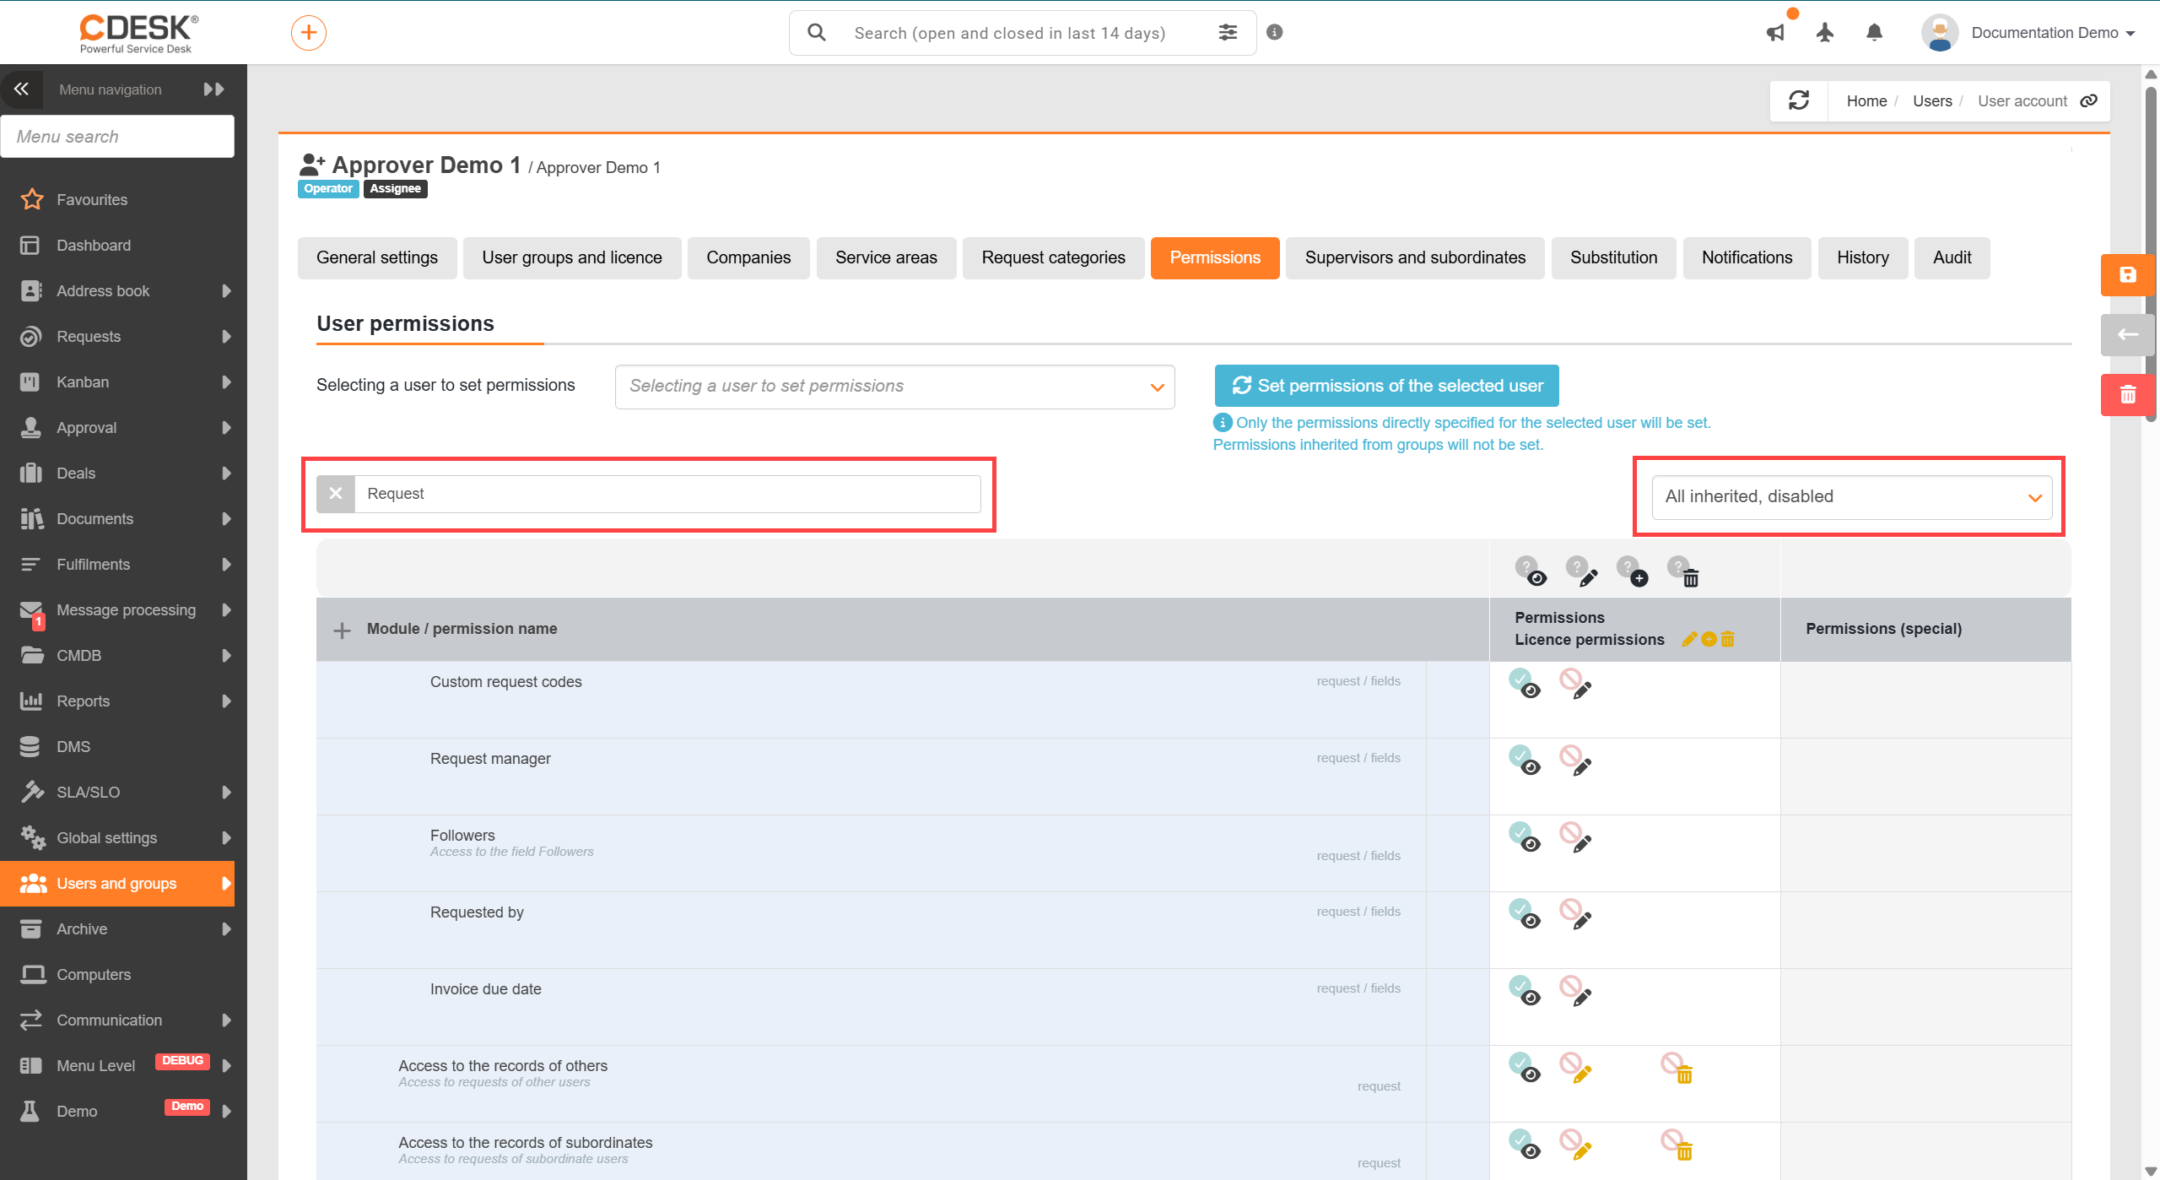
The list of permissions is extensive, which is why there are two tools above it. The Search field searches the names and descriptions of permissions. It views the items found, along with the path where they are located, and simultaneously expands the entire branch below them. So, if you search for a module, all its subordinate permissions will also be displayed, such as access to individual fields. Without this tool, you would need to know the exact name of the permission you are looking for and click your way through the entire tree to find it.

The drop-down filter by status limits the list to permissions in the selected status:

  • All
  • All explicitly permitted
  • All explicitly denied
  • All taken over
  • All taken over, permitted
  • All taken over, prohibited
  • All licence permissions
Image: Search box and drop-down filter above the permissions tree

When a search or filter is active, the tree expands to show the items found. It is advisable to apply the filter when checking settings – by selecting ‘All inherited’, you can see what the account takes from groups; by selecting ‘All explicitly enabled’, you can see what is set directly.