


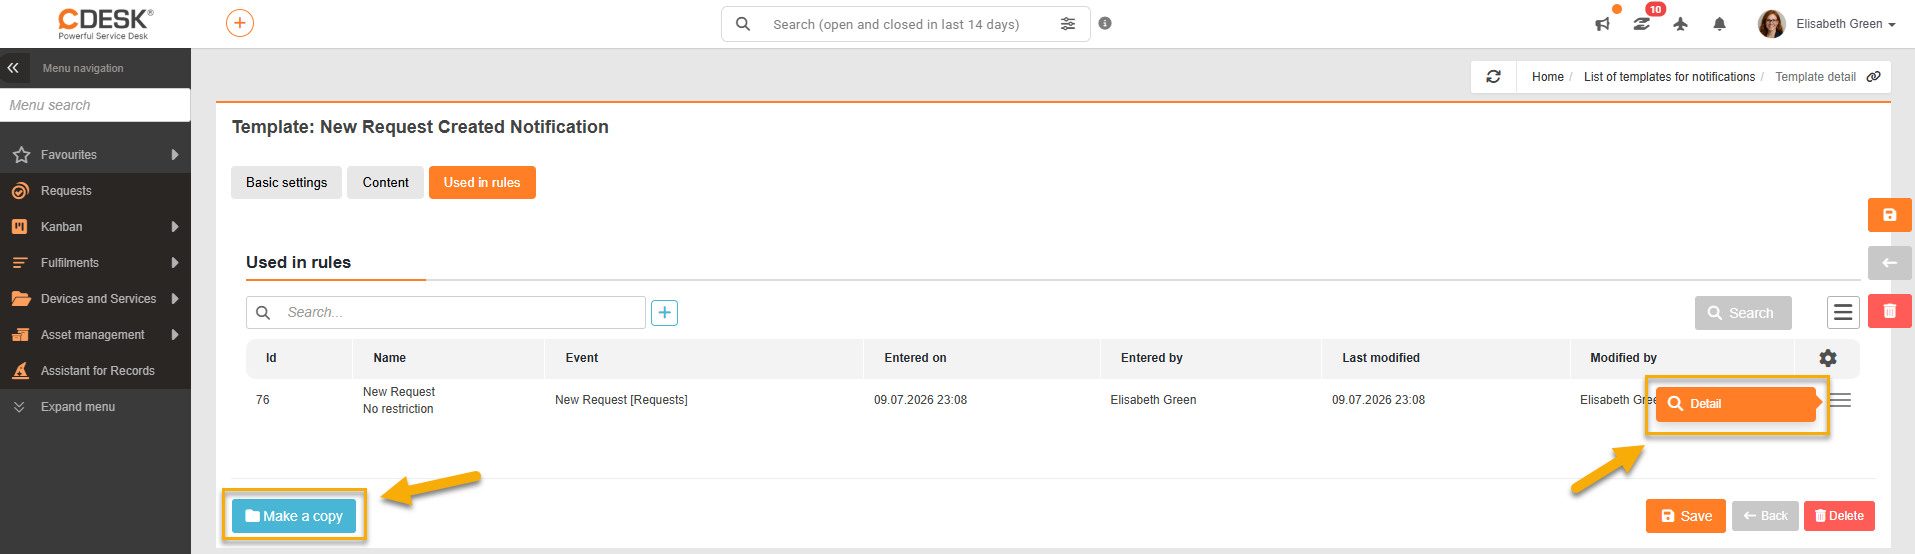
The third tab, when creating or editing a notification template, gives an overview of all the rules in which the template is used. The hamburger menu ( ) at the end of the row shows the rule detail.
Beta verzia novej dokumentácie.
Home Documentation Notifications Rule-based notifications Notification templates for sending rules
A template defines what the resulting e-mail or SMS will look like. Every rule must have a template assigned.
A new template can be created by clicking the + Add button in the top right corner.
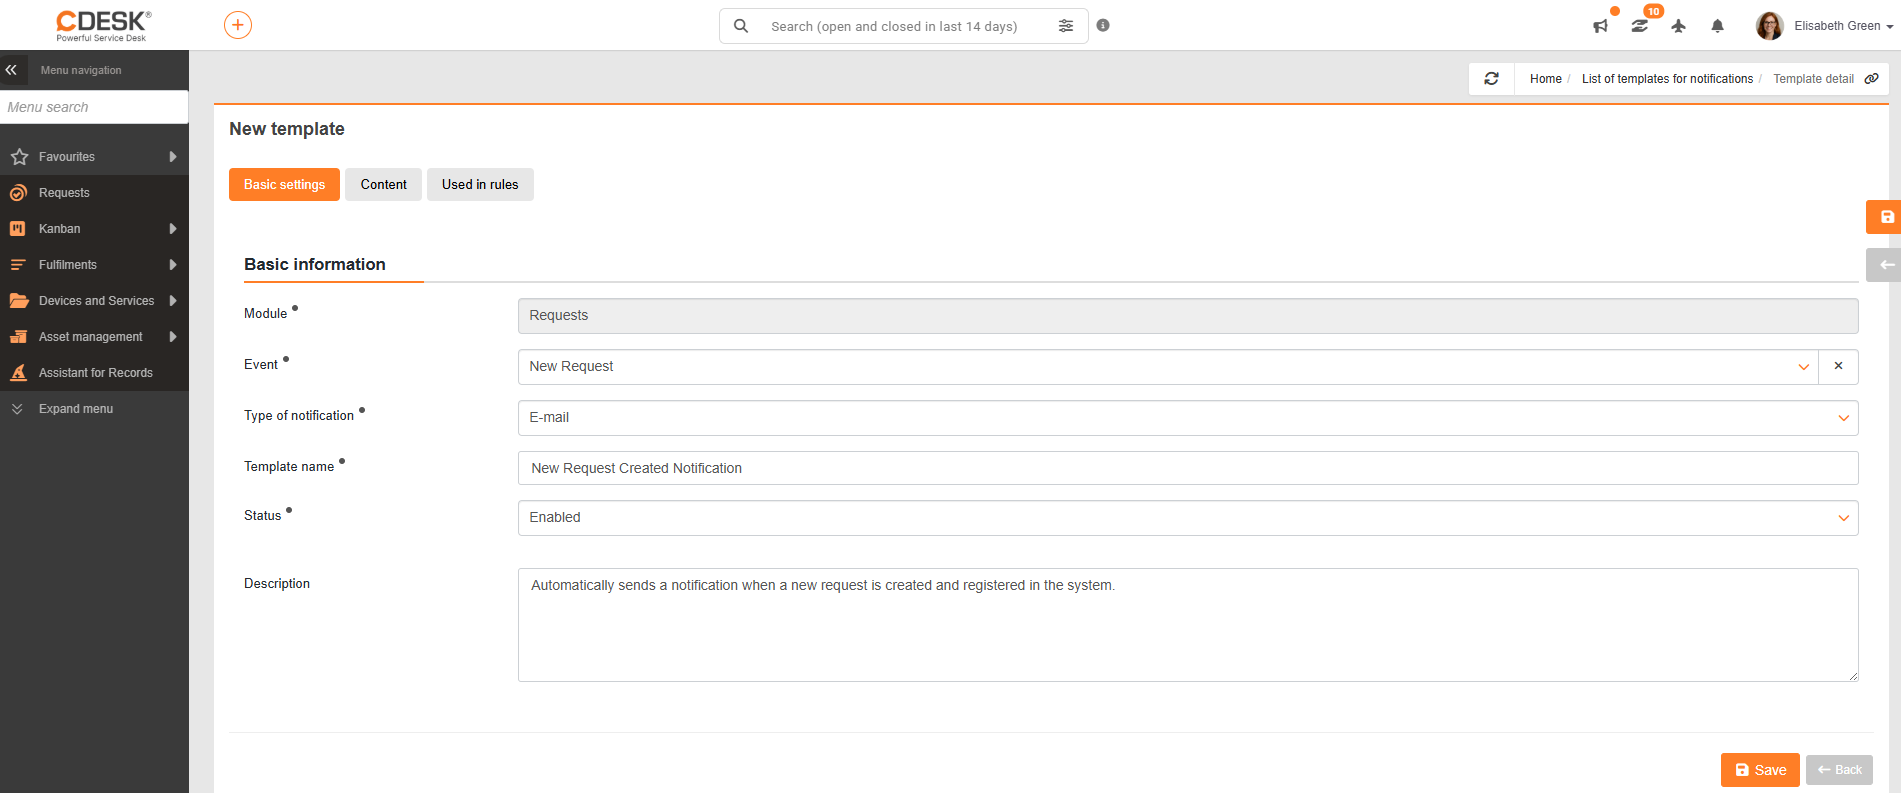
When creating a template, the first step is to select the Module. Then the event it will relate to. The notification type, E-mail or SMS. Next, the template name is chosen freely. Status – on/off (for it to be offered when selecting a rule, it has to stay on) and a Description for better orientation.
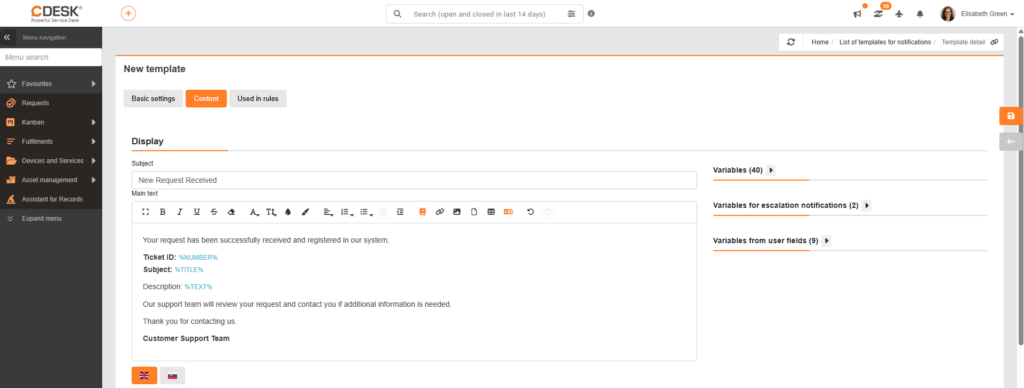
This tab defines the subject and wording of the notification. In both fields you can enter plain text but also insert variables, which are specified for the given module on the right. The variable name is case-sensitive. The variable value can also be formatted. Variables inserted directly into the subject or text of the notification are displayed exactly according to the wording created. If the recipient’s permissions to view individual data need to be taken into account, it is recommended to use Record parameters.
The text in the message body can be edited with the standard basic text editing functions.
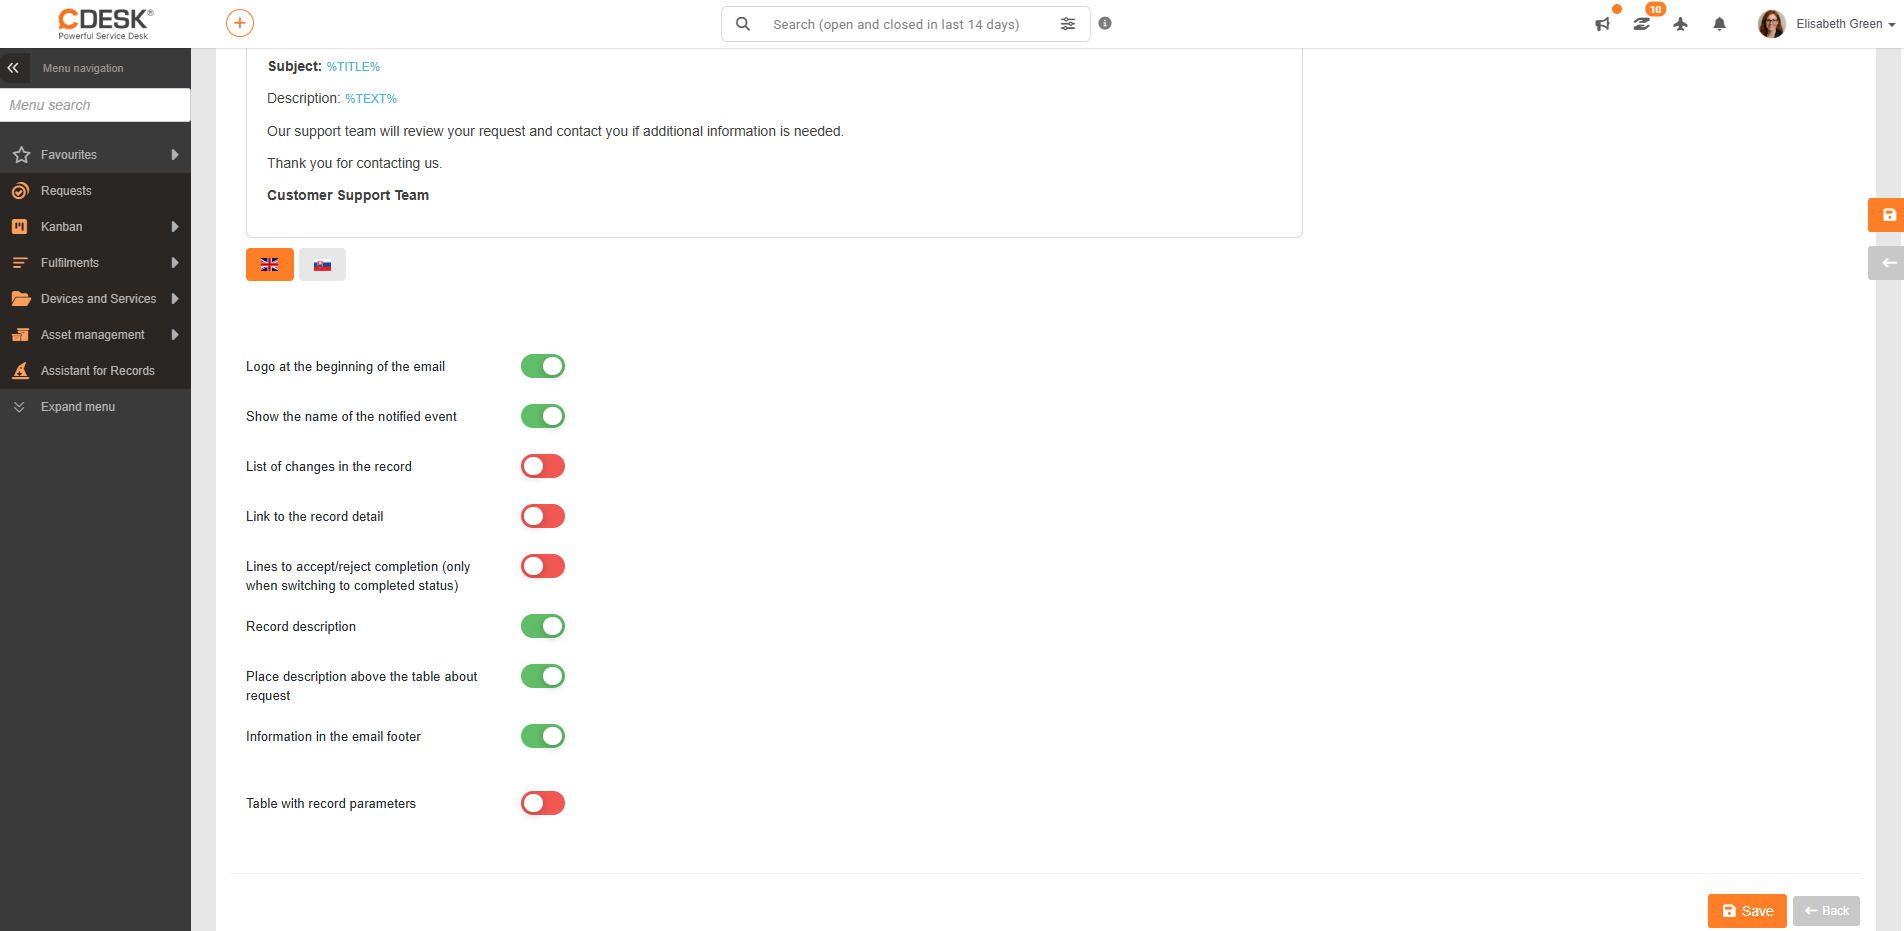
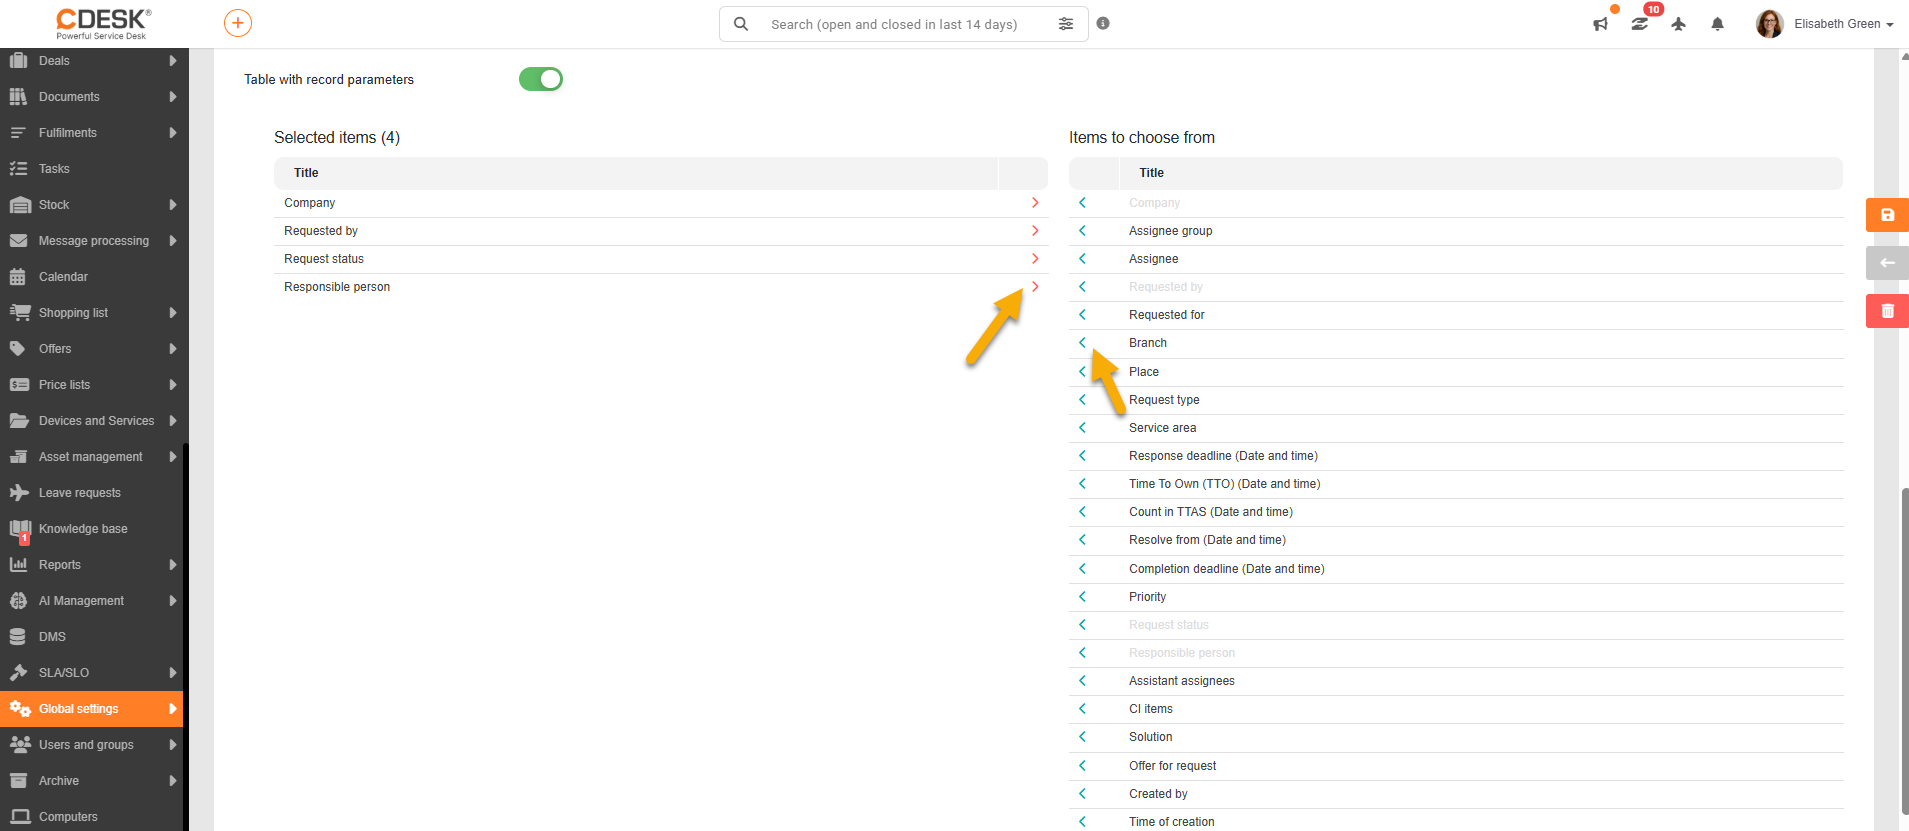
Below the text editor of the notification there are further settings that change the look of the notification – show the logo in the notification, state the name of the notified event, show a list of changes, link the record detail, links to accept/reject completion, state the record description, place the description above the request table, information in the e-mail footer and a table with record parameters. For the parameter table, the parameters to be shown in the table in the notification can be selected from the right column with the < arrow. The > arrow moves a parameter that should not appear in the table back. Unlike attributes inserted directly into the wording, record parameters take the user’s permissions into account. If a user does not have permission to view a particular attribute, this attribute is not shown in their notification.
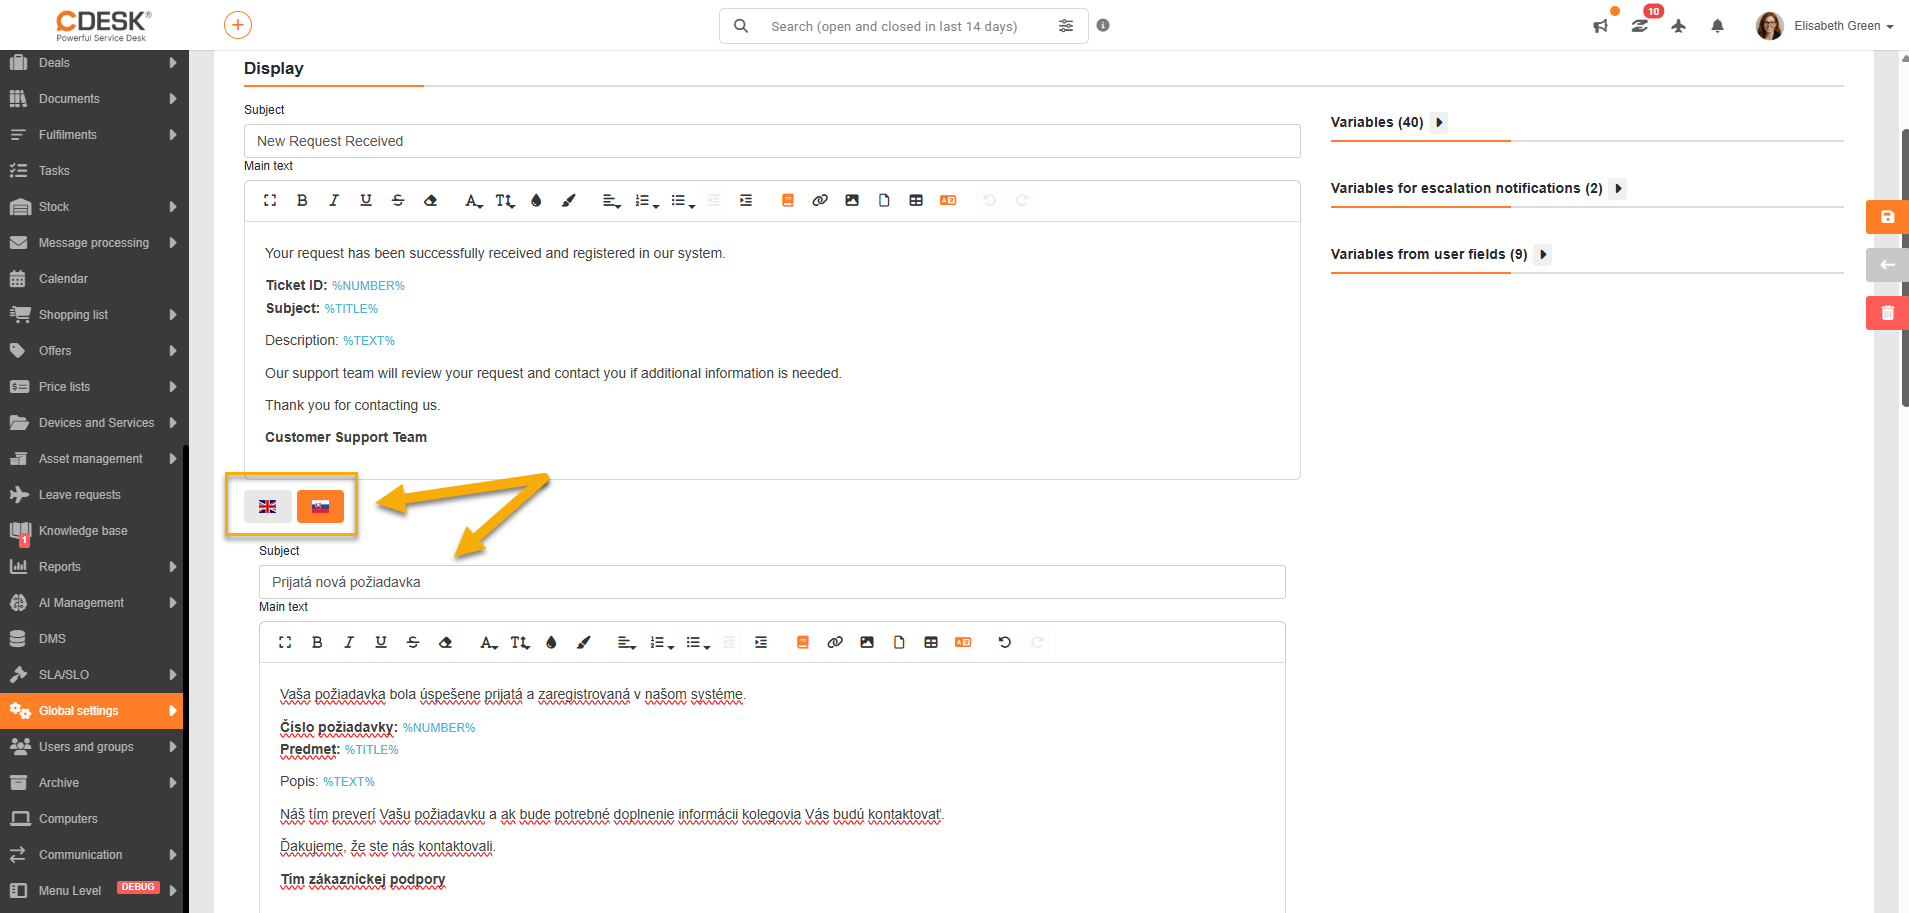
When creating a notification, you can add different language versions of it. To add one, click the flag below the original notification text; the option to fill in the notification subject and text in the selected language then appears below. If no translation is filled in for a language, the text in the default language is used when the notification is sent.
The third tab, when creating or editing a notification template, gives an overview of all the rules in which the template is used. The hamburger menu () at the end of the row shows the rule detail.
When creating a notification, the Make a copy button is available in the bottom left of all three tabs; it creates a copy of the notification template.
Home Documentation Notifications Rule-based notifications Notification templates for sending rules