
Beta verzia novej dokumentácie.

Google maps connector

The Google Maps connector is used to obtain the GPS coordinates of a company’s location or of a CI object of the Places type, which are then stored in CDESK. These coordinates are excellent for pinpointing the place where work is carried out. They can be used for navigation with the Waze app, from a link in an e-mail notification.

Before you add the connector to CDESK

Before you start using the Google Maps connector in CDESK, you first need to create a project in the Google Cloud Platform and then activate the Maps JavaScript API and the Geocoding API.

Creating a project in the Google Cloud Platform

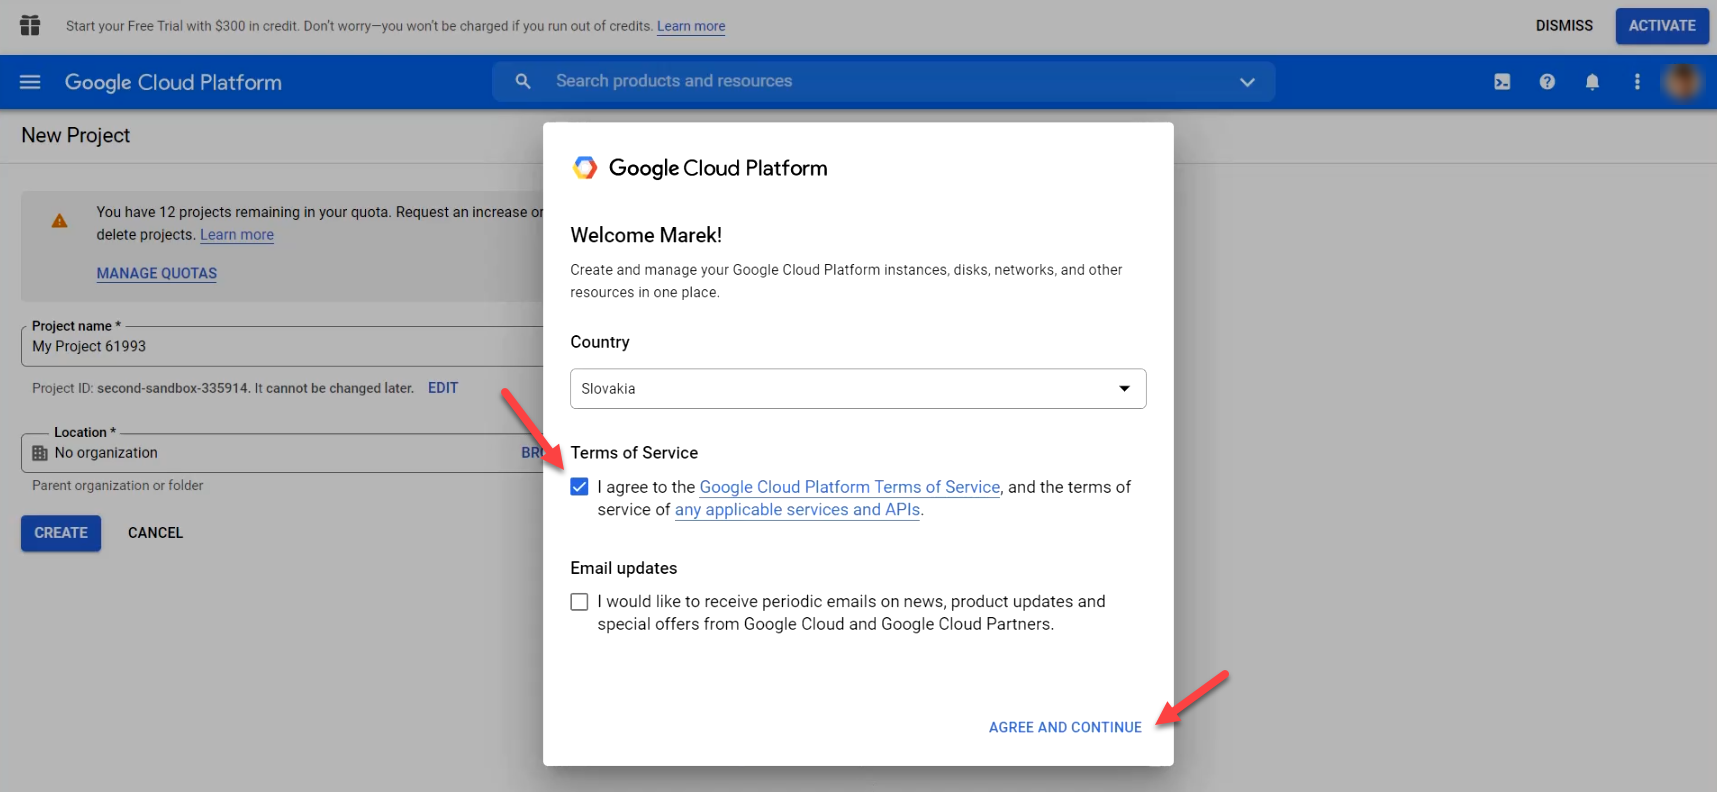
To create a new project, go to the Google Cloud Platform page. If you have not used this platform before, a window for confirming the terms of use will appear after you click the link.

Image: Confirming the Google Cloud Platform terms of use

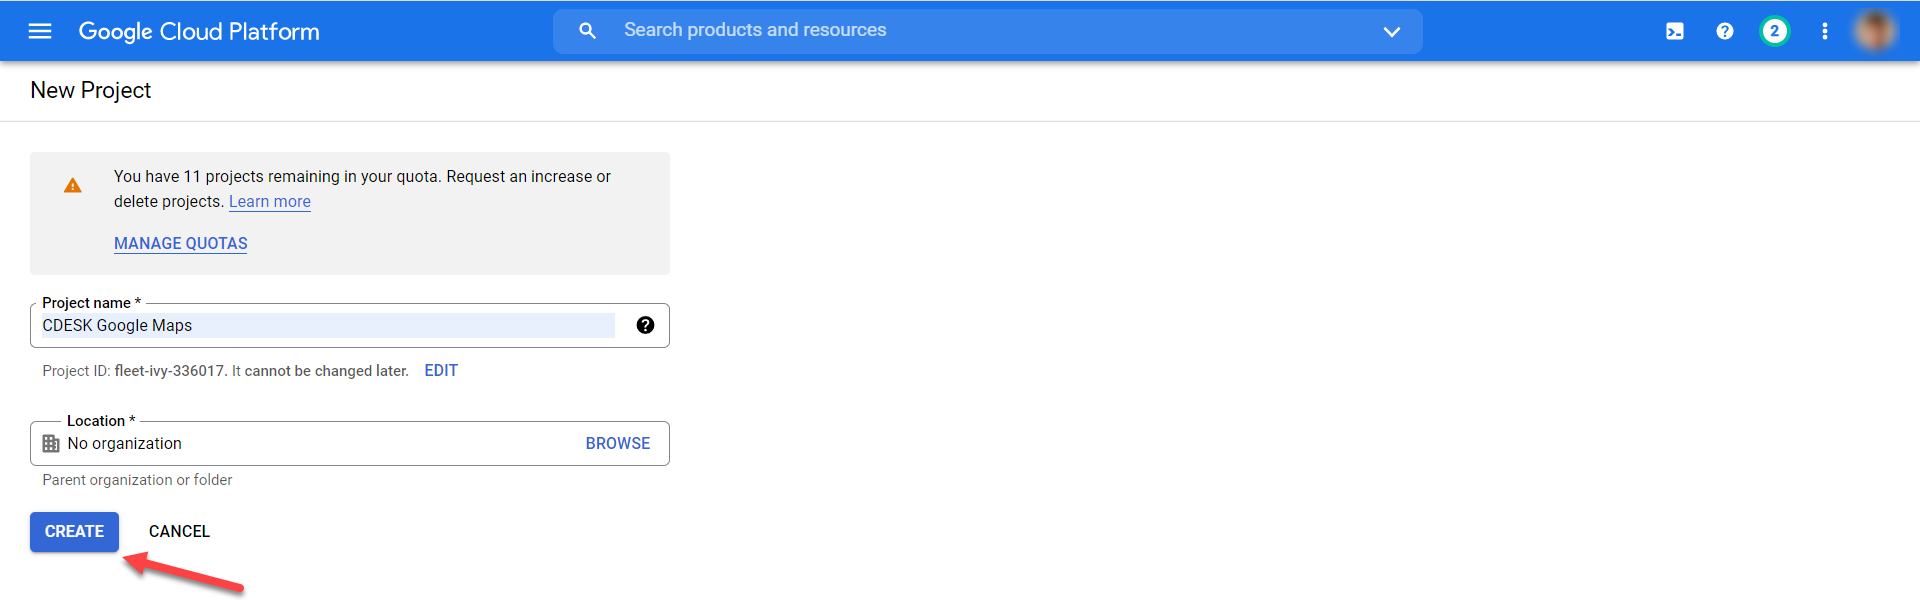
Once you have agreed to the terms of use, a window appears for entering the project name. The Location field does not need to be changed. Then click the Create button.

Image: Entering the name of a new project in the Google Cloud Platform

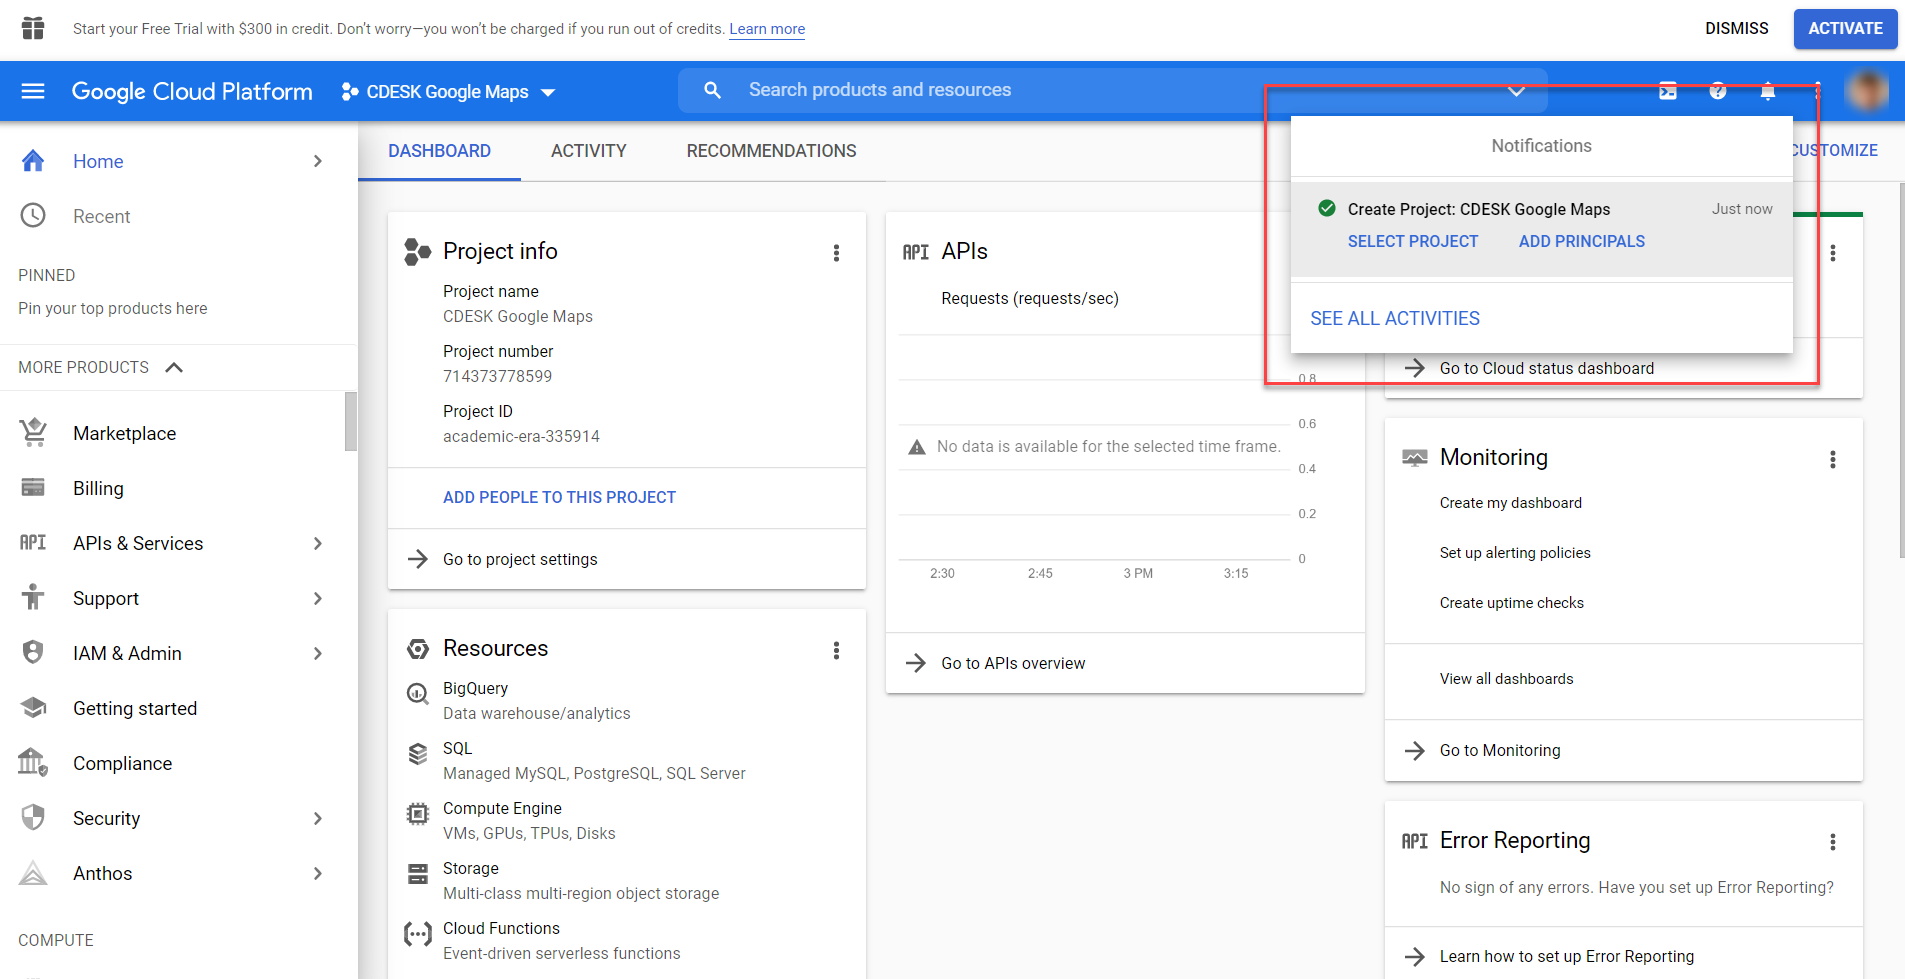
After clicking you will be redirected to the Google Cloud Platform home screen. If you created the project correctly, a notification about the project having been created successfully appears in the top right-hand corner.

Image: The Google Cloud Platform home screen and the notification about the project having been created successfully

Configuring the billing details for the new project

Once the project has been created successfully, the billing details need to be set up. When a new account is created, every user receives $300 in credit. If it is used up, no further charges will be made without your agreement.

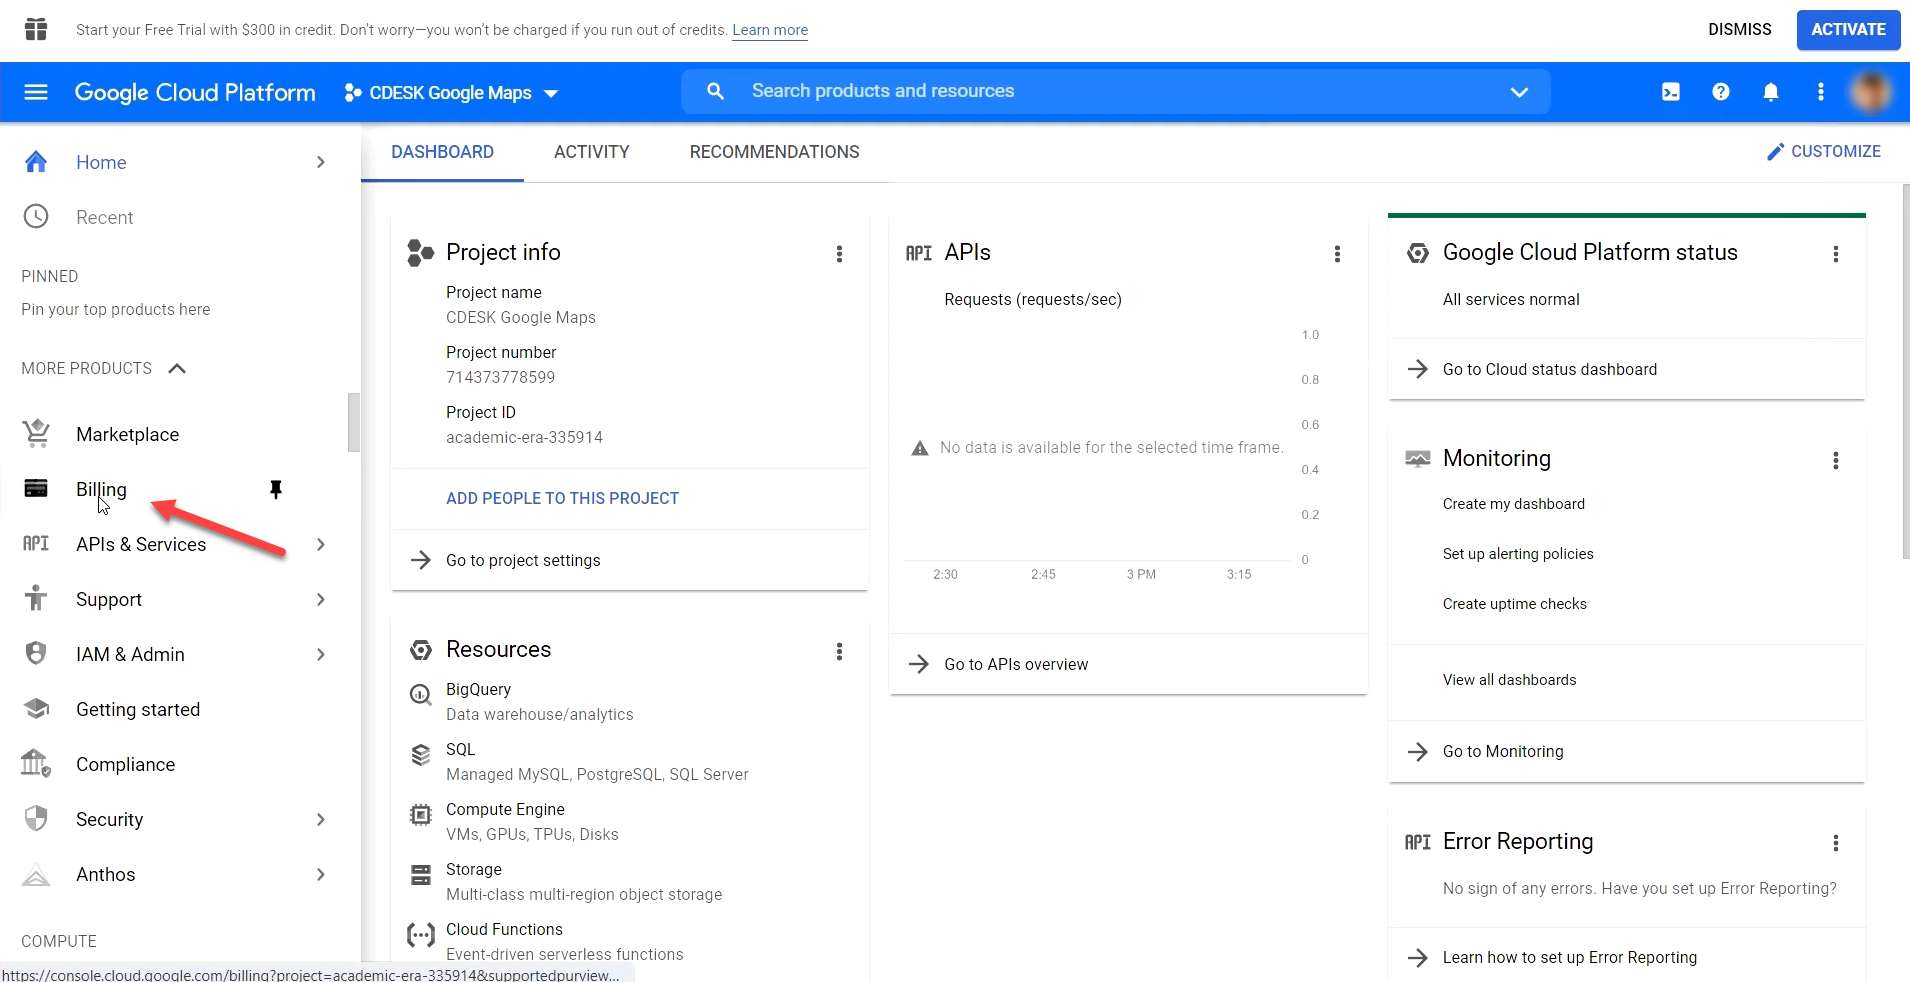
To set up the billing details for the new project, click Billing in the menu on the right-hand side.

Image: The Billing button in the main Google Cloud Platform menu

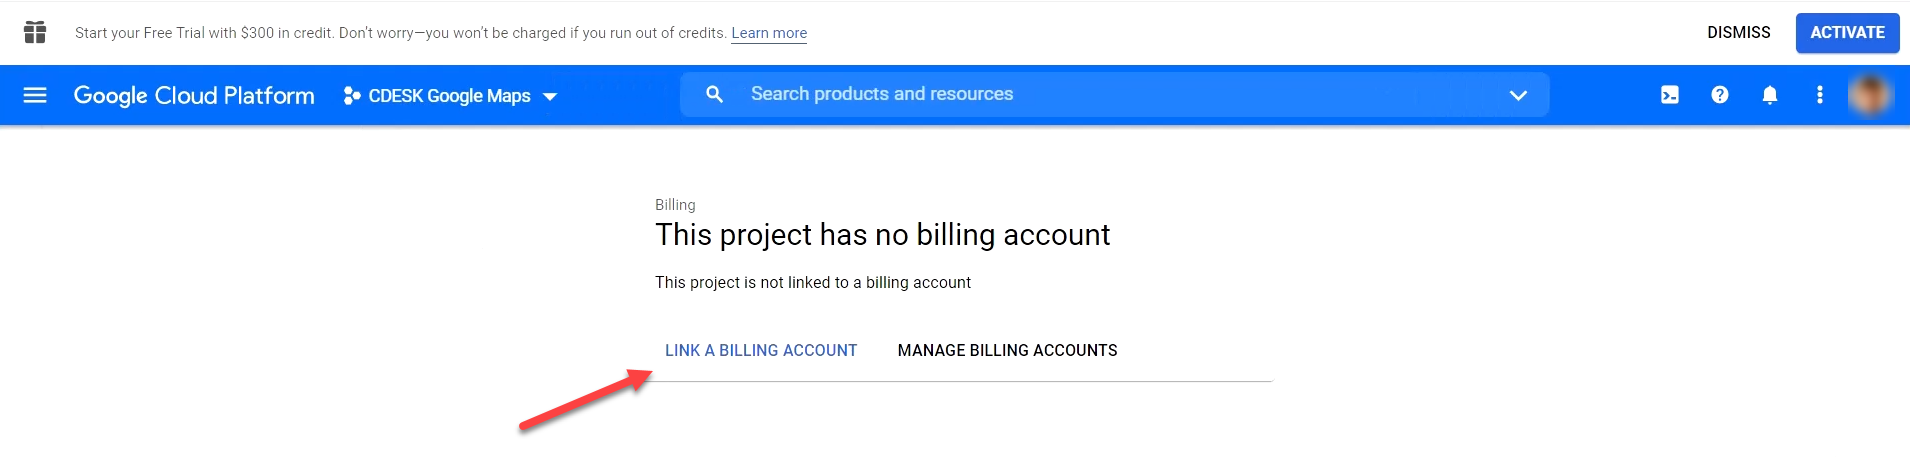
After clicking, a window appears warning you that the project has no payment method set. You set one by clicking the Link a billing account button.

Image: Button for setting the payment method for the project

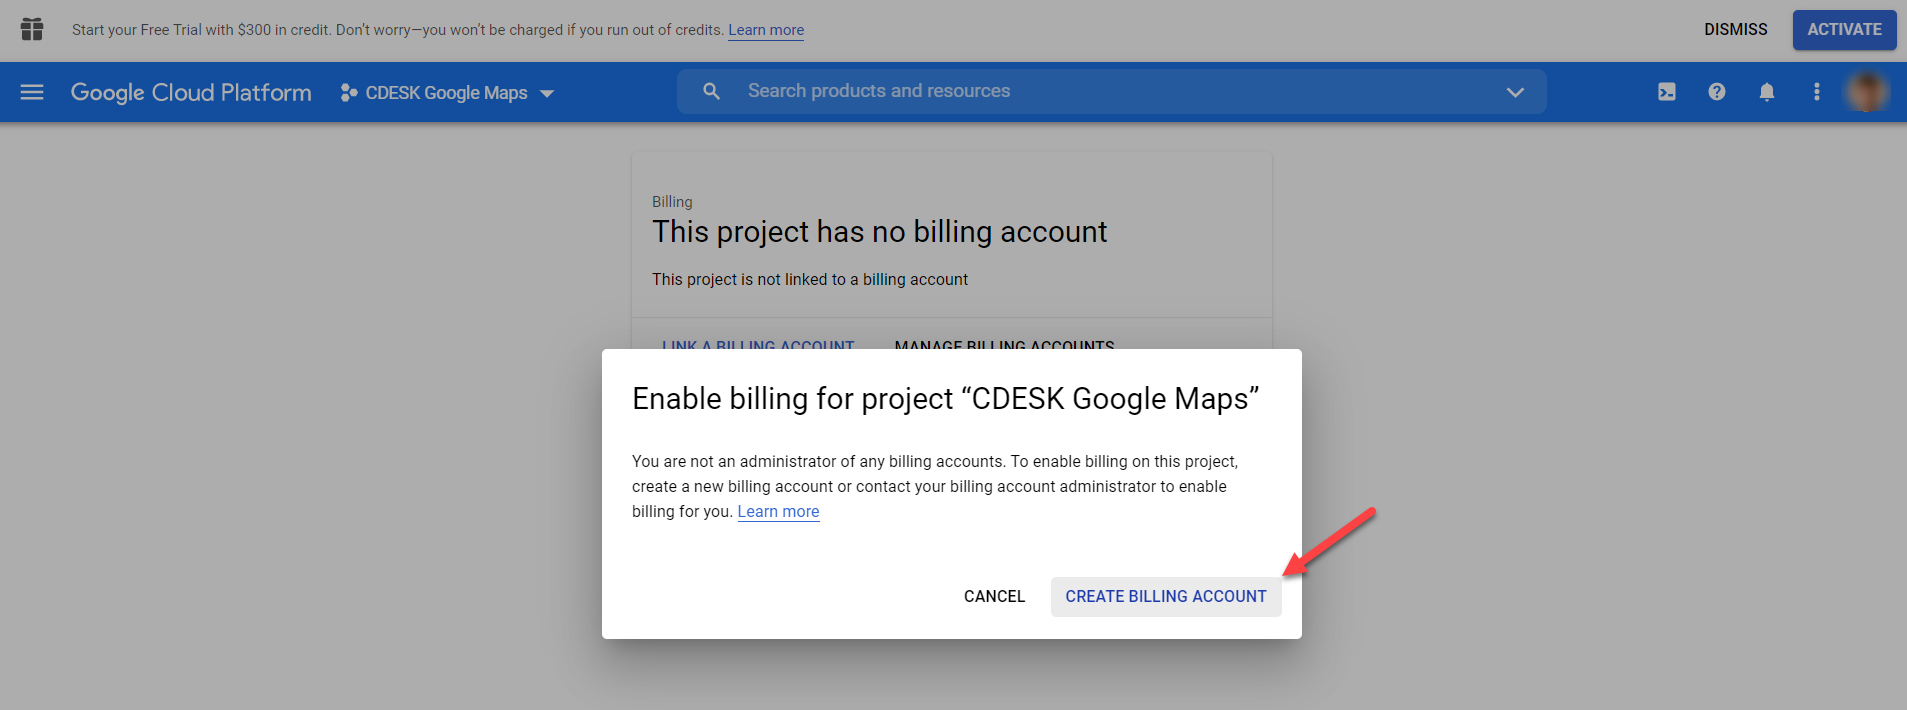
If you do not use any billing details in the Google Cloud Platform, a modal window appears asking you to add them. To continue, click the button Create billing account.

Image: Button for adding billing details

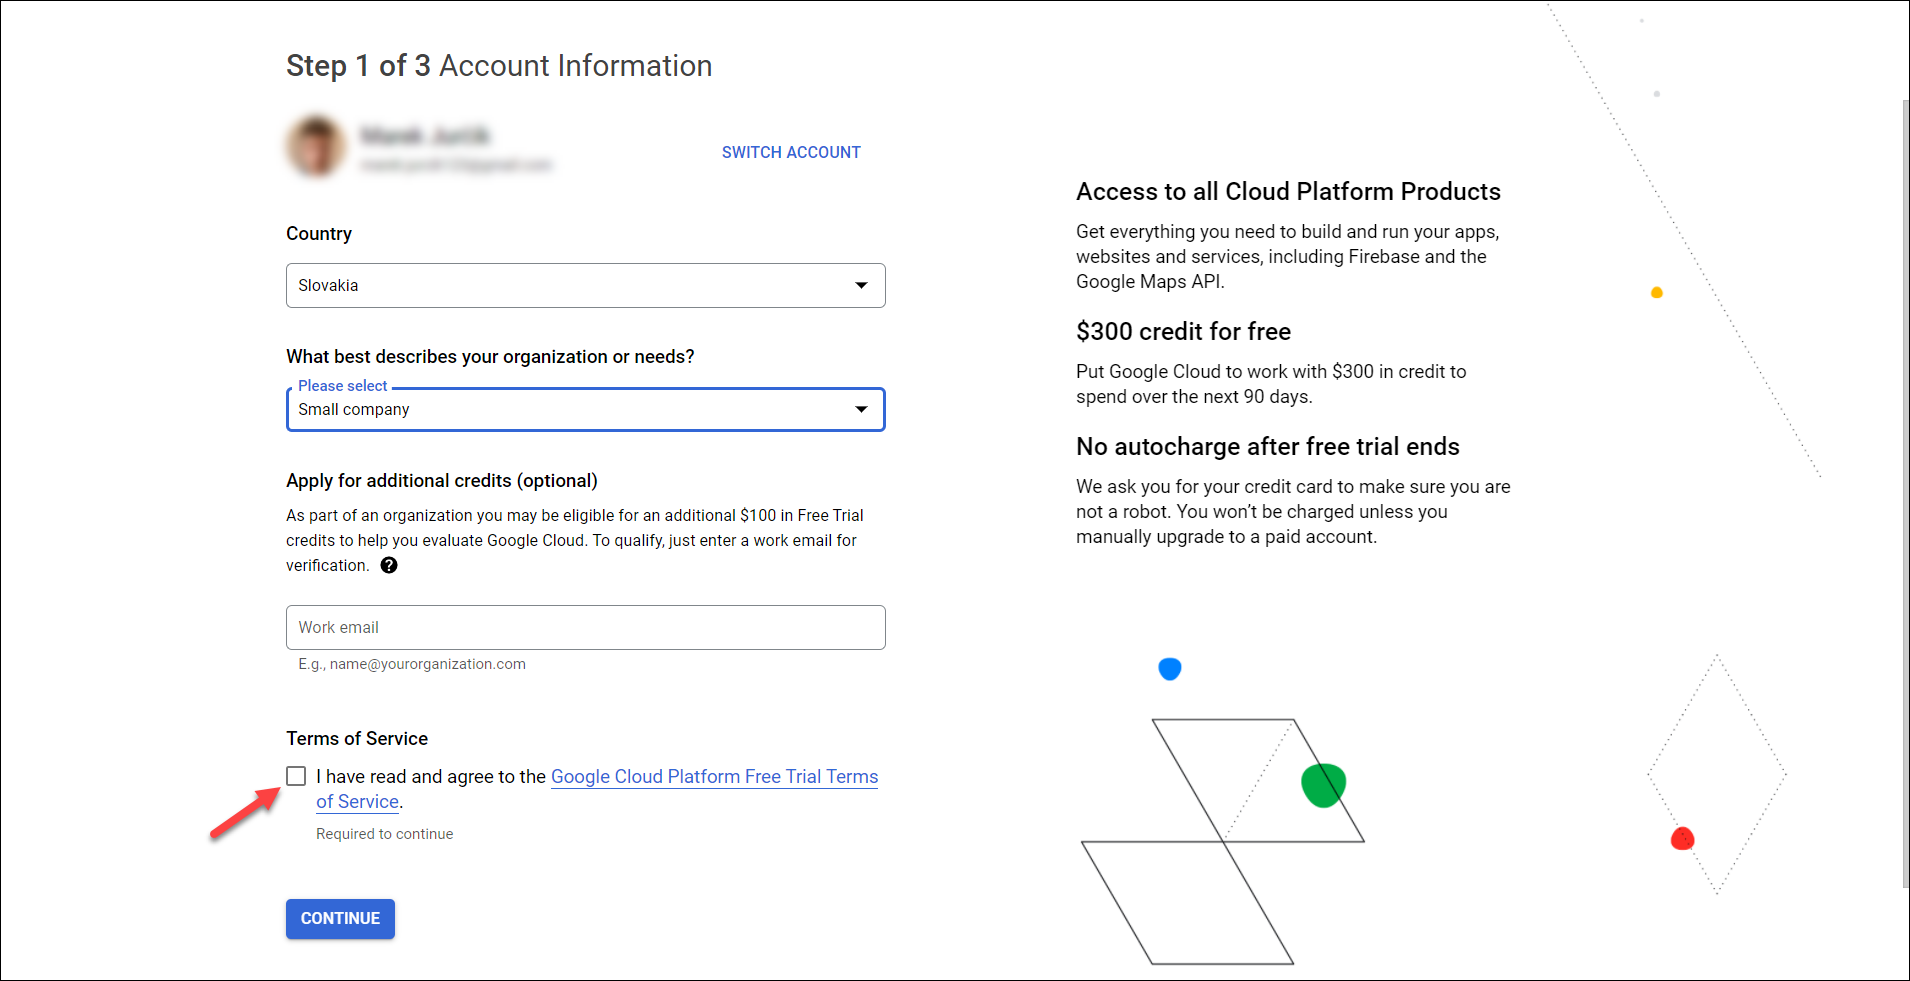
A window for configuring your Google Cloud account then appears. In the first step, select the option that best describes your company. Once you select one of the options, a field appears for entering an e-mail address in case you want to increase the amount of credit on the platform. Filling in this field is not mandatory. To continue, also agree to the Google Cloud platform terms of use. The country selection field is pre-filled automatically.

Image: Step 1 of configuring the Google Cloud account – company details

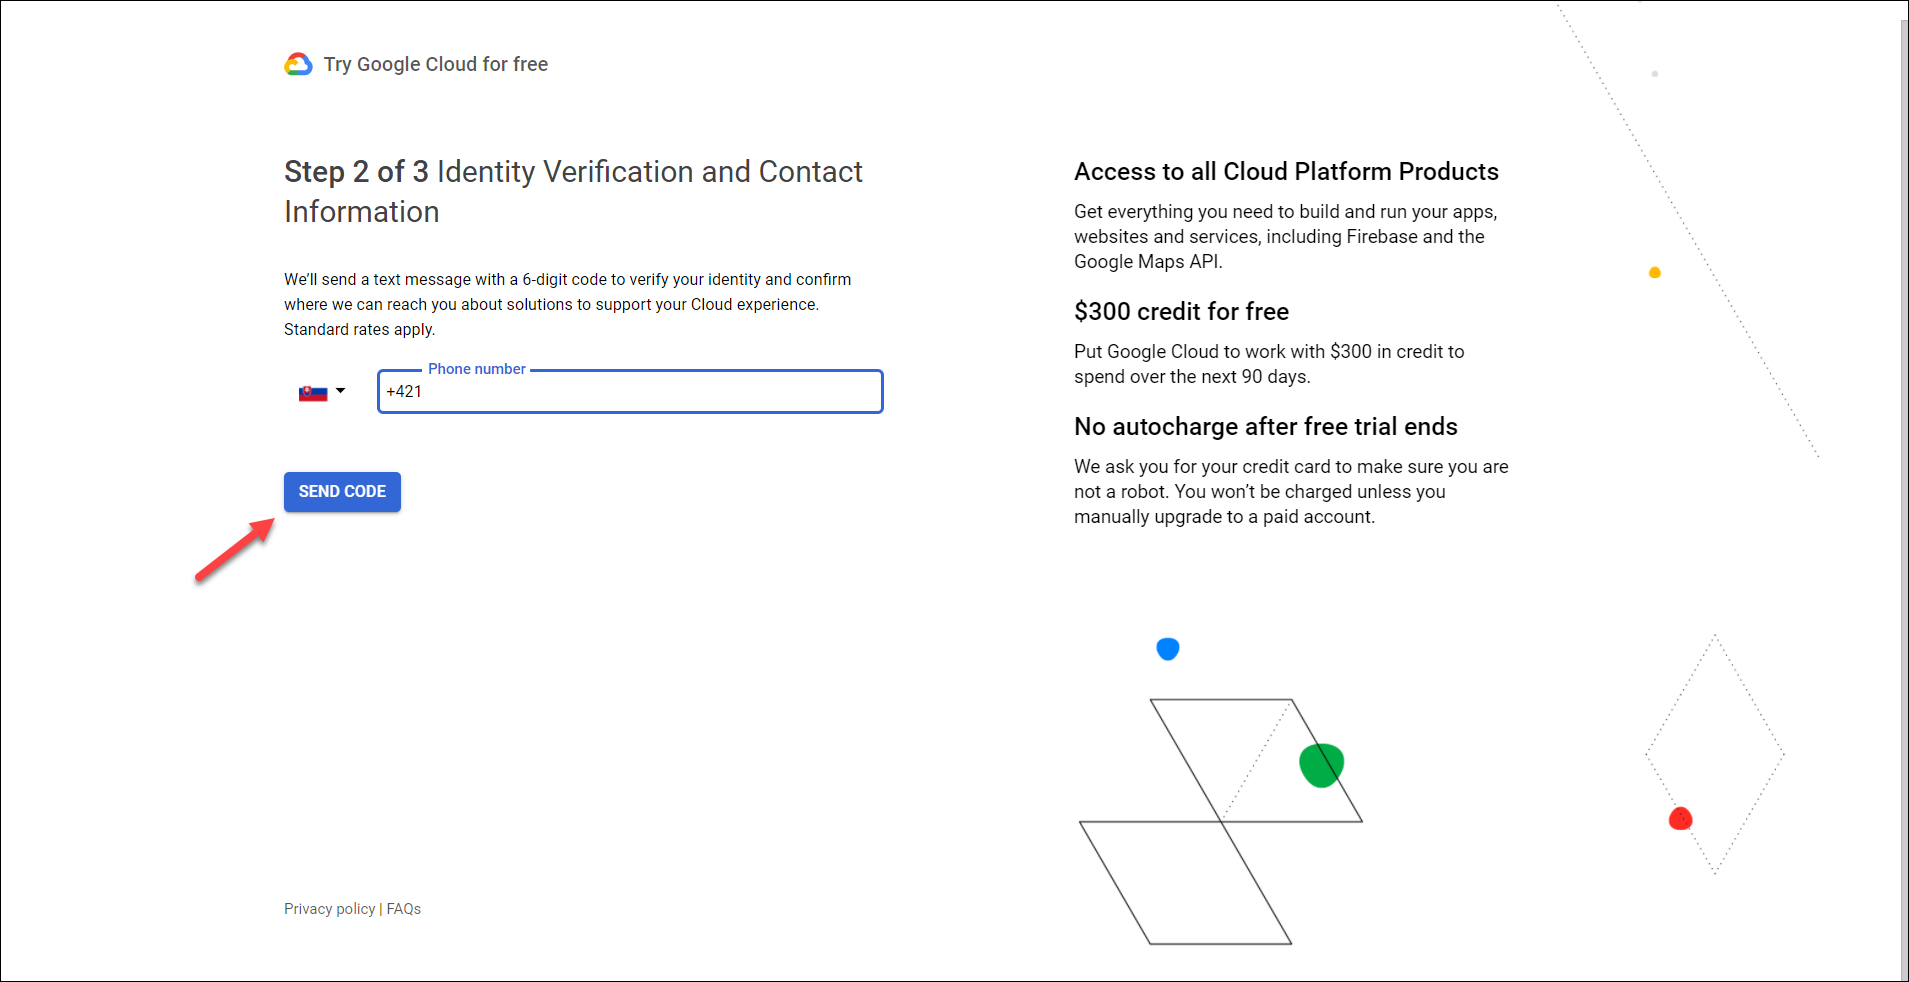
A field for entering a telephone number then appears. A verification code will be sent to this number. Once you have entered the telephone number, click the Send code button.

Image: Step 2 of configuring the Google Cloud account – entering the telephone number

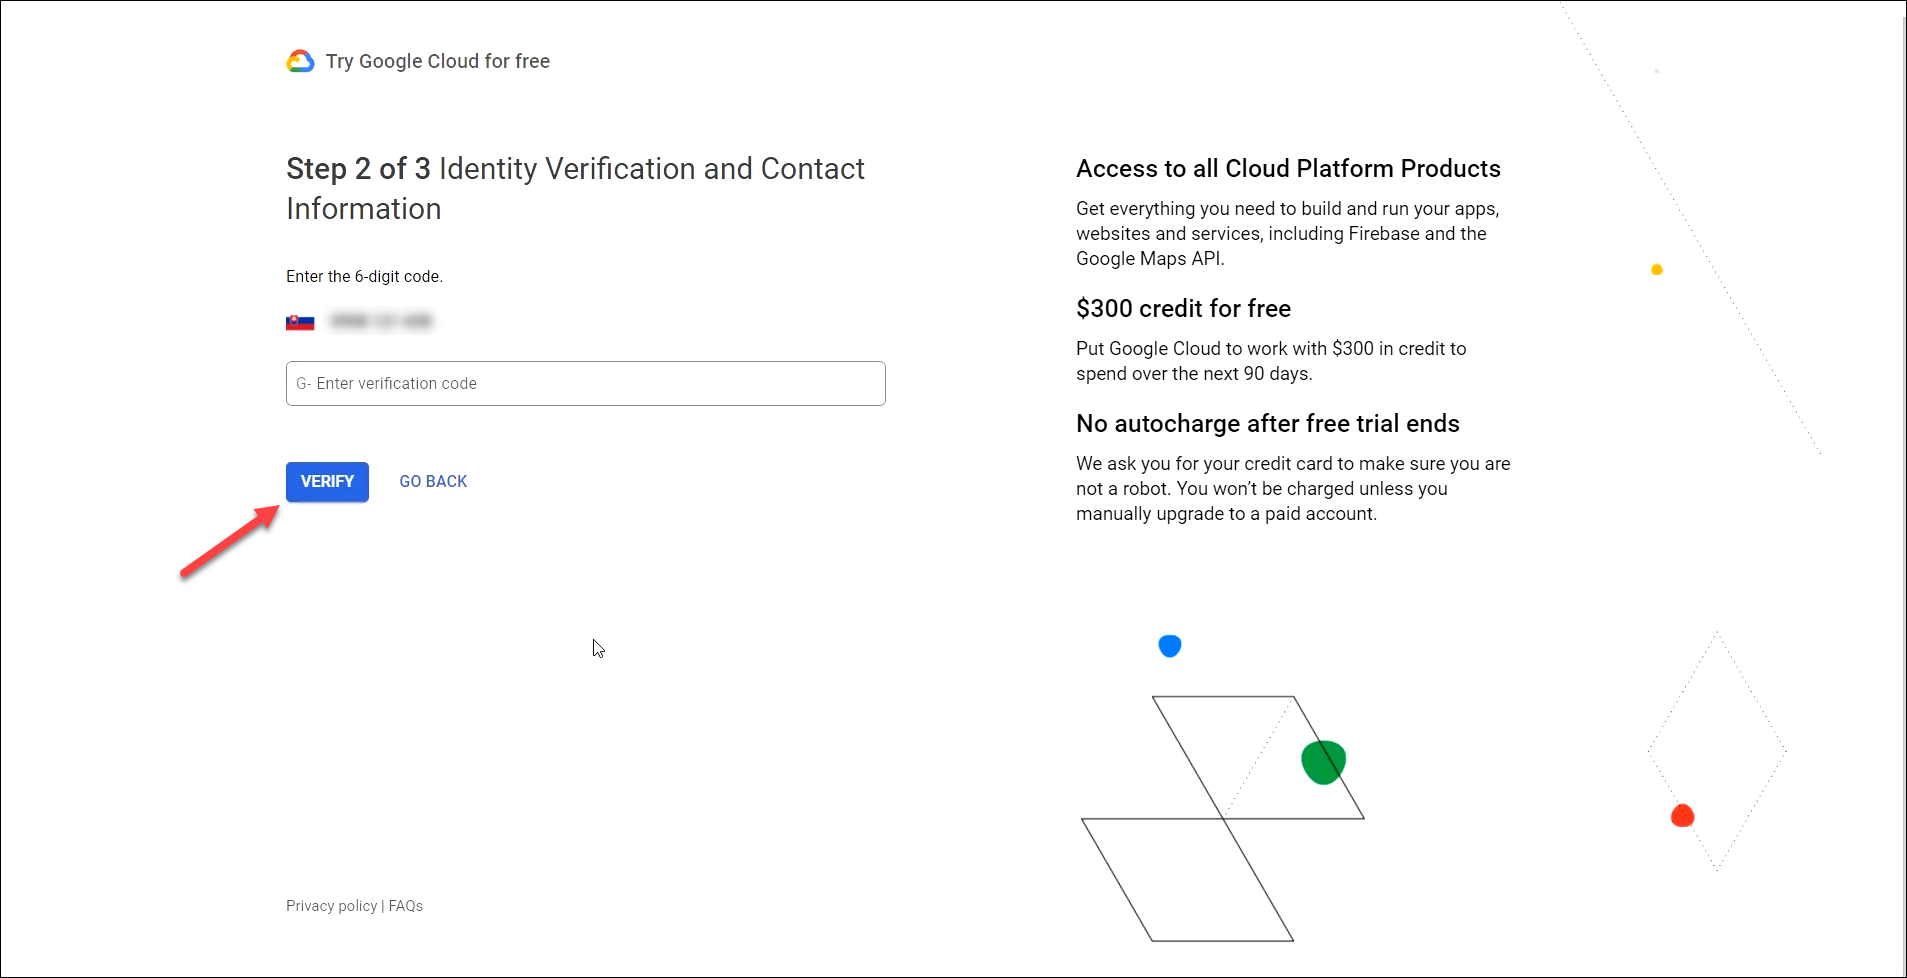
A field for entering the verification code then appears. Once you have entered the code, click the Verify button.

Image: Step 2 of configuring the Google Cloud account – entering the verification code

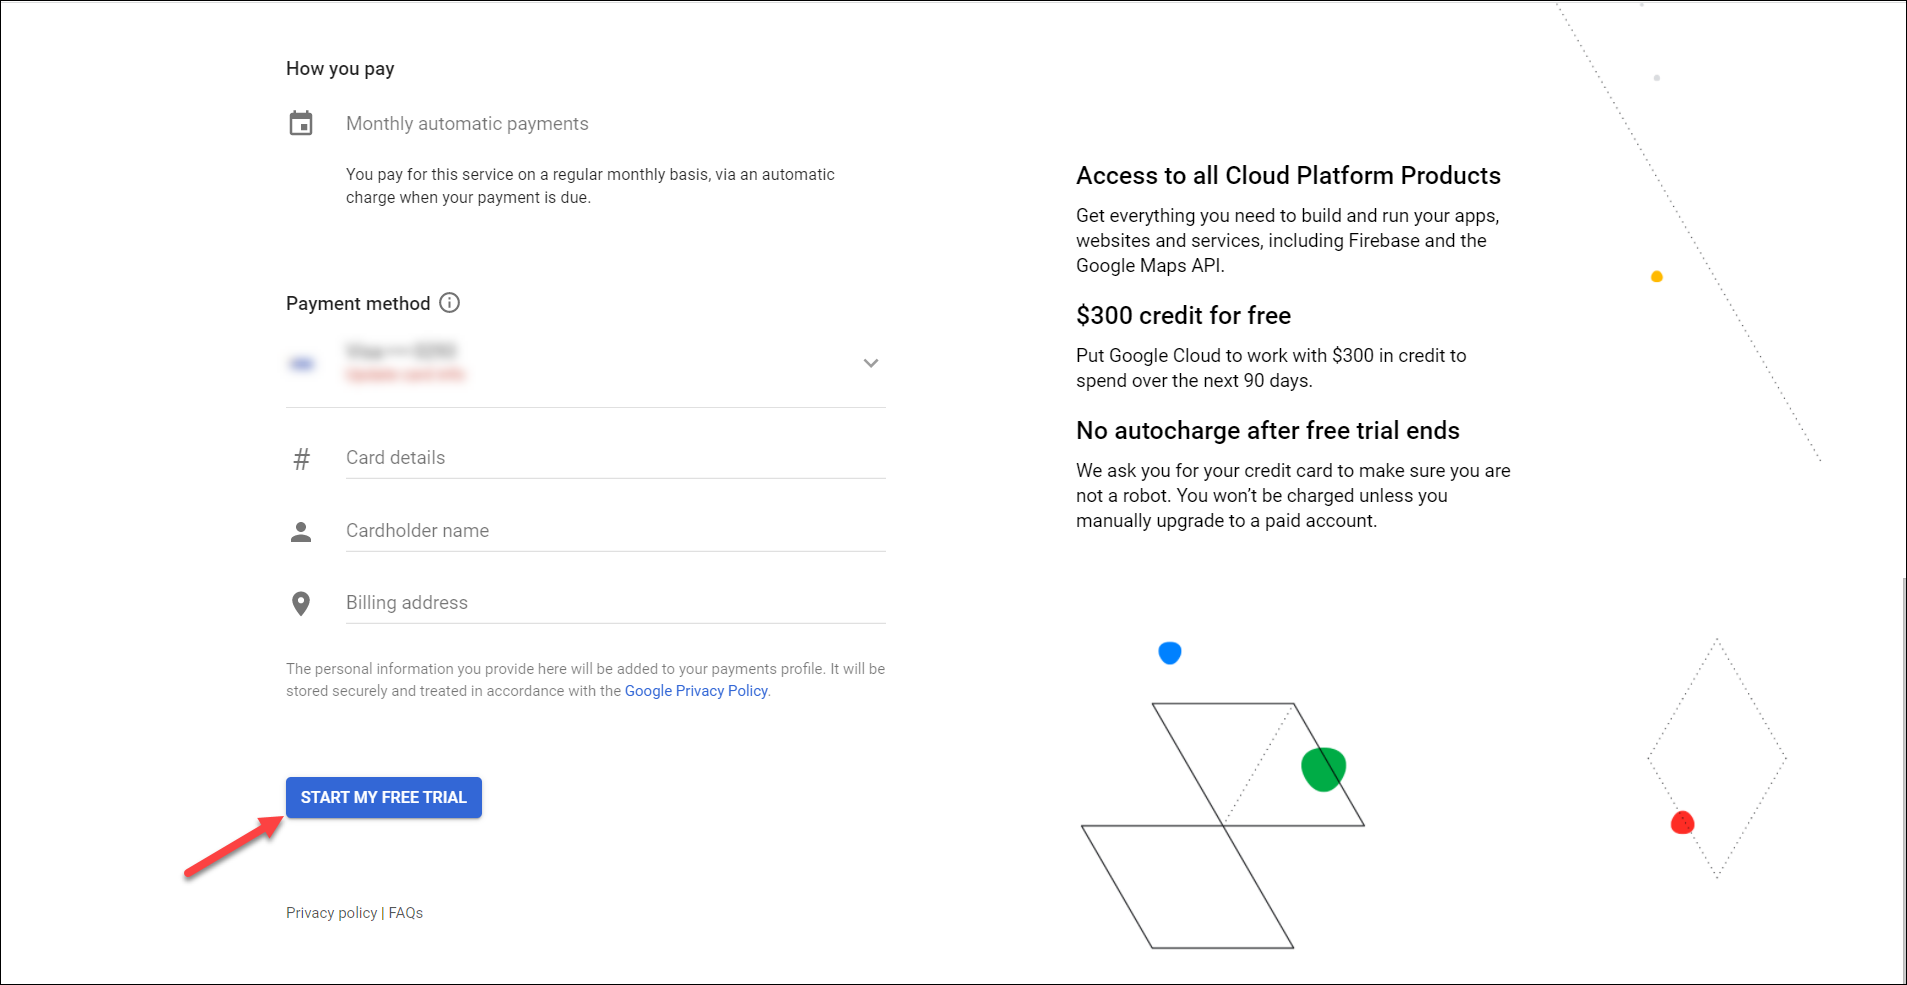
In the next step, fill in your personal information. In the Name and address section enter your address, and in the Payment method section enter your payment card details. Once all the details have been filled in, click the Start my free trial button.

Image: Step 3 of configuring the Google Cloud account – entering personal and payment details

A modal window with a short questionnaire then appears, which Google uses to improve the services it provides. Filling in the questionnaire is not mandatory and you can skip it by clicking Close.

Activating the Maps JavaScript API and the Geocoding API

Once the personal and payment details have been configured, you can activate the APIs for your project. To activate an API, go to the Google Cloud Platform main page and select APIs & Services in the menu and then Dashboard.

Image: The path to the Dashboard module

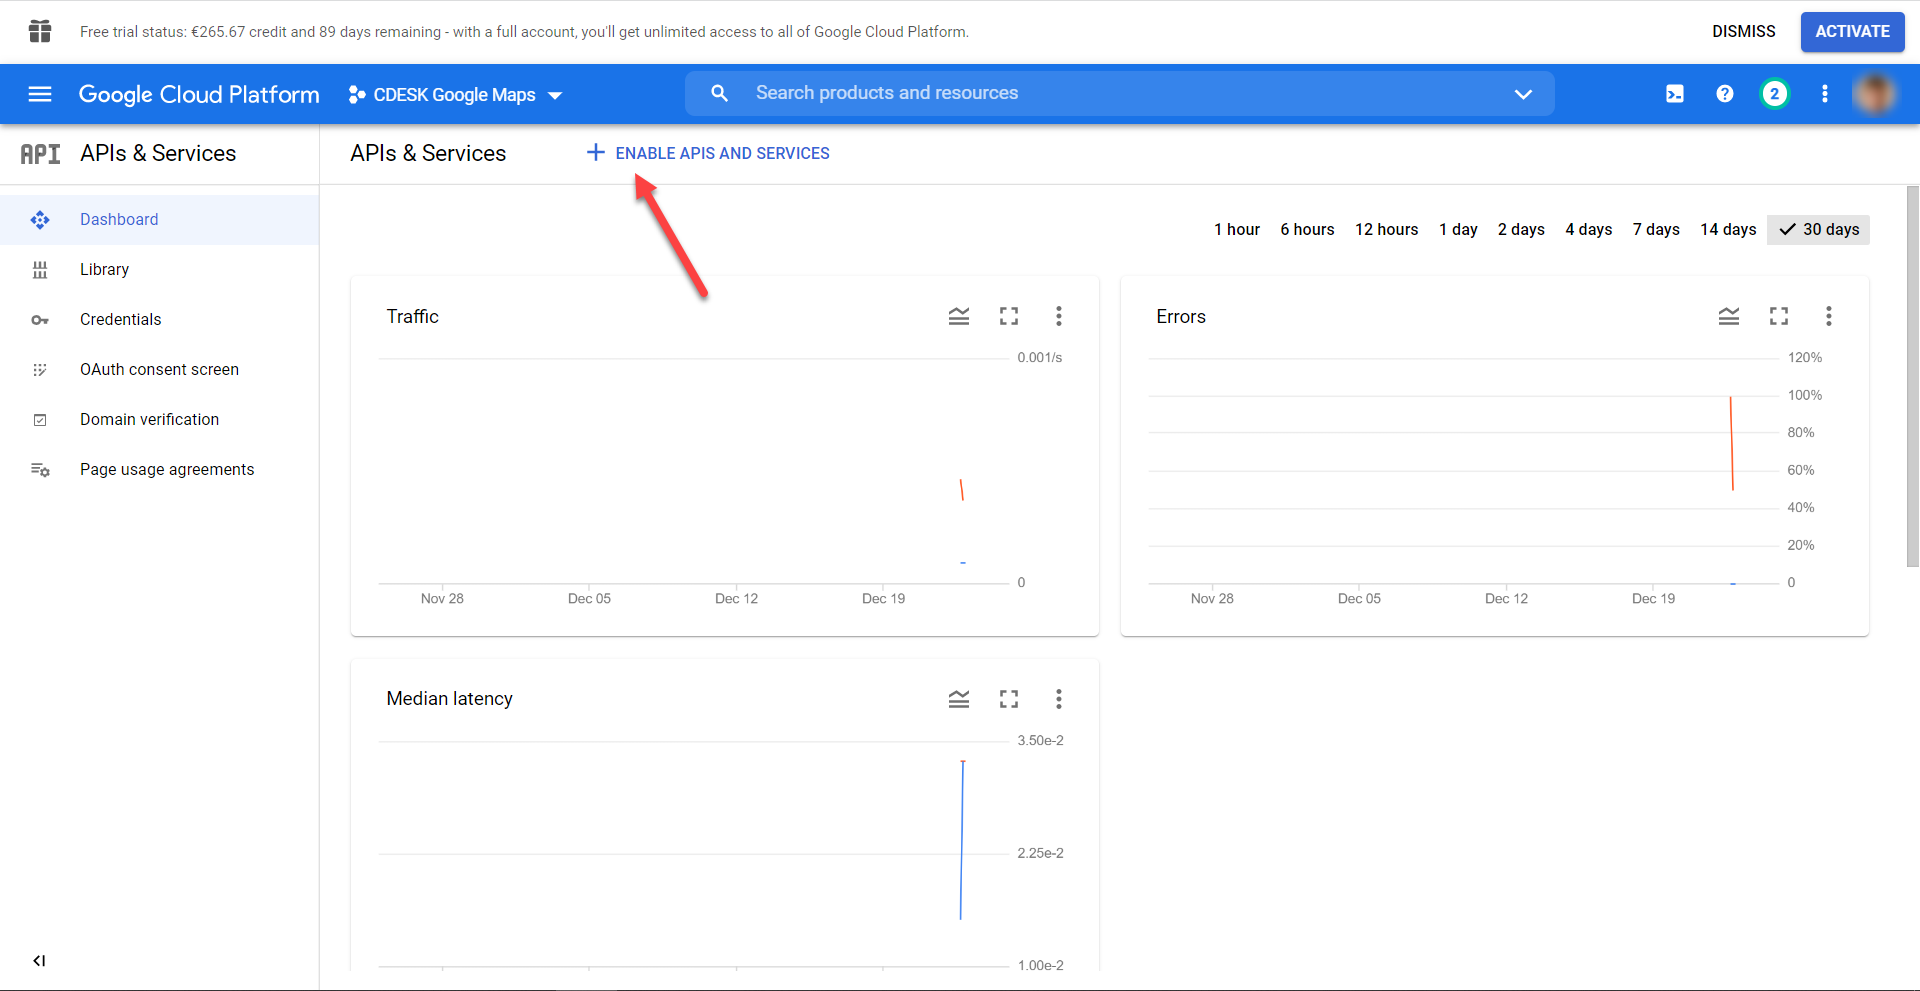
To activate a new API, click the +Enable APIs and Services button at the top of the window.

Image: Button for adding a new API

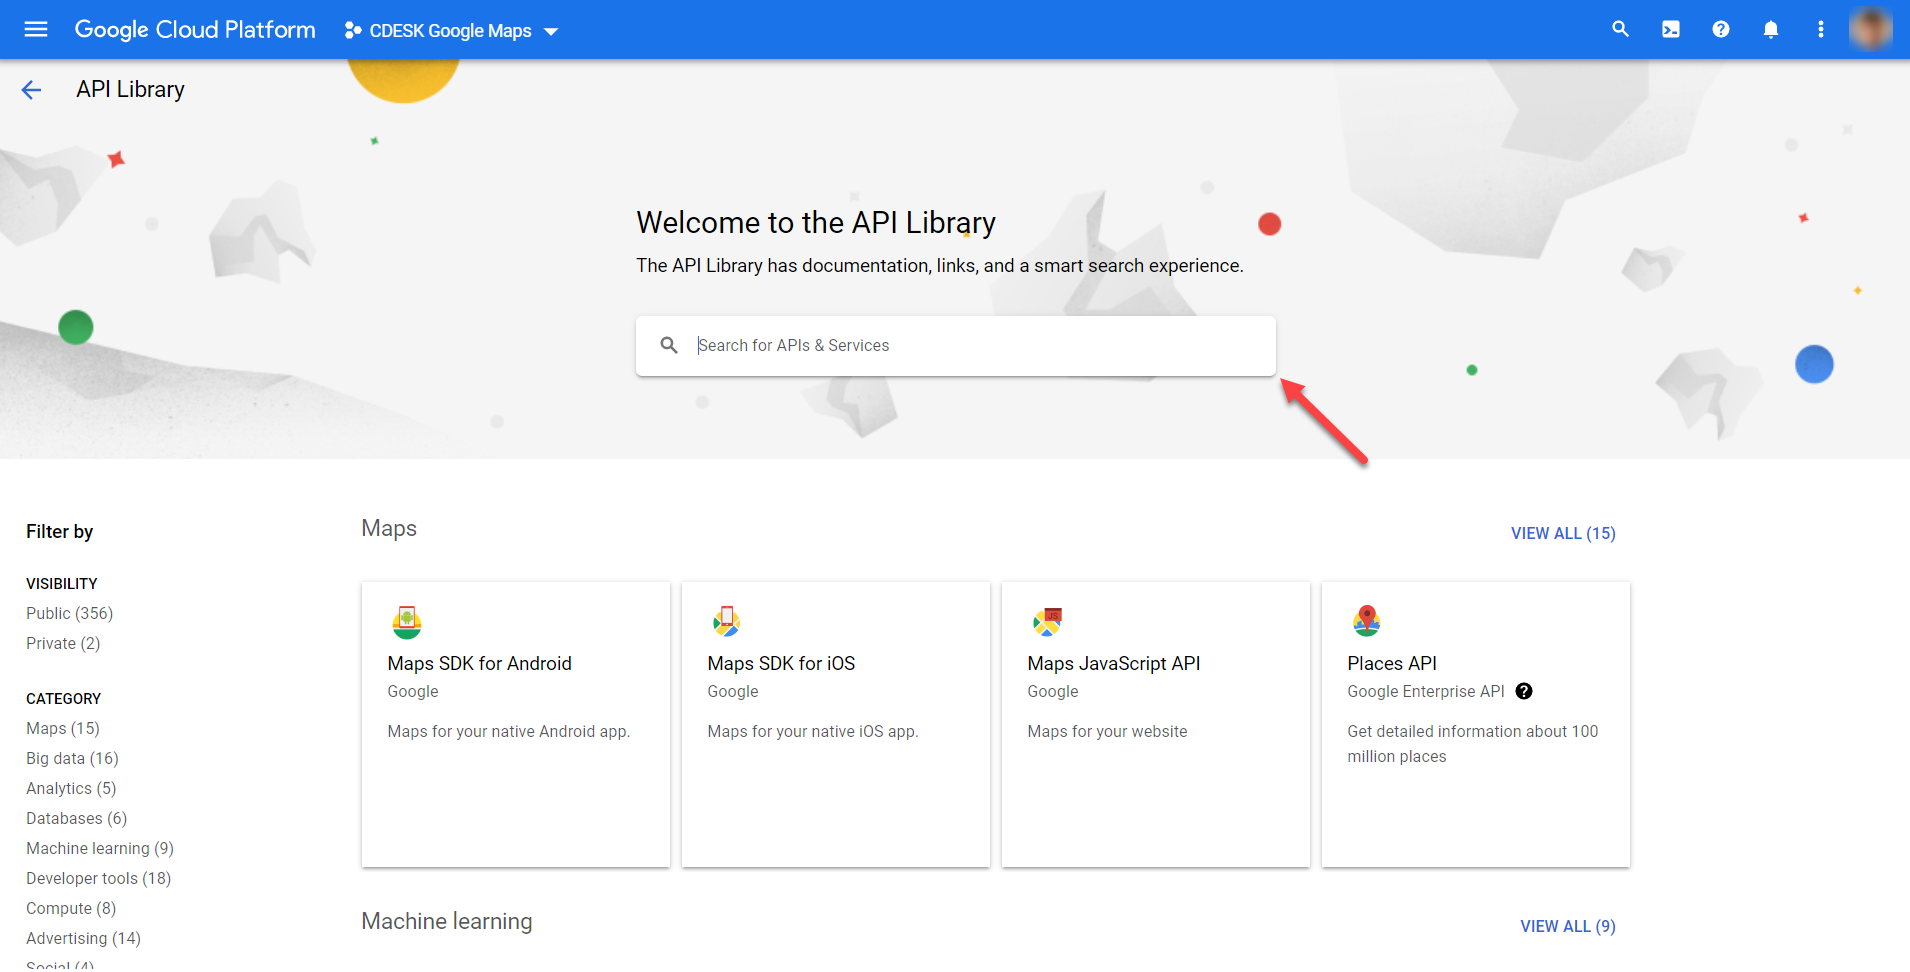
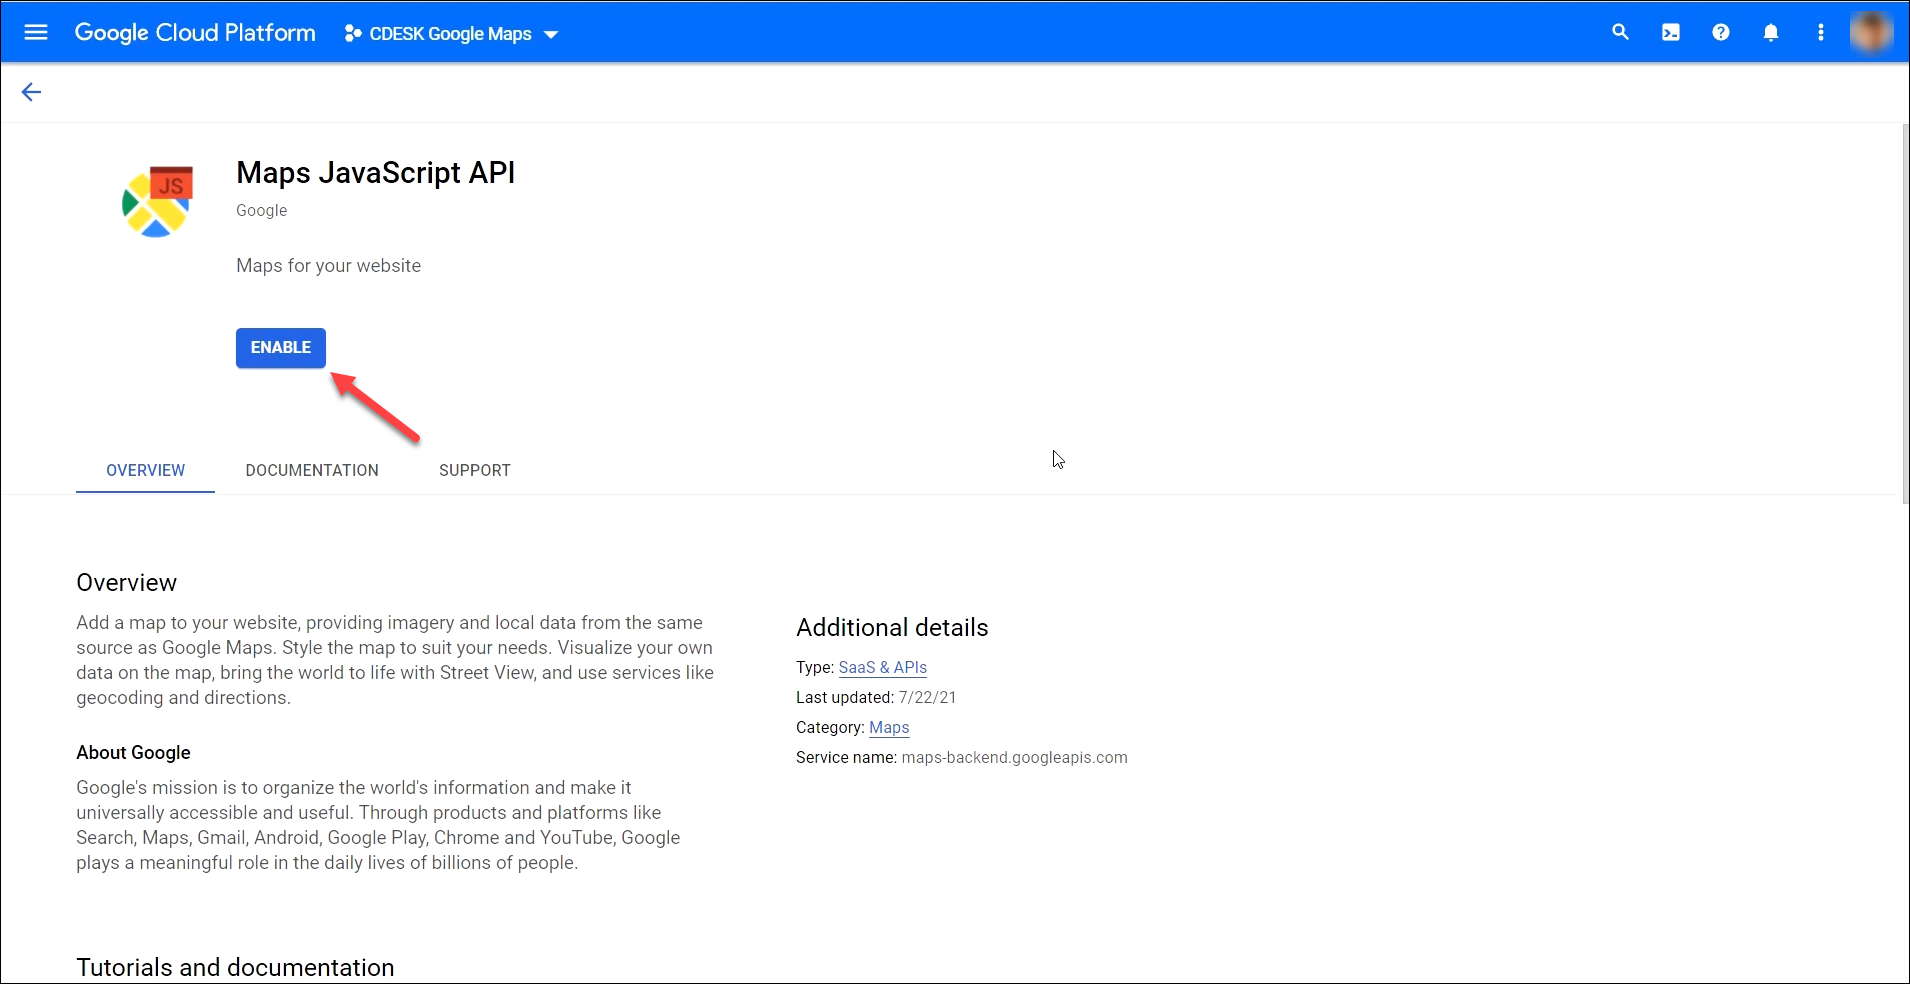
Then search for Maps JavaScript API in the search bar and click the Enable button.

Image: The API search bar
Image: Adding the Maps JavaScript API

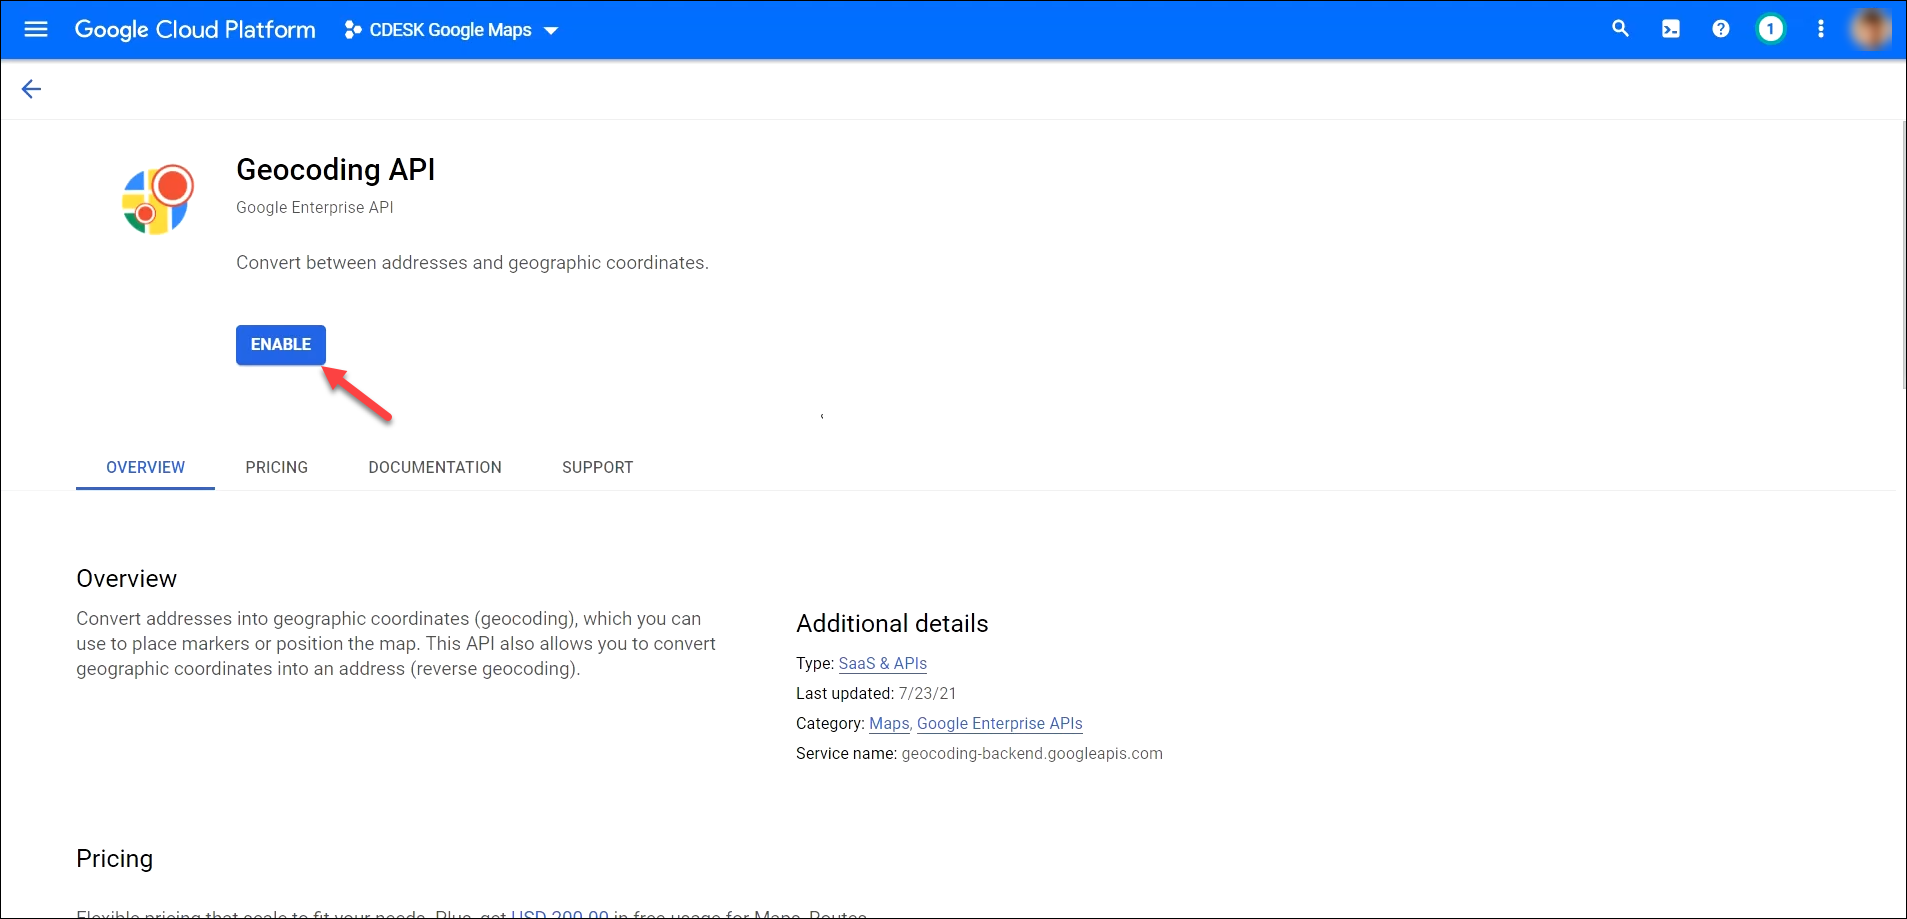
You add the Geocoding API in the same way.

Image: Adding the Geocoding API

Obtaining the Google API key

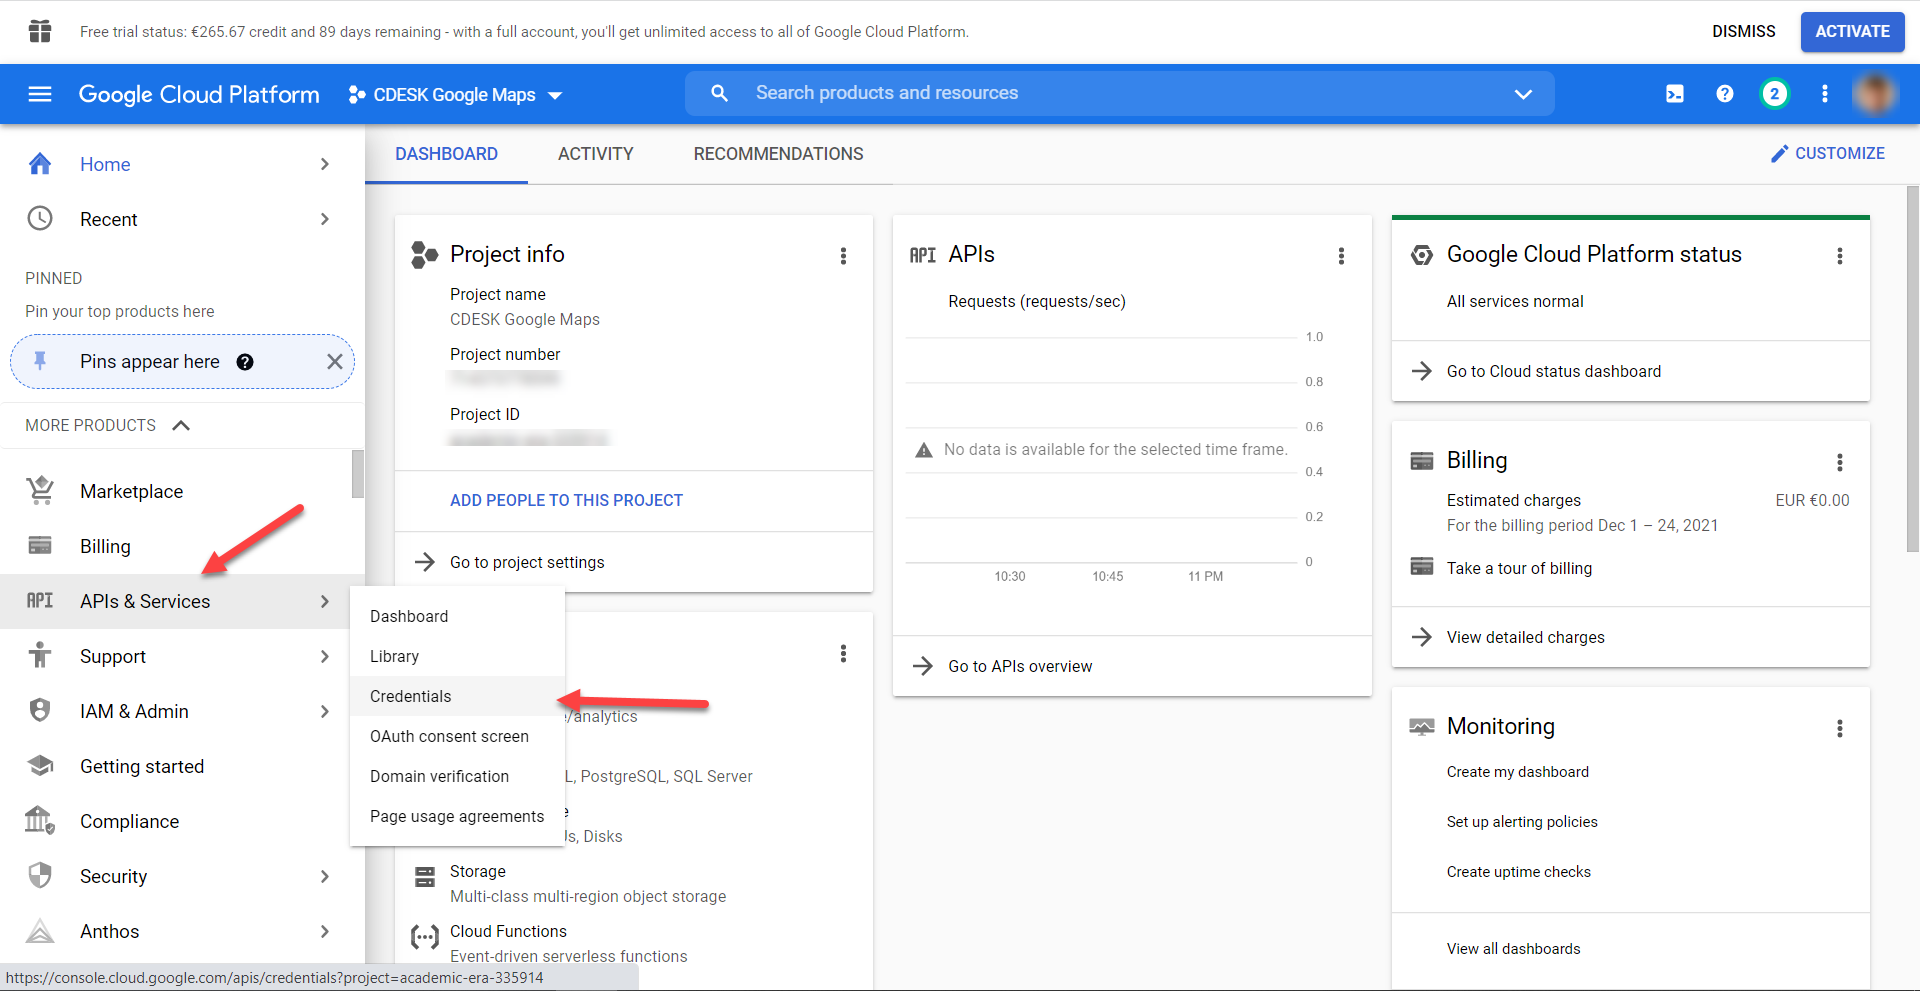
Once both APIs have been activated, credentials need to be set up so that you obtain the Google API key, which you will later enter in CDESK while configuring the Google Maps connector. Go to the Google Cloud Platform home screen and then select APIs & Services -> Credentials in the menu.

Image: The Credentials tab

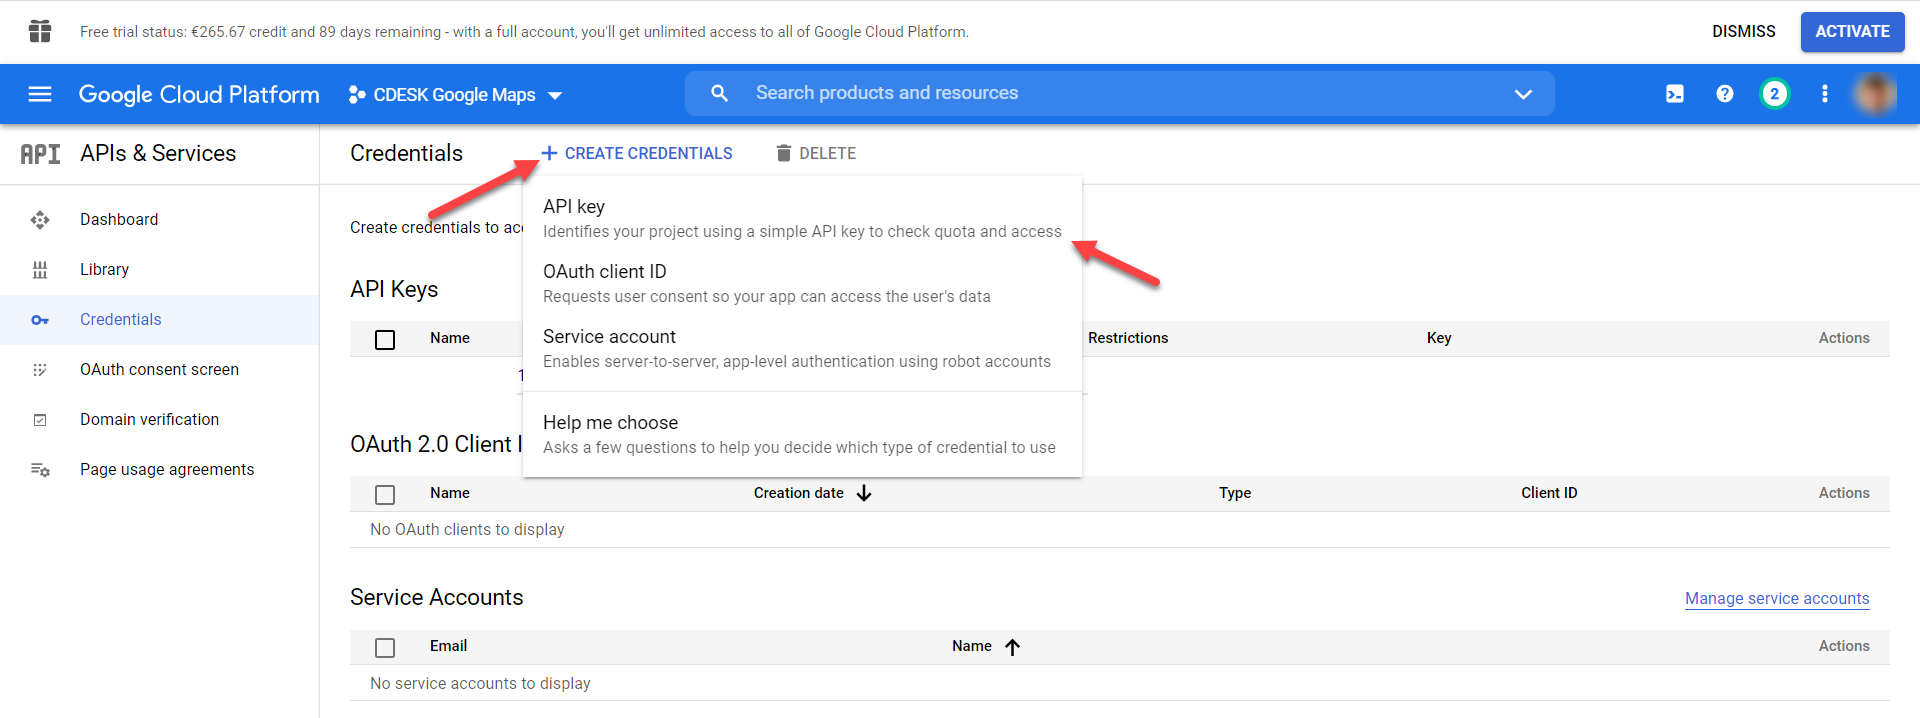
After clicking, a new window appears. Click the +Create Credentials button on the top bar. Then select the option API key.

Image: Button for adding new credentials

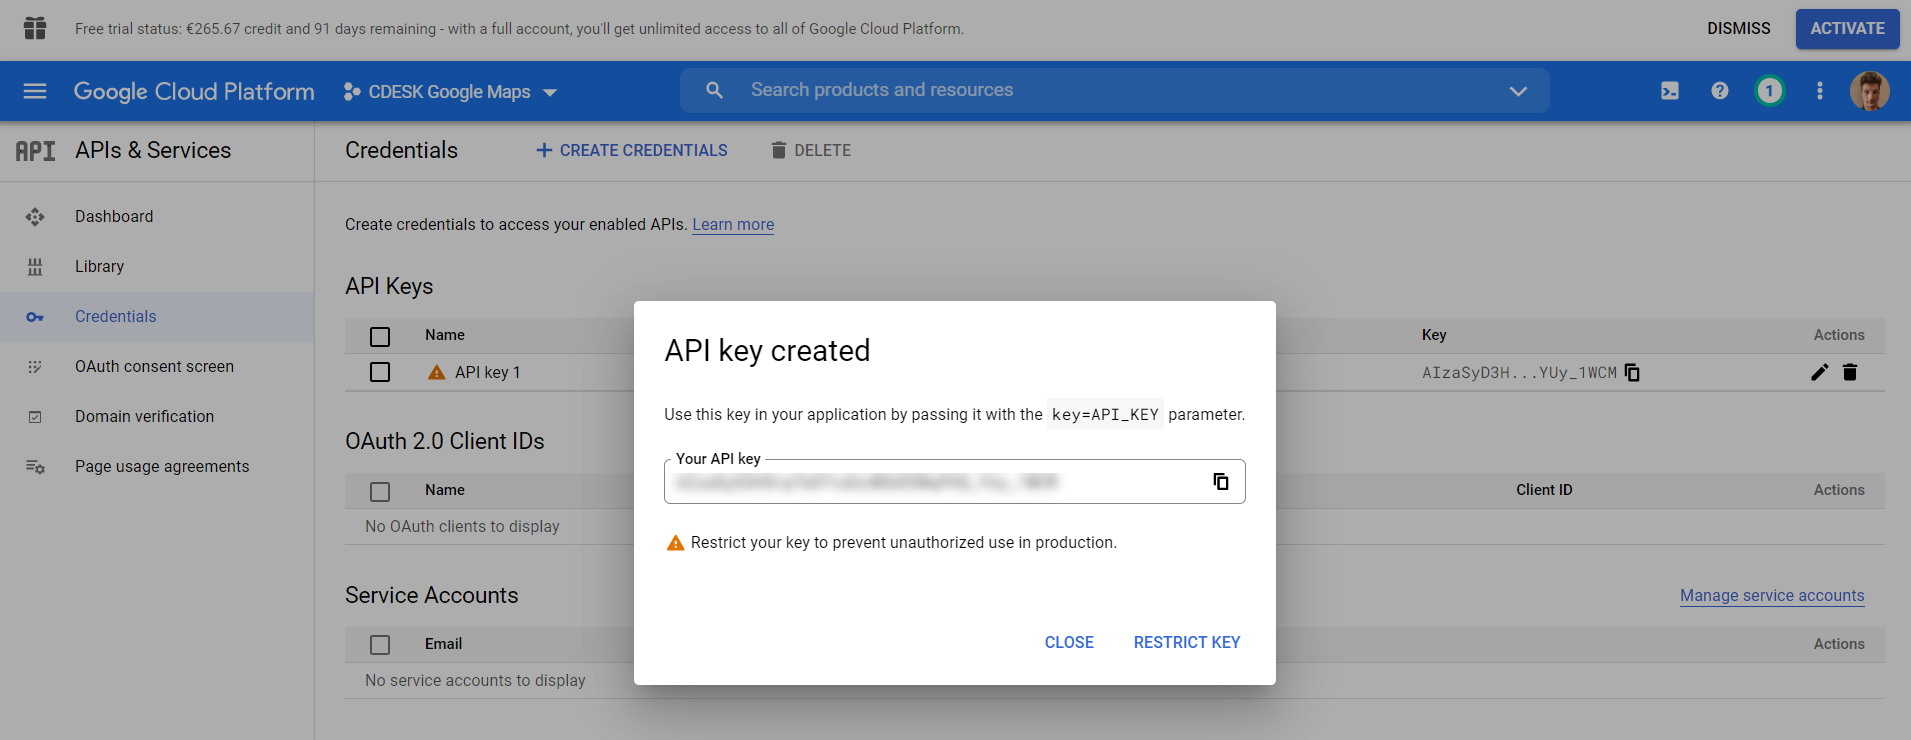
After clicking, the key you will need in the next steps appears in a modal window. So do not close this page, or copy the key to the clipboard. Now go to your CDESK, where you can add the Google Maps connector.

Image: The Google API key

Adding and configuring the Google Maps connector in CDESK

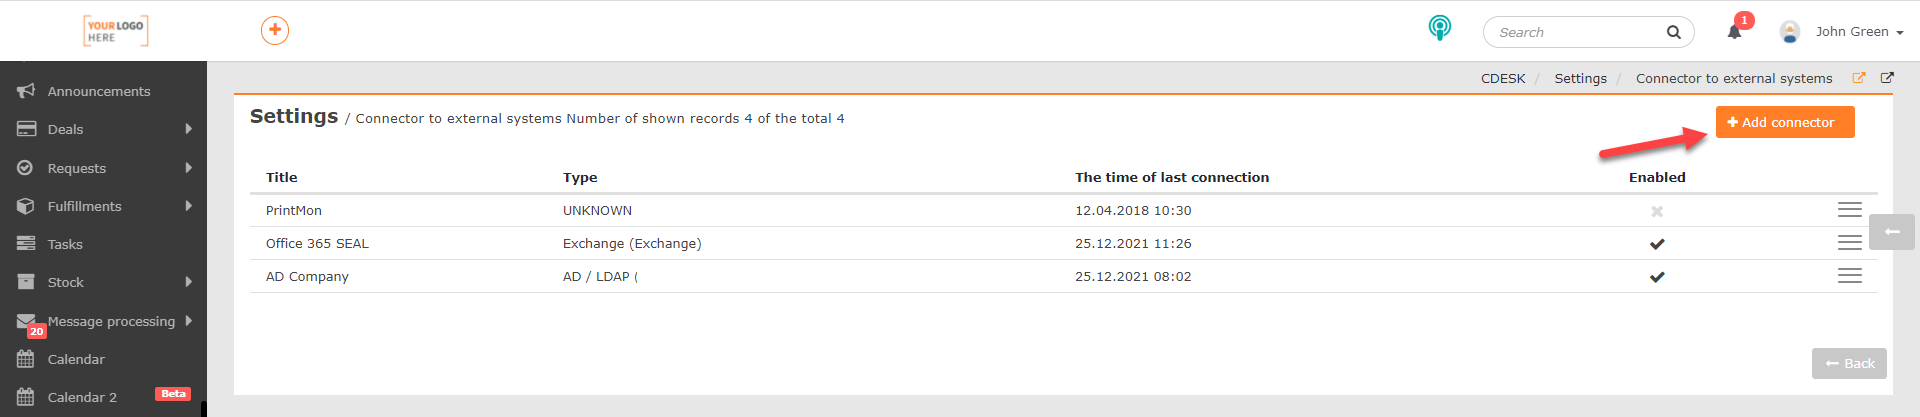
To add the Google Maps connector, go to Global settings->Connectors API in CDESK and then click the +Add connector button.

Image: Button for adding a connector in CDESK
After clicking, a window with a choice of connector type appears. Select the Google Maps option. To continue, click the -> Continue button.
Image: Selecting the connector type

A window for configuring the connector’s parameters then appears.

Connector type – This item is not editable. The Google Maps option is pre-filled in it automatically.

Name – enter your own name, under which the connector will be shown in the list of connectors.

Enabled – So that the connector can be used, set the switch to the on position . If the switch is in the off position , the connector will not be active.

Google api key – enter the key from the Google Cloud Platform. In the main menu on that platform, click APIs & Services ->Credentials. In the API Keys section, open the item you created. (The procedure for obtaining the Google api key is described in the section Obtaining the Google app key). After clicking, a form for setting the key’s restrictions appears. The key itself is in the top right-hand corner.

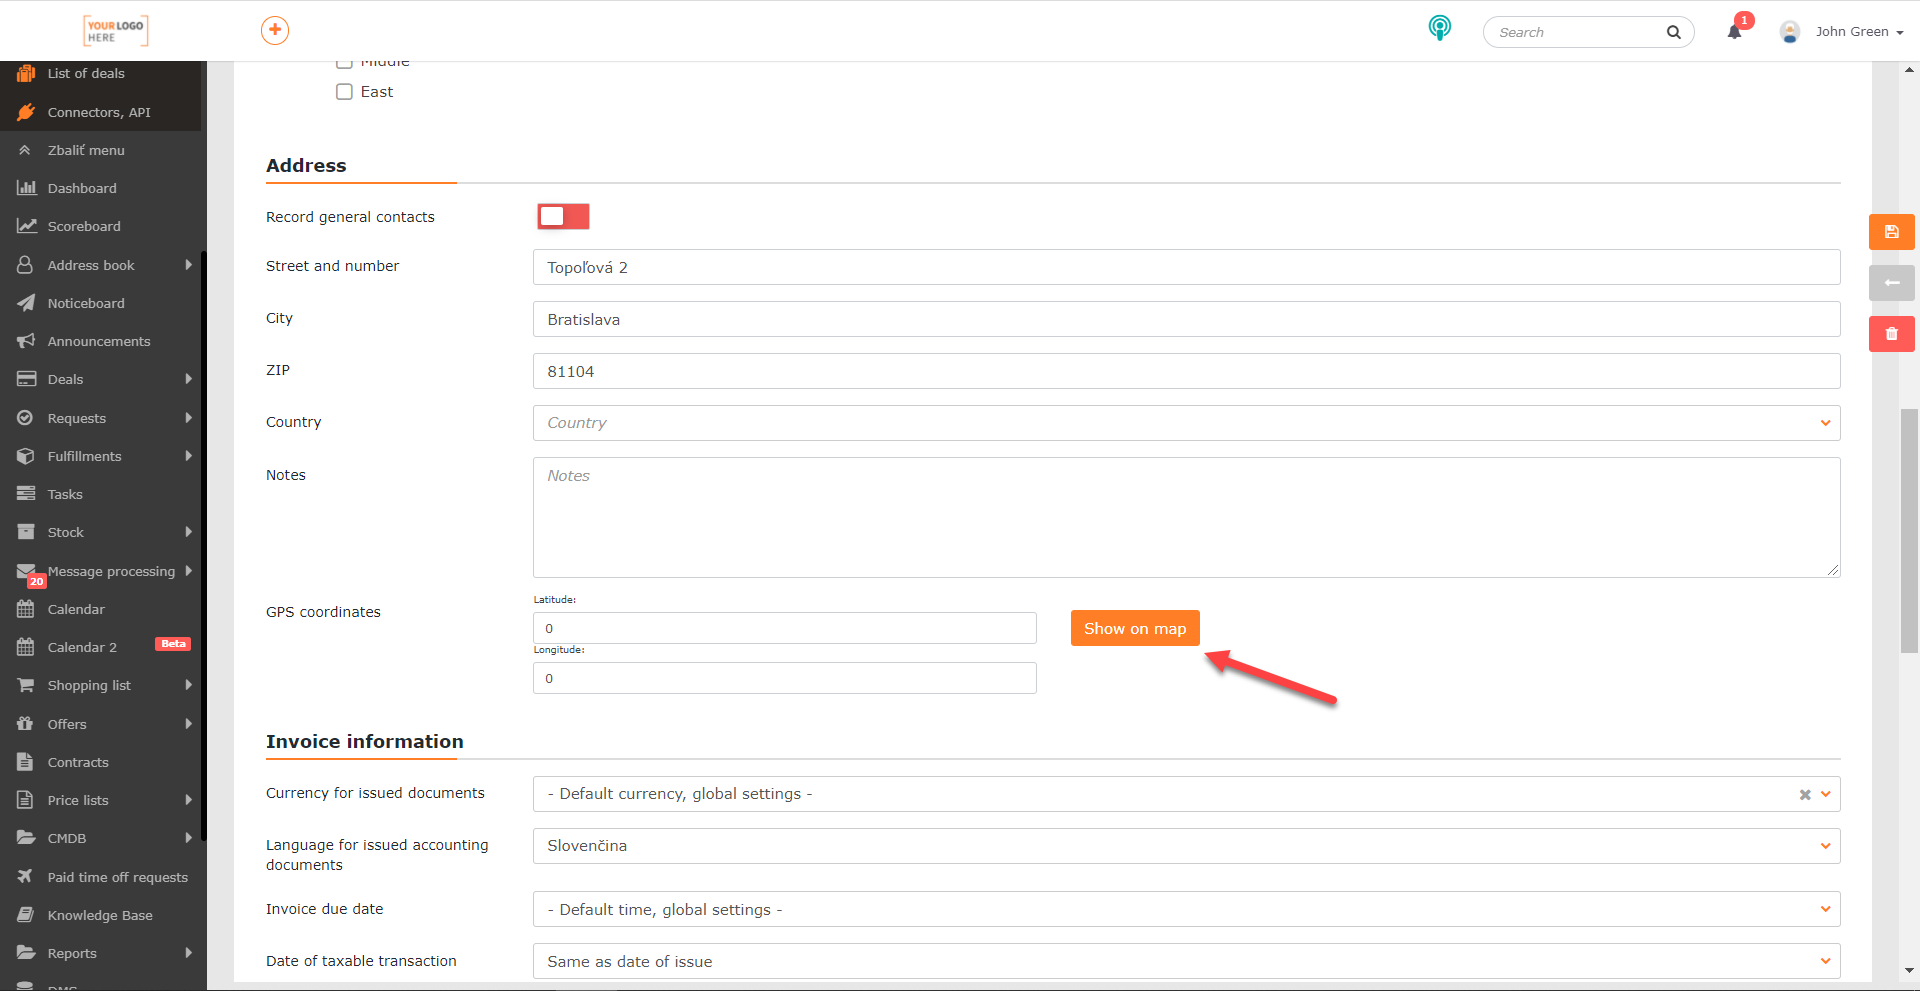
Image: Configuration of the Google Maps connector
You save the changes made in CDESK by clicking the Save button. For the connector to load correctly, the page also needs to be reloaded, for example using the keyboard shortcut CTRL+R.

Showing a place from CDESK on the map

The purpose of the Google maps connector is to show a company’s address or an entered Place on Google maps directly in CDESK. If you have configured the connector correctly using the procedure described above, in the company form on the General information tab, in the Address section, you will see the button Show on map. For this button to be shown, the company / place must have its address details filled in correctly. You can find more information in this article.

Image: Button for showing the company on the map

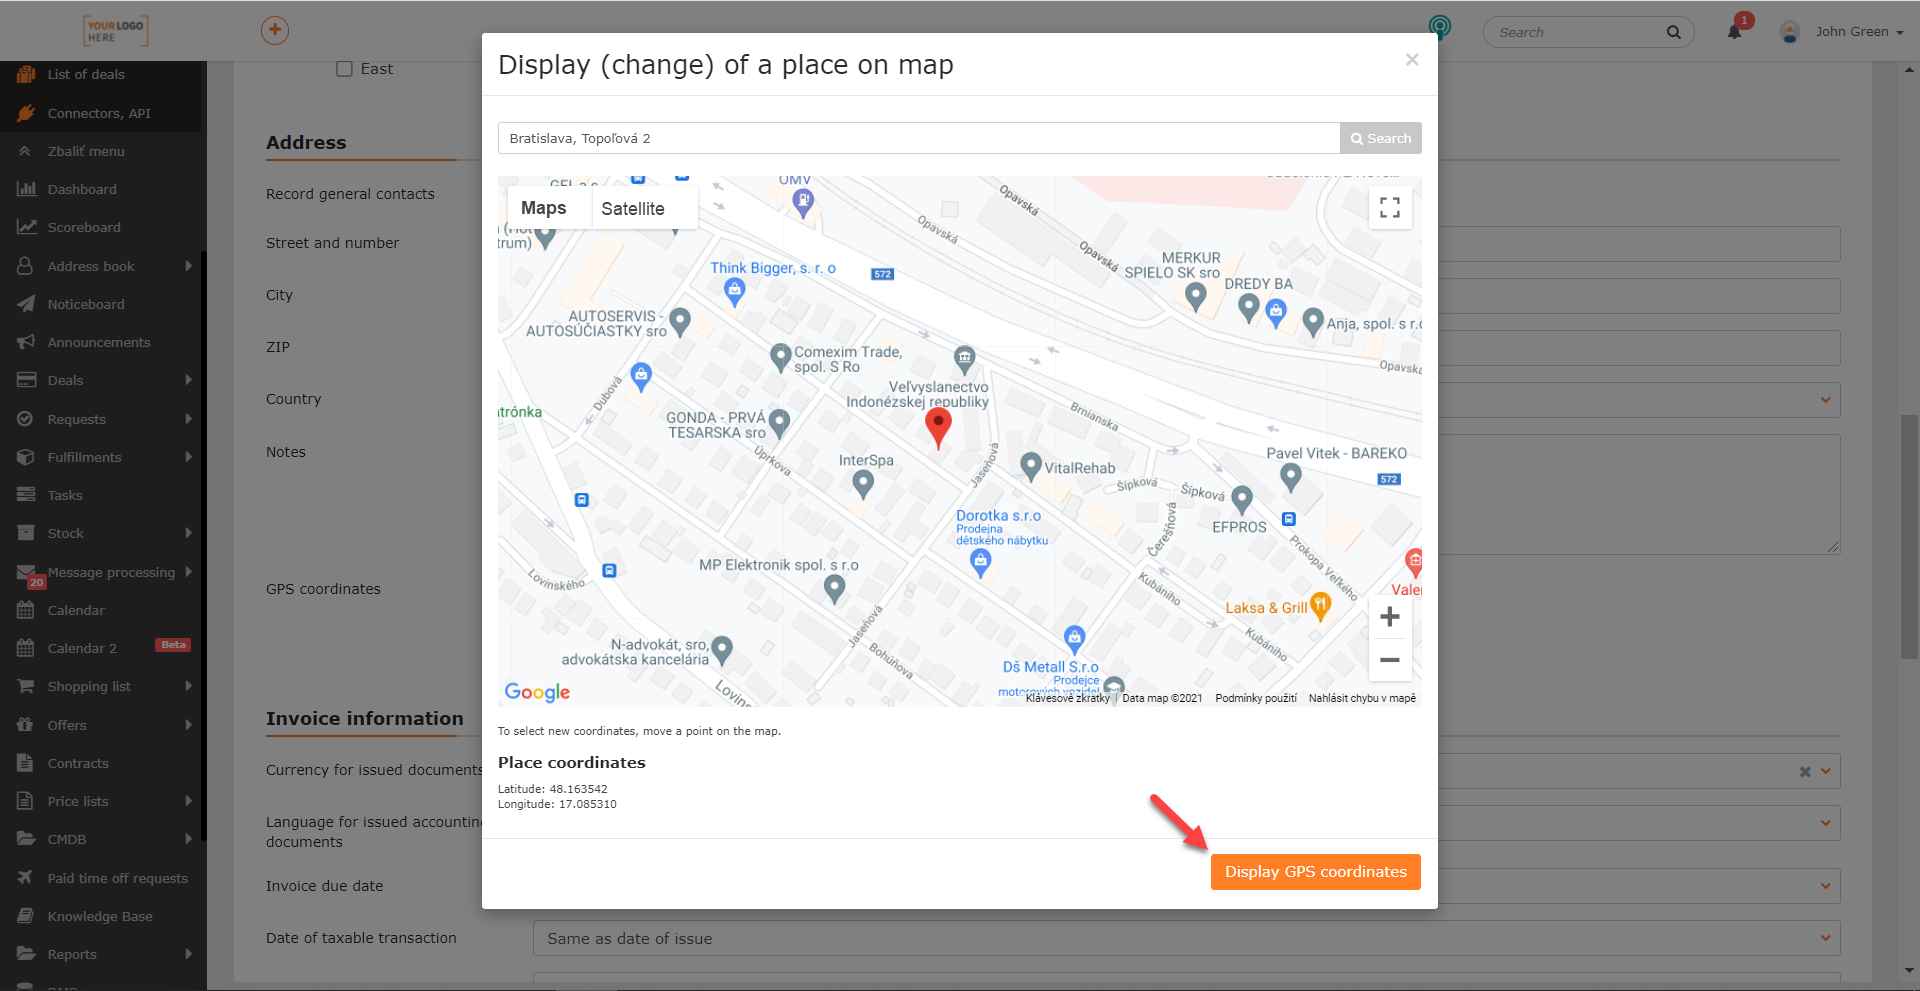
After clicking the button, a dialogue window appears with a map from the Google Maps service, on which the location of the given company is marked. If necessary, the GPS coordinates for this location can be obtained. The Get GPS coordinates button, shown in the bottom right-hand corner below the map, is used for that. After clicking this button the dialogue window with the map closes and the coordinates are entered into the GPS coordinates fields in the company form.

The practical use is implemented by adding a link to the e-mail notifications for requests. If the request concerns a company or place that has an address / GPS coordinates entered, a link with the WAZE app icon is inserted. If you click this link on a mobile device where WAZE is installed, a map with navigation opens.

Image: The company shown on maps and the button for obtaining GPS coordinates