Beta verzia novej dokumentácie.

Creating the first records

In this section, you will learn about the basic lifecycle of a request in the CDESK system. You will walk through the steps step by step, from creating a user, to creating your first request, adding a post to a discussion, and logging a fulfilment, all the way to closing the request and evaluating the assignee.

The goal of this chapter is to demonstrate the request processing workflow in practice so that you gain an overview of the individual steps and understand how they are interconnected. After reading it, you will be able to:

  • create a new user, assign them to an assignee group, and set permissions,
  • create a request and configure its basic attributes,
  • communicate via discussions with customers and internal users, either directly in CDESK or via email
  • record fulfilments and hours worked,
  • close a request and rate the requester’s satisfaction.

This will give you a practical overview of the basics of working with requests in the web interface.

Create a user

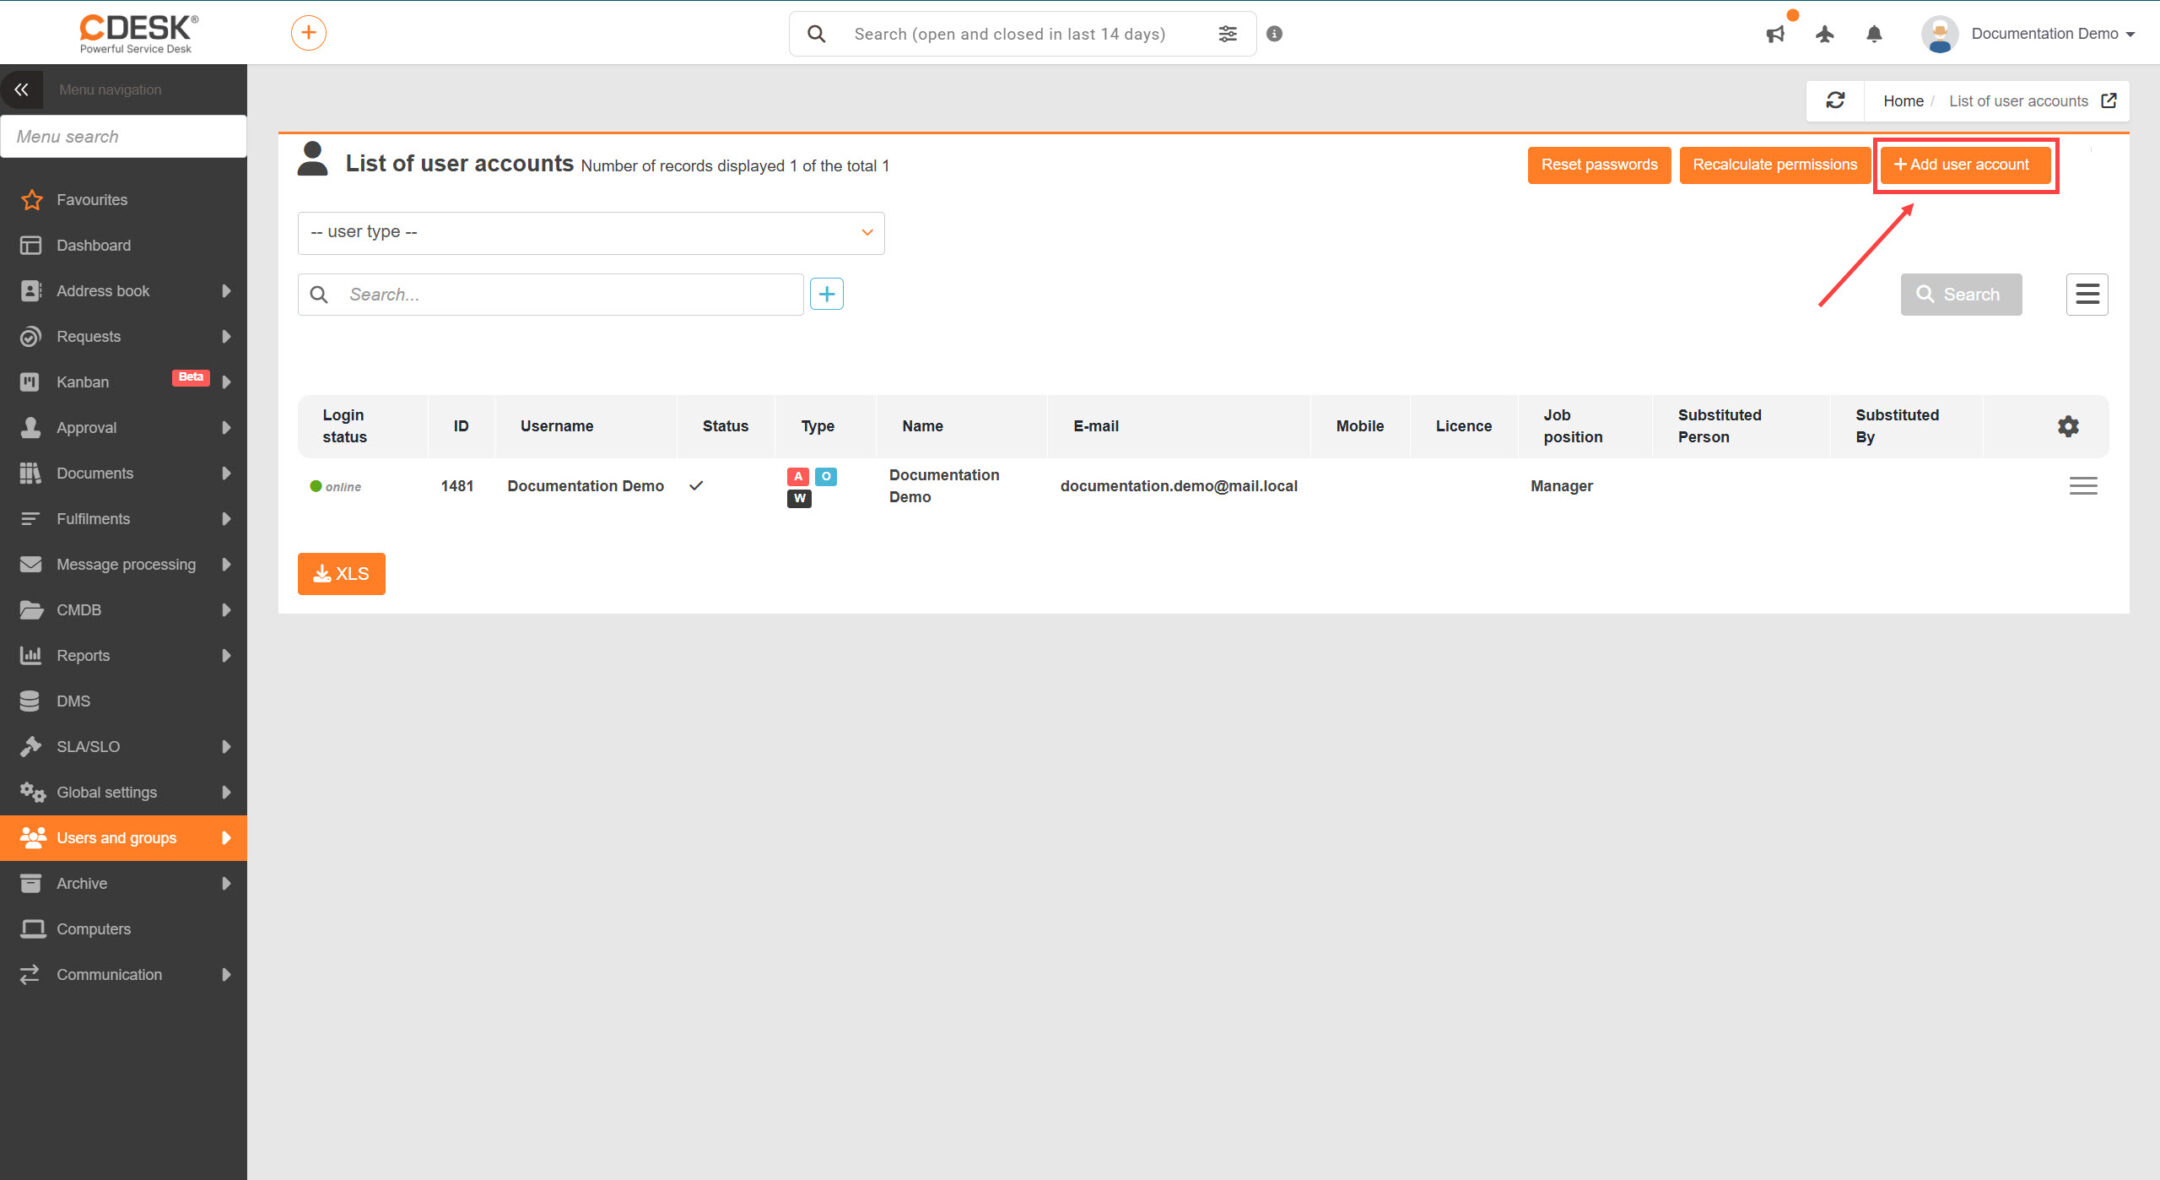
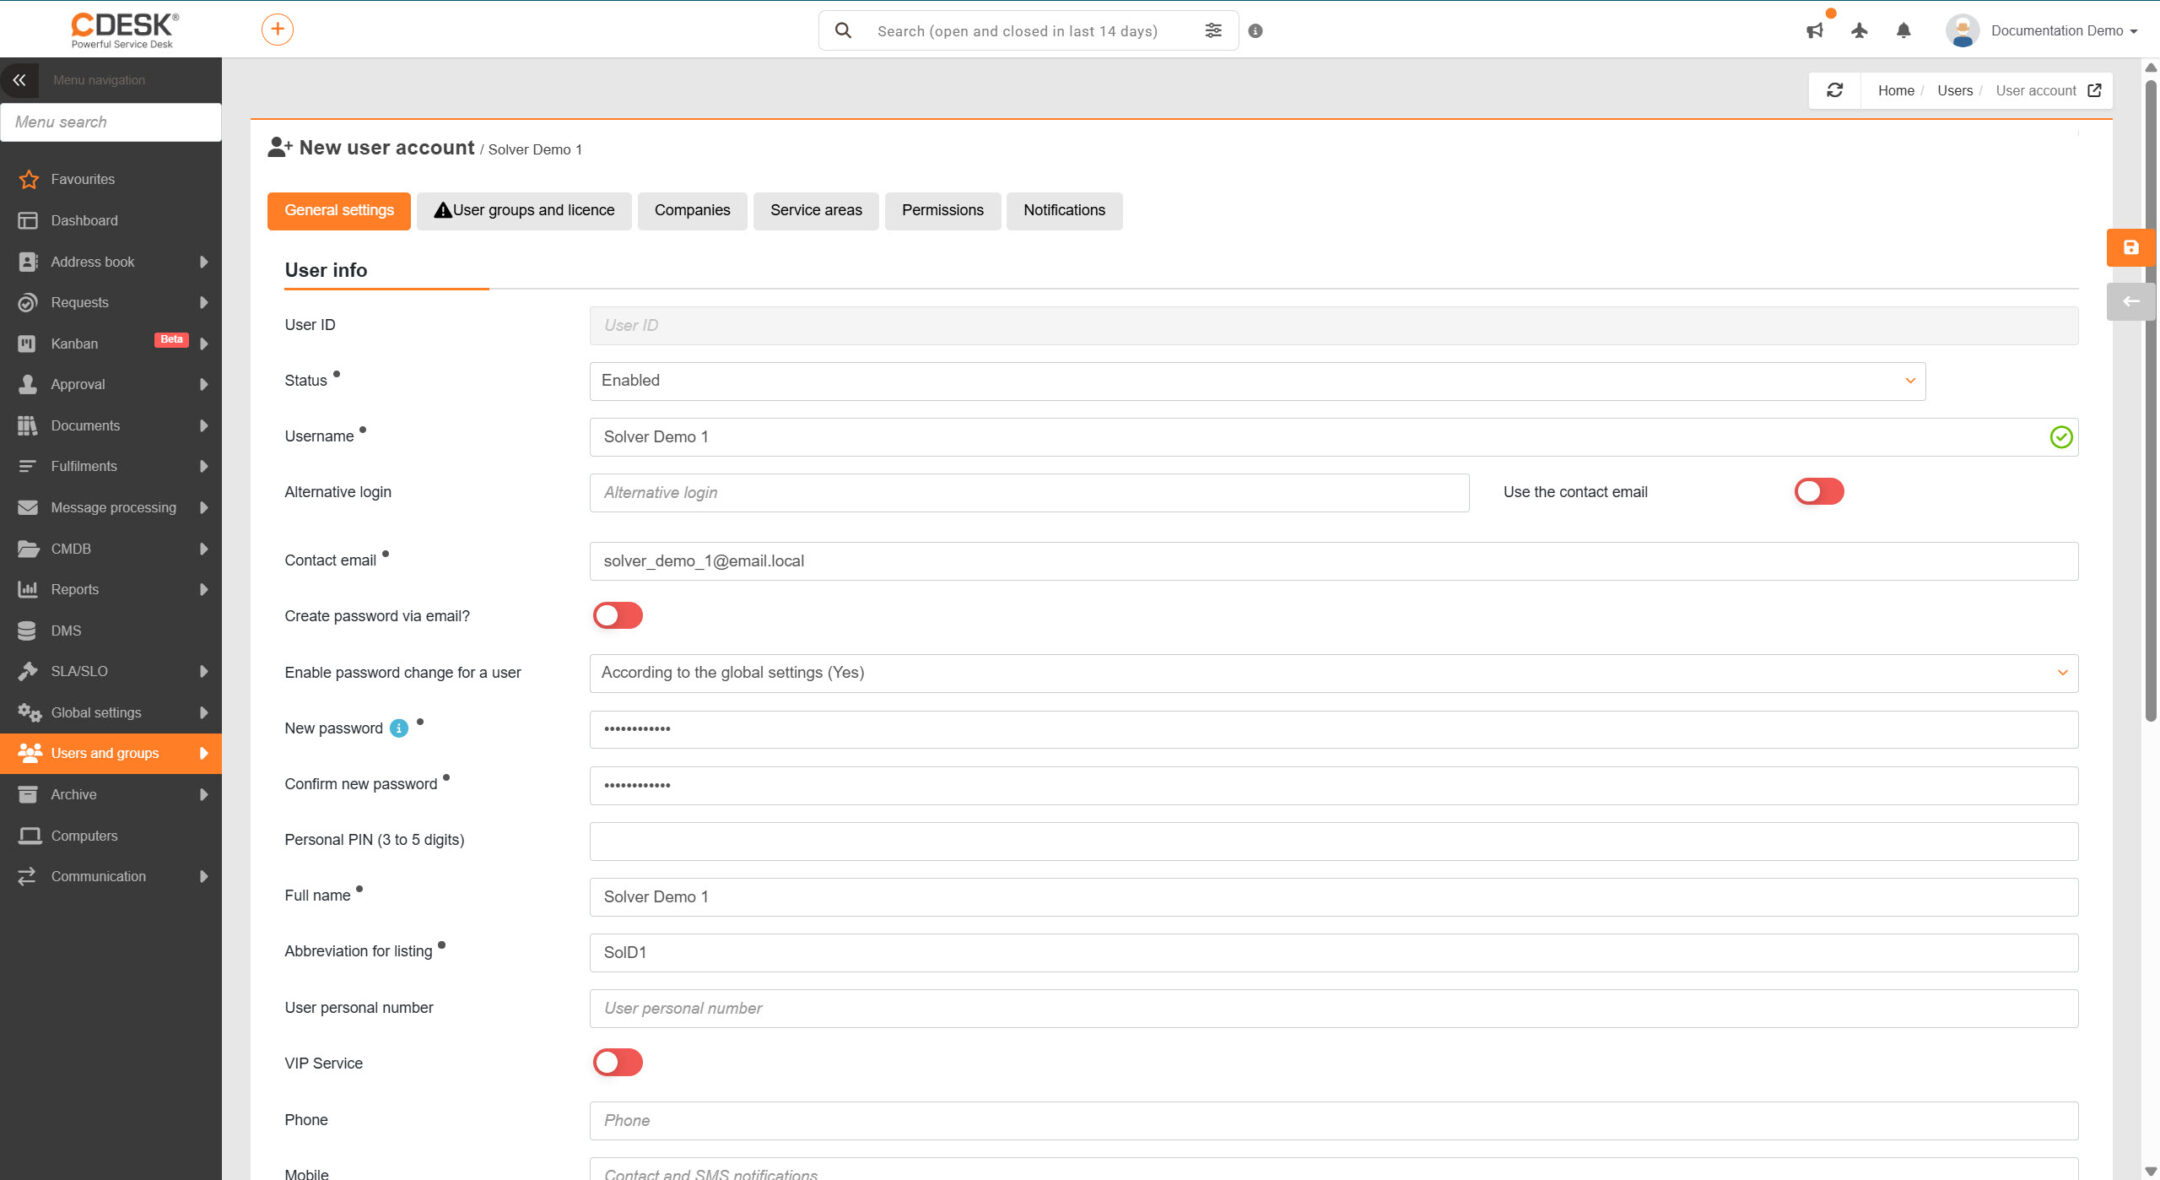
You can manage system users under Users and Groups → Users. To create a new user, click the button + Add User Account. After clicking, enter basic information such as name, contact email, password, job title, and other details.

Image: Button for creating a new user

After filling in the information on the General settings tab, proceed to the User groups and license tab, where you will assign the user to a specific user group. Note: You cannot create a user without filling in the information on this tab. To begin, assign the user to the Operator (OW) group. This will grant you most of the permissions required for the next steps in configuring the Requests module.

On the next tab, Companies, select the option Customer in the Visible companies by type section and in Optional assignee for other assignees by company type.

Image: Form for creating a new user

To create a user, click the Create button. Once the record is created, additional tabs with settings will become available for the user, including, for example, Permissions. You can return to these settings at any time and adjust them according to your needs. All necessary information is provided in the individual sections of the documentation.

Creating the first request

The Request Module allows you to handle your customers’ requests efficiently and clearly, while also providing you with an overview of your employees’ work.

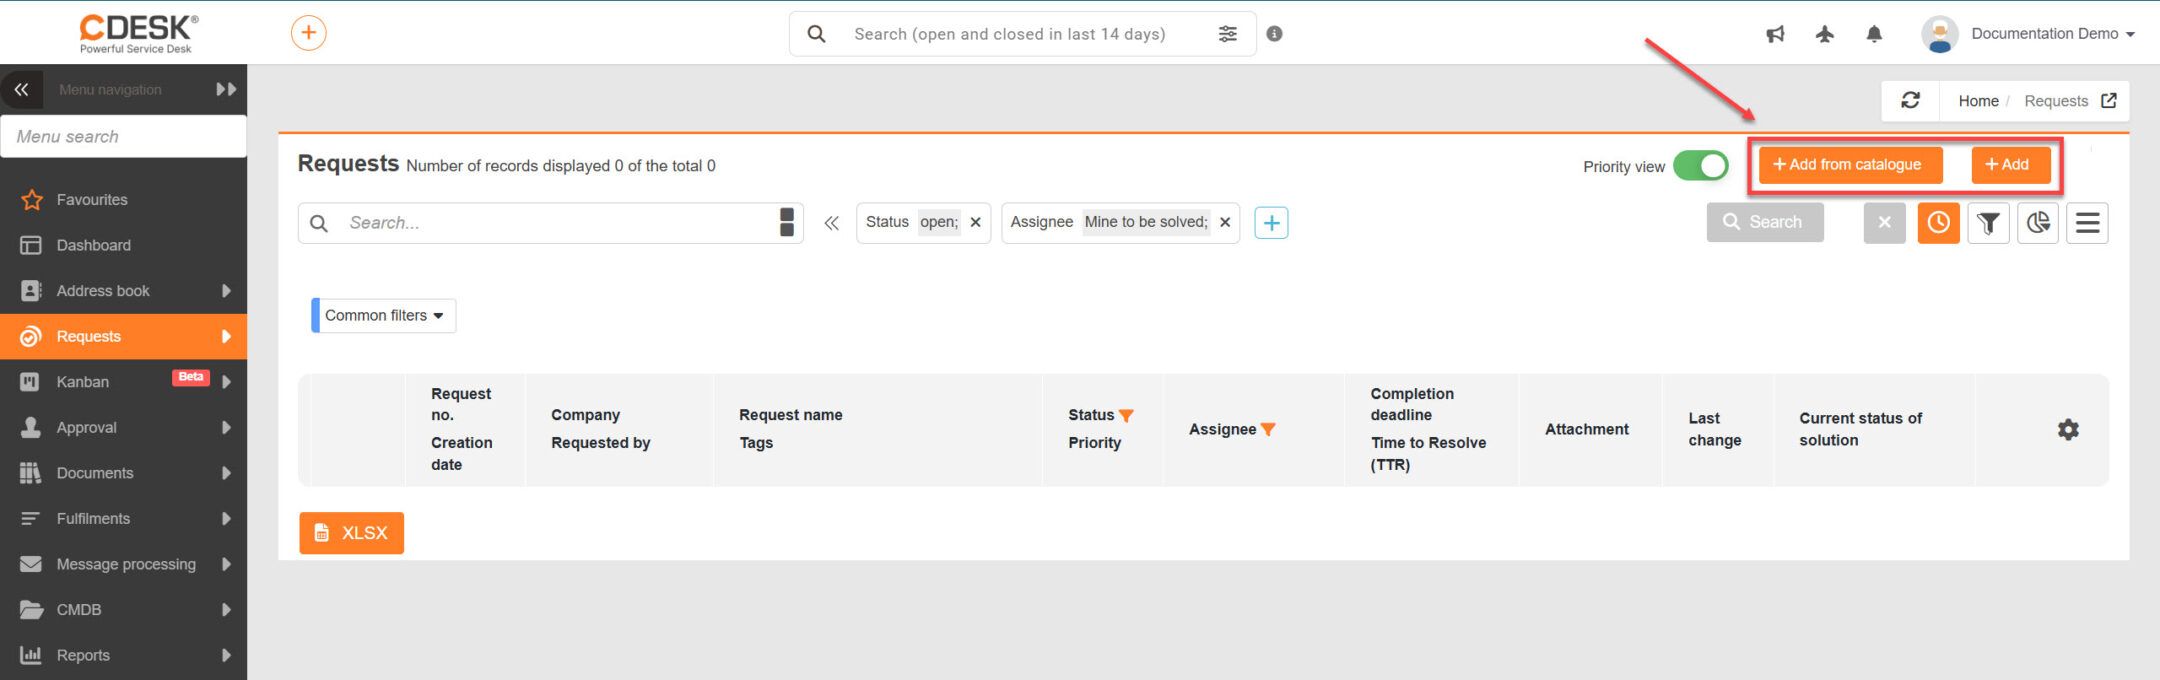
There are several ways to submit a new request. Directly from the list of requests (Requests → Requests section), the following methods are available:

  • + Add – creation of a request by a user logged into CDESK
  • + Add from catalog – creation of a request based on a predefined template from the catalogue of requests. This option is displayed if the catalogue of requests is enabled in Global Settings → Requests → Request Catalog.

Image: Buttons for submitting a request

You can also submit a new request by clicking the quick add button , which is available in the top bar of the web version of the system. The button is available in all parts of the system and is always displayed in the same location. After clicking the button, a list of options appears, including the option Add a request and Add a request from the catalog (depending on the system configuration).
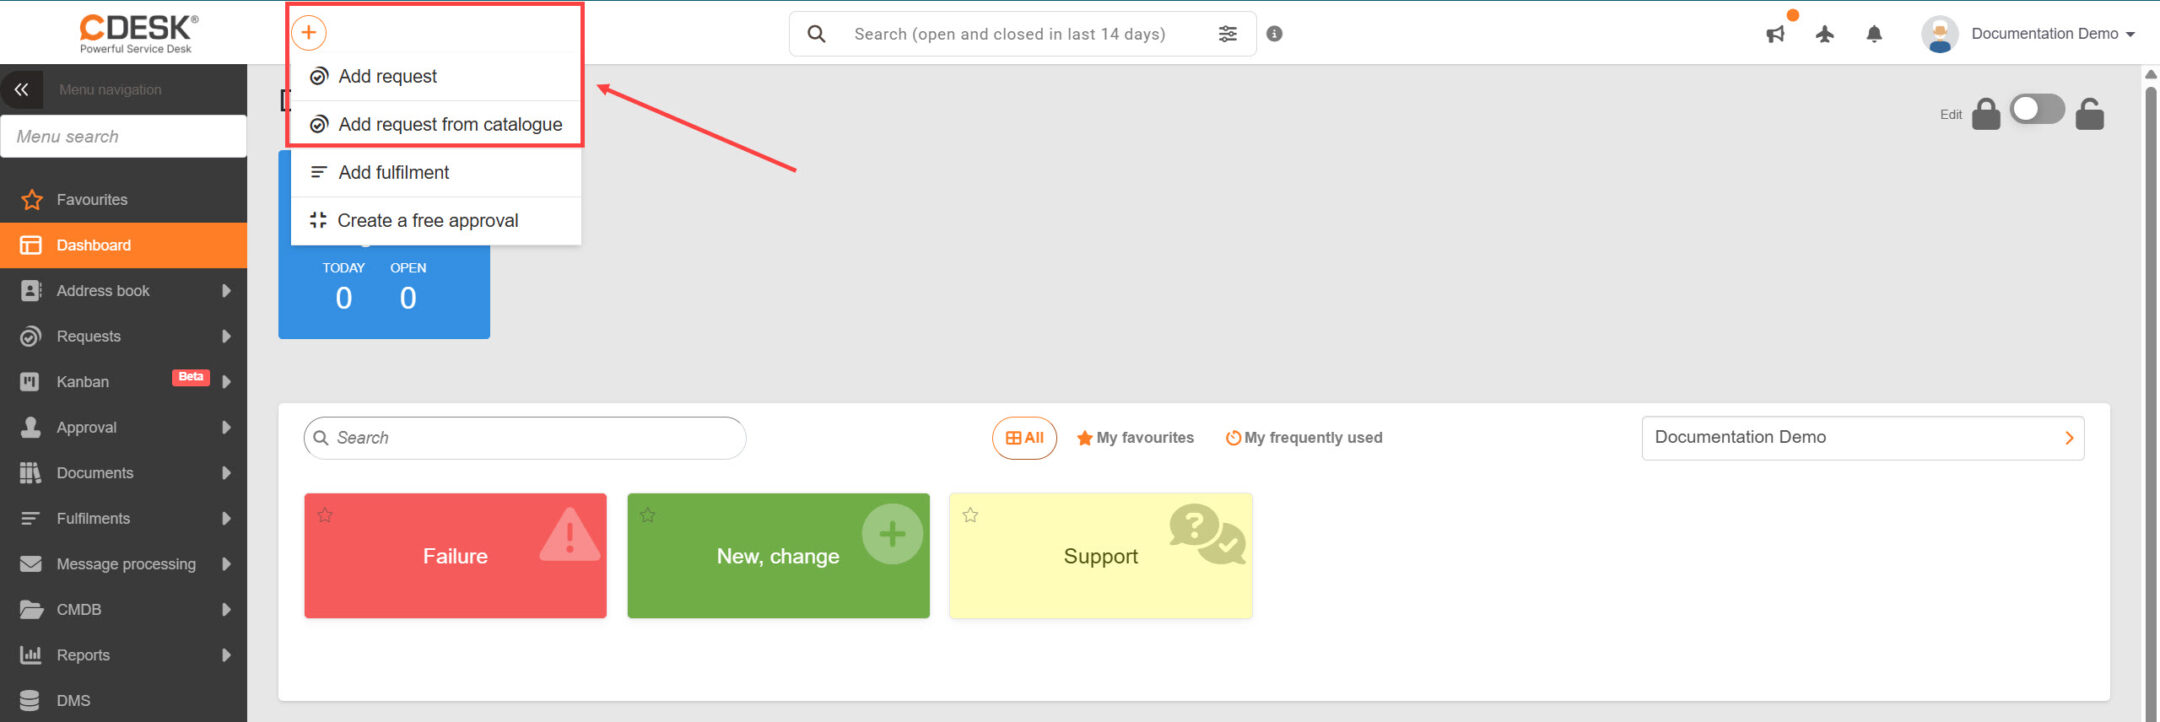
Image: Adding a request via Quick Add

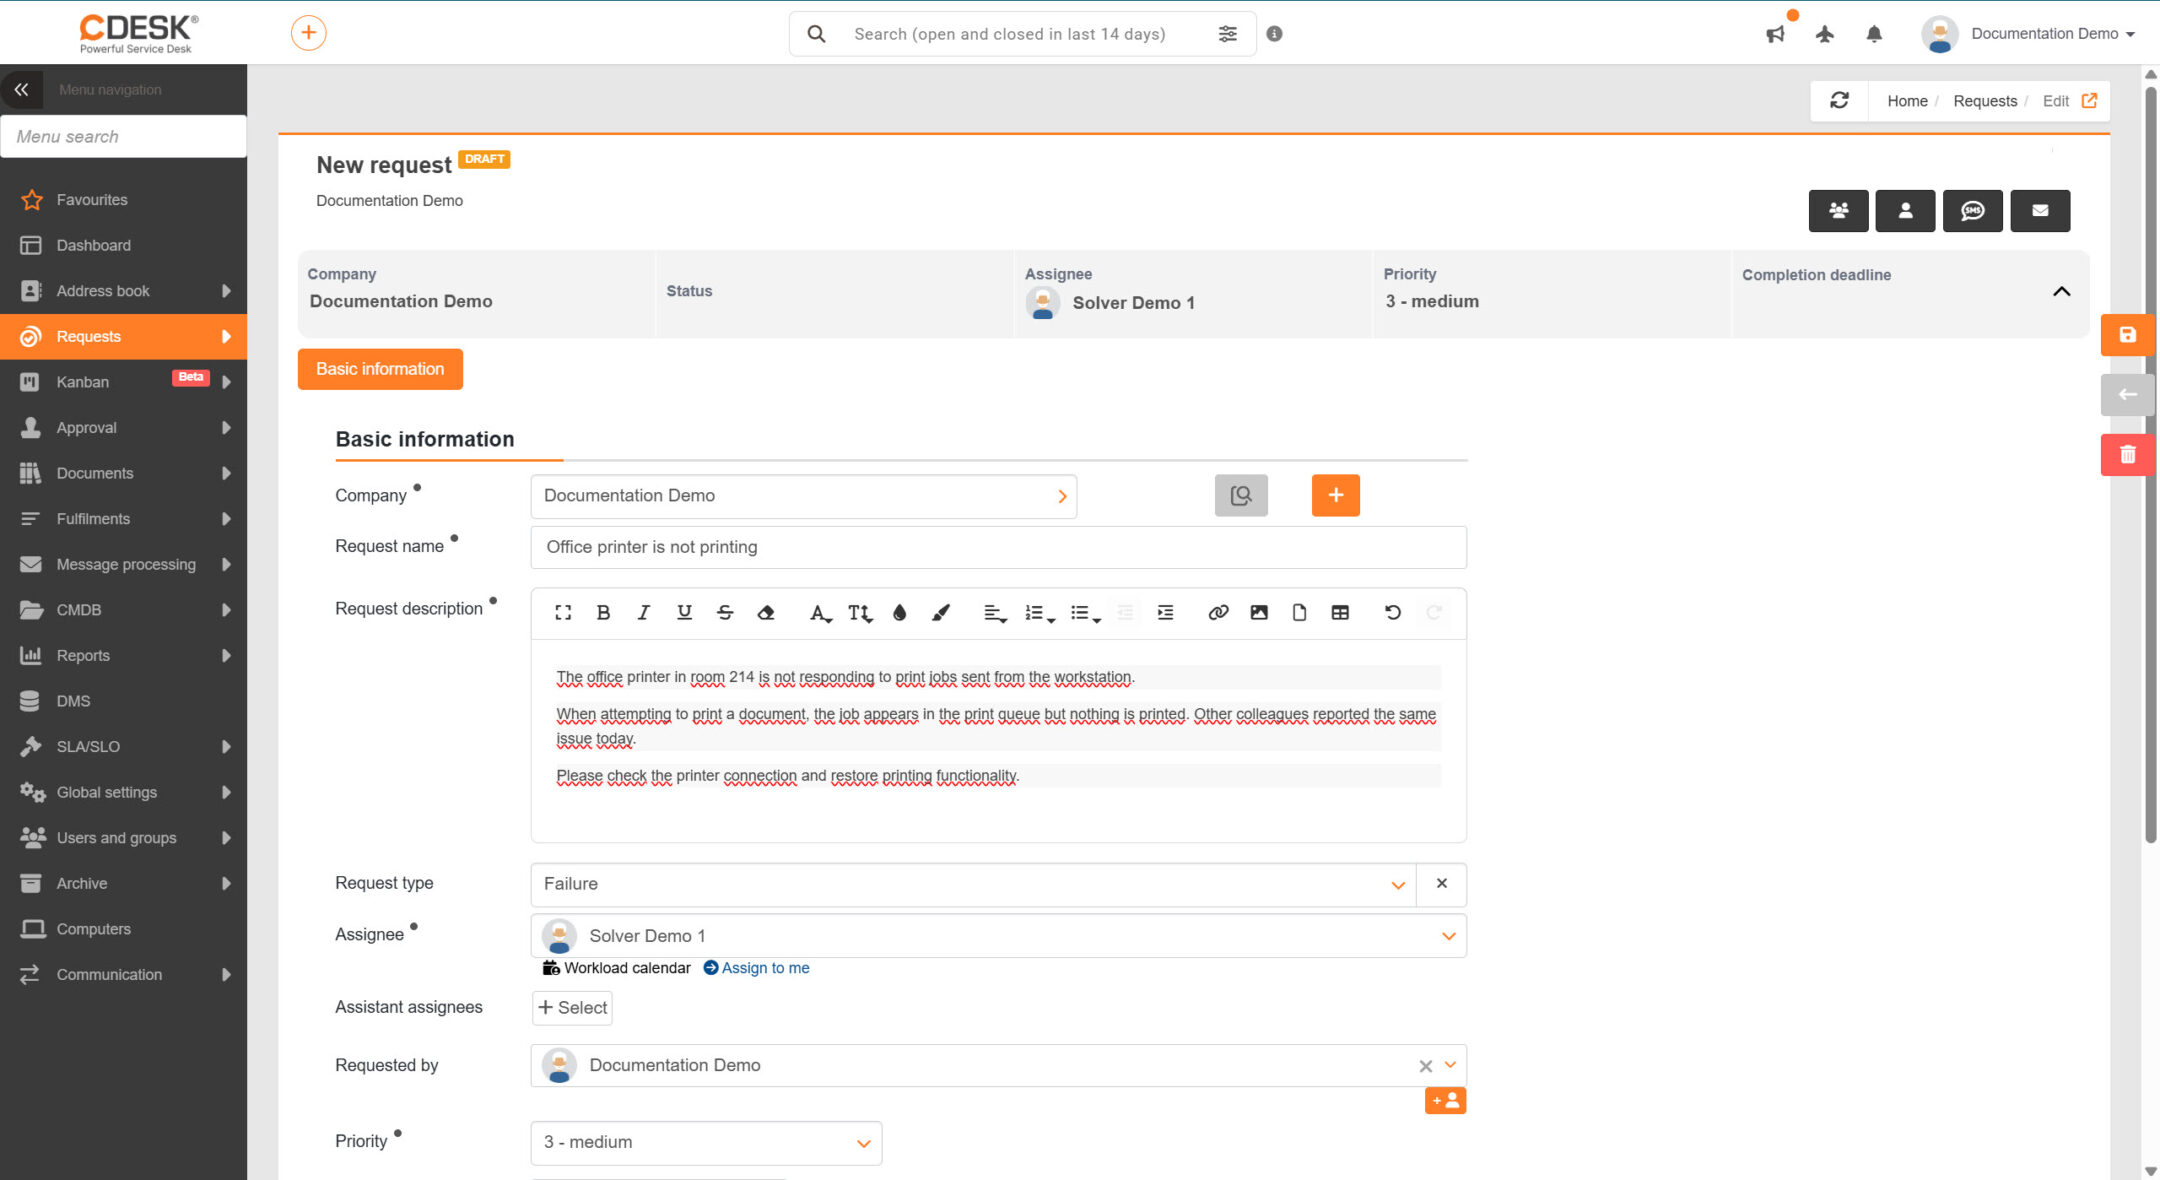
Clicking the button to create a request opens a new window with a form for entering the request. The purpose of each field is described in the section Meaning of the fields in the request form. When creating a request from the catalog, you must first select a template (tile) based on which the request will be created. Only tiles assigned to the requester’s company are available for selection. After clicking on a tile, a form for creating a request opens. Depending on the template settings, some fields are pre-filled, while others may be hidden. This topic is covered in detail in the documentation section Request Catalog.

Image: Request form

Additional options for working with requests, including other ways to create requests (via email, CUSTOMER MONITOR, etc.), are described in the documentation section Requests.

Adding a post to the discussion

The discussion thread for a request is used to communicate with the customer and third parties. Internal discussions among team members are hidden from the customer.

When you open an existing request in the request list, you will find the Discussion tab among the tabs. Opening these tabs displays the existing discussion posts. Above the posts, you will find the buttons + Customer Discussion and + Internal Discussion for adding a discussion post. The posts in the discussion are also distinguished by the color of these buttons—posts in communication with the customer are highlighted in green, and posts in the internal discussion are highlighted in blue. For more details on the discussion, see the documentation section Working with an existing request from the assignee’s perspective and Actions on an existing request from the customer account.

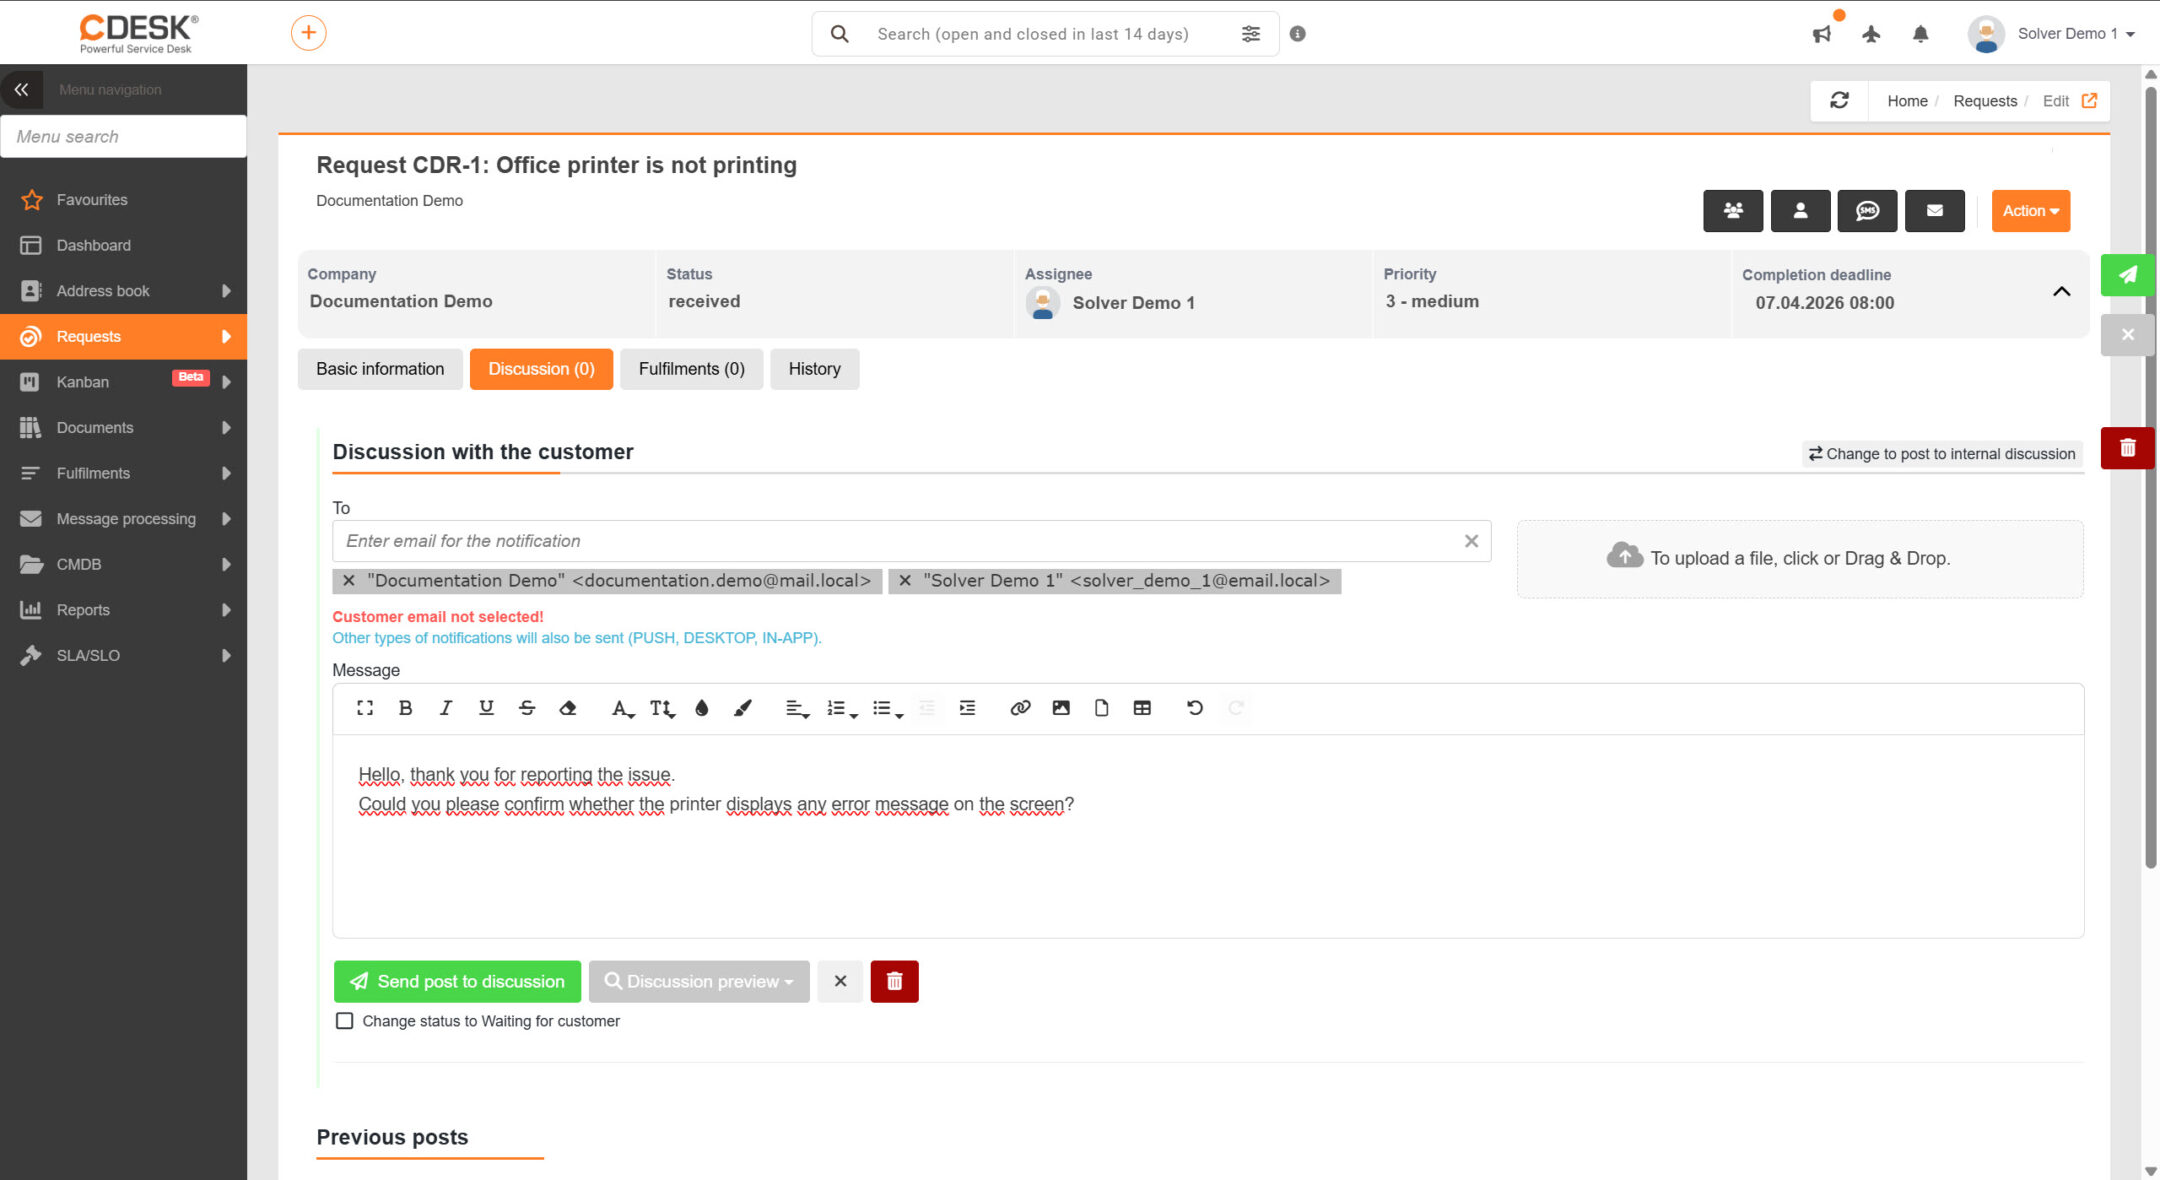
In this case, you have not yet created any discussion posts. Since communication takes place only within your company (without the participation of an external customer), the choice of discussion post type is not important. For a demonstration, select the option + Discussion with a customer and enter the post message.

Image: Form for adding a comment to a discussion in a request

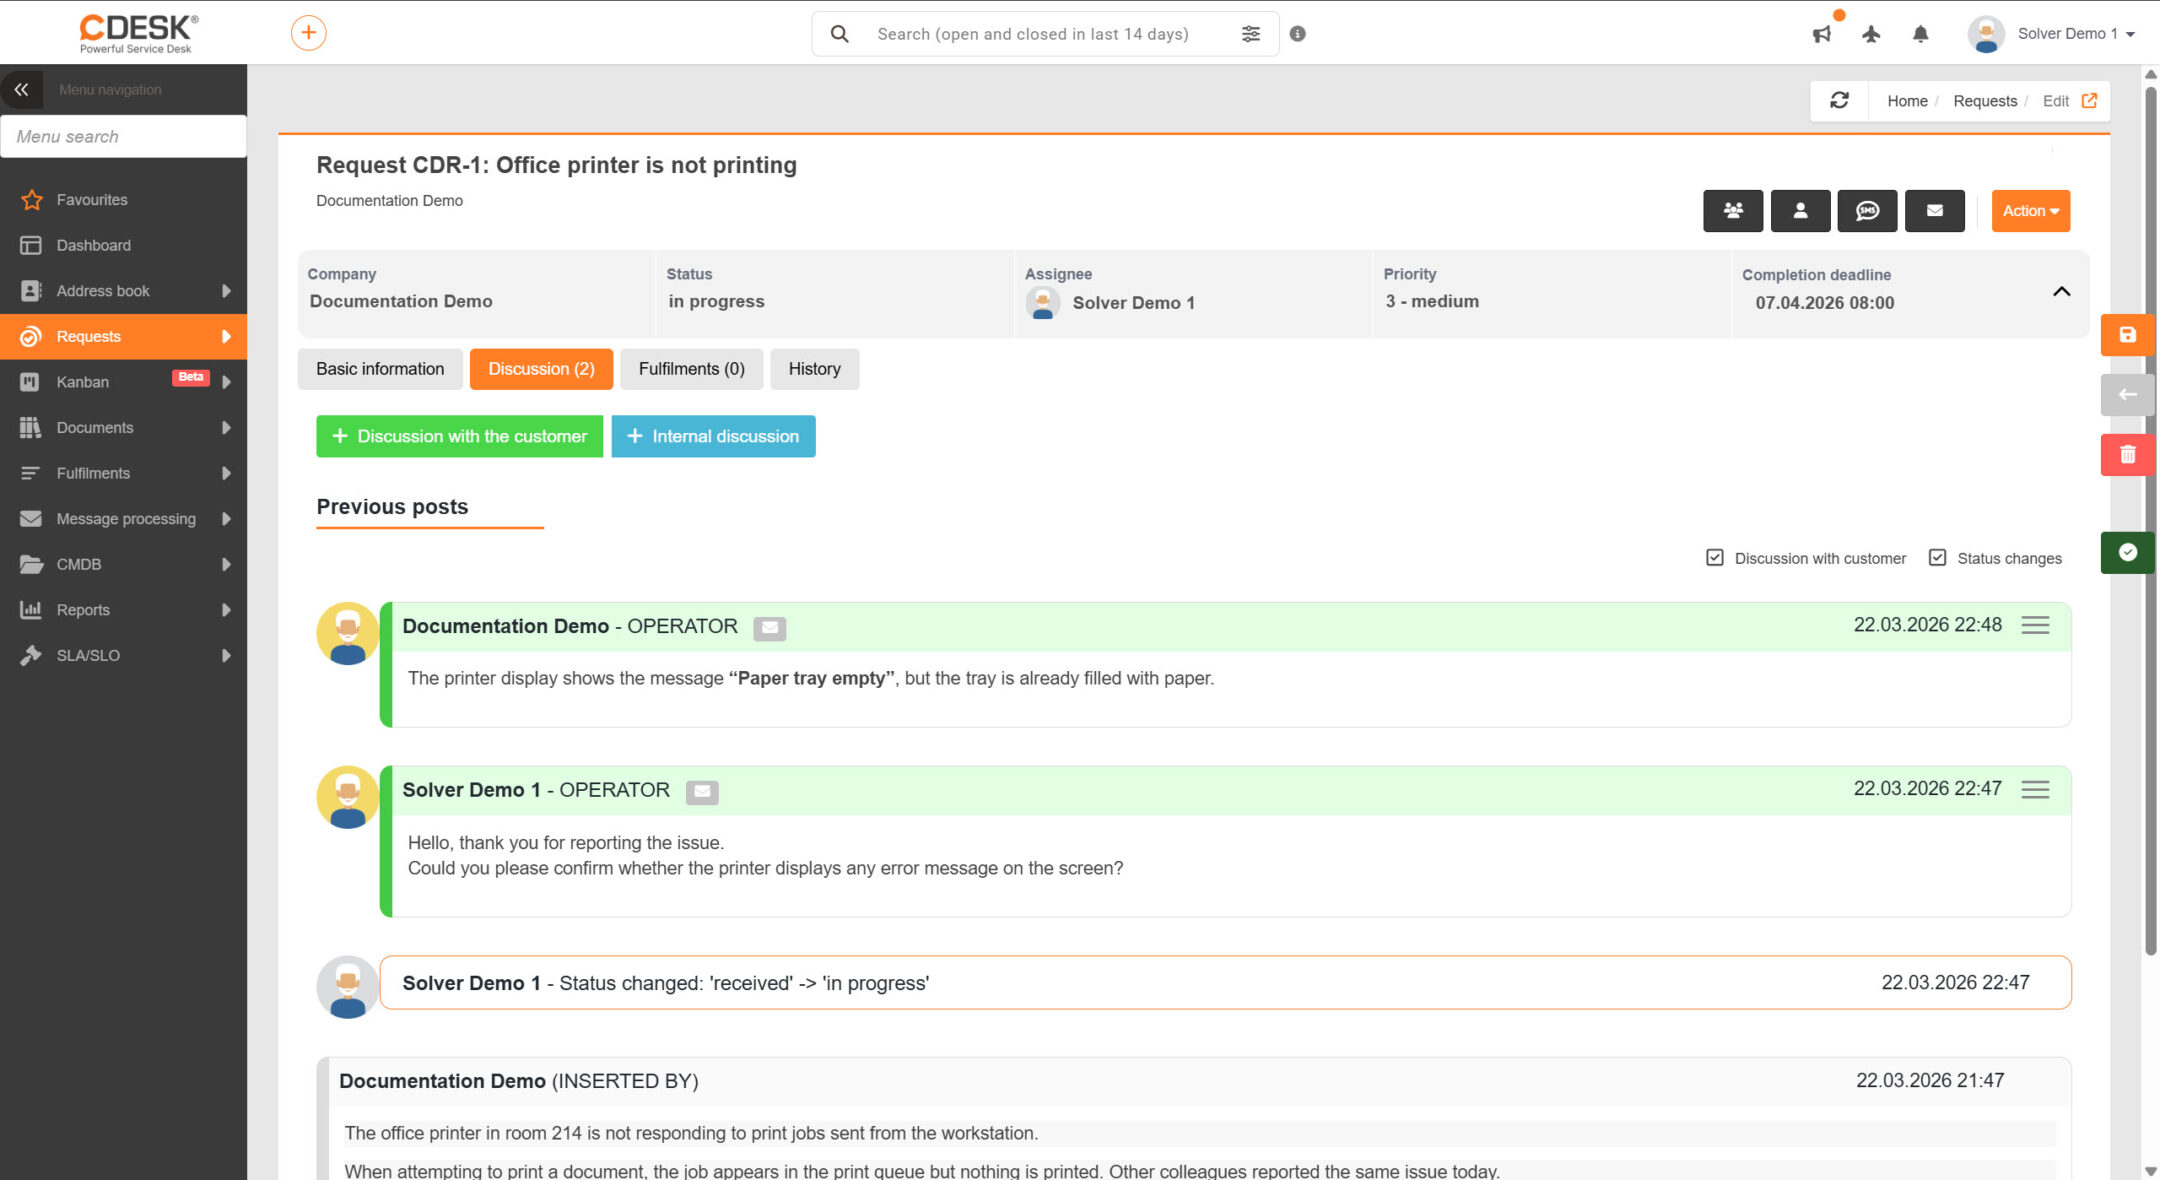
To post a comment, click the Send discussion post button.

Image: Preview of the discussion on the request details

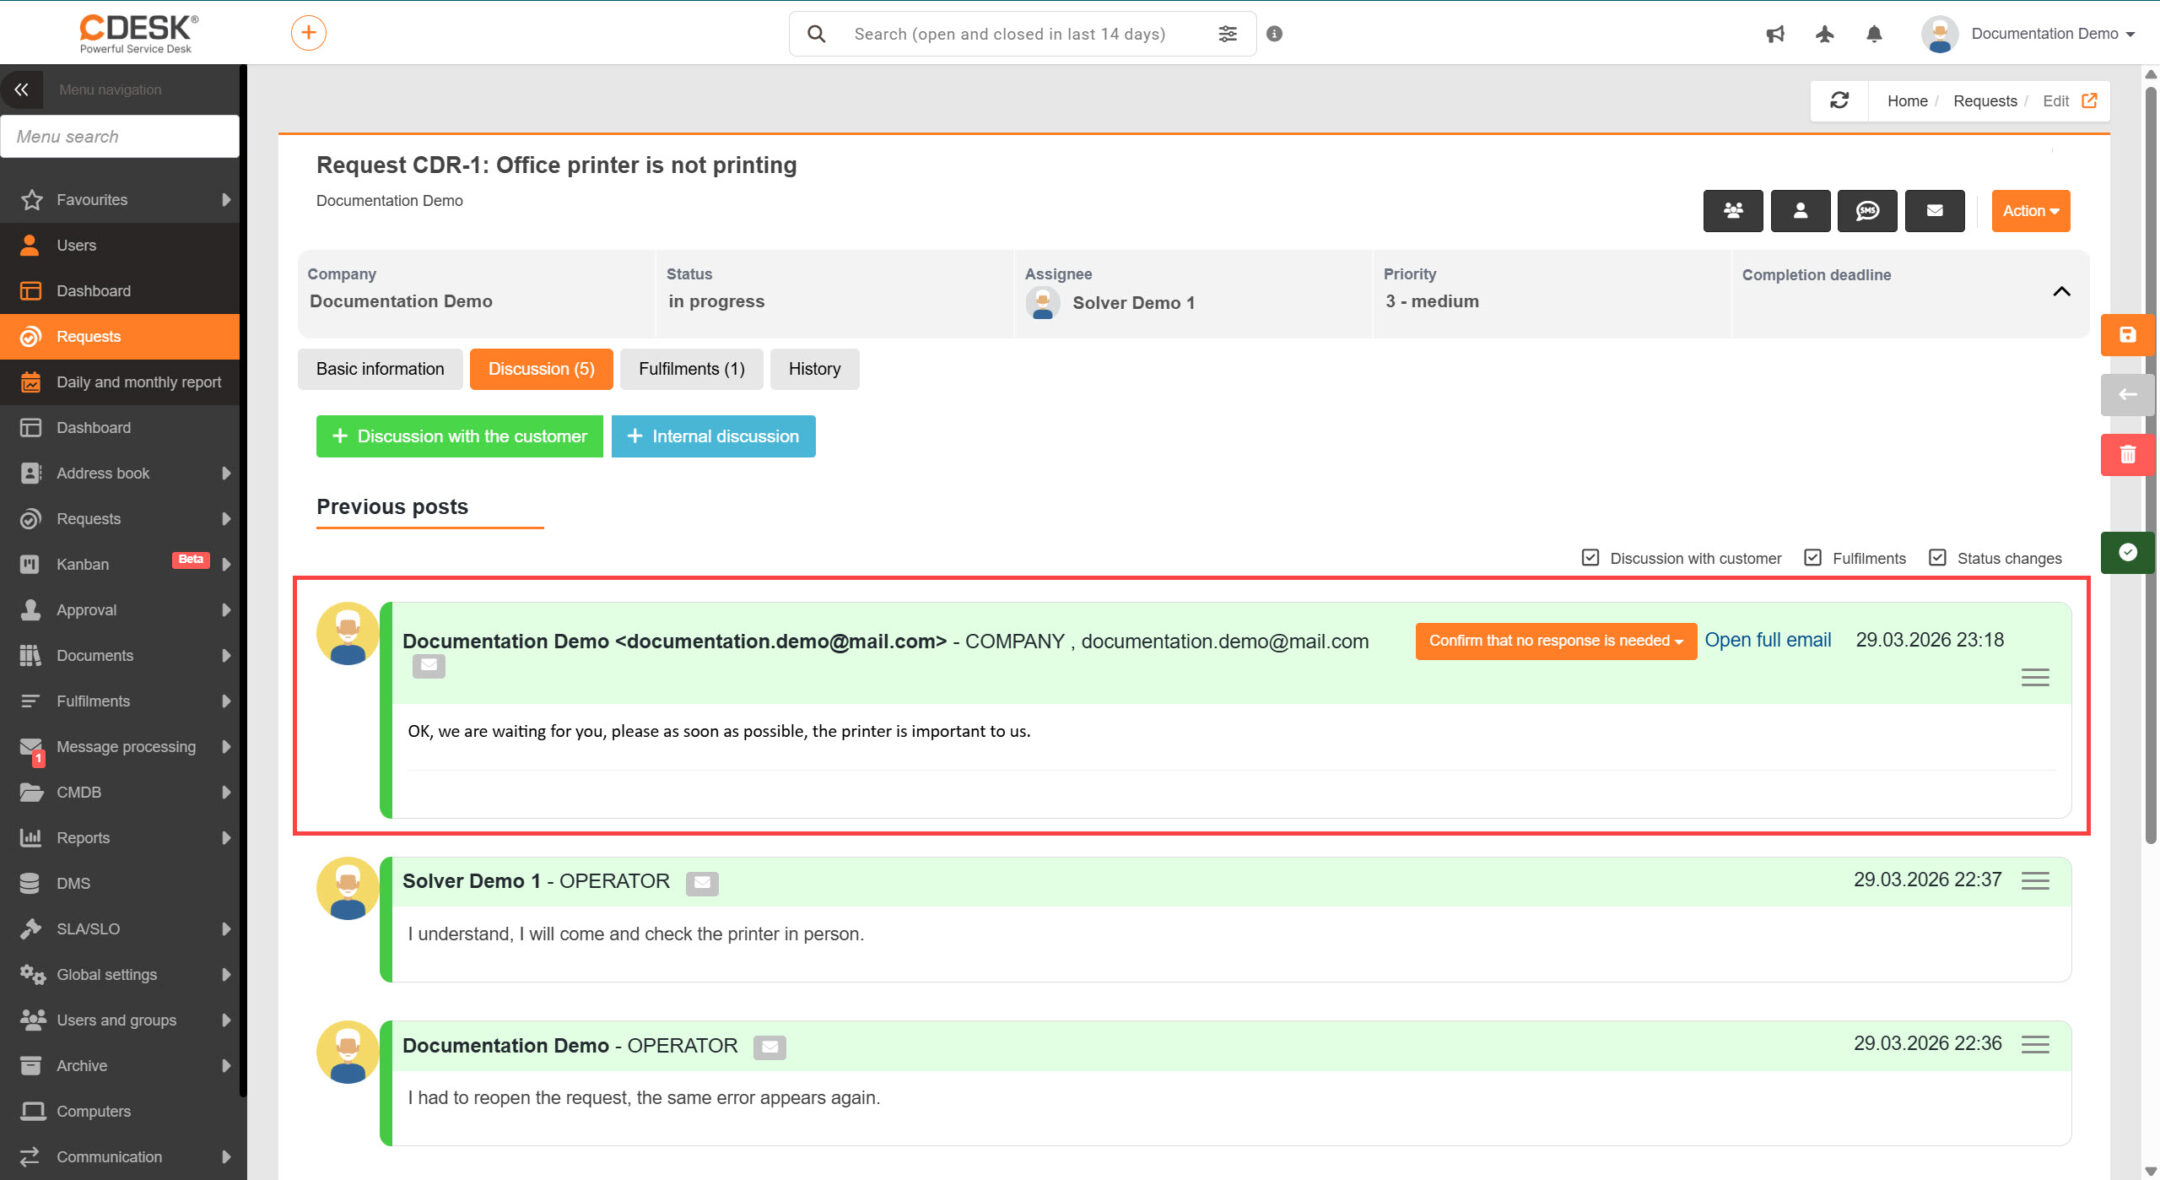
When you register an environment, an email address is automatically assigned to handle message processing. In practice, this means that when you reply to such an email, the CDESK system processes the message as a specific record type (e.g., a discussion post) based on a specific code that is automatically included in the email subject line. For detailed information, see the Message Processing section of the documentation.

The recipient of a discussion post will receive an email containing its content. Using this email, you can:

  • view the request details by clicking the button Join the discussion,
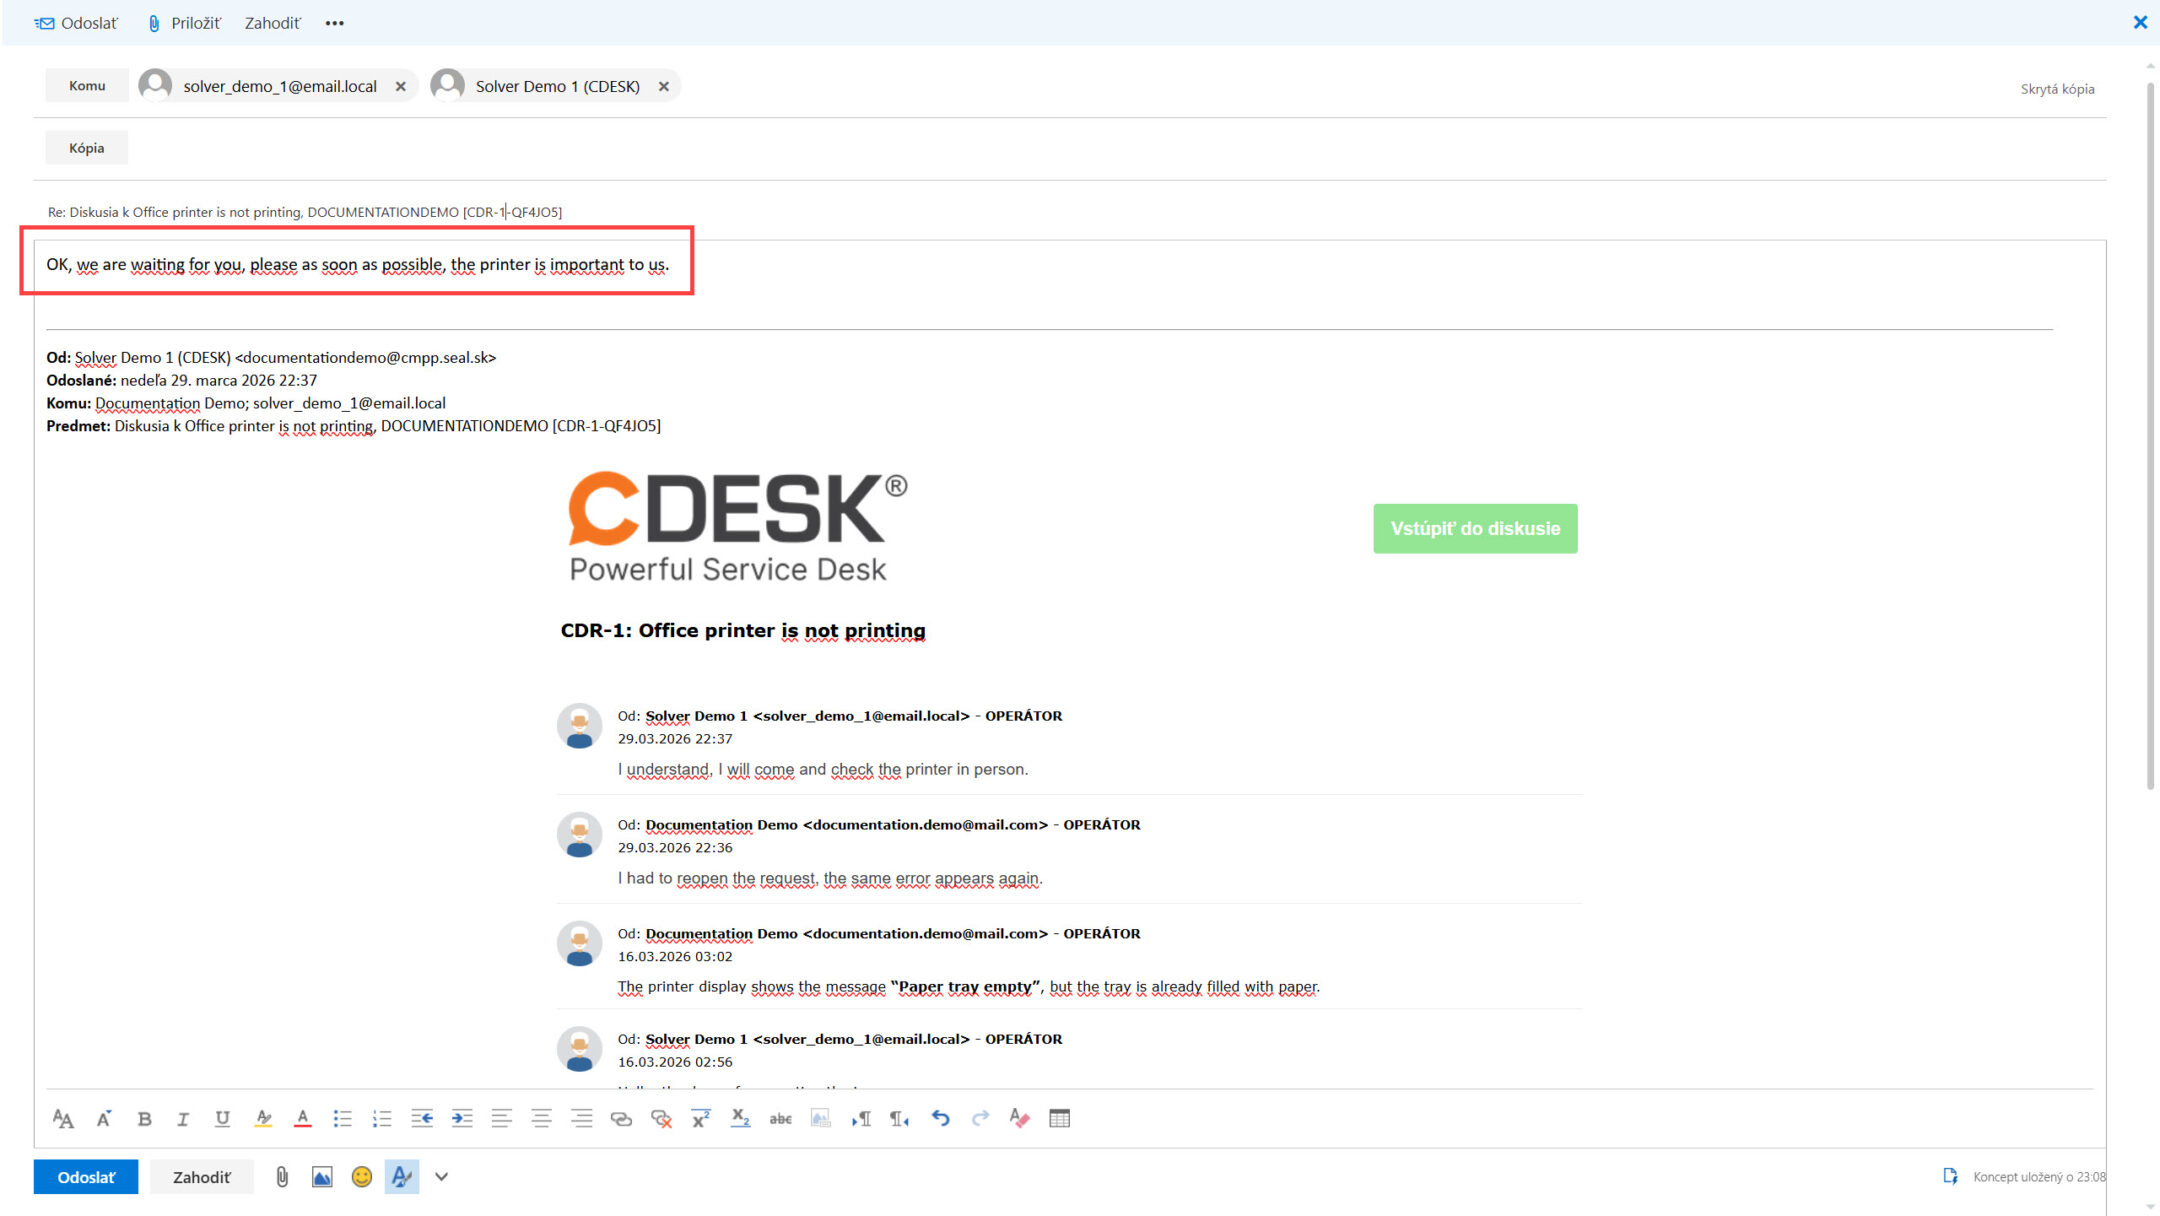
  • reply directly to the email; this reply will be processed as a discussion post within the request.
Image: Reply to an email about a discussion post

Once the email is sent, the reply will be processed as another discussion post in that request (processing takes approximately 5 minutes).

Image: Discussion in the request after the email response has been processed

Recording the first fulfilment

In CDESK, fulfilments are used to track work performed, time spent, and other costs incurred when handling requests, tasks, projects, or project deals.

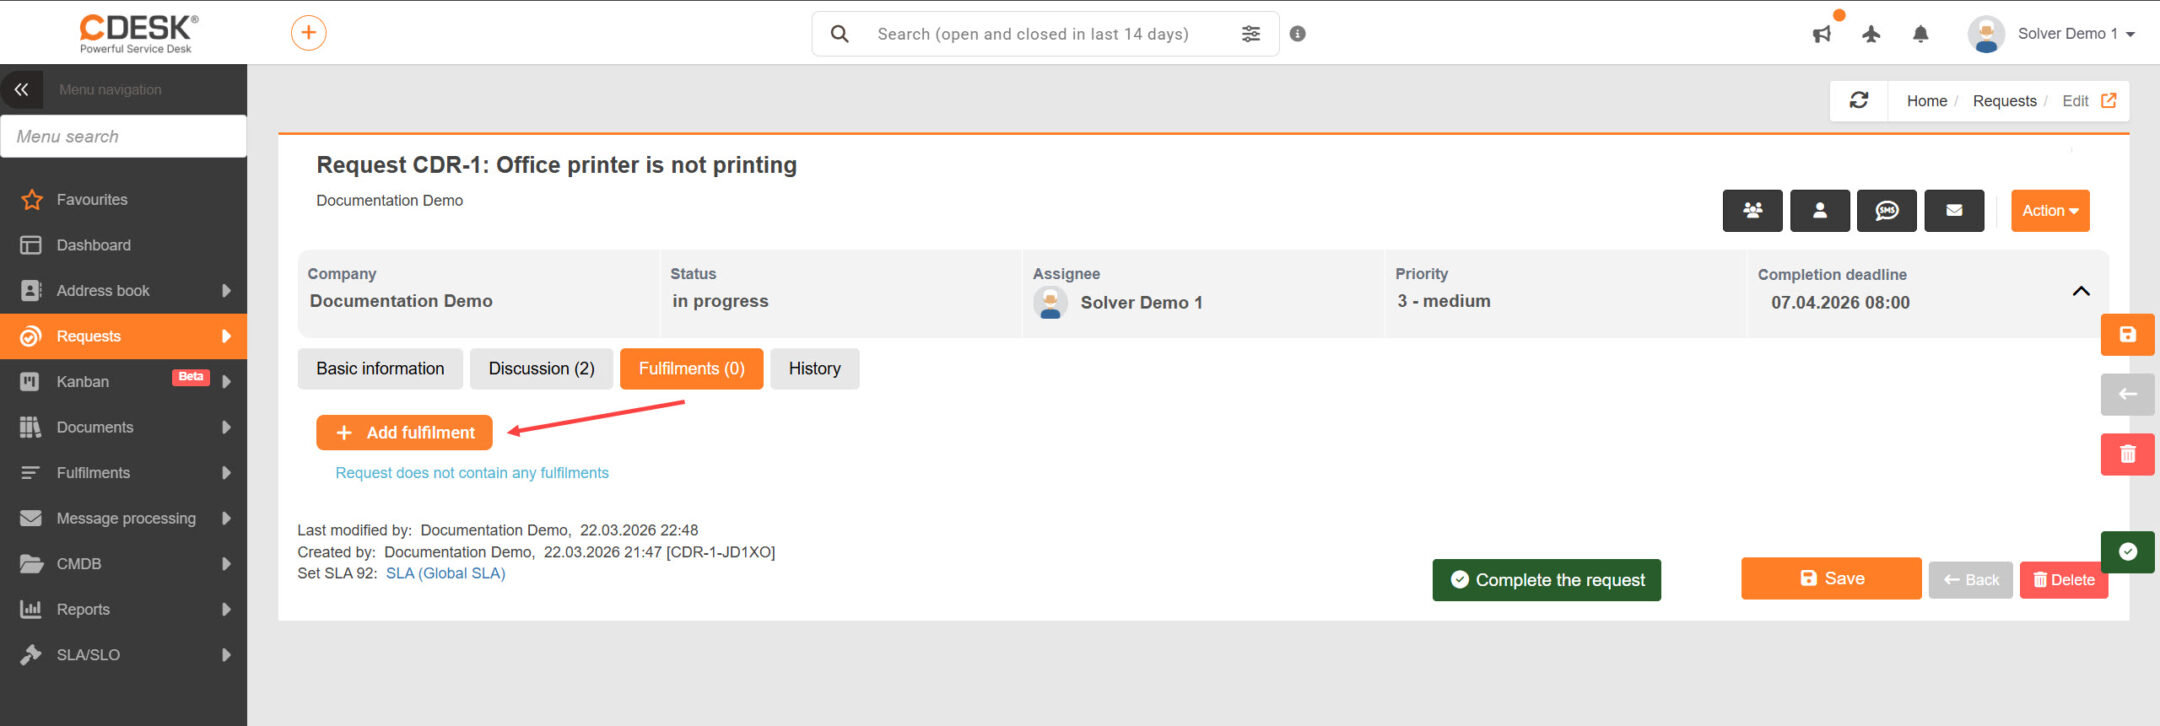
Like requests, fulfilments can be created in several ways. Directly in the fulfilment list, you can create a new billing fulfilment by clicking +Add fulfilment. Another option is to add fulfilments directly from a request detail, on the Fulfilments tab.

Image: Adding a fulfilment in the request details

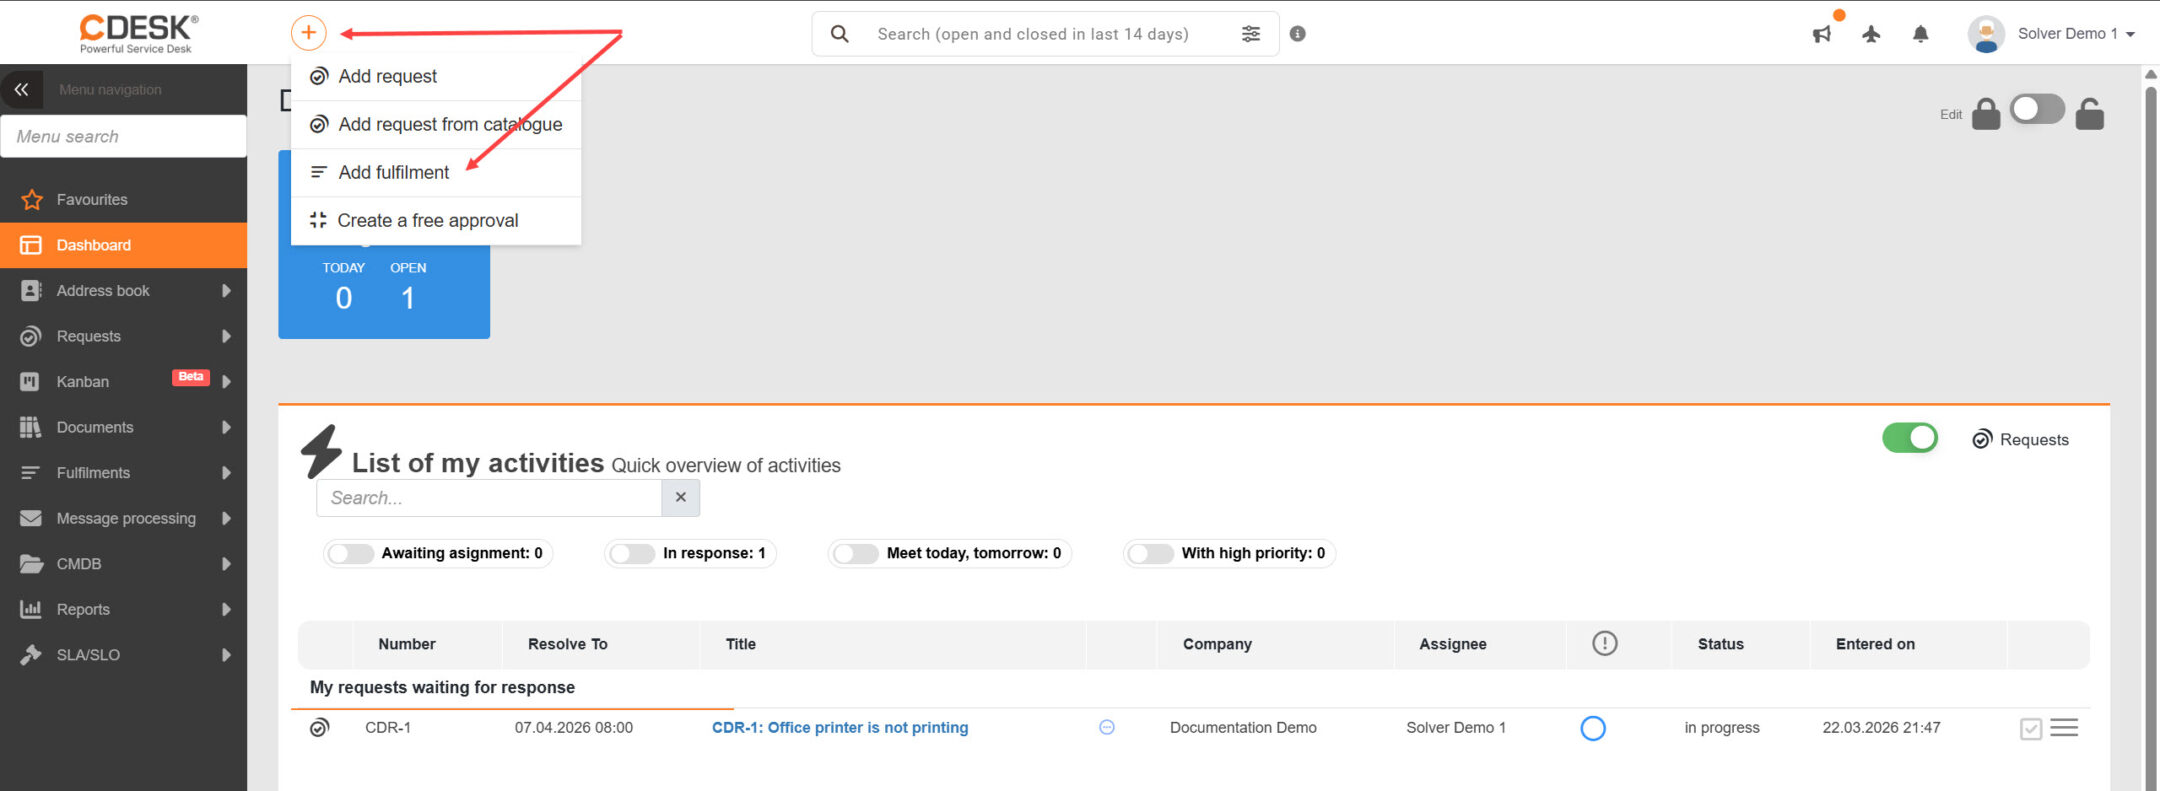
You can also enter a new fulfilment by clicking the button for quick addition, which is available in the top bar of the web version of the system. The button is available in all sections of the system and always appears in the same location. After clicking the button, a list of options will appear, including the option Add Fulfilment.

Image: Adding a fulfilment via the Quick Add button

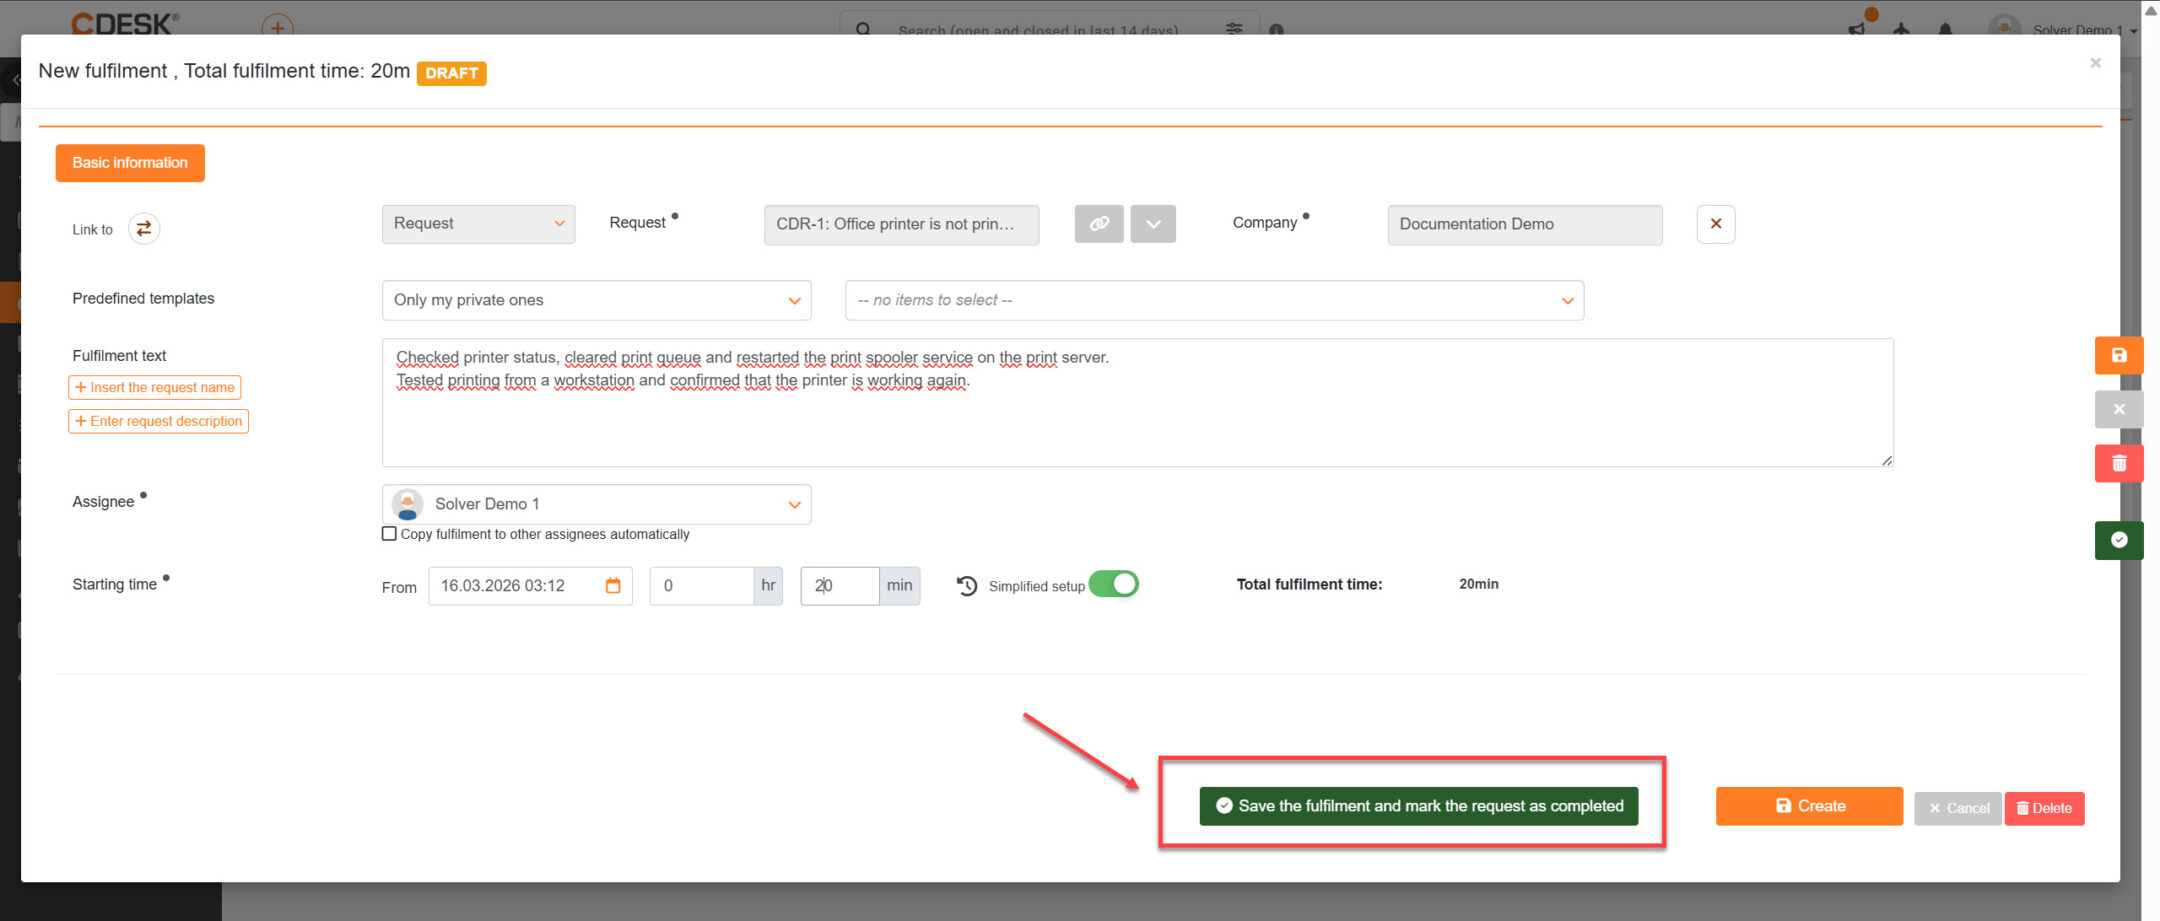
Clicking the button to create a payment will open a new window with a form for entering payment details. The purpose of each field is described in the section Meaning of the fields in the fulfilment form. In the form, you must fill in the following fields in particular: Link to, Task text, Assignee, and Start time. The Link to field can be filled in two ways—by searching for a record or by selecting the link type and then choosing a specific record. You can change the link selection method by clicking the icon next to the field name.

Image: Form for adding a fulfilment

To create a fulfilment, click the Create button. Once created, the fulfilment will appear in the List of fulfilments and also in the request details on the Fulfilments tab. If the resolution of the request is complete, clicking the Save Resolutions and Close Request button allows you to automatically close the request along with creating the resolution. In our case, we will use this option and click the button; the selection must be confirmed by clicking the button again.

Acceptance of Completion and Evaluation of the Assignee

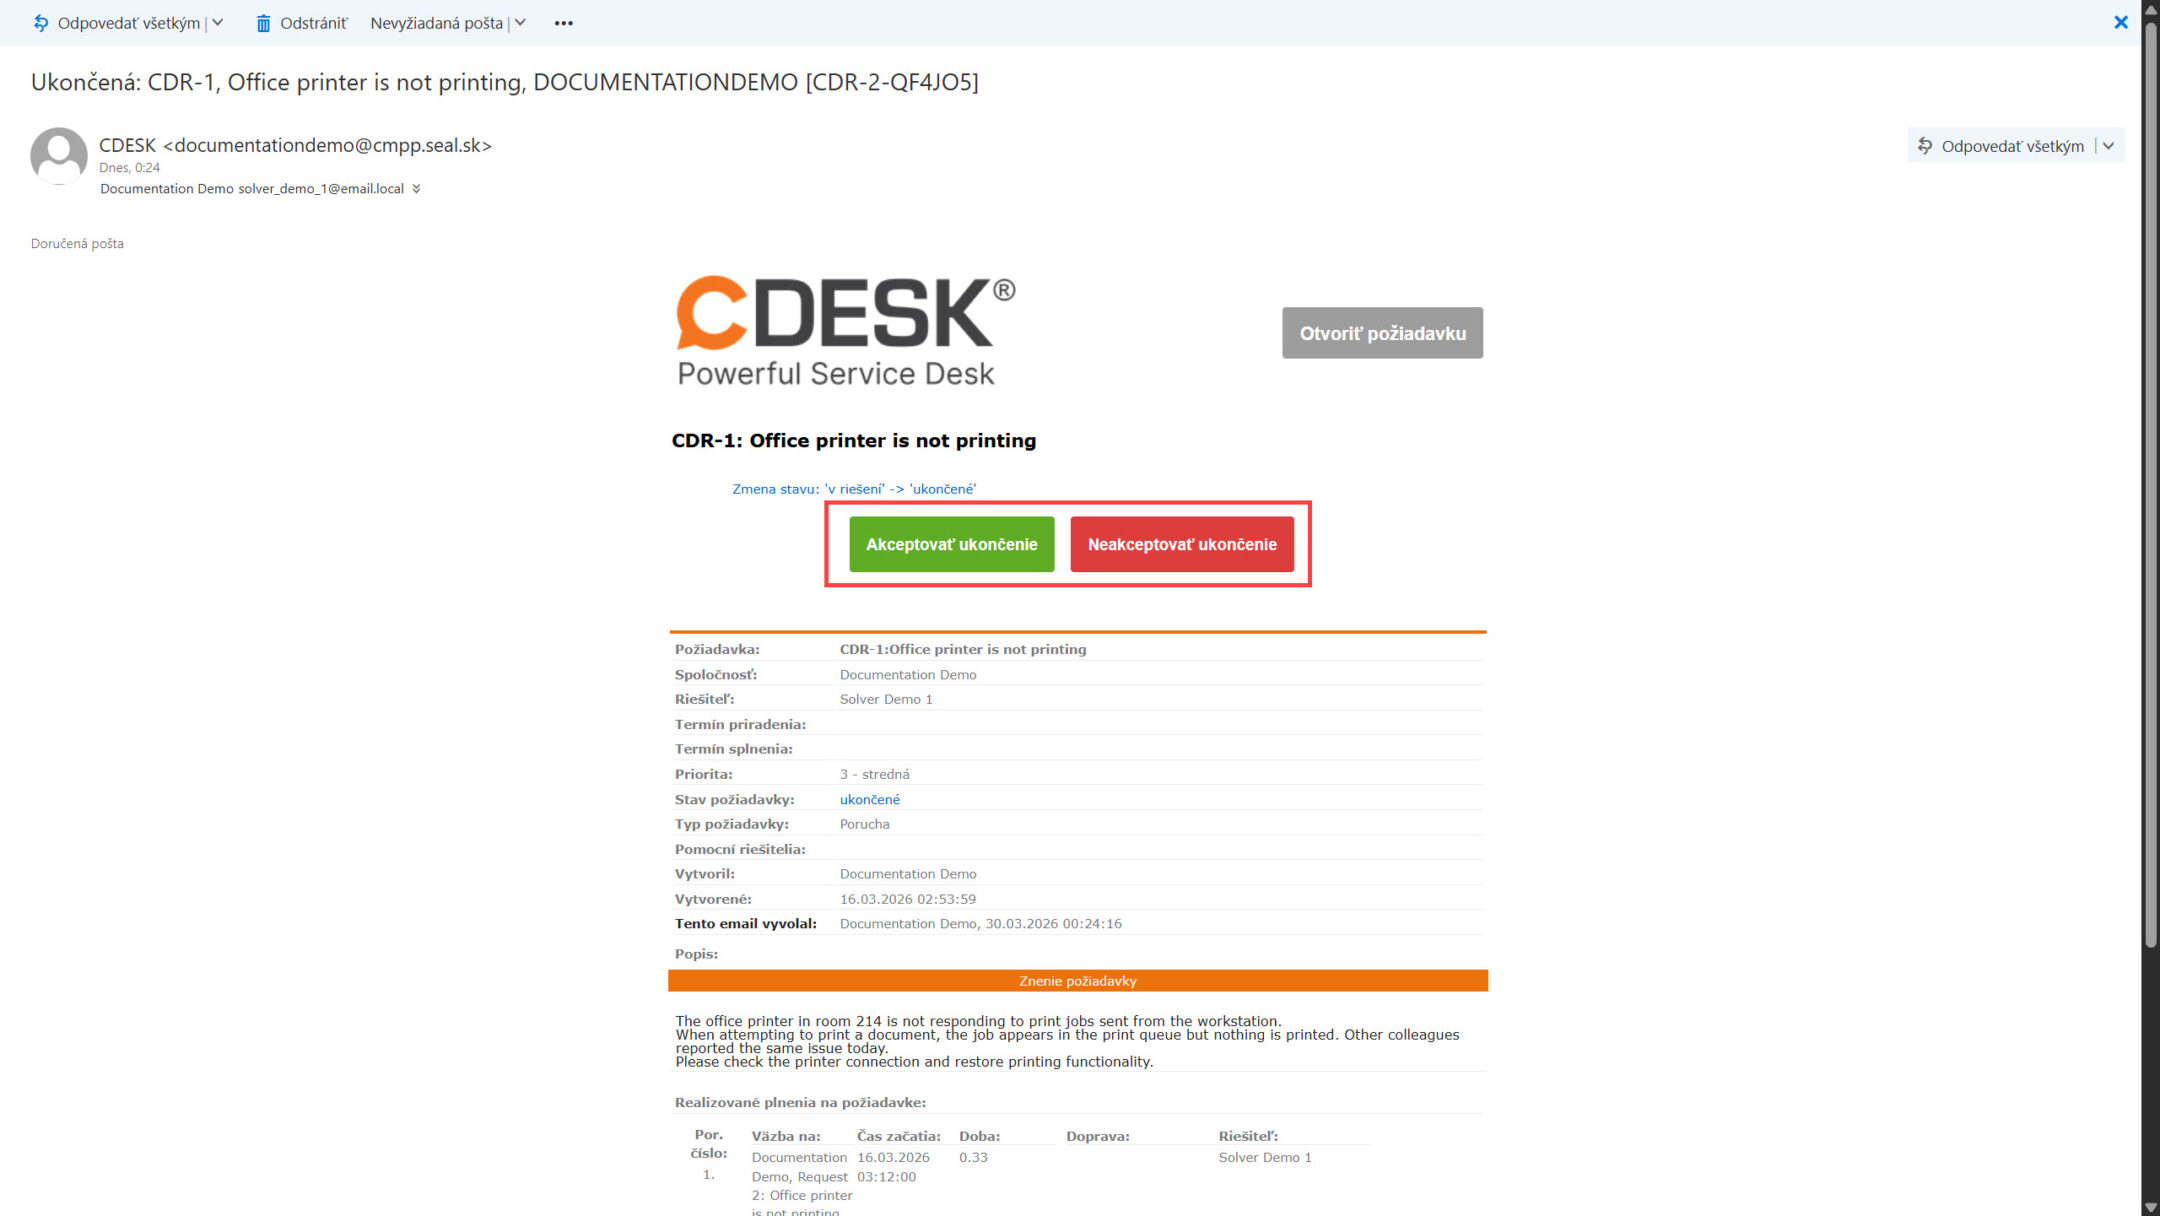
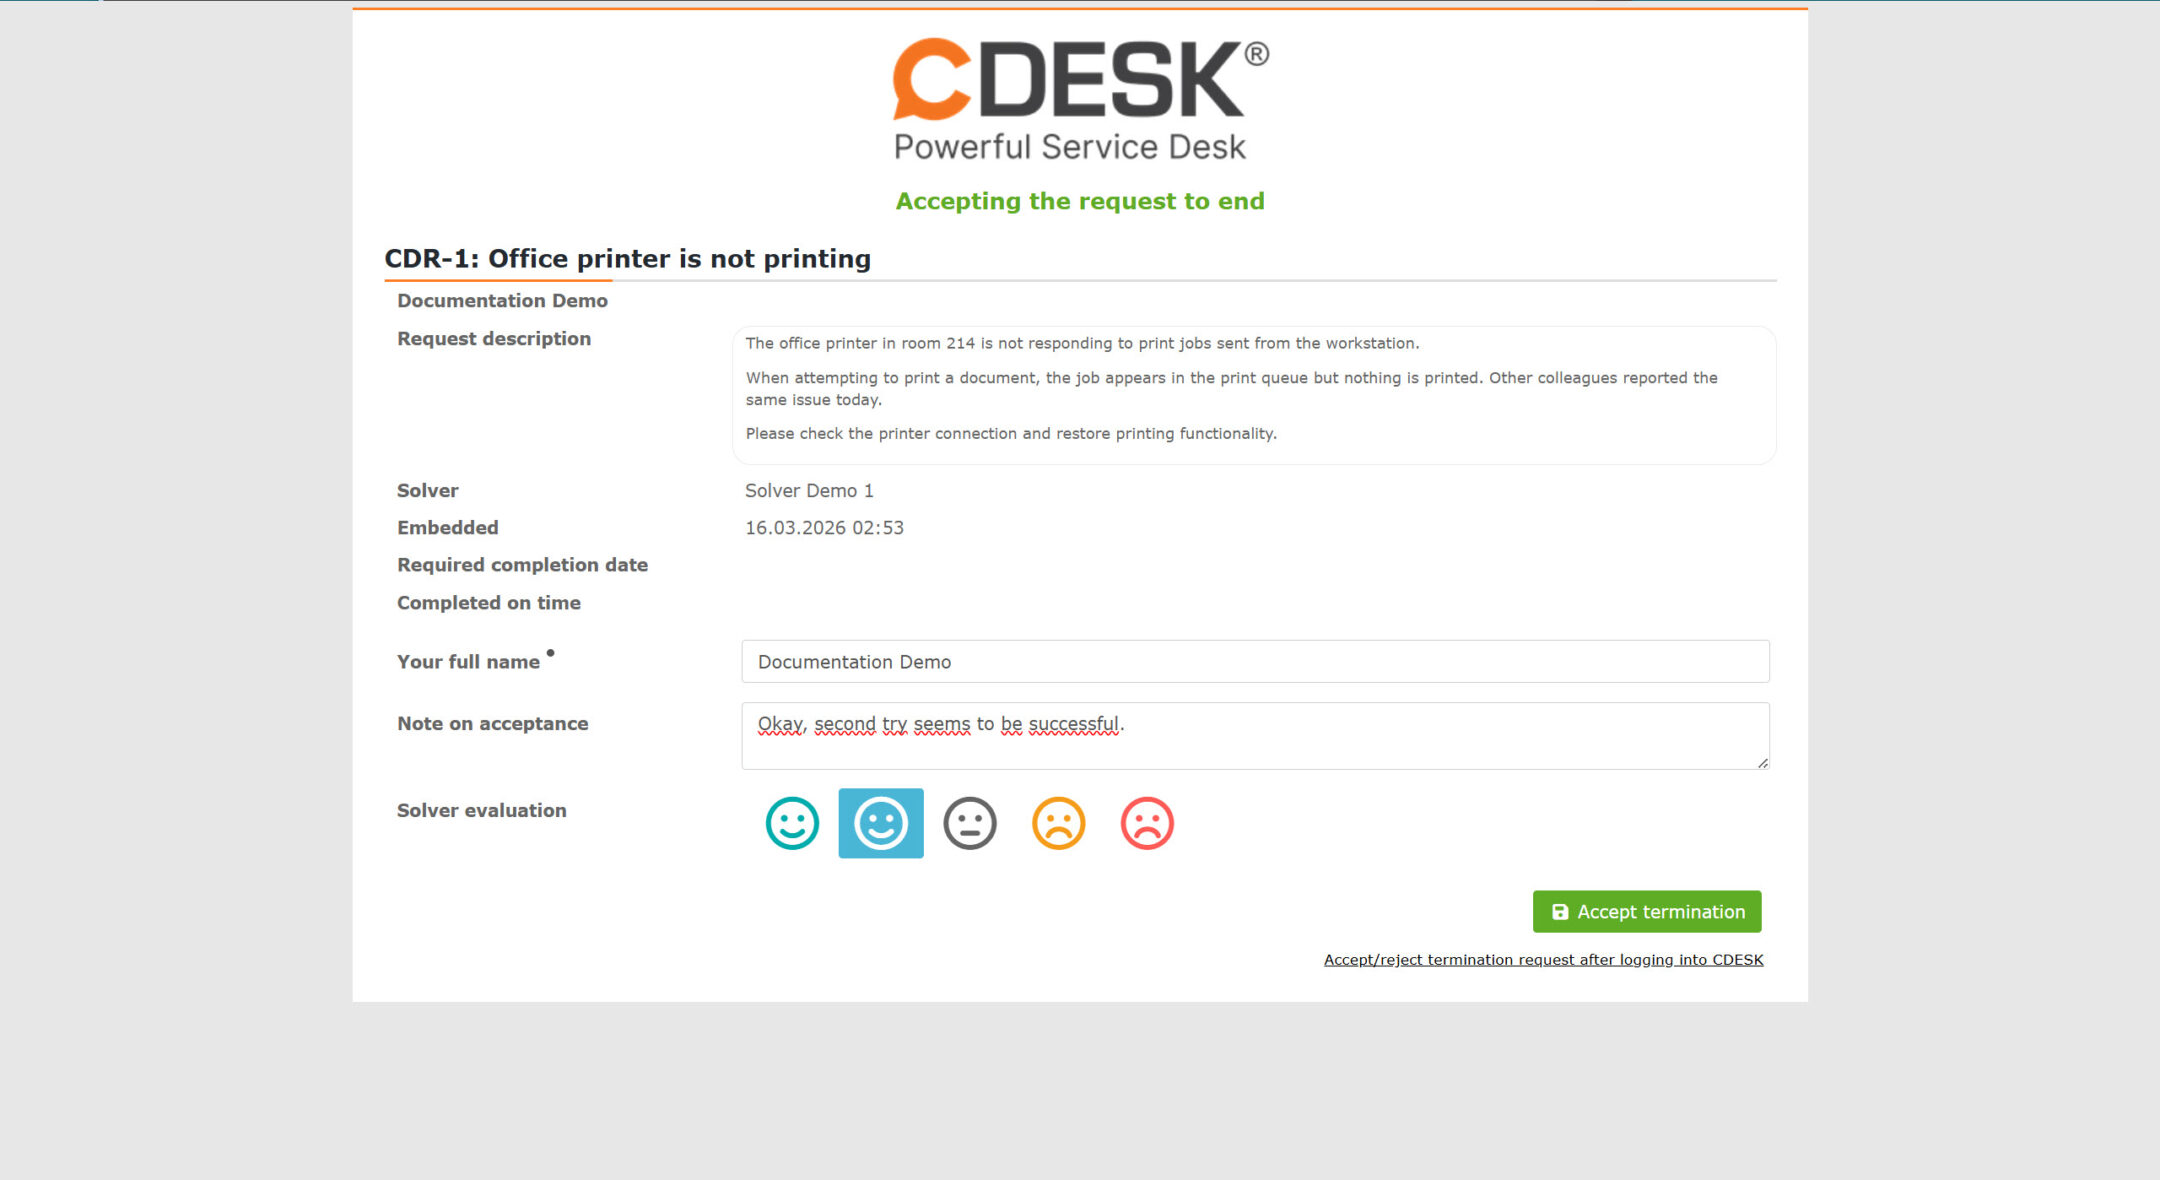
Once the assignee has closed the request (status changed to Closed), the submitter is notified via email, which includes buttons to accept or deny the closure—the submitter can therefore respond to the closure directly from the email.

Image: Notification email regarding the closure of a request, with the option to accept or deny the closure
Image: Accepting the closure of a request directly from the request closure notification email

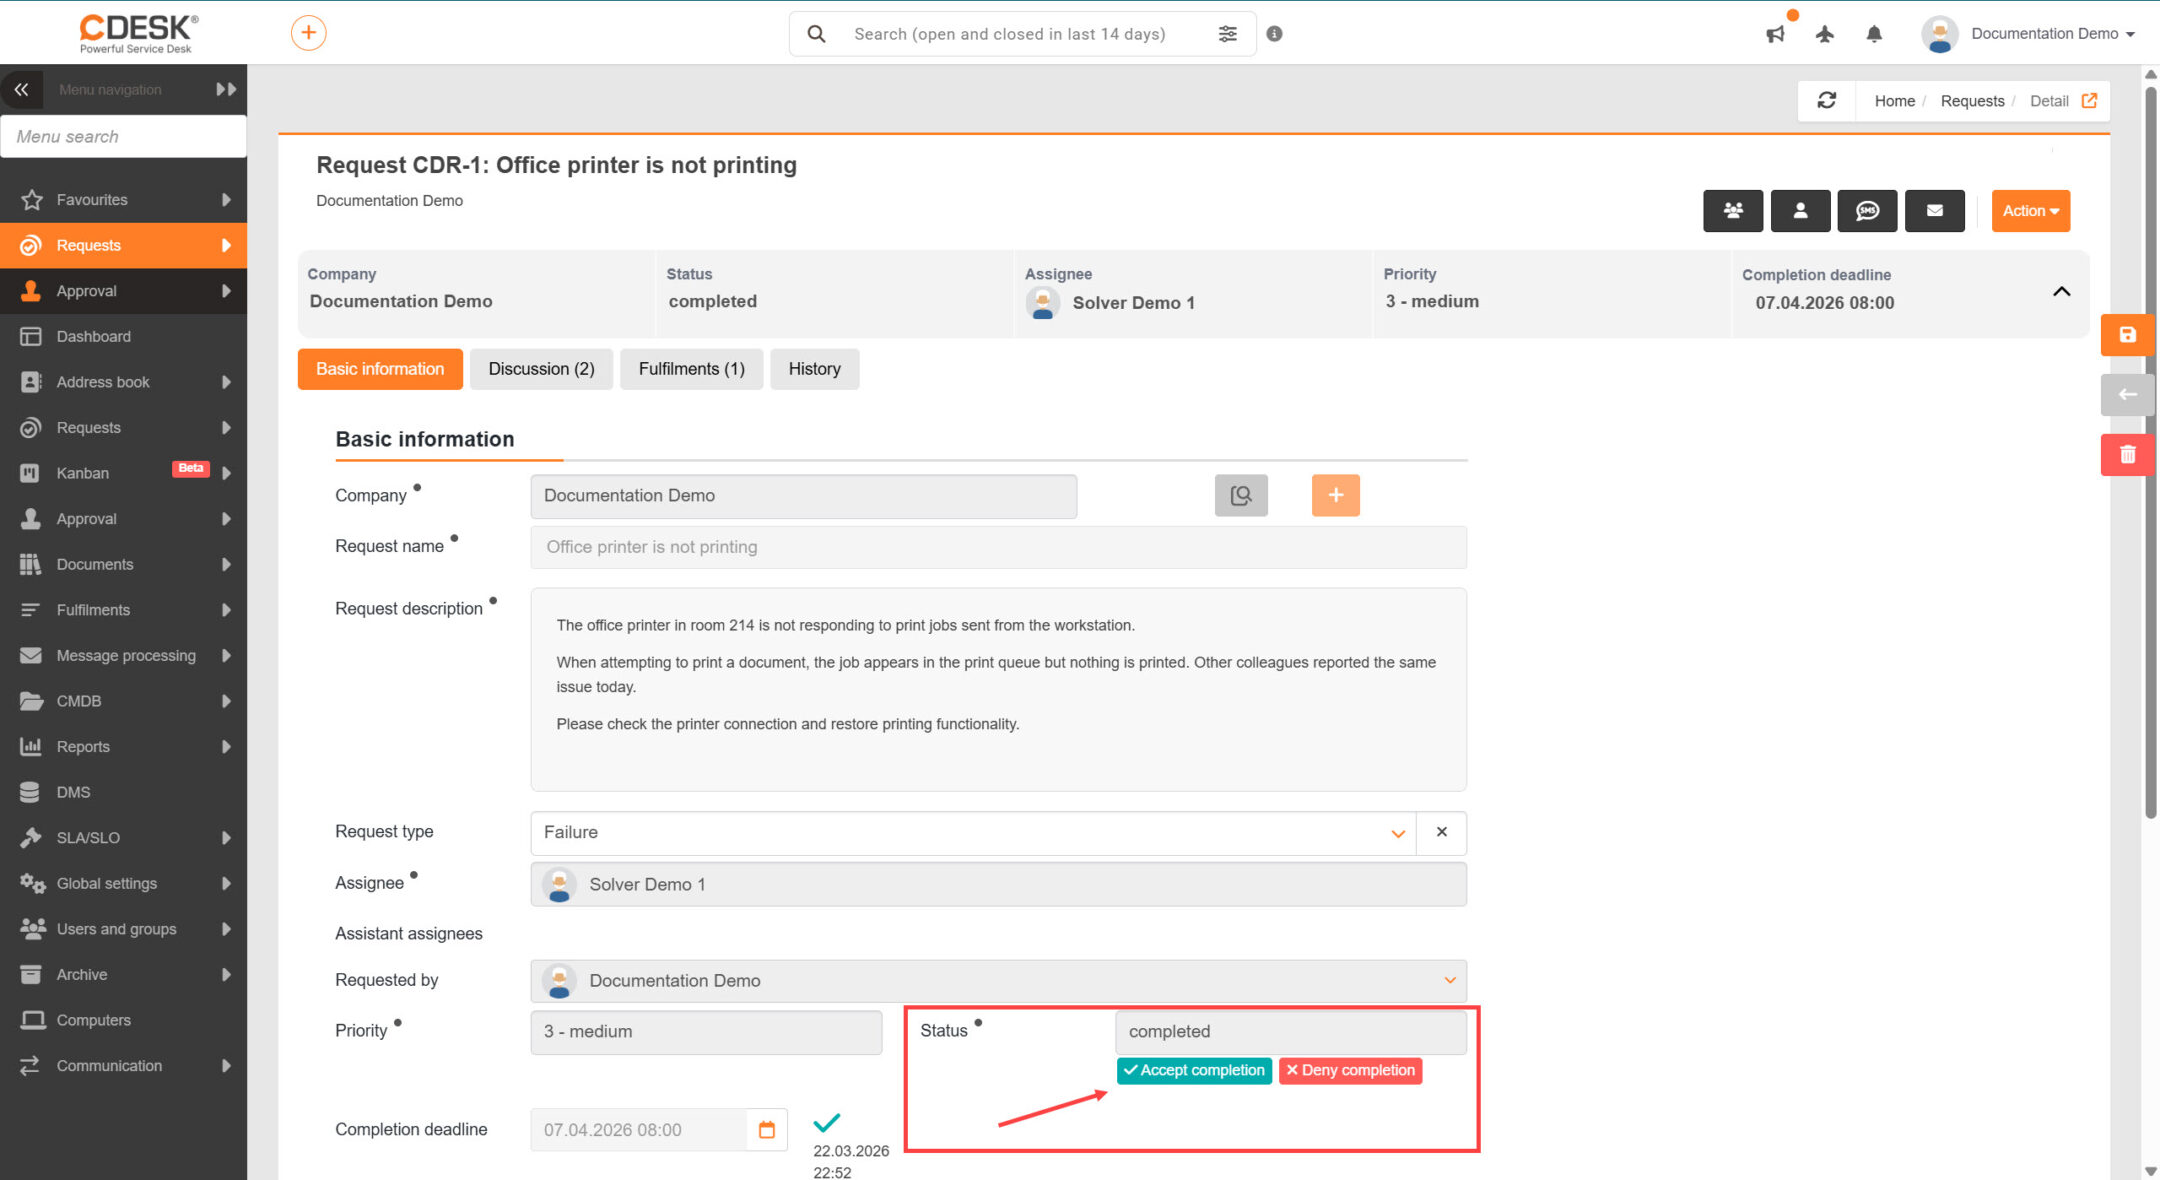
The buttons for accepting or denying closure become available directly in the request details after the status changes to Closed. You can accept the closure by clicking the Accept closure button.

Image: Button to accept the closure of a request

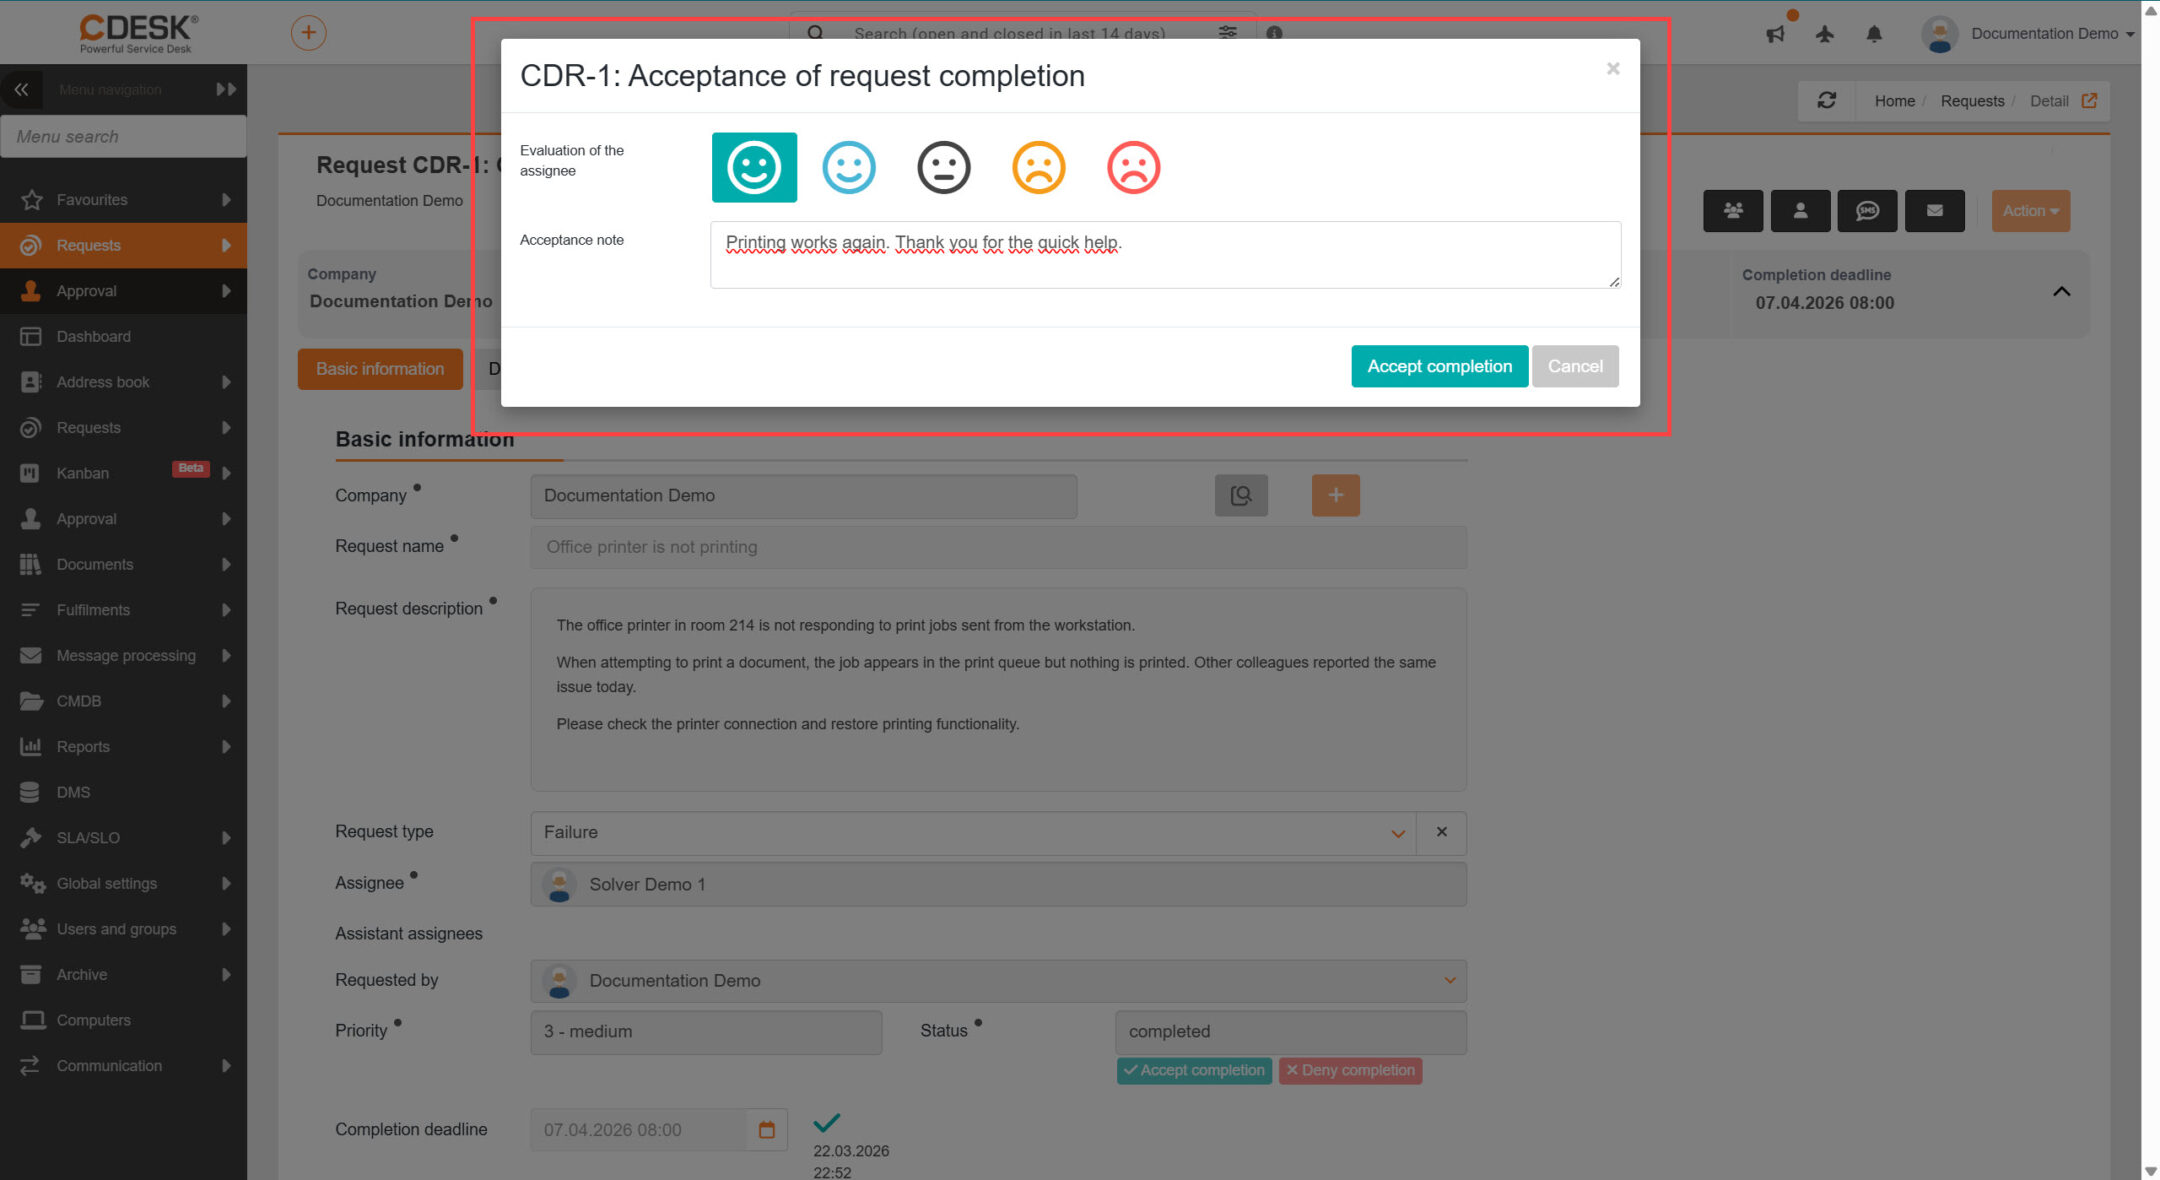
After clicking, a window will appear with a form for evaluating the assignee and the option to add a comment regarding acceptance.

Image: Form for Acceptance of Request Closure and Assignee Evaluation

Once the closure is accepted, the request status changes to “Closed”. Such a request can no longer be edited. If configured in the system, it is still possible to return such a request for further processing.