Beta verzia novej dokumentácie.

Inventory Orders

You can find a list of all inventory orders via the navigation menu: Asset Management → Inventory Orders. The following explains how to add an inventory order during an inventory. The number in the tab indicates the number of inventory orders in the inventory. If a warning triangle appears in the tab , it means that no inventory orders have been created.

Inventory orders are created from pre-prepared inventory orders in the inventory, which you can find in the Inventory Orders tab under Unassigned Locations. Only the locations you have defined in the Basic Datatab are displayed here. You can create an inventory order by clicking the Create Inventory Order button in the desired row. Use the New inventory order from selected button along with the checkboxes in each row to create a single inventory order for multiple unassigned locations at once. After selecting the checkboxes, you can also use the Merge into existing order button to merge all selected unassigned locations into an already-created inventory order.

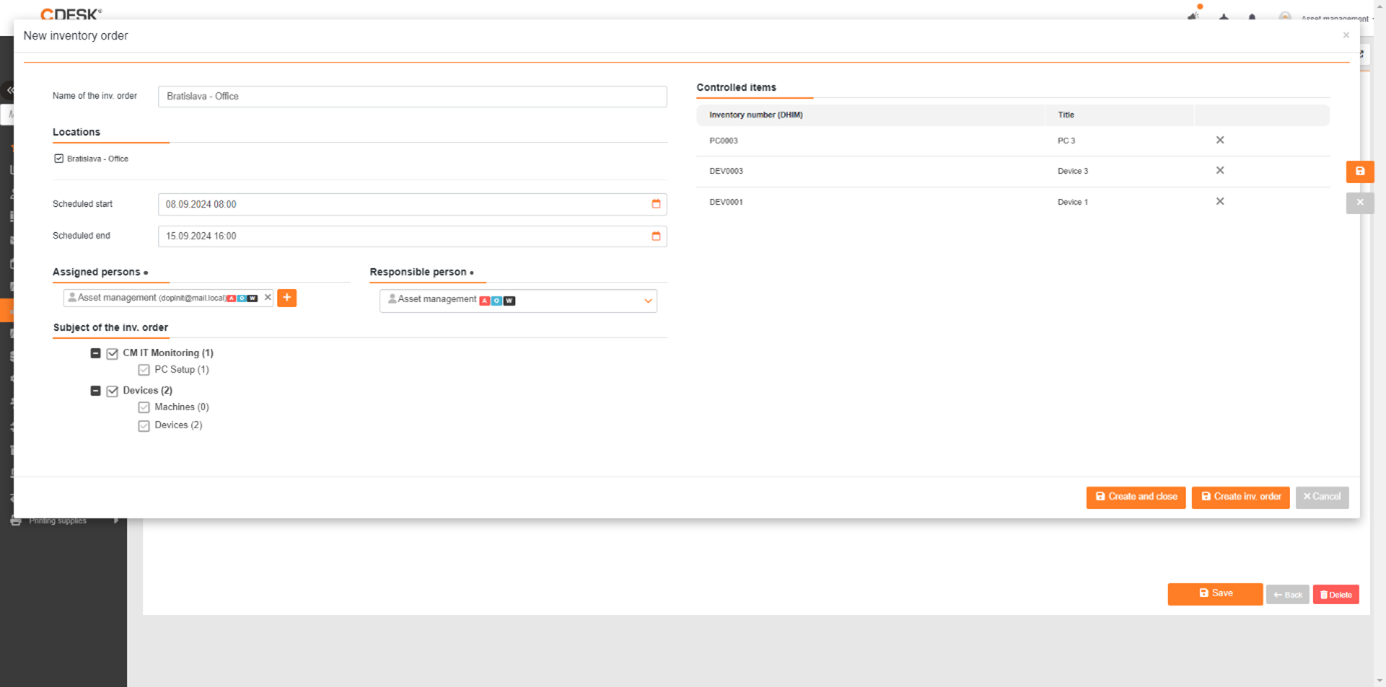
Image: Inventory orders during inventory

Creating a stock-taking order

  • Inventory Order Name – this field does not need to be filled in. If it remains empty when saved, a name will be automatically generated from the inventory order locations.
  • Locations – all locations selected prior to creating the inventory order will be automatically displayed here.
  • Scheduled Start – the scheduled start date of the inventory order. The planned start date of the entire inventory is automatically entered.
  • Planned end – the planned end of the inventory is automatically entered. In the section Global Settings → Asset Register → Inventory Orders, you can set the number of days to be deducted from the planned end of the inventory. This date is then inserted into all scheduled inventory orders.
  • Authorized Persons – selection of the person who will perform the inventory order itself, i.e., scanning the assets. The button + Select is used to select persons. If multiple persons are selected, the result of the inventory order does not depend on which person performed it. However, only one person can scan assets at a time; after logging out of the scanning application, another person can continue scanning.
  • Responsible – selection of the person who will be responsible for the inventory order and will therefore approve it upon completion. The Responsible person selected in the inventory details is automatically entered into this field.
  • Inventory Order Subject – selection of asset types to be checked by the given inventory order. You can also remove and add individual items to the inventory order.
  • Items to Be Checked – list of specific items to be checked in the inventory order. Selection of item group/type. If you wish to remove specific items from the list of checked items, use X at the end of the line. To add them back, select the type of the removed item again in the section Subject of the inventory order.
Image: Detail of the inventory order

Execute the INV command

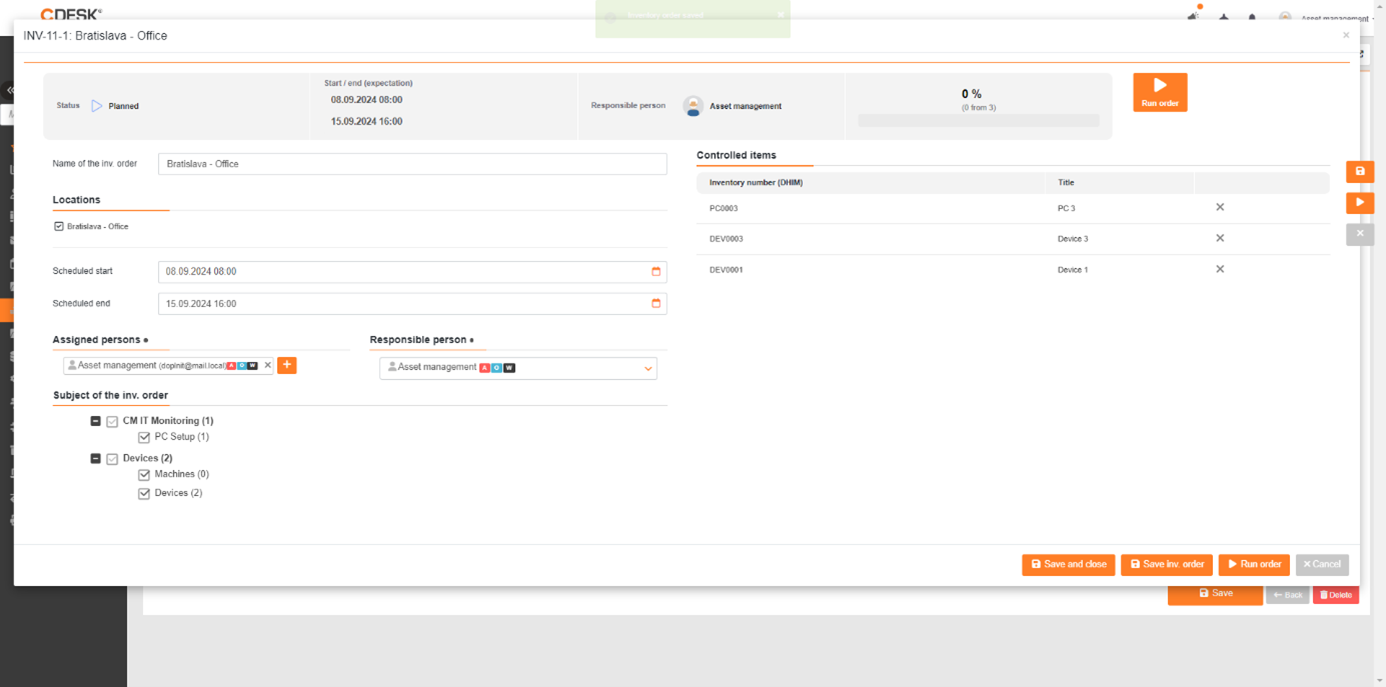
You must confirm the creation of an inventory order by saving it. Created inventory orders will appear in the Inventory Orders section on the Inventory orders tab. After saving, a Start order button will appear in the inventory order details. Clicking it sends the order to the mobile scanning app, where the actual inventory will take place.

Image: Executing an INV command

The inventory command can also be launched via the hamburger menu () in the list of inventory commands.

Process of an investment order

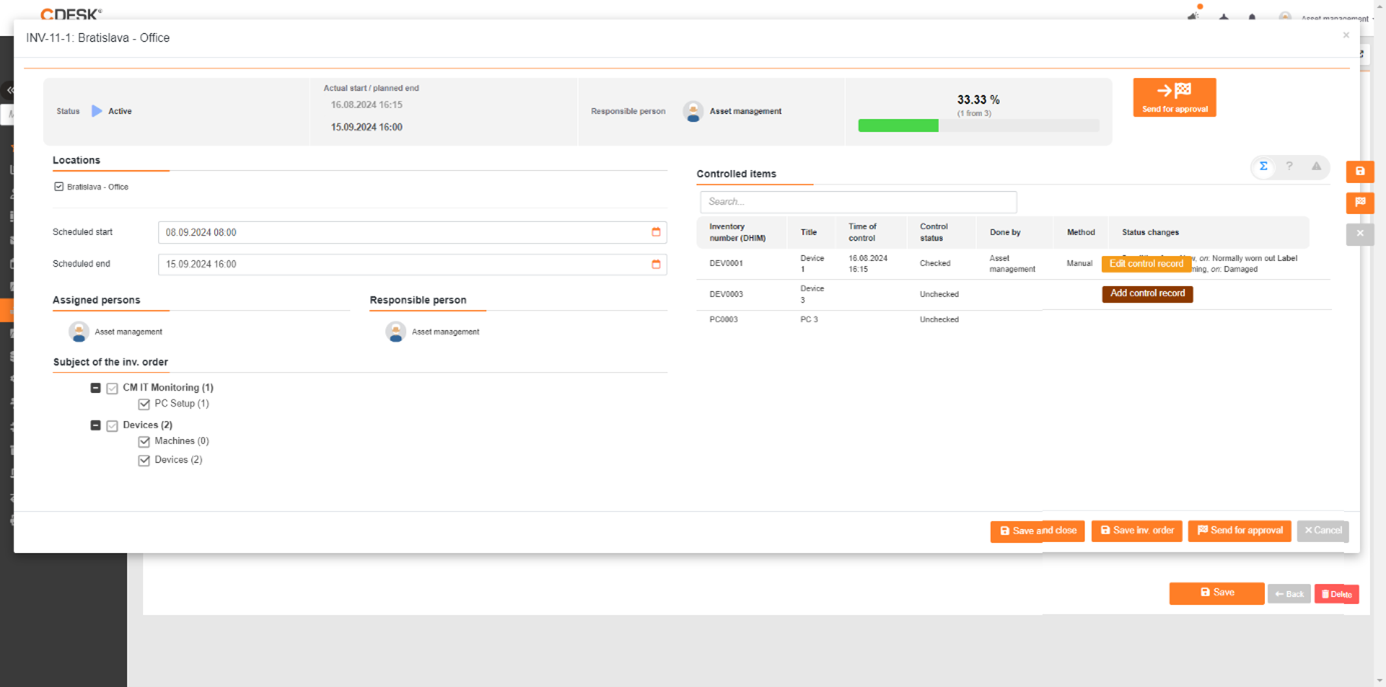
An inspection record for an item can be added by clicking the Add inspection record button, which appears to authorized users when they hover over the row of the item in the Inspected itemssection. After filling in the fields in the modal window, the item is saved as checked. You can edit the inspection record using the button Edit inspection record, which also appears when hovering over the desired row. Clicking it displays the same pop-up window, which allows you to edit the data.

To help you navigate the list more easily, we recommend using the toggle in the upper-right corner:

  • – full list,
  • – unchecked items,
  • – conflicts.
Figure: Flow of an inventory order

Approval of the purchase order

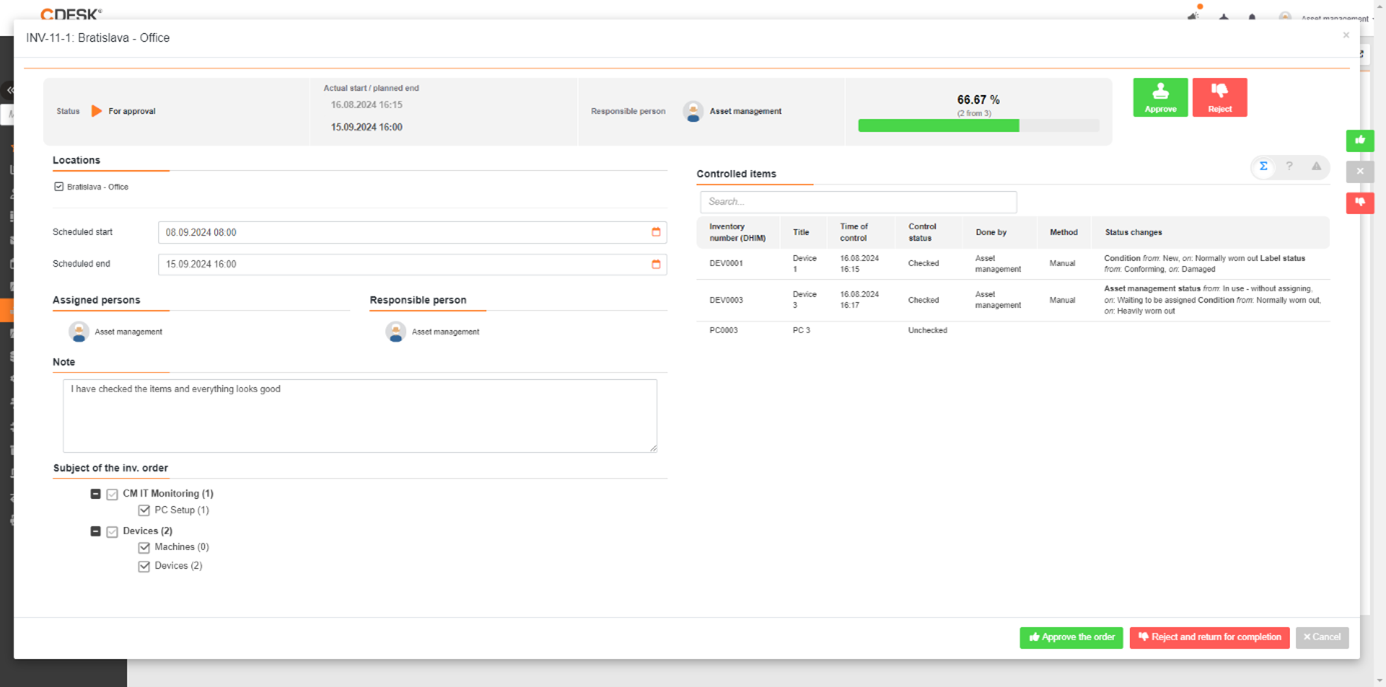
After checking the assets, you can send the purchase order for approval using the button Send for Approval. The designated person responsible for the purchase order will be able to add a note, approve, or deny the purchase order using the buttons Deny and Approve. If denied, the purchase order will reopen for revision. Using the setting “Postpone planned end when reopening inventory order” in the section Global Settings → Asset Records → Inventory Orders, you can set the number of days by which the planned end date of the inventory order and the inventory itself will be postponed.

Image: Approval of a purchase order