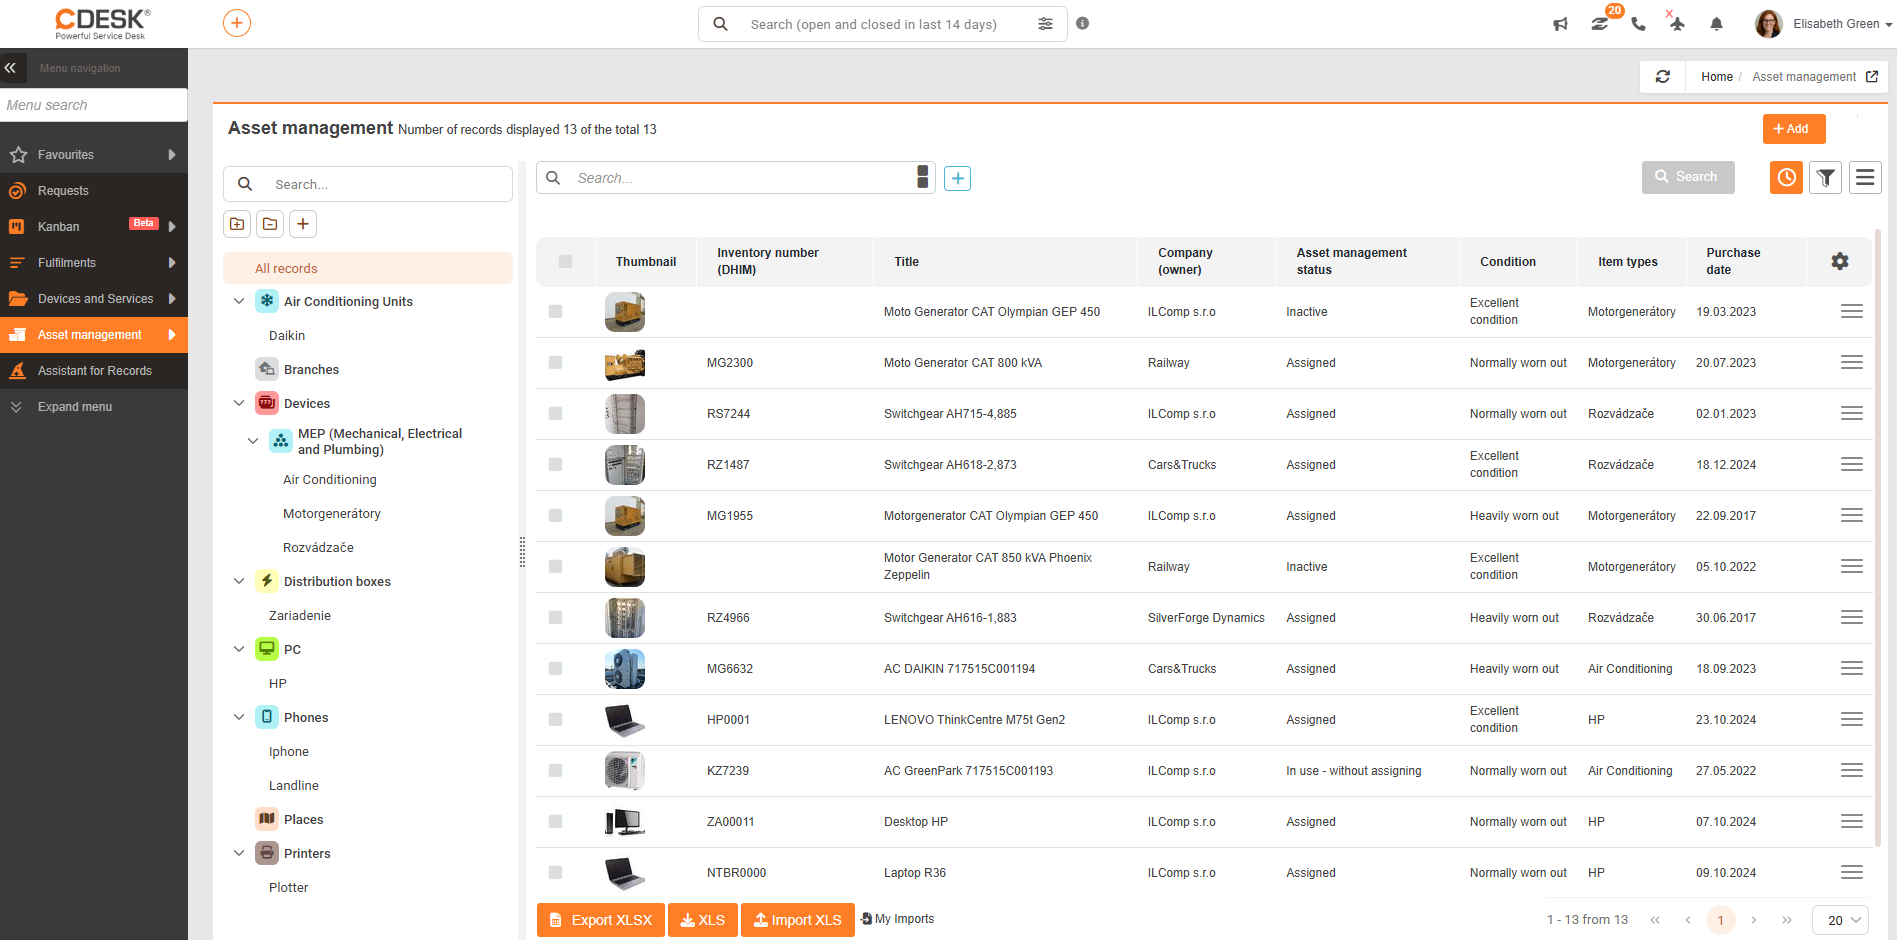
The header of the item list window displays the number of records shown out of the total number; it also includes controls for easily creating a new record and searching using an advanced filter, along with the option to save the filter.
Below is a list of items based on the currently set filter or search results. You can edit existing items by double-clicking the relevant row or by selecting the option from the context menu  Edit. You can create a new item by clicking on +Add.
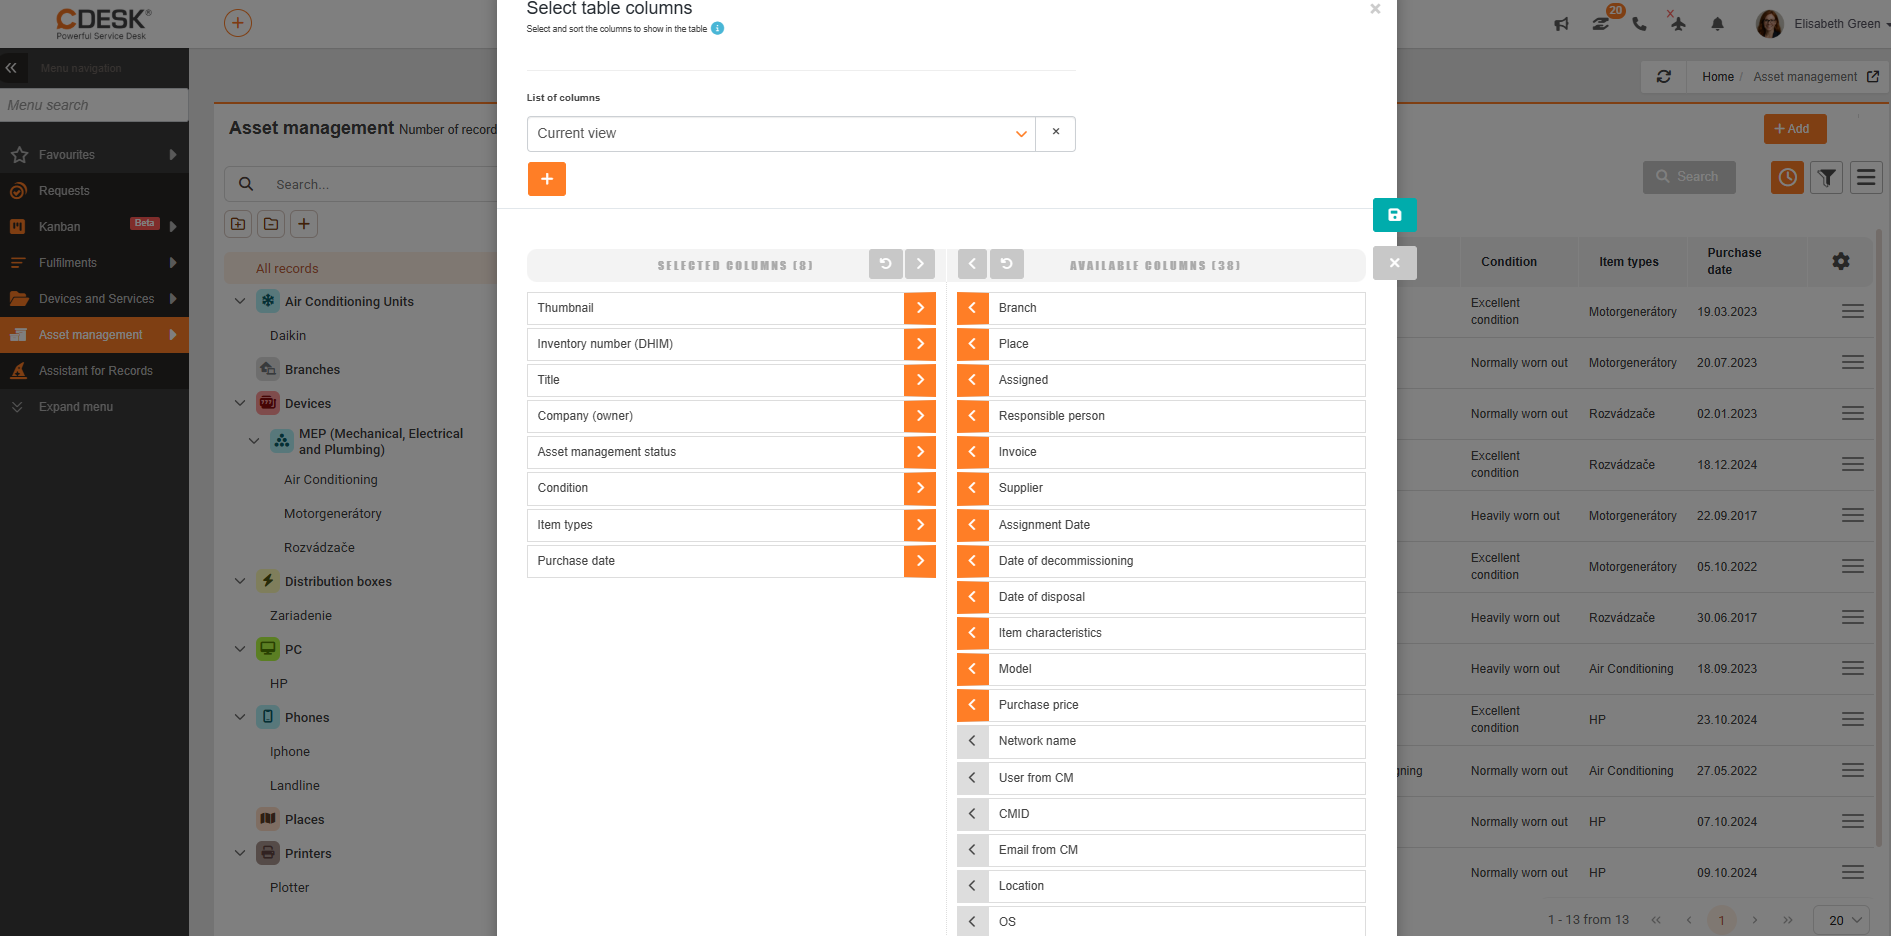
You can adjust the columns displayed in the asset list table using the gear icon in the upper right corner of the table. Clicking this button ( ) displays a modal window offering a selection of table columns. The columns (custom fields) listed in the Selected columnssection will be displayed in the asset list. Use the left and right arrows to adjust the column display. You can also reorder the displayed columns using drag-and-drop. Confirm the changes by clicking the green “” button.. Orange-colored column arrows indicate predefined fields in the asset register, while gray arrows indicate user-defined fields.
You can also freely adjust the width of each column displayed in the list—by clicking on the area between the columns and dragging to the right or left to the desired width.
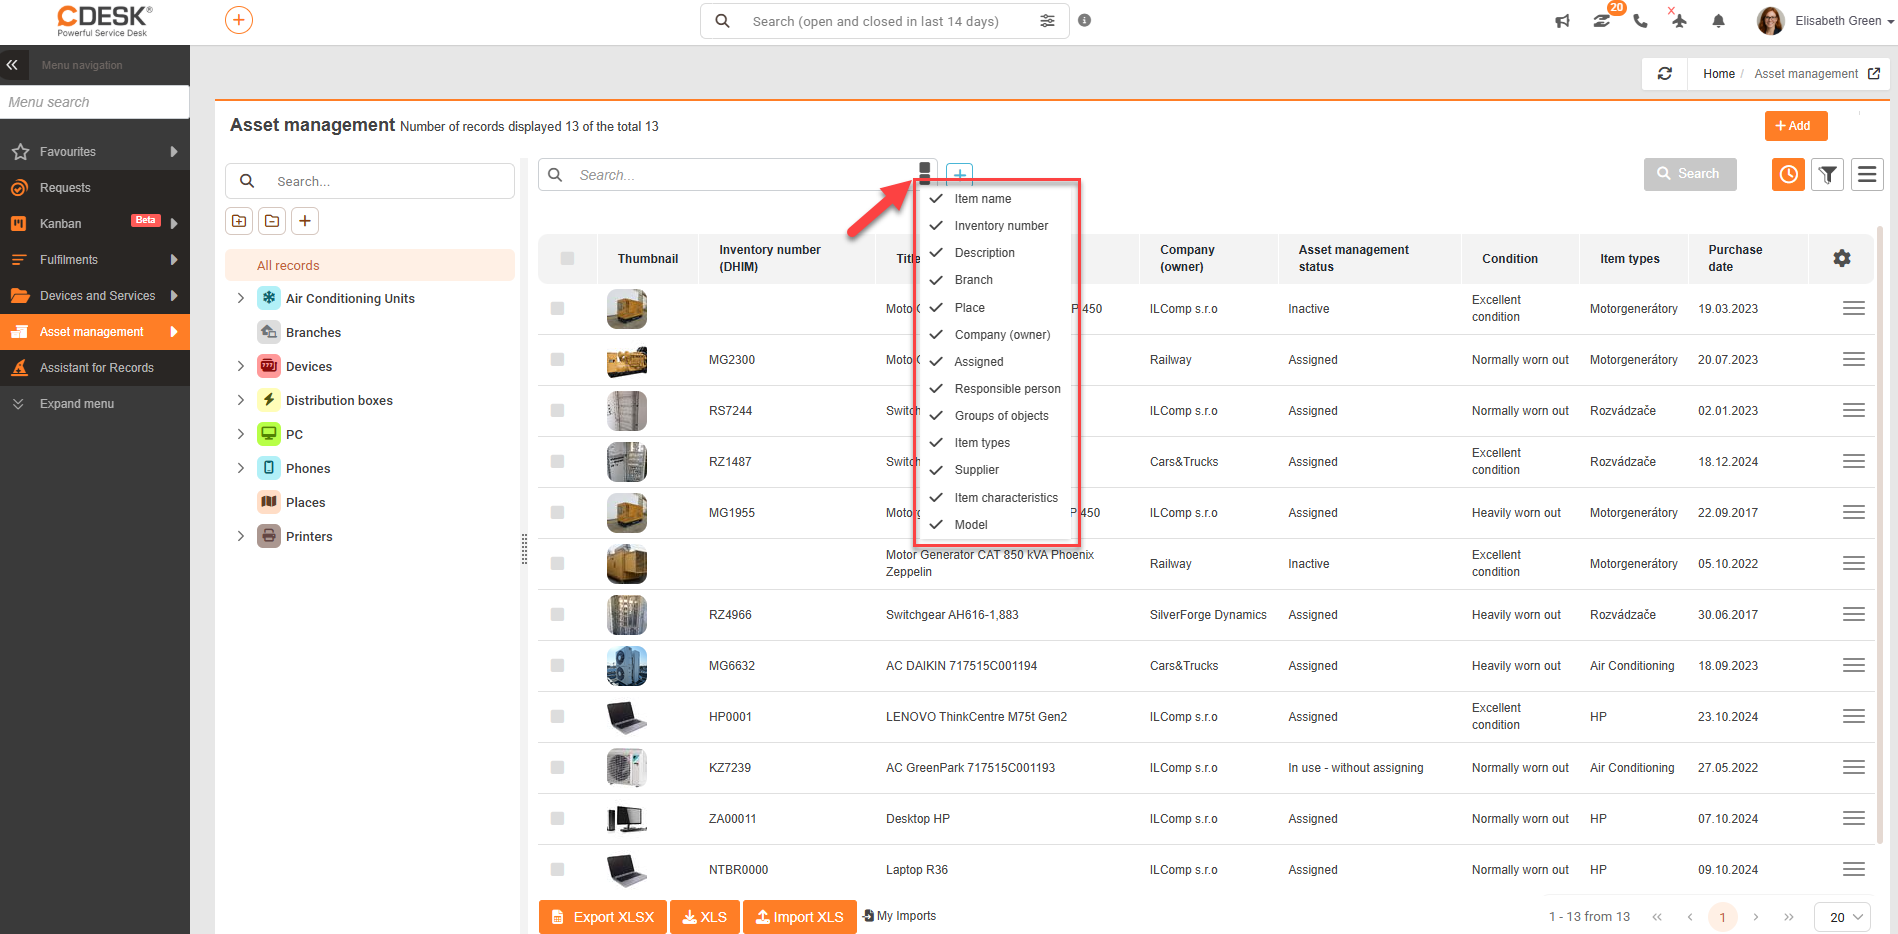
For an effective search, you can use the Search field located above the list of items. This “full-text search” searches the columns that appear when you click “ ” at the end of the search field. Columns that do not need to be searched can be deselected by clicking on them, and the ✓ symbol will disappear to the left of their name.
You can use filters to make searching the list easier. Click the “ ” button to add a filter.
If you need to search for items based on multiple criteria, use the advanced search filter, which is applied by clicking the “ ” button next to the “” field. Search. This filter allows you to specify specific search conditions in any column from the selection.

Depending on the column type, you can choose from conditions such as “contains,” “does not contain,” “is,” “is not,” “is filled in,” and “is not filled in” for the search term or part of it; for drop-down lists, you must select one of the available values. Search conditions can be added using the icon. Conditions can be freely combined and expanded using the logical operators AND (and) and OR (or). Frequently used or otherwise specific filtering conditions can be saved and will be available with a single click above the list of items for future use.
You can read more about working effectively with filters in CDESK in the text Searching and filtering in the list of items.
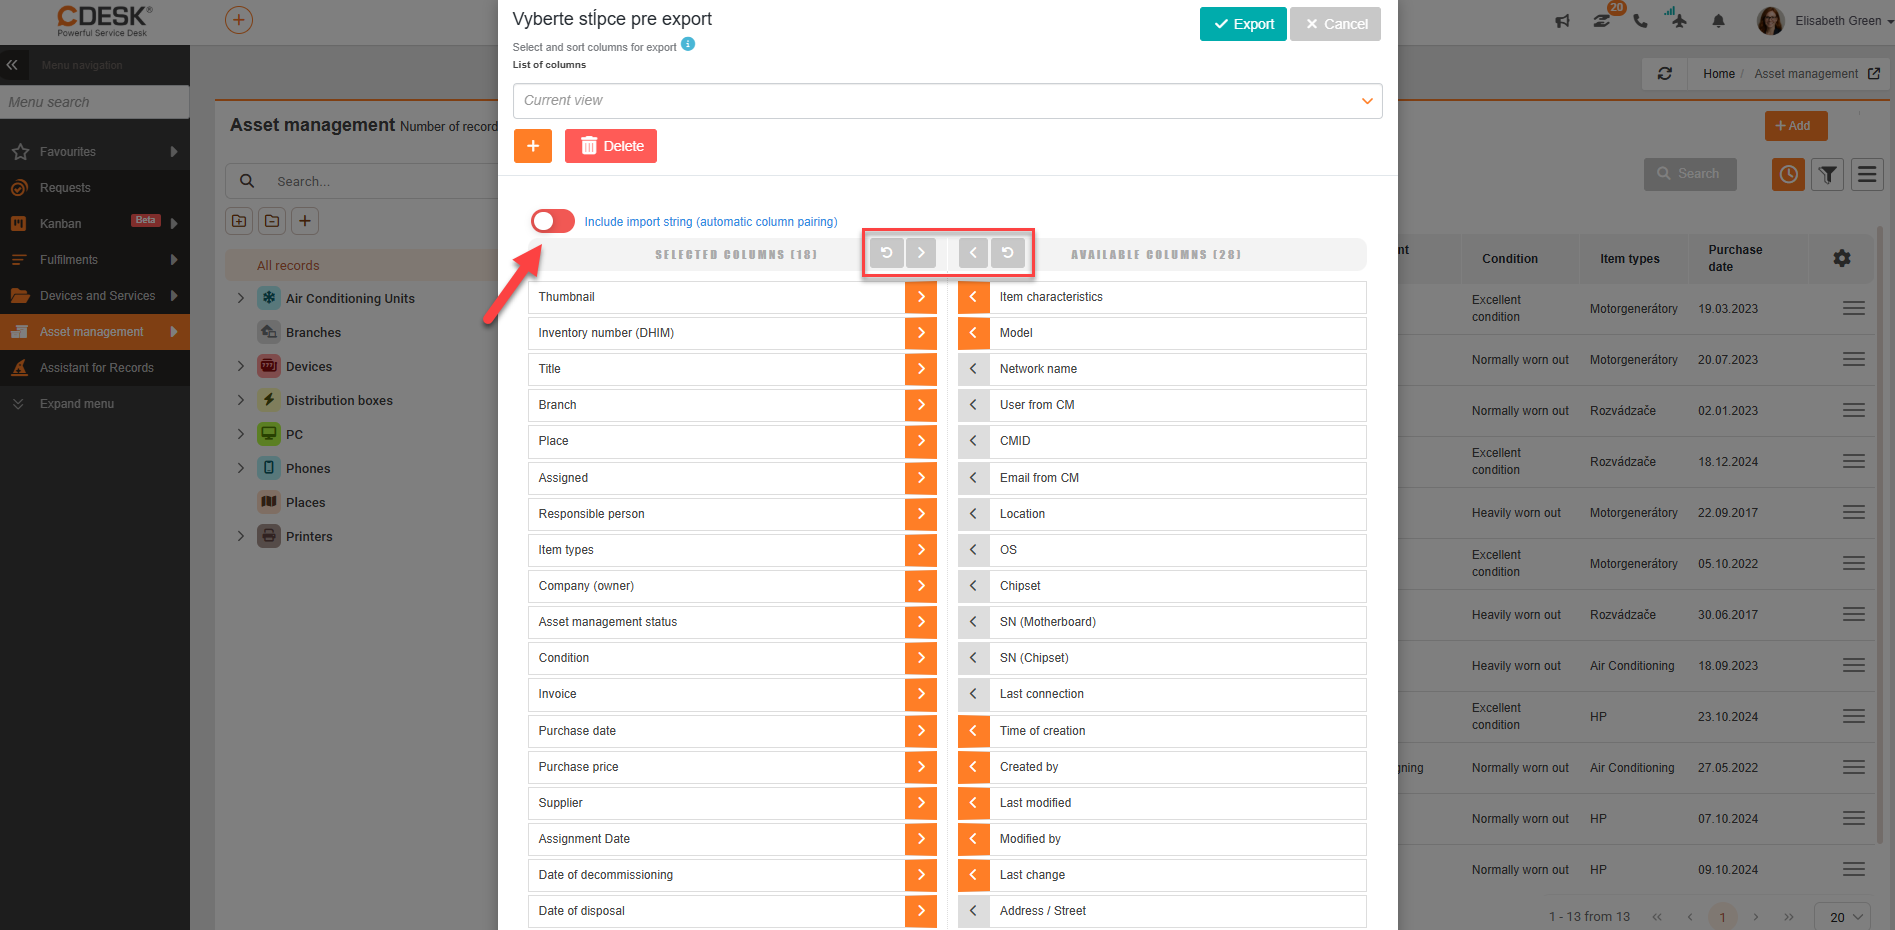
Exporting the asset list works on the same principle as column customization. The only difference is the option to pin a column for XLSX using the paperclip button  . Confirm the export to XLSX by clicking the button Export.
To export the asset list, click the button Export XLSX or XLS below the asset list. After clicking, a new window will open where you can select the columns for export. If you need to export all columns, you do not need to select them individually. By clicking the  icon in the Available columns section, all columns will be moved in bulk to the Selected columns section. The order of the columns in this list also determines their order in the export. This order can be changed as desired.
Clicking the  icon above the column list will sort the columns in their default order. Using, you can lock columns for XLSX.
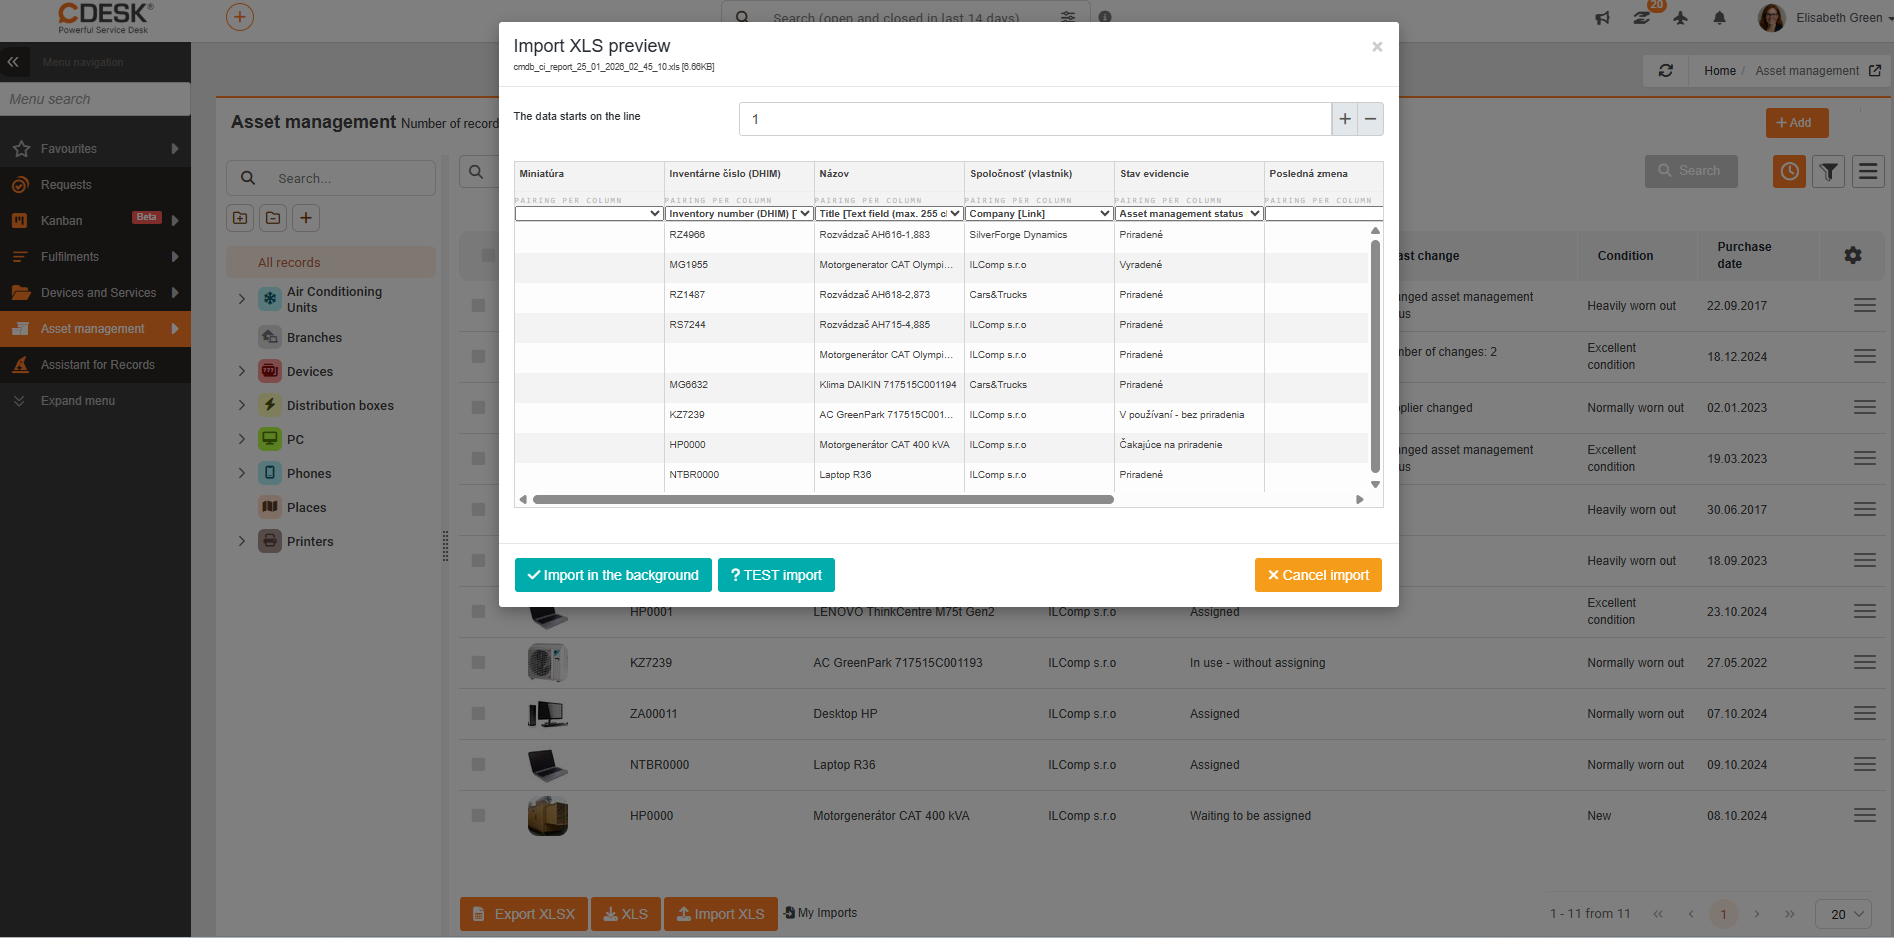
After selecting the columns, the export is created by clicking the ✓ Export button, which is located in the upper right corner and also in the lower right corner of the window. Selecting the X Cancel option returns you to the list of items without creating an export. If the exported table is to be supplemented and subsequently used to import data, you must export an XLS file where, above the column selection, the option “” is enabled, and “Include Import String” () is selected (automatic column matching).