Beta verzia novej dokumentácie.

List of fulfilments

The list of fillings can be found in the main menu under the item Fillings. If “Fulfilments” does not appear in your menu, you likely do not have this module enabled in Global Settings → Fulfilments or you do not have the appropriate permissions to use this module in Users and GroupsUsersspecific userPermissions tabFulfilments.

The list of recorded fulfilments is located in Fulfilments → List of Fulfilments. The window header displays the number of fulfilments shown out of the total, and also includes controls for creating a fulfilment, searching using an advanced filter, and buttons for exporting to XLS, XLSX, HTML, and PDF. Below is a list of entries sorted from newest to oldest, displaying details about each entry.

Image: List of fulfilments

You can customize the columns displayed in the list according to your preferences by clicking the “” icon. This allows you to select which fields to display and reorder them.
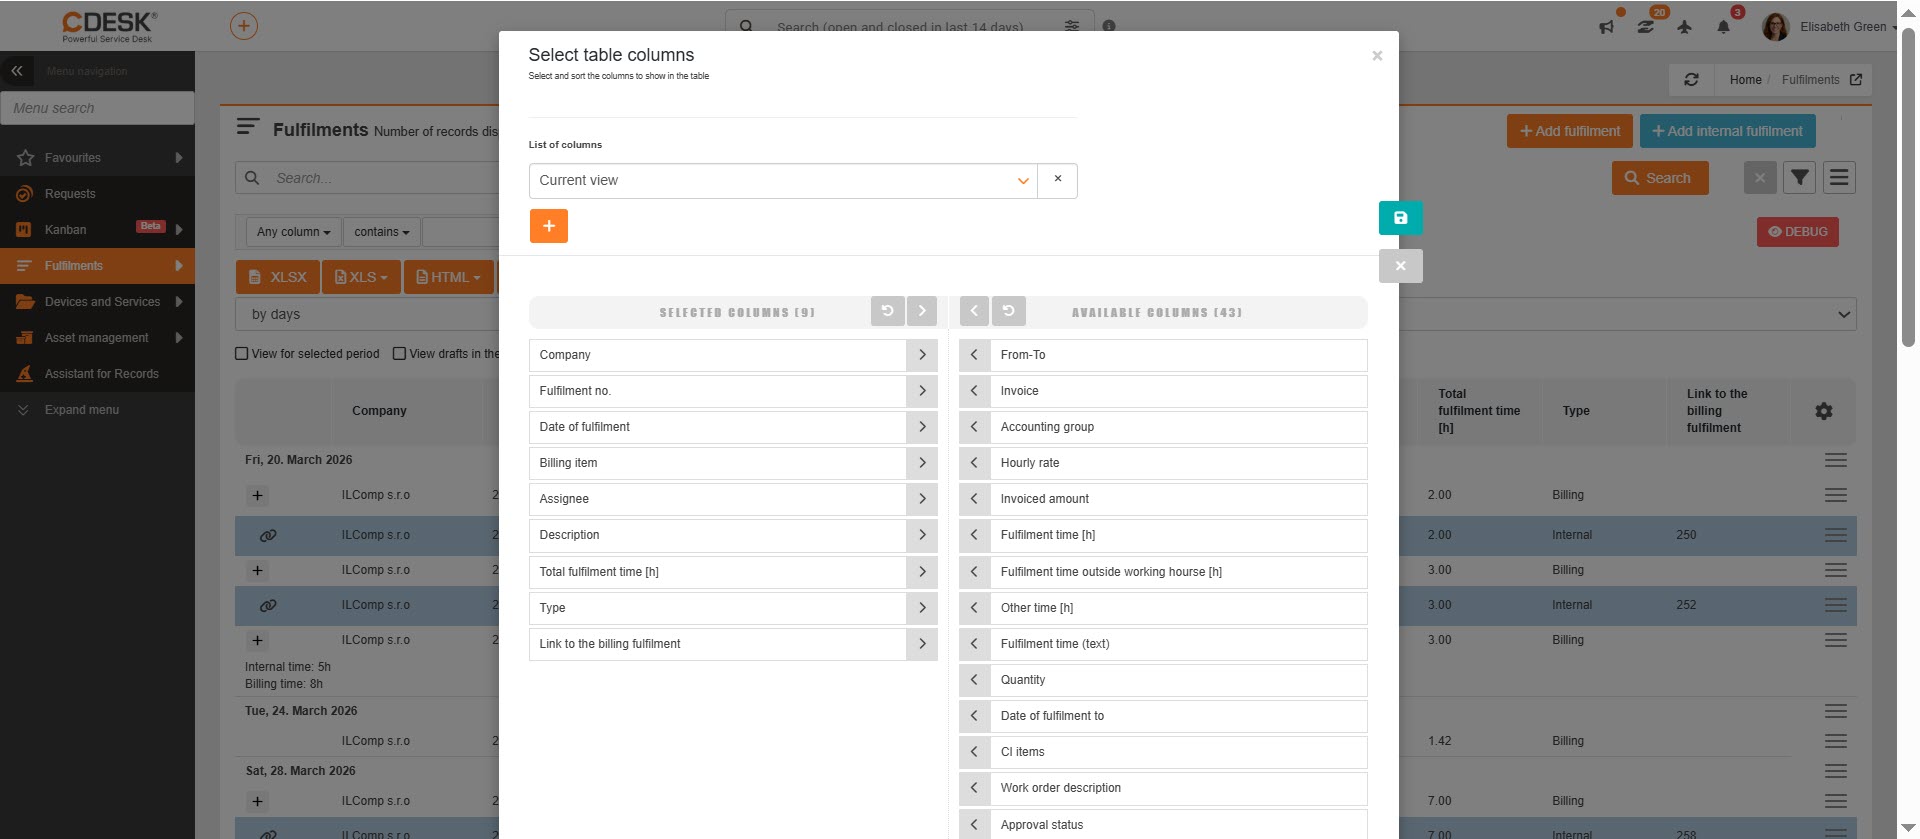
Image: Column display settings in the fulfilment list

Searching and filtering in the list of fulfilments

Full-text search in the list of fulfilments allows you to search for records based on data in the columns Assignee, Company / Name, Accounting item, and Deal code.

If you need to search for fulfilments based on multiple criteria, use the advanced search filter. Within this filter, you can set various search conditions based on:

  • Any column
  • Fulfilment number
  • Link to billing fulfilment
  • Assignee
  • Assignees – group members
  • Date
  • Fulfilment invoicing date
  • Date from
  • Date to
  • Duration (h)
  • Actual time worked (h)
  • Fulfilment time outside working hours (h)
  • Description
  • Material used
  • Accounting item
  • Invoice
  • Request
  • Request status
  • Task
  • Work order
  • Request assignee rating
  • Type
  • Warranty fulfilments
  • Signed
  • Transport
  • Place of fulfilment
  • Link to
  • Link type
  • Approval status
  • Request assignee
  • JIRA link
  • Company / Name
  • Company type
  • Deal
  • Deal code
  • Deal type
  • Start of fulfilment
  • Request type
  • Service area
  • Stock document
  • Item (CI)
Image: Advanced filter in the List of Fulfilments

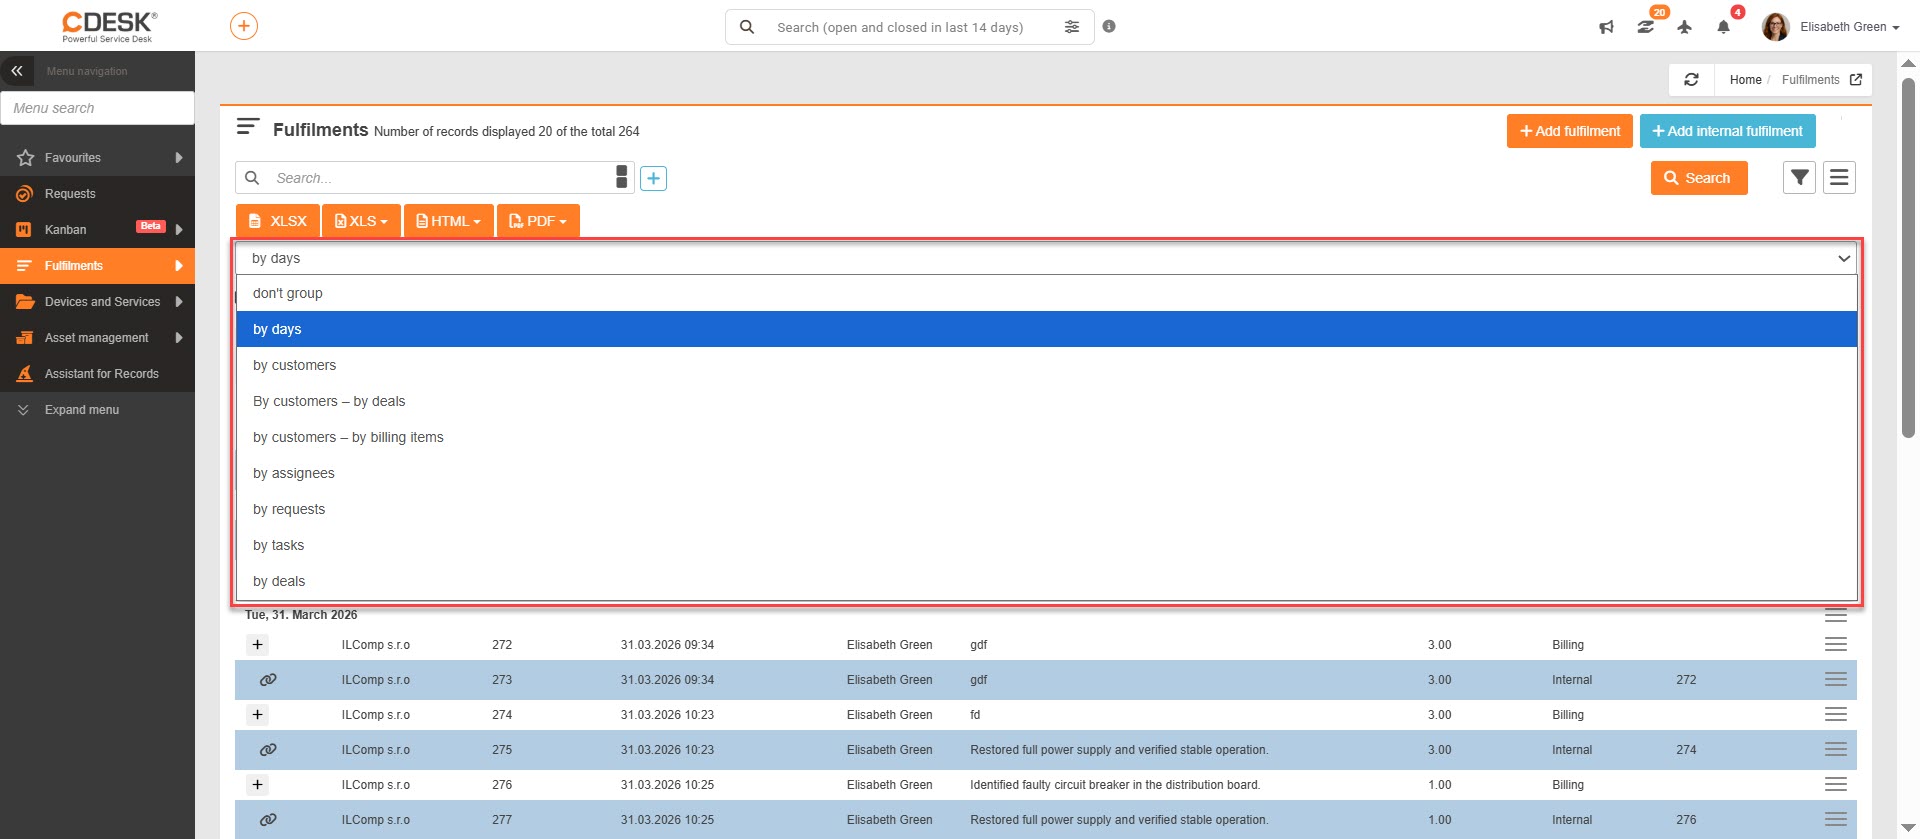
Another option for sorting records in the fulfilment list is grouping. By default, records are grouped by day. Records can be grouped or ungrouped:

  • by days
  • by customers
  • by customers – by deals
  • by customers – by accounting items
  • by assignees
  • by requests
  • by tasks
  • by deals
Image: Grouping in the fulfilment list

Below the drop-down list for grouping, there are checkboxes to filter certain groups of records:

  • Show records for a specific period
  • Show drafts in the list
  • Show leave requests
  • Show internal fulfilments
Image: Checkboxes for filtering results in the fulfilment list

Exporting fulfilments

Fulfilments can be exported in three different formats – XSLX, XLS, HTML and PDF. The export buttons are above the fulfilment list and in the lower-left corner. You can make them available / unavailable to certain users via permissions (in Permissions → Fulfilment → Export).

Image: Buttons for exporting fulfilments

XLS / XLSX

After clicking on the option XLS / XLSX (XLS exports a standard table, XLSX exports a pivot table), a new window will open where you can select the columns to export. If you want to export all columns, you do not need to select them individually. Clicking the icon selects all of them. The order of the columns in this list also determines their order in the export. If you want the columns in their default order, click the icon, and the columns will be sorted.

Image: Selecting columns for fulfilment export

After selecting the columns, create the export using the Export button, located in the lower-left corner of the window. Selecting the Cancel option will return you to the fulfilment list without creating an export.

Image: XLSX fulfilment report

HTML

To export fulfilments to HTML format, select the option HTML. After clicking, two options will appear: List with column headers and Summary report. With both options, only the items currently displayed in the list will be exported. They can thus be grouped according to your settings.

When selecting the option List with column header, a new window opens where you can select columns for export. If you want to export all columns, you do not need to select them individually. Clicking the icon selects all of them. The order of the columns in this list also determines their order in the export. If you want the columns in their default order, click the icon, and the columns will be sorted.

Figure: Selecting columns for exporting fulfilment data

After selecting the columns, create the export using the Export button, located in the lower-left corner of the window. Selecting the Cancel option will return you to the fulfilment list without creating an export.

Image: Exporting fulfilments to HTML - List with column headers

Summary report contains information on total fulfilment times, and you can choose which data to include in the report. After selecting the columns, choose the option Export. The report will open in a new window of your web browser. By selecting the option Cancel, you will return to the list of fulfilments and the report will not be generated.

Image: Exporting fulfilments to HTML — summary report

PDF

To export fulfilments to PDF format, select the option PDF. After clicking, two options will appear: List with column headers and Summary report. With both options, only the items currently displayed in the list will be exported. They can be grouped according to your settings.

When selecting the option List with column headers, you will receive an export that is identical to the layout of the displayed fulfilment list. However, at the beginning, you can choose which columns will be included in the export. A new window will open where you can select the columns for export. If you want to export all columns, you don’t need to select them individually. Clicking the icon selects all of them. The order of the columns in this list also determines their order in the export. If you want the columns in their default order, click the icon, and the columns will be sorted.

Figure: Selecting columns for exporting fulfilment data

After selecting the columns, create the export using the Export button, located in the lower-left corner of the window. Selecting the Cancel option will return you to the fulfilment list without creating an export.

Image: Exporting fulfilments to PDF - Report with column header

Summary report contains information about total fulfilment times, and you can choose which data to include in the report. After selecting the columns, choose the Export option. If you select the Cancel option, you will return to the list of fulfilments and the report will not be generated.

Image: Exporting fulfilments to PDF - Report with column headers