



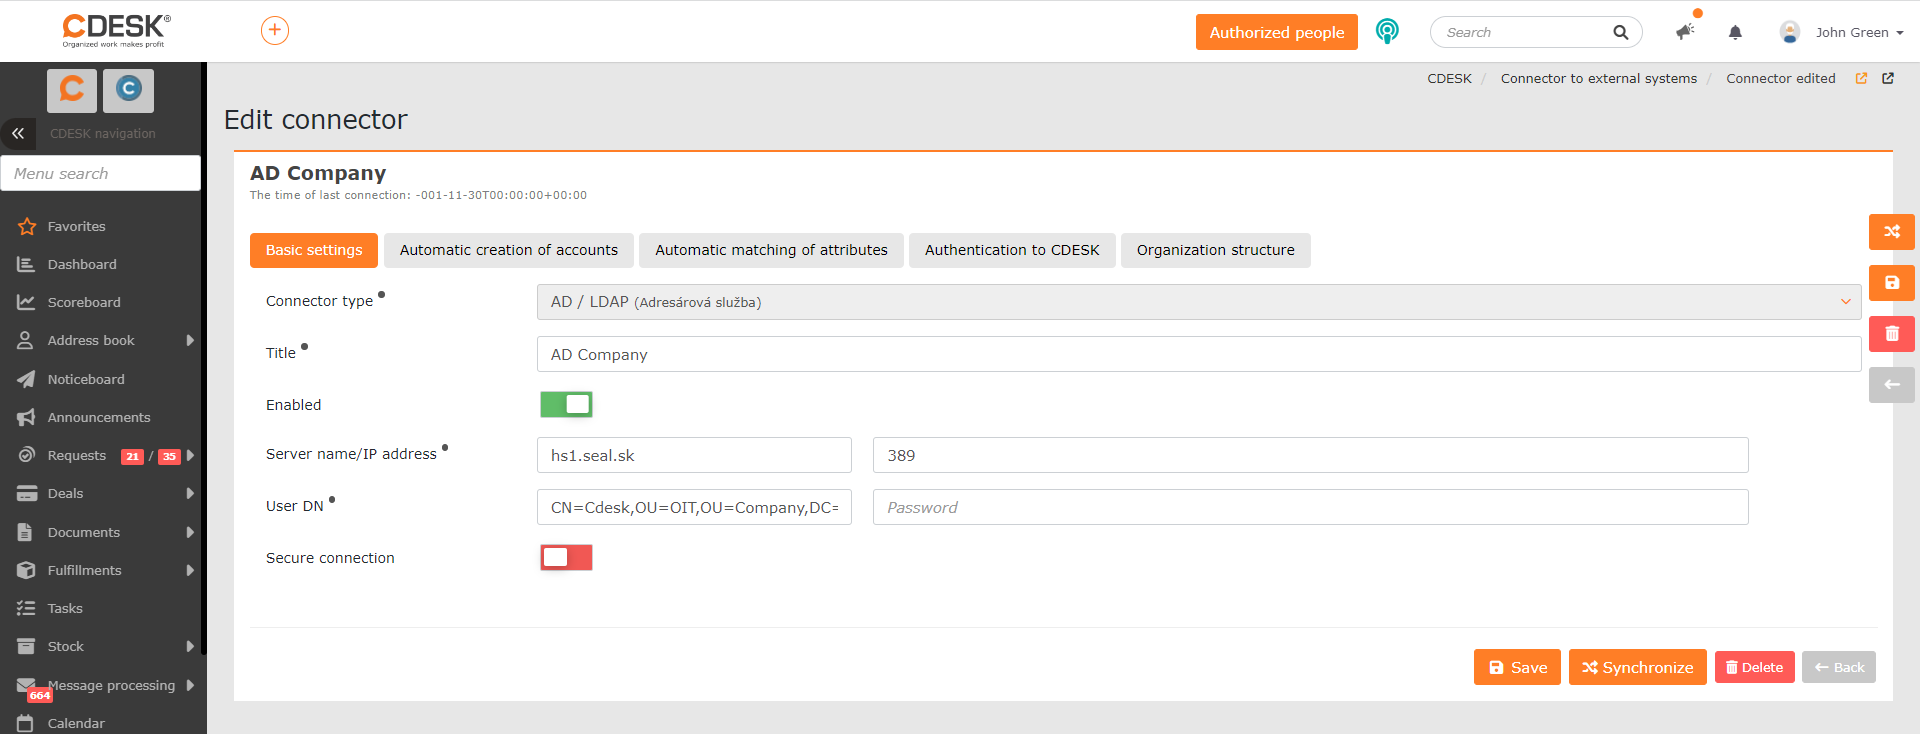
Connector type – the field is not editable and is filled in automatically.
Name – the name under which the connector will be shown in the list of connectors.
Enabled – setting the switch to the on position  makes it possible to use the connector.
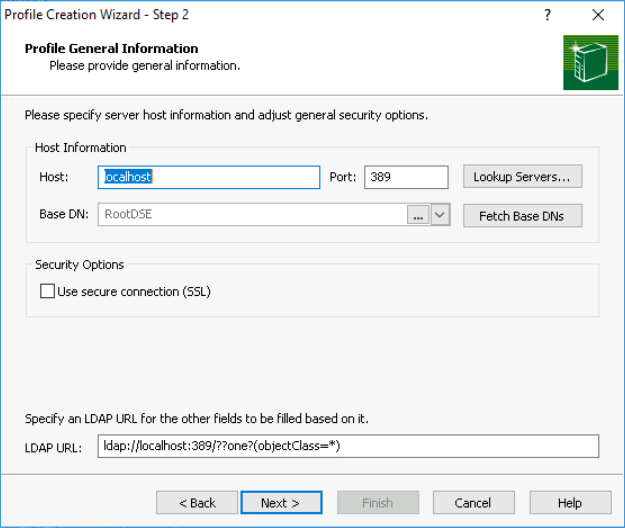
Server name/IP address – in the first field enter the name or the IP address of the server, and in the second field enter the port number. The standard port designated for AD communication is TCP/UDP 389.
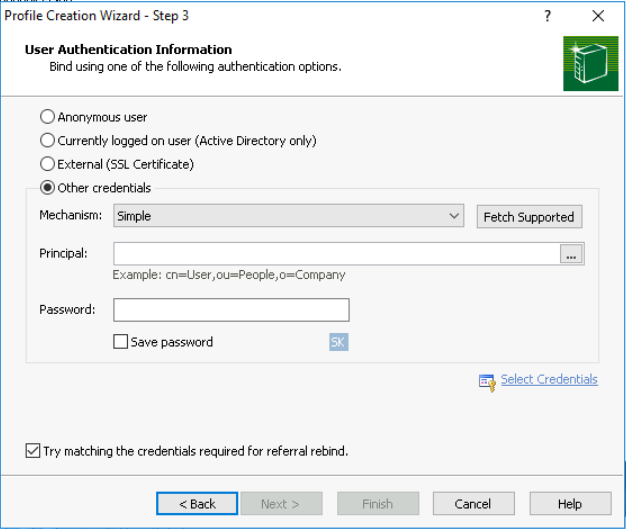
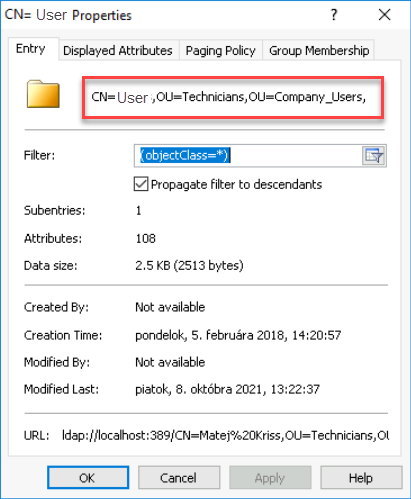
User DN – the user who will read the data from AD for CDESK. It is enough for them to have read-only permissions to the necessary parts of AD. It can be entered in the form domain/user. It is also possible to use the path from AD. To obtain the path, find the given user in the LDAP software, right-click on them and select Properties. After clicking, a modal window with the user’s parameters appears. The path you need is in the very first line on the Entry tab.
In the Password field enter the password the user uses in AD.
Secure connection – if you have the option of a secure connection with the AD server, set the switch to the on position and change the port from 389 to 636.
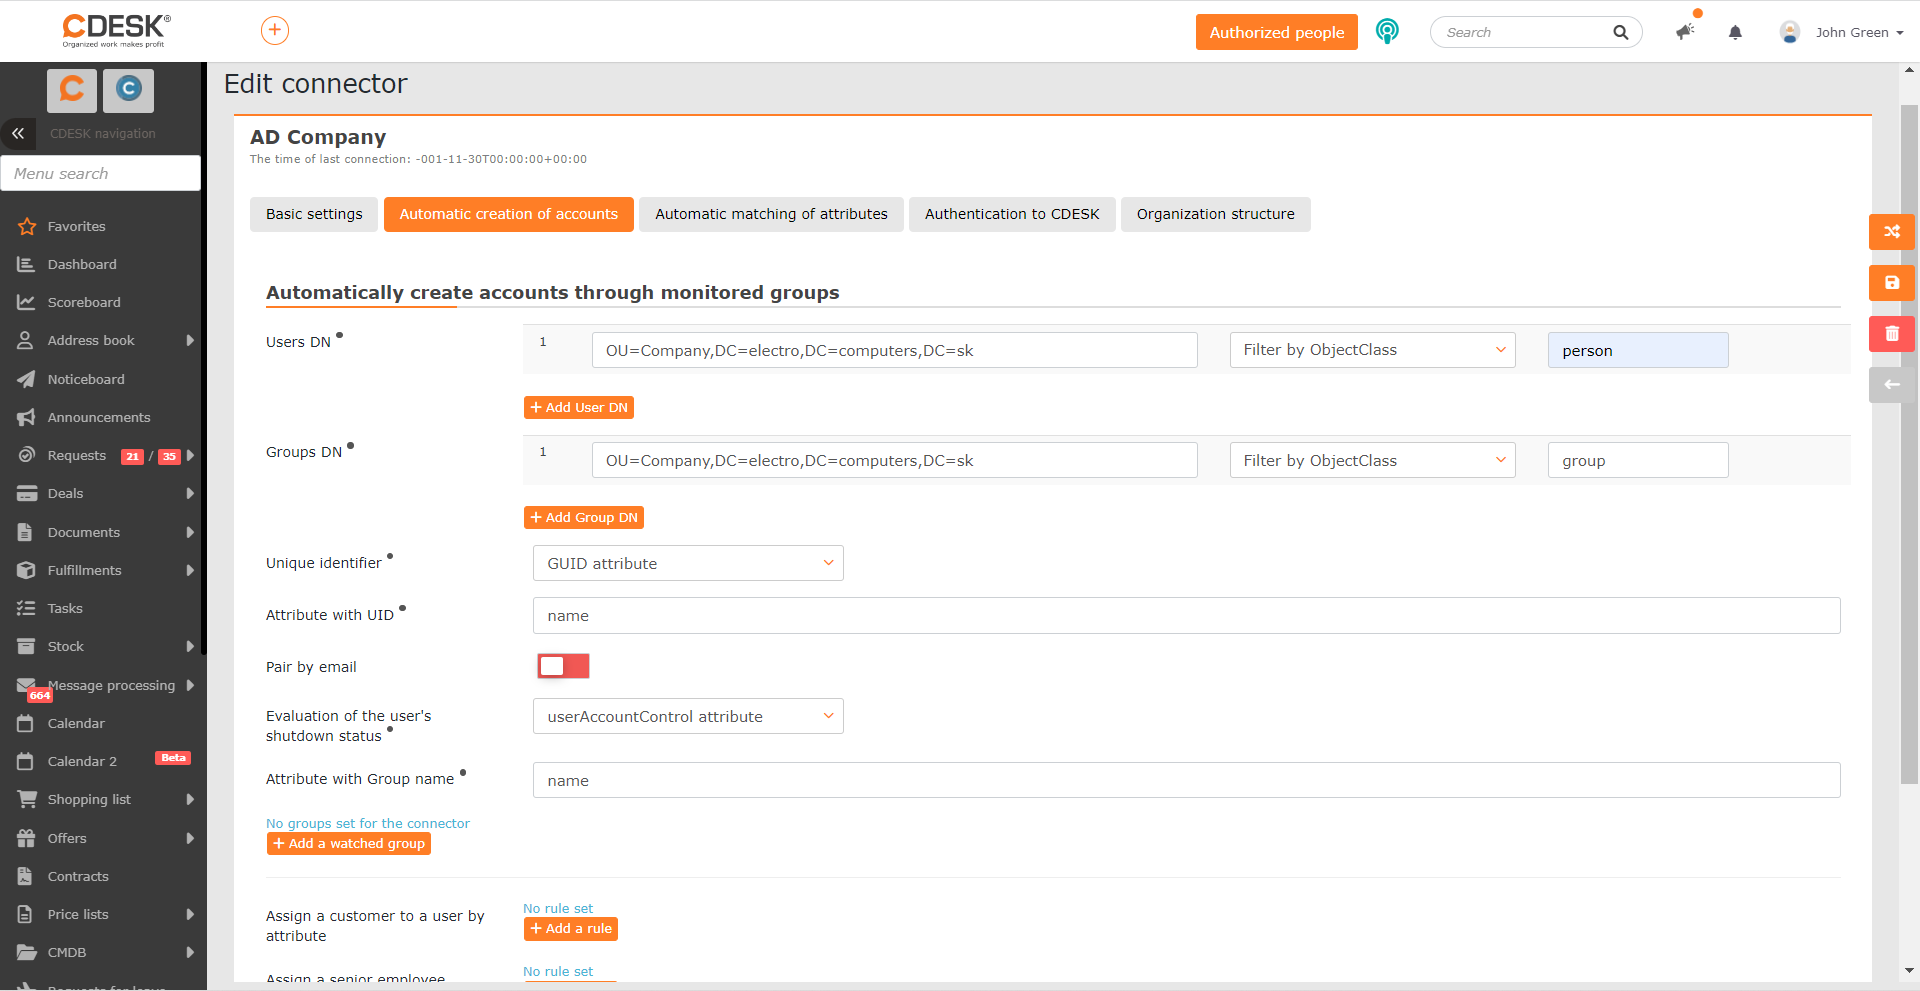
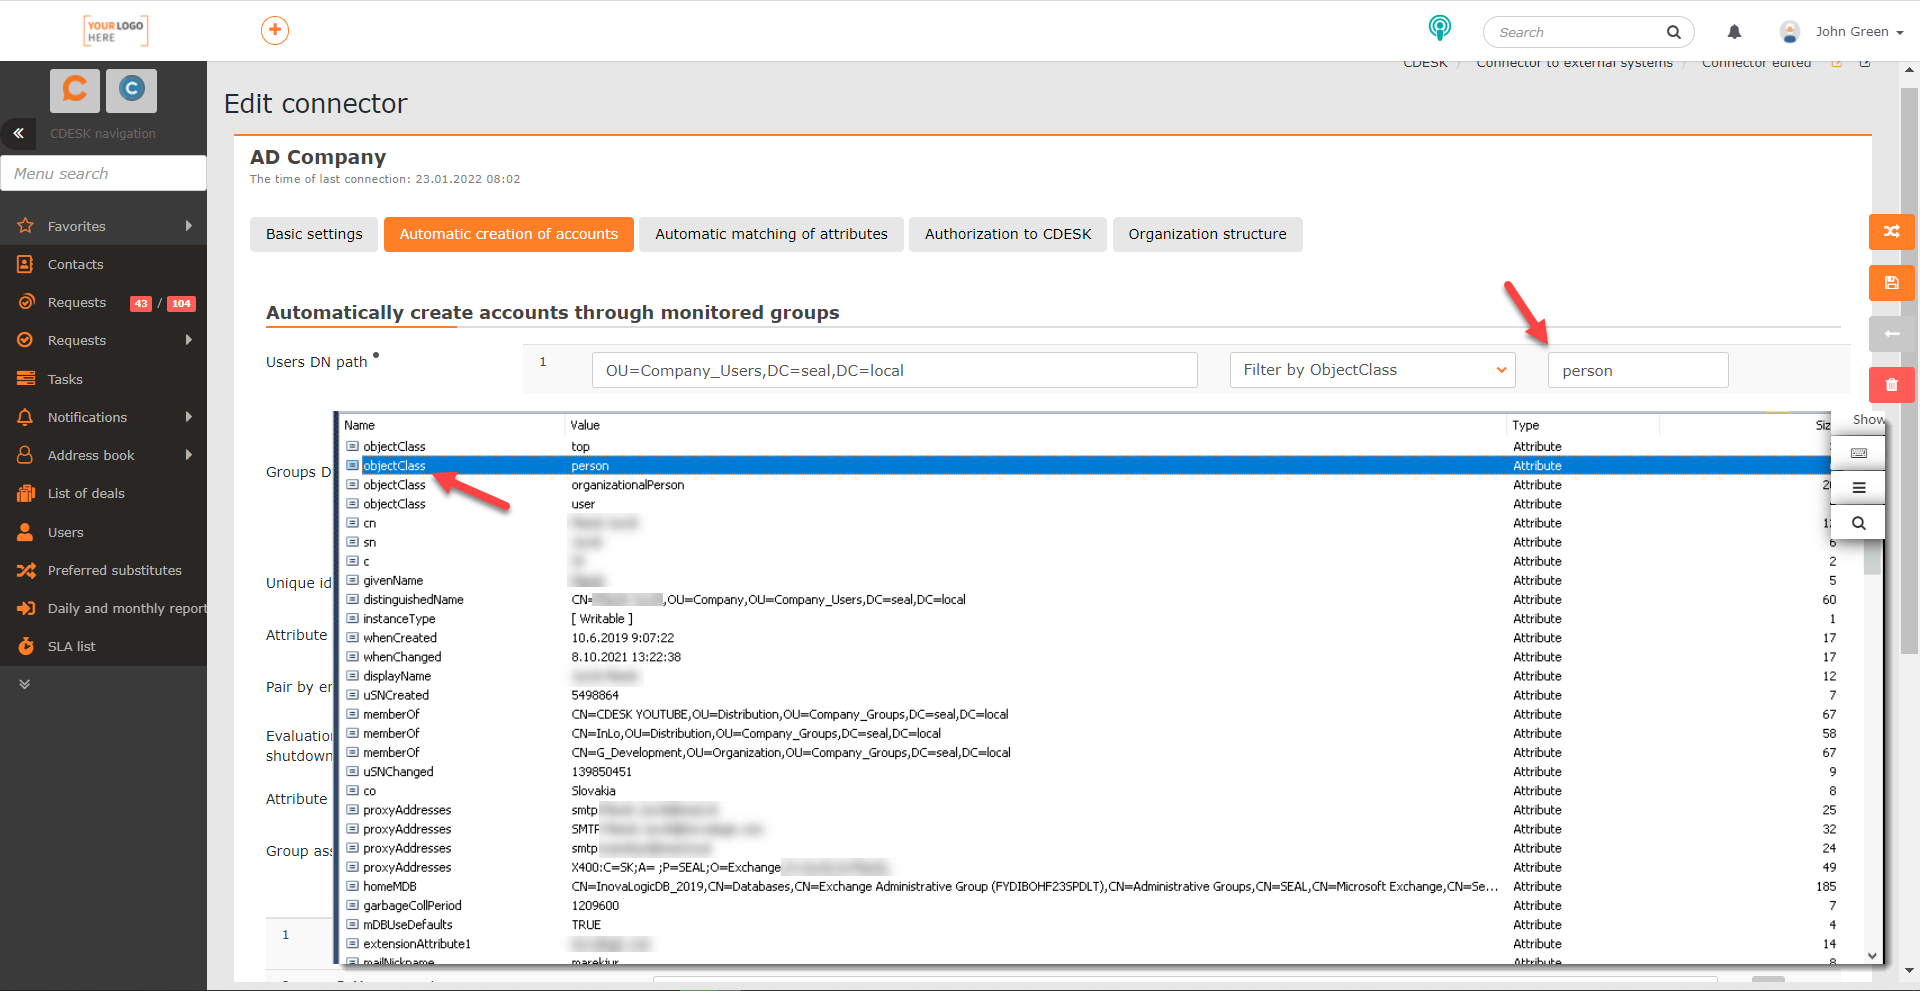
Group DN path – specifies the path for loading groups. This setting is important so that the user groups used in CDESK are assigned to the individual groups from LDAP. This field’s detail contains a setting for whether all records falling under the given path will be loaded, or only objects falling under a particular objectClass. The +Add Group DN path button is used to add a further path from which groups will be loaded. Filtering by objectClass can be set for each new path.
Unique identifier – the value that is loaded from LDAP into CDESK and on the basis of which the user will be synchronised. This identifier stays the same even when the user’s login and other personal details change in the LDAP software.
If you use Active Directory, we recommend leaving the GUID attribute option selected. Once accounts have been created successfully, the GUID attribute is transferred to the newly created user in the External ID item on the General settings tab in the CDESK account settings.
If the data in the LDAP software is loaded from another system, select the Custom attribute option. When this option is selected, a field for entering the attribute appears. We recommend using an attribute similar to the objectGUID attribute used in Active Directory. The reason is so that the user is uniquely identified throughout the whole existence of the AD account.
Attribute containing the UID – we recommend using the value sAMAccountName, but if necessary another value can be entered, as long as it does not contain spaces. Once the account has been created in CDESK, this value is pre-filled as the Username. (This value can be found on the General settings tab in Users and groups->Users->the particular user.)
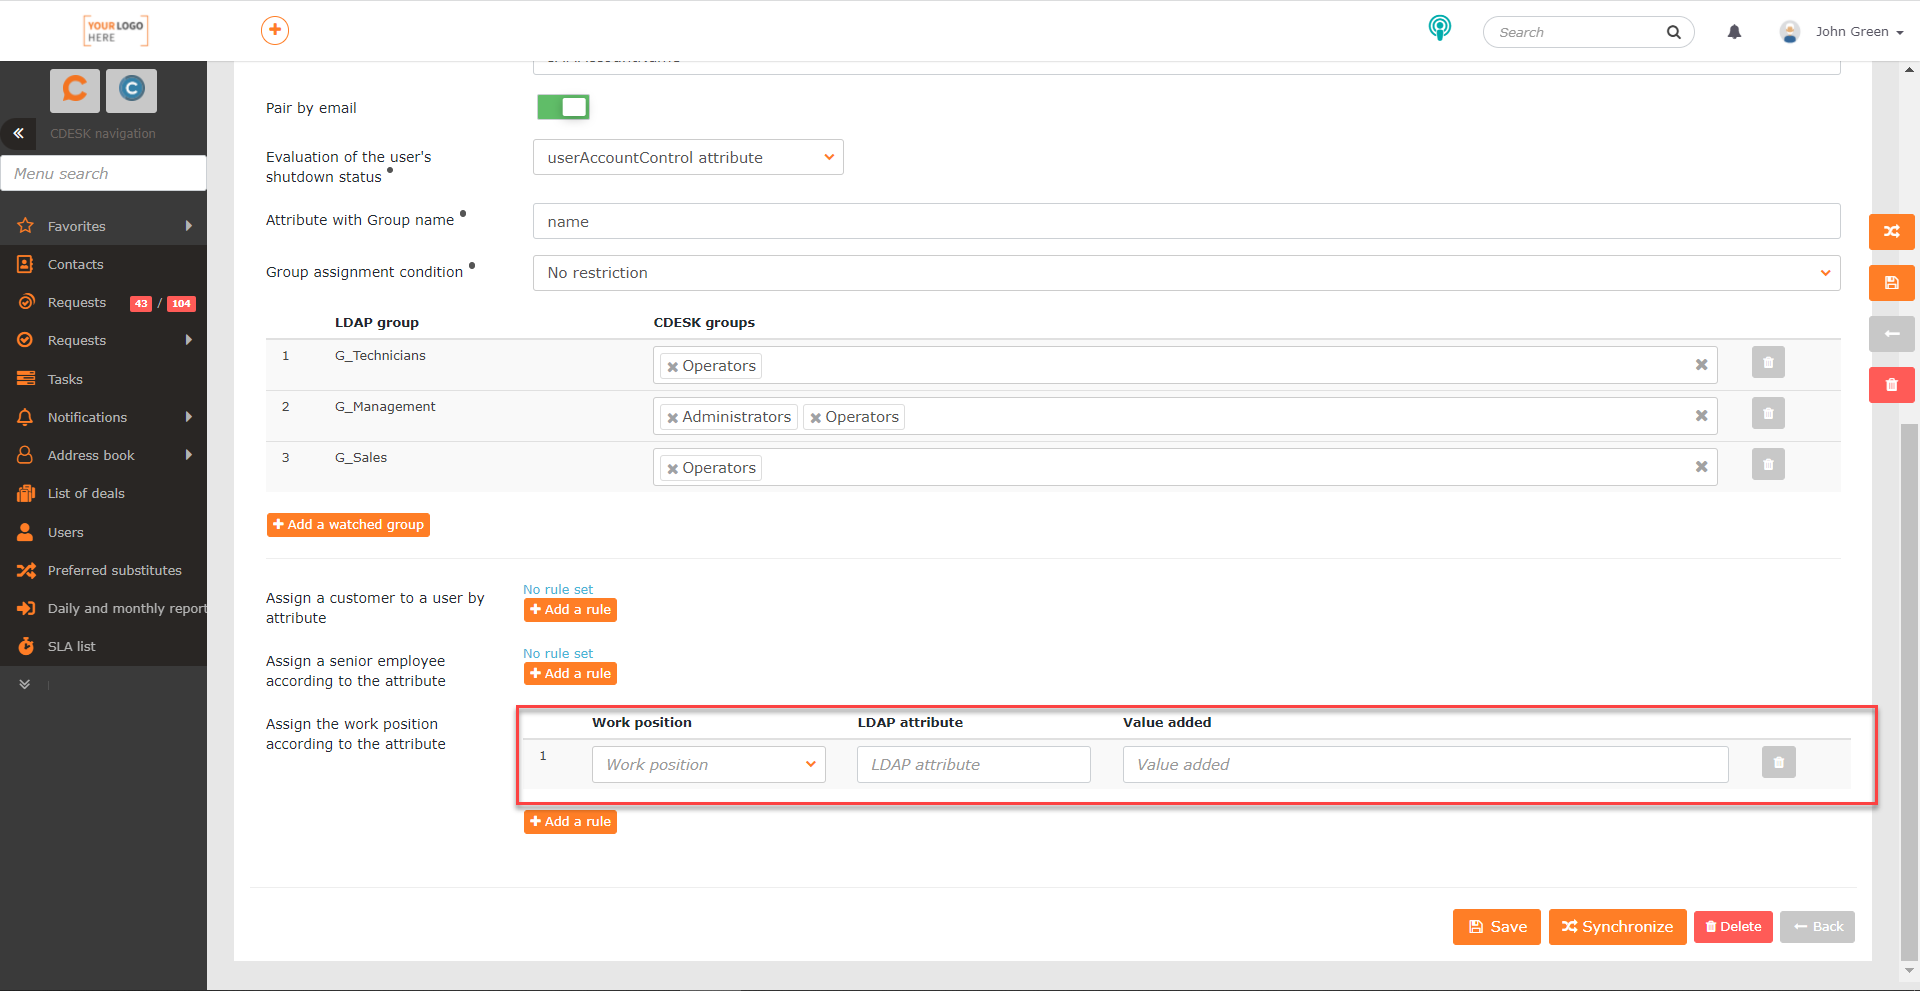
Pairing by e-mail – if the switch is in the on position  , new accounts will not be created for users who have the same e-mail in CDESK as in Active Directory. If you leave the switch in the off position
  during synchronisation, duplicate accounts will be created even for users who are already registered. Switching it back on during a later synchronisation will not remove the duplicate accounts. We therefore recommend switching it on at the very first synchronisation.
Evaluation of the user’s disabled state – the attribute on the basis of which the user’s state (active / inactive) is evaluated. In AD the userAccountControl attribute is normally used for this. So if you do not use custom settings, select this option. No further settings are made when this option is selected, because CDESK recognises the code for an active and an inactive user automatically. If you use your own parameter for evaluating the user’s state, select the Custom attribute option. In that case a field appears for entering the attribute that will be used to evaluate the state.
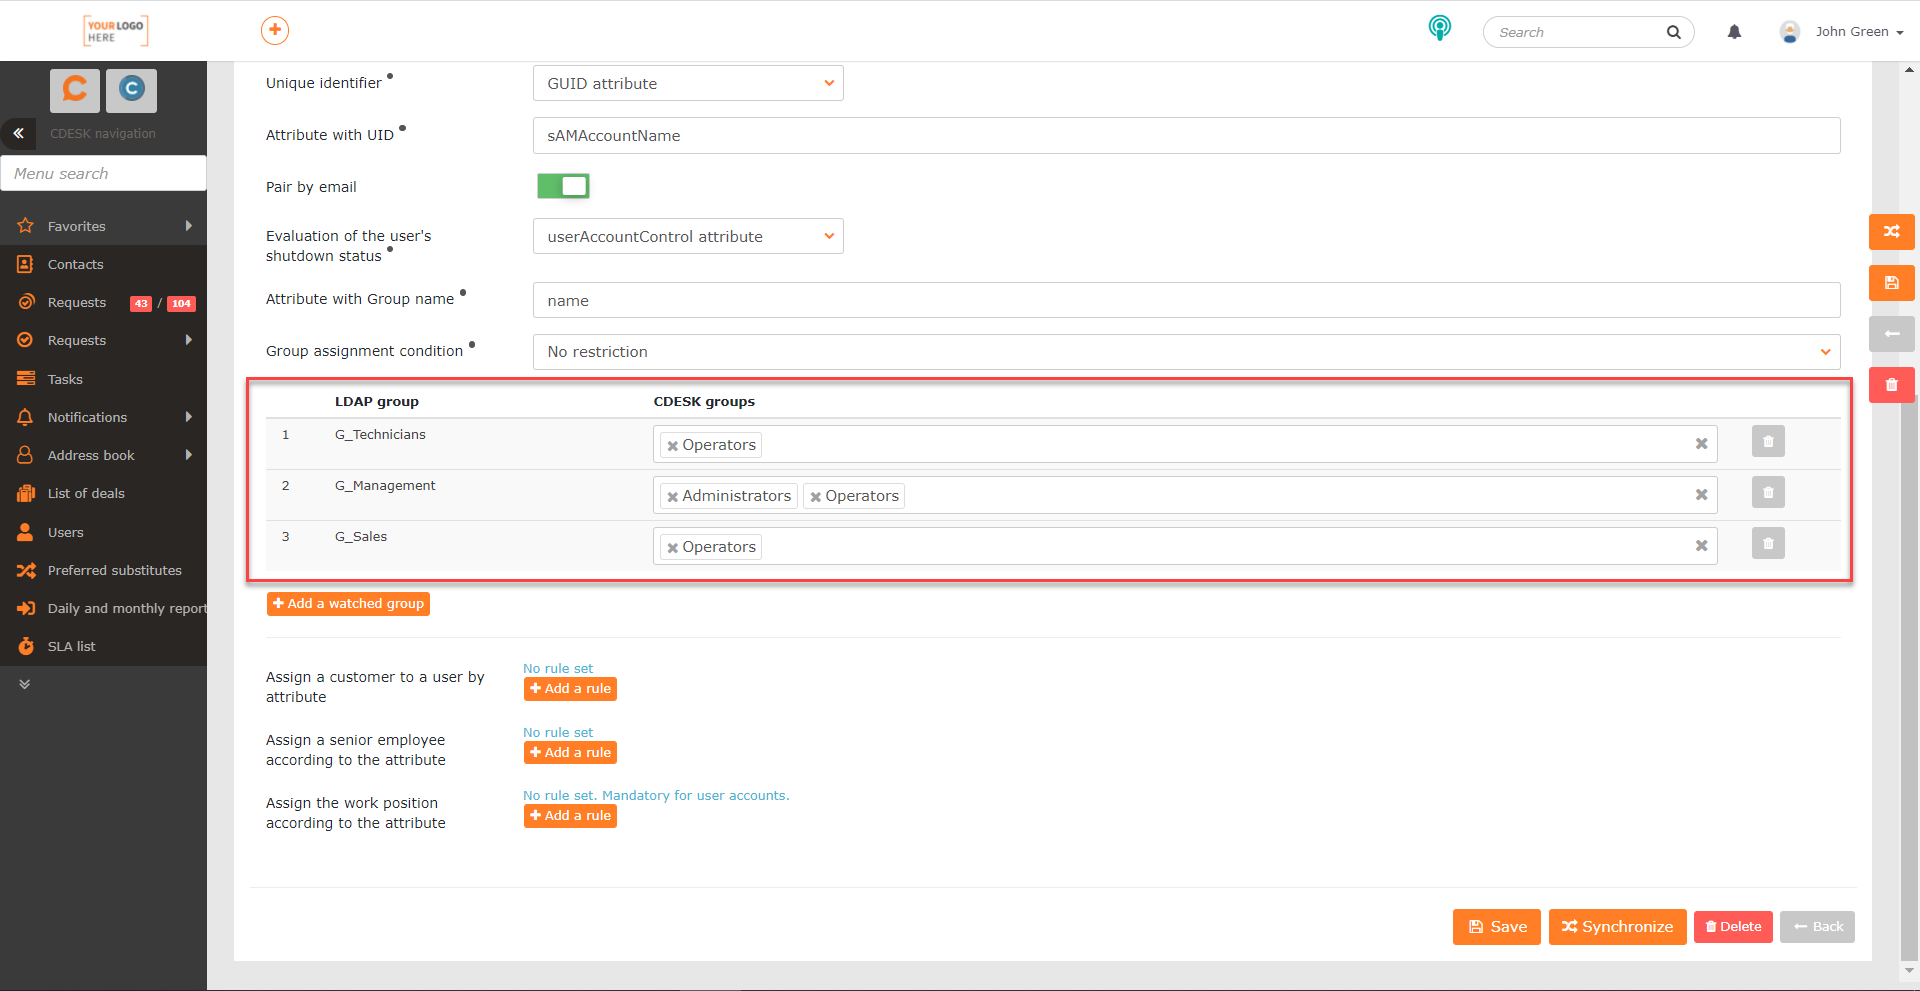
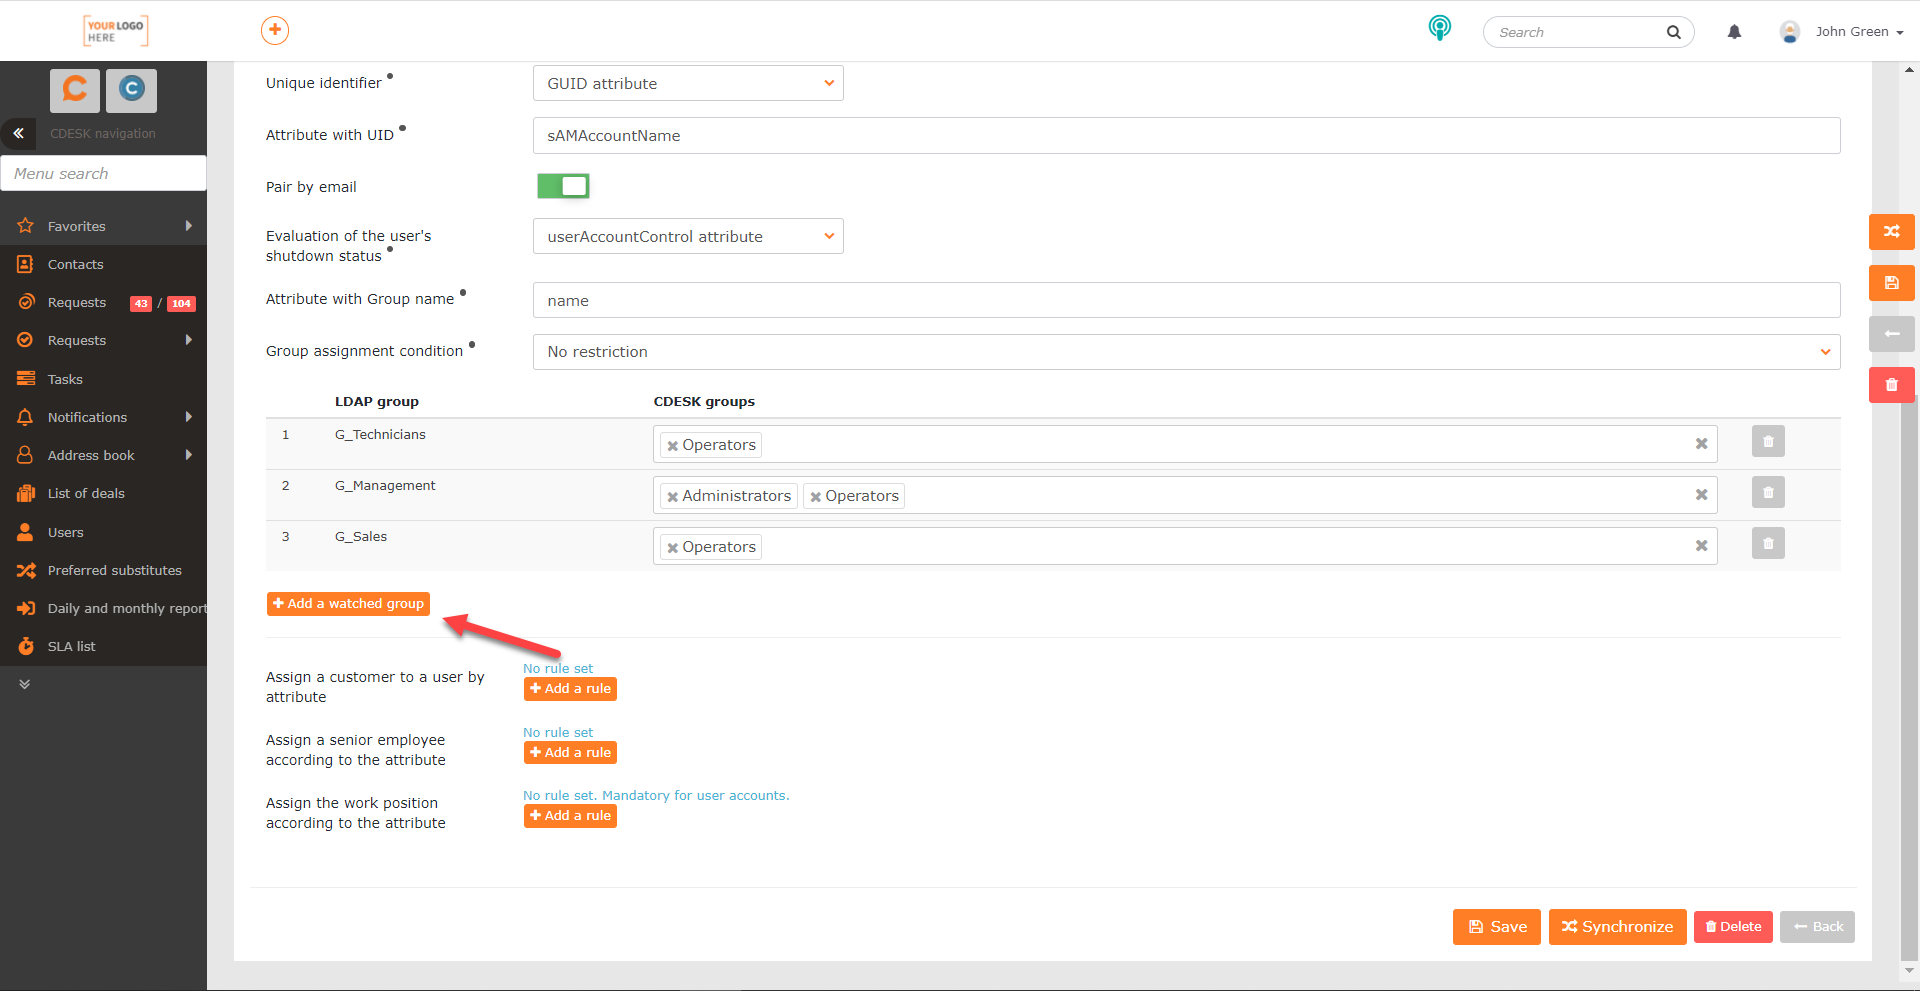
You can add a further LDAP group to the list of groups shown using the +Add monitored group button. After clicking, a list of the available groups appears. Clicking the group name and then the Add button places the LDAP group in the list of groups to which CDESK groups can be assigned. You can remove a group from the list using the  icon at the end of each row.
If you do not register groups in the LDAP software, or you want to add all users regardless of their group membership, click the +Add monitored group button and select the No group specified option.
Assigning a customer to a user by attribute – use this setting if you want a customer to be assigned automatically to newly created users in CDESK. This allows the users to enter requests, for example. After clicking the +Add rule button, a row with the following fields appears:
- CDESK company – after clicking, a selector with the list of companies registered in CDESK appears. Select the customer that will be assigned to the selected users. The list of companies registered in CDESK can be found in Address book -> Companies.
- LDAP attribute – any attribute in the LDAP software on the basis of which CDESK will evaluate whether the selected company is assigned to the users. If you want to assign the company to all newly created users and those users have no LDAP attribute in common, we recommend entering the value userAccountControl.
- Value obtained – the value of the selected LDAP attribute which, if met, means that the company that has been set is assigned automatically to users with that value. When choosing the LDAP attribute userAccountControl we recommend using the value 66048 and / or 512. These are the standard values in AD. 66048 denotes users whose password does not expire, and 512 users whose password expires.
So that a company can be assigned on the basis of two or more values of an LDAP attribute, a new rule has to be defined for each value. You again define it using the +Add rule button. In this way you can also define the assignment of users to a different company in CDESK on the basis of any LDAP attribute and its values. If you need to remove a rule, click the icon at the end of that rule’s row.

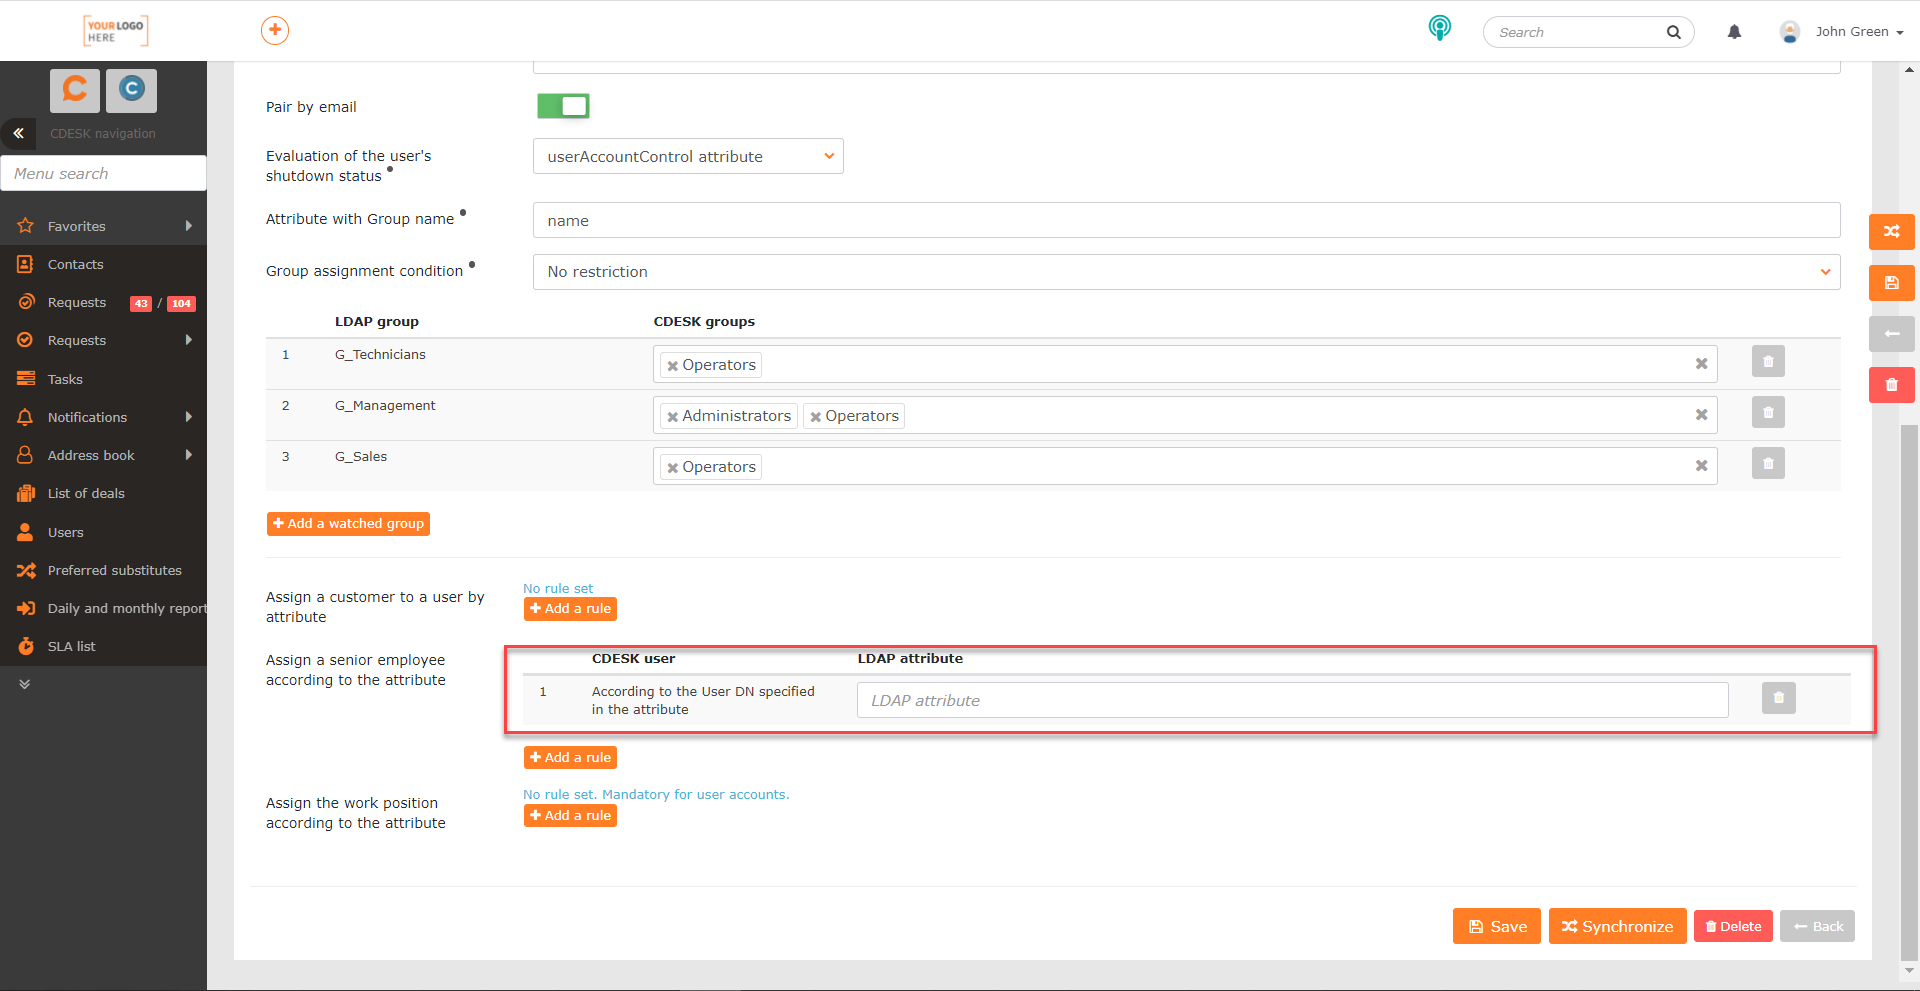
Assigning a manager by attribute – use this setting if you want a manager to be assigned automatically to newly created users in CDESK. This might be the company manager, for example. After clicking the +Add rule button, a field appears for entering the LDAP attribute which, if the user / users in the LDAP software meet it, means they are assigned as managers to the newly created accounts. It can be any attribute. It is also possible to add several rules for adding a manager. If you need to remove a rule, click the icon at the end of that rule’s row.
You will find the list of managers for a particular account in Users and groups -> Users -> the particular user -> the Managers and subordinates tab -> the Managers section.
Assigning a job position by attribute – use this setting if you want job positions to be assigned automatically to newly created users in CDESK. After clicking the +Add rule button, a row with the following fields appears:
- Job position – after clicking, a selector of the job positions registered in CDESK appears. Job positions can be created in Global settings -> Job positions -> Defining job positions.
- LDAP attribute – any attribute in the LDAP software on the basis of which CDESK will evaluate whether the selected job position is assigned to the users. If you want to assign the job position to all newly created users and those users have no LDAP attribute in common, we recommend entering the value userAccountControl.
- Value obtained – the value of the selected LDAP attribute which, if met, means that the job position that has been set is assigned automatically to users with that value. When choosing the LDAP attribute userAccountControl we recommend using the value 66048 and / or 512. These are the standard values in AD. 66048 denotes users whose password does not expire, and 512 users whose password expires.
So that a job position can be assigned on the basis of two or more values of an LDAP attribute, a new rule has to be defined for each value. You again define it using the +Add rule button. In this way you can also define the assignment of users to a different job position in CDESK on the basis of any LDAP attribute and its values. If you need to remove a rule, click the icon at the end of that rule’s row.
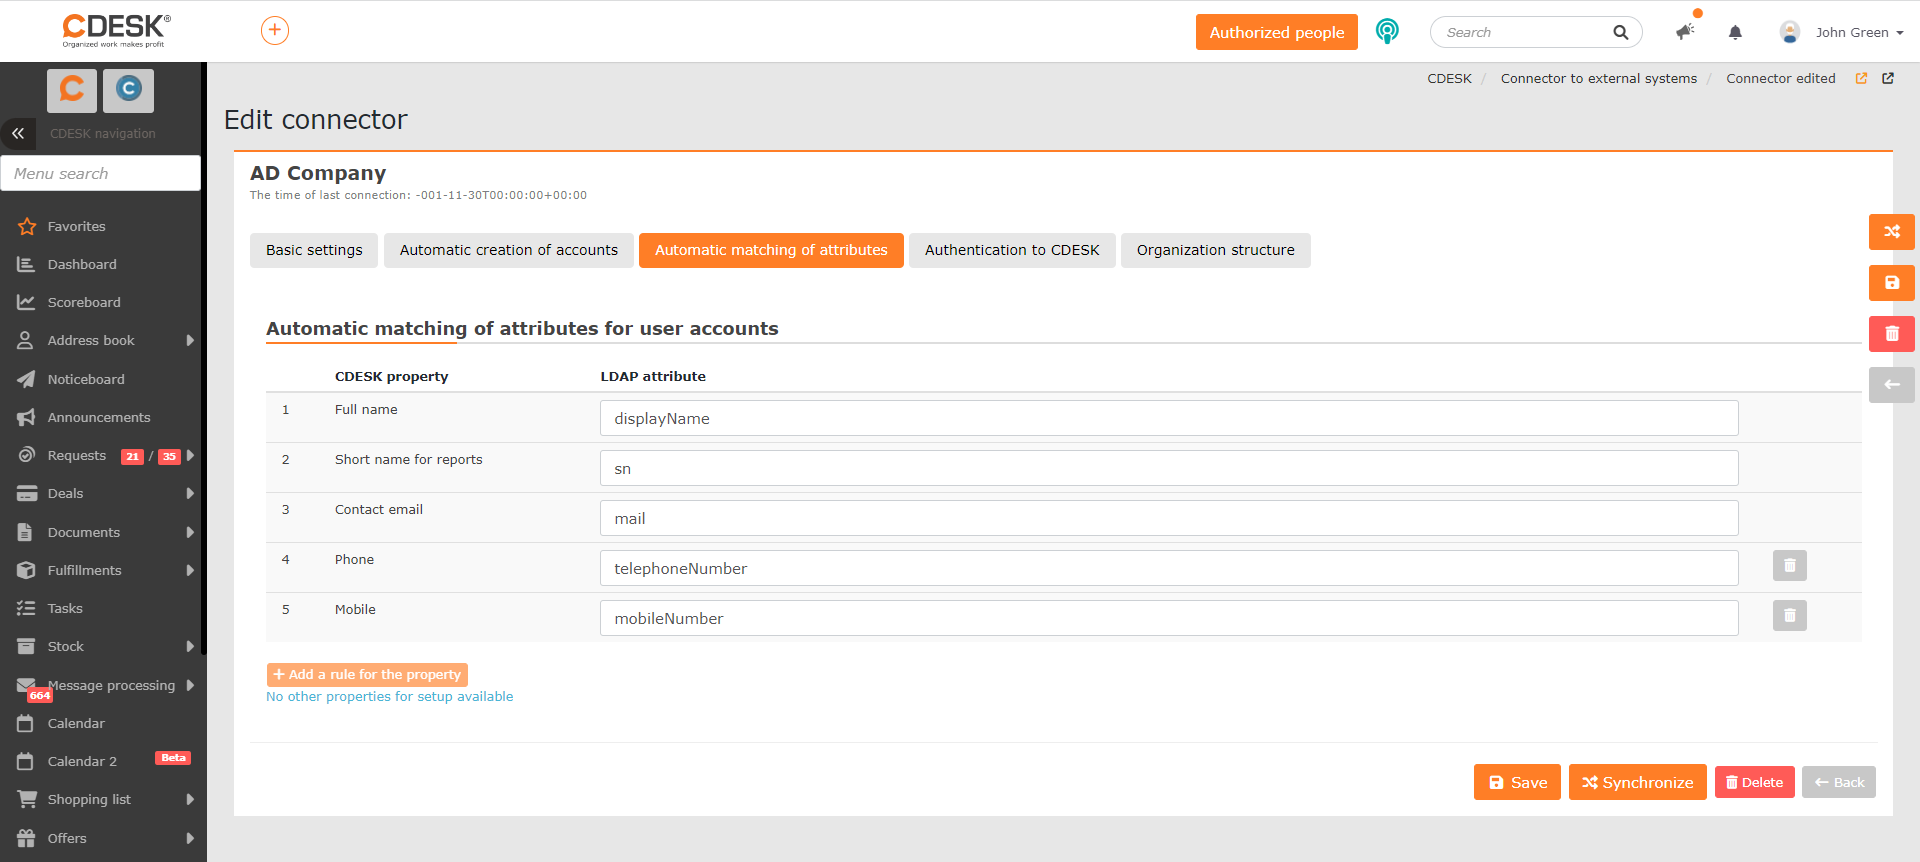
By default the list contains the properties that are mandatory.
Full name – enter the LDAP attribute on the basis of which the user form fills in the field Full name. Any attribute can be entered. We recommend, however, using the attribute displayName.
Abbreviation for listings – enter the LDAP attribute on the basis of which the user form fills in the field Abbreviation for listings. For CDESK it is recommended that the Abbreviation for listings is the same as the user’s login. Any attribute can be entered. We recommend, however, using the attribute sAMAccountName
Contact e-mail – enter the LDAP attribute on the basis of which the user form fills in the field Contact e-mail. Any attribute can be entered. We recommend, however, using the attribute mail.
If necessary, automatic pre-filling can be set up for the fields Phone and Mobile. If you have further additional properties set for users in your CDESK environment, it will be possible to add those as well. They must, however, be properties set globally for all users, which you can add in Global settings -> Users -> the section Additional properties.
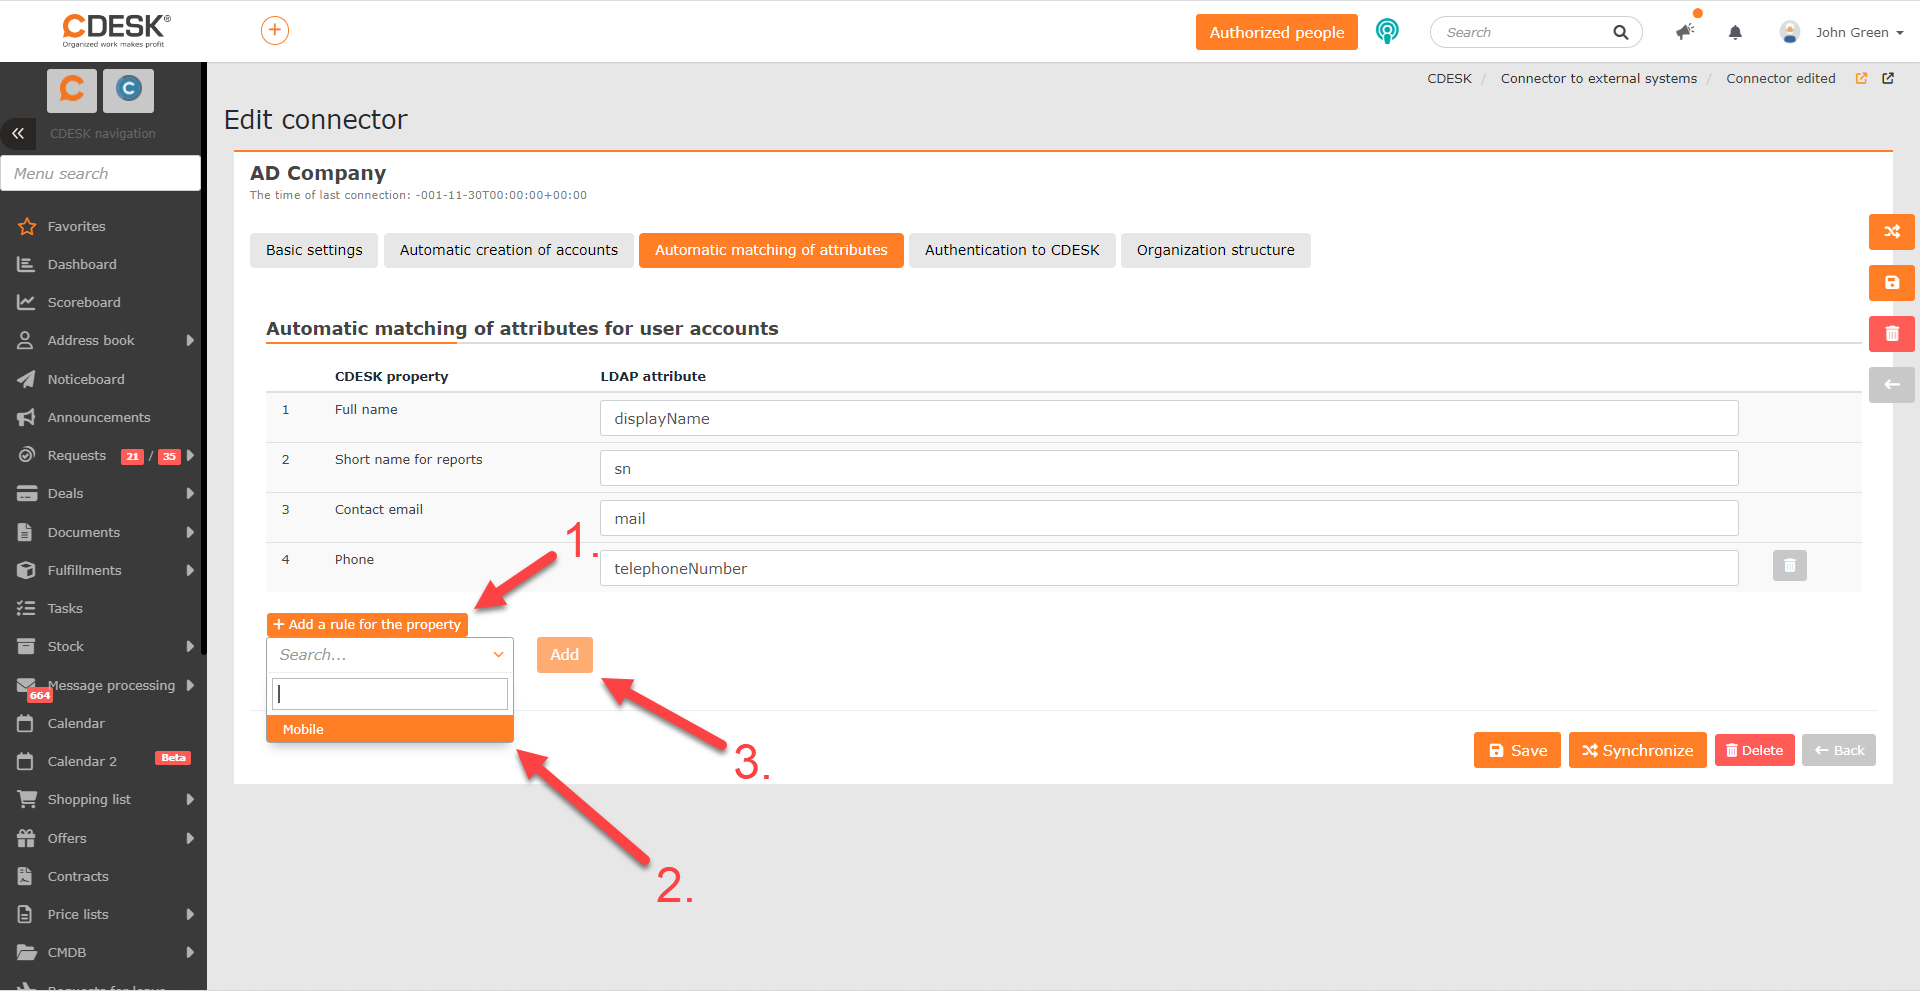
To add one of these properties, click the +Add rule button for the property, which is below the current list of properties.
After clicking, a field for selecting the property appears. You select the property you want by clicking it and then click the button Add. The property is then placed in the list and a field appears next to it for entering the corresponding LDAP attribute. If you want to remove a property added in this way from the list, click the icon , which is at the end of that property’s row. Only those attributes that are not mandatory can be removed.
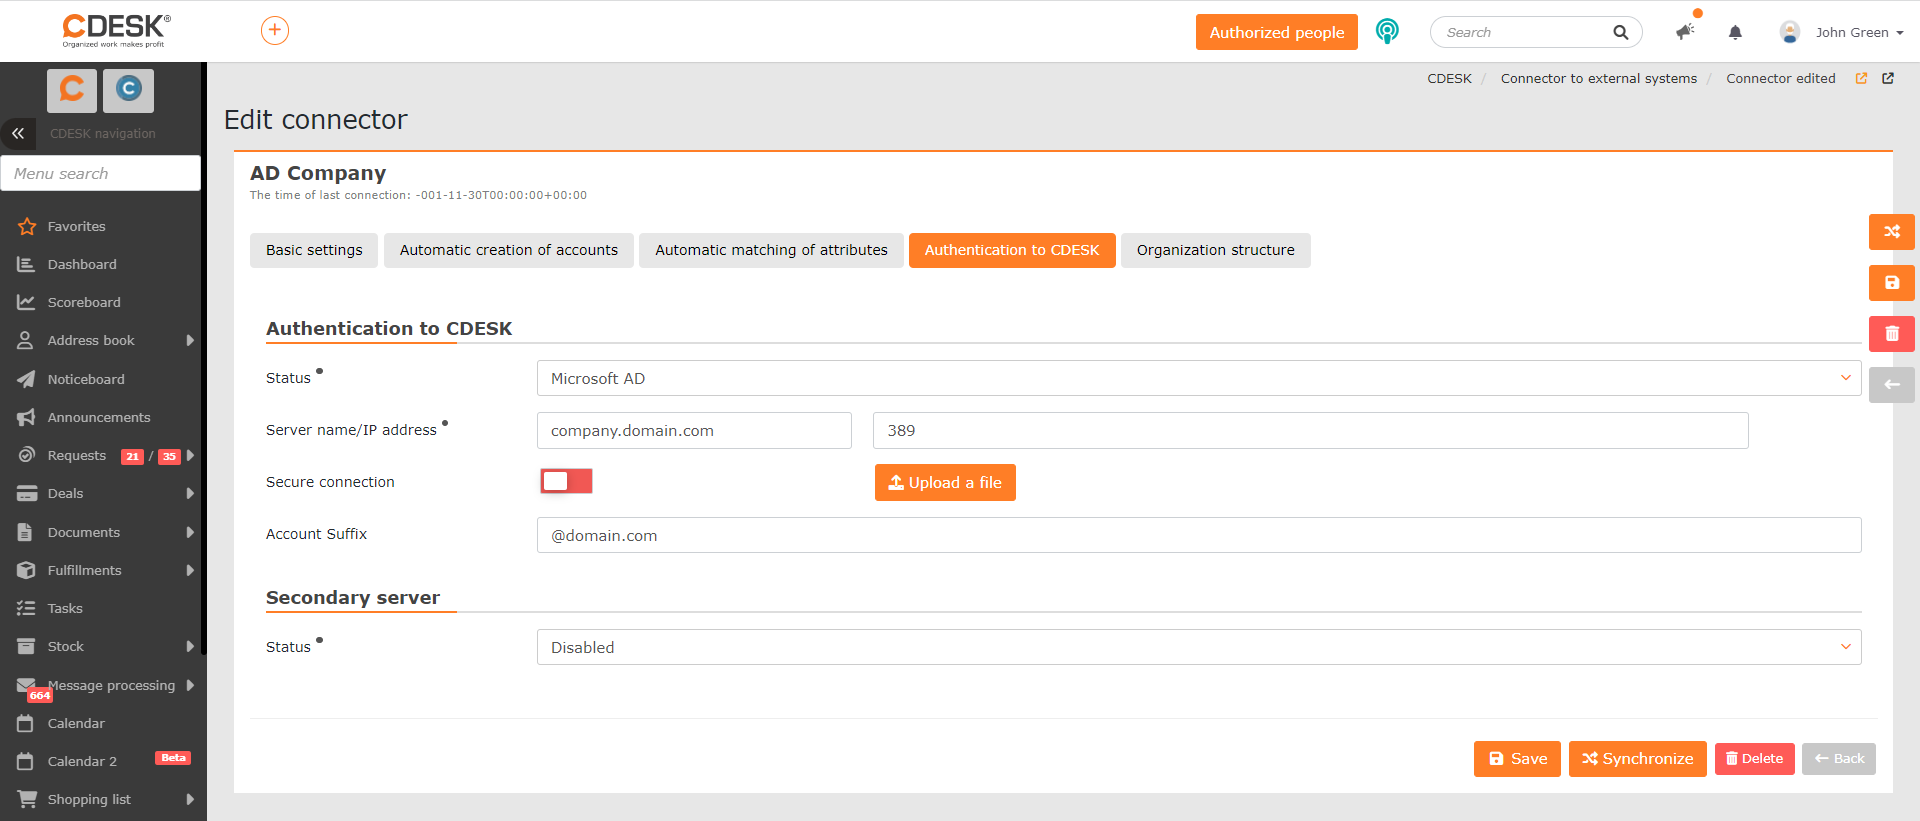
State – the selector offers the following options:
- Off – the option filled in by default. In that case the fields for further settings are not shown. Use the Off state if you register several domains in the AD connector, as a result of which the login details of newly created users will also contain several domains.
- Microsoft AD – use this if you register all users in AD under a single domain. When this option is selected, further fields for configuring that domain’s server become available.
Server name/IP address – in the first field enter the name or the IP address of the server, and in the second field enter the port number.
Secure connection – so that the connection is secure, set the switch to the on position and, if necessary, upload the certificate using the Upload file button.
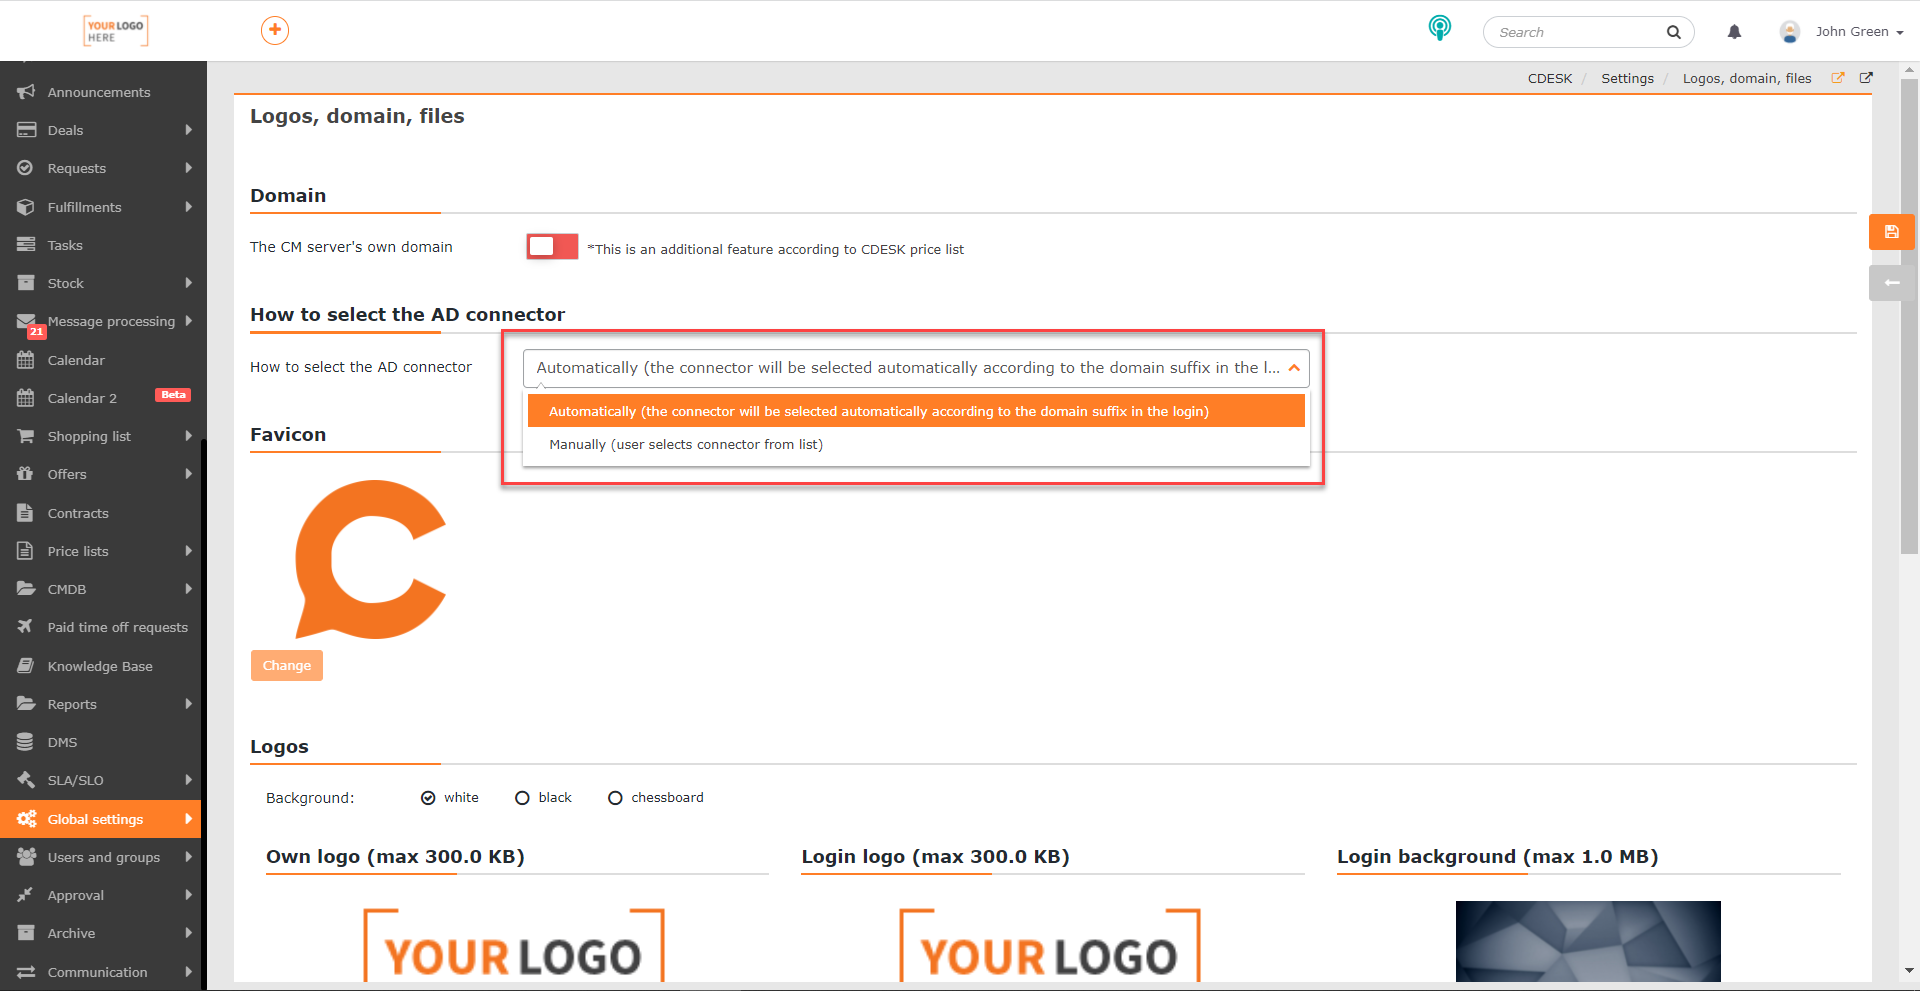
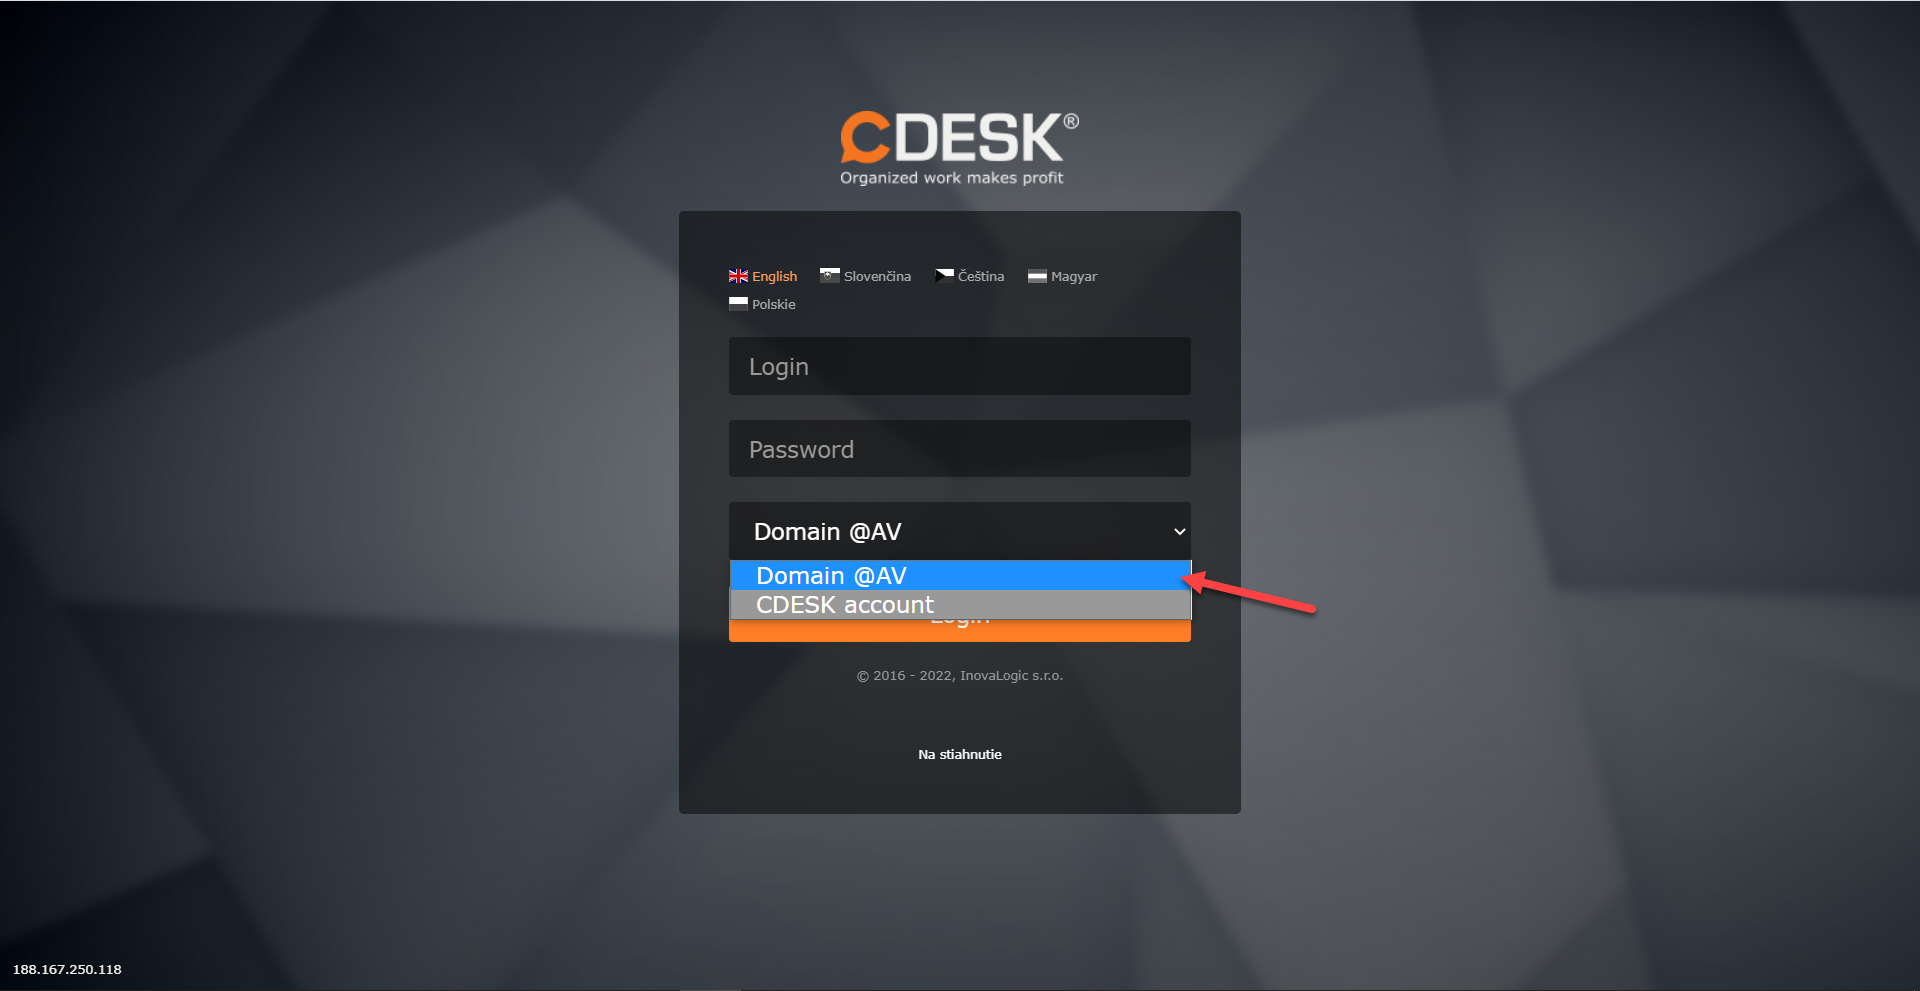
Account suffix – the domain name in the form @domain.domain. It will be possible to select this name on the CDESK login screen if you have the manual connector selection method set.
Secondary server – if you use several AD servers, in this section you can configure logging in via a secondary server, which will be used if the primary one fails. By default the Off option is set in the state field. To configure a secondary server, select the Microsoft AD option and configure the data in the fields shown in the same way as for the primary server, but with the secondary server’s details.