This section of the manual is intended for the operator. It assumes that the administrator has completed the settings described in the previous chapter and that the operator has been assigned an extension. Without an assigned extension, there is no way to make calls and the telephone’s functions are not available.
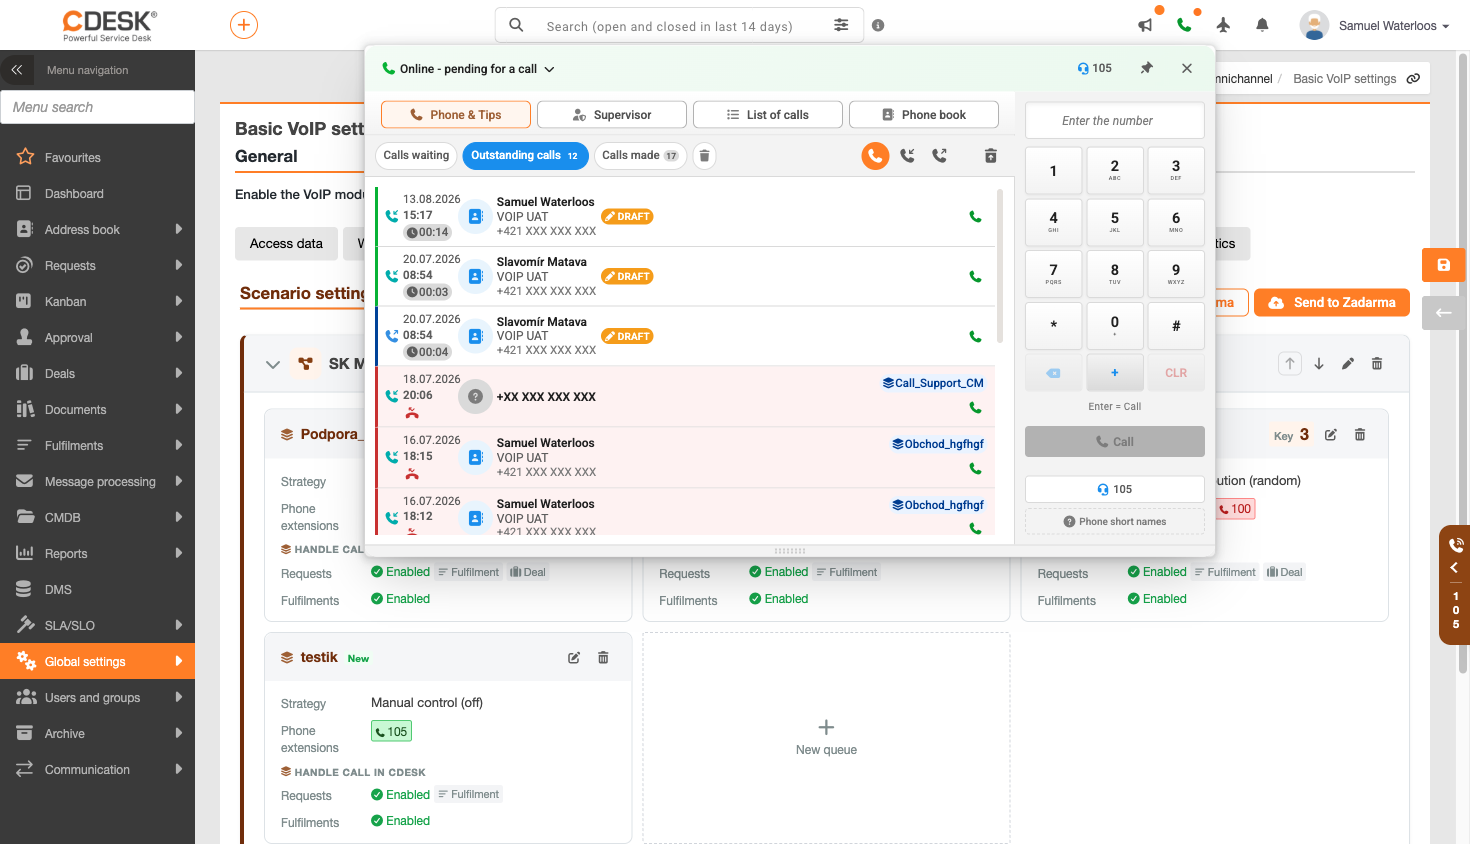
The telephone is controlled via the telephone icon in the top bar of CDESK. The panel has four tabs:
- Phone & Tips – contains a selection list for dialing and lists of calls on hold, outstanding, answered and rejected calls.
- Supervisor – views ongoing calls for extensions with active supervisor mode.
- Call Log – a call history with filtering options.
- Phone Book – used to search for contacts and dial numbers directly from the directory.
The panel header displays the operator’s status, which changes depending on the situation – Offline, Online – pending for a call. At the footer of the panel is the connection status of the voice device. The panel can be pinned so that it remains open; if you have an ongoing call request, it will be saved before you switch away.
In addition to the top panel, there is the Zadarma web phone itself – a widget in the bottom right-hand corner. By default, it is tucked away behind the right-hand edge of the screen, with only the tab showing your extension number remaining visible; it slides out automatically when a call is received. Whether it is extended or retracted is saved to your user profile, so this applies across browsers and computers. Its position on the screen is saved locally in the browser, as each device has a different resolution.
The telephone icon in the top bar has three colour statuses that are worth knowing: green means you are online and available, red means you have manually switched to offline, and a red crossed-out icon indicates a technical problem with your connection to Zadarma. A dot in the theme colour next to the icon indicates that you have at least one pending call; a red circle showing the quantity of overdue calls takes precedence and disappears once you’ve opened the list for the first time.
Offline status applies to your entire account, not just a single browser tab. When you switch to offline mode in any tab, all your open tabs and devices will switch within a few seconds, and calls will stop ringing everywhere. This does not affect the status of other operators.
You can adjust the height of the panel by dragging the handle on its bottom bar; the setting will be saved for your user in that browser. The collapsed panel can also be dragged up and down. In your profile under the default settings, there is also a toggle for ‘Automatically open the large VoIP panel when connected’ – this is disabled by default and is only visible to users with an assigned extension.
The panel itself is controlled by several elements that are worth familiarising yourself with. ‘Minimise to mini panel’ collapses the large panel – this function is disabled during call forwarding, and the panel will first prompt you to complete or cancel call forwarding. Selecting View Requests / Hide Requests opens the left-hand panel showing the caller’s current requests.
The mini-panel is toggled using the ‘Open large panel’ and ‘Collapse large panel’ buttons; ‘Hide mini-panel’ moves it to the side, and it will be viewed during the next call. You can access the phone book directly from this panel by clicking the ‘Open phone book’ button. The header always displays your extension number and status – ‘Dial’, ‘Calling’, ‘Active call’, ‘On hold’ or ‘Processing call’.
Incoming call
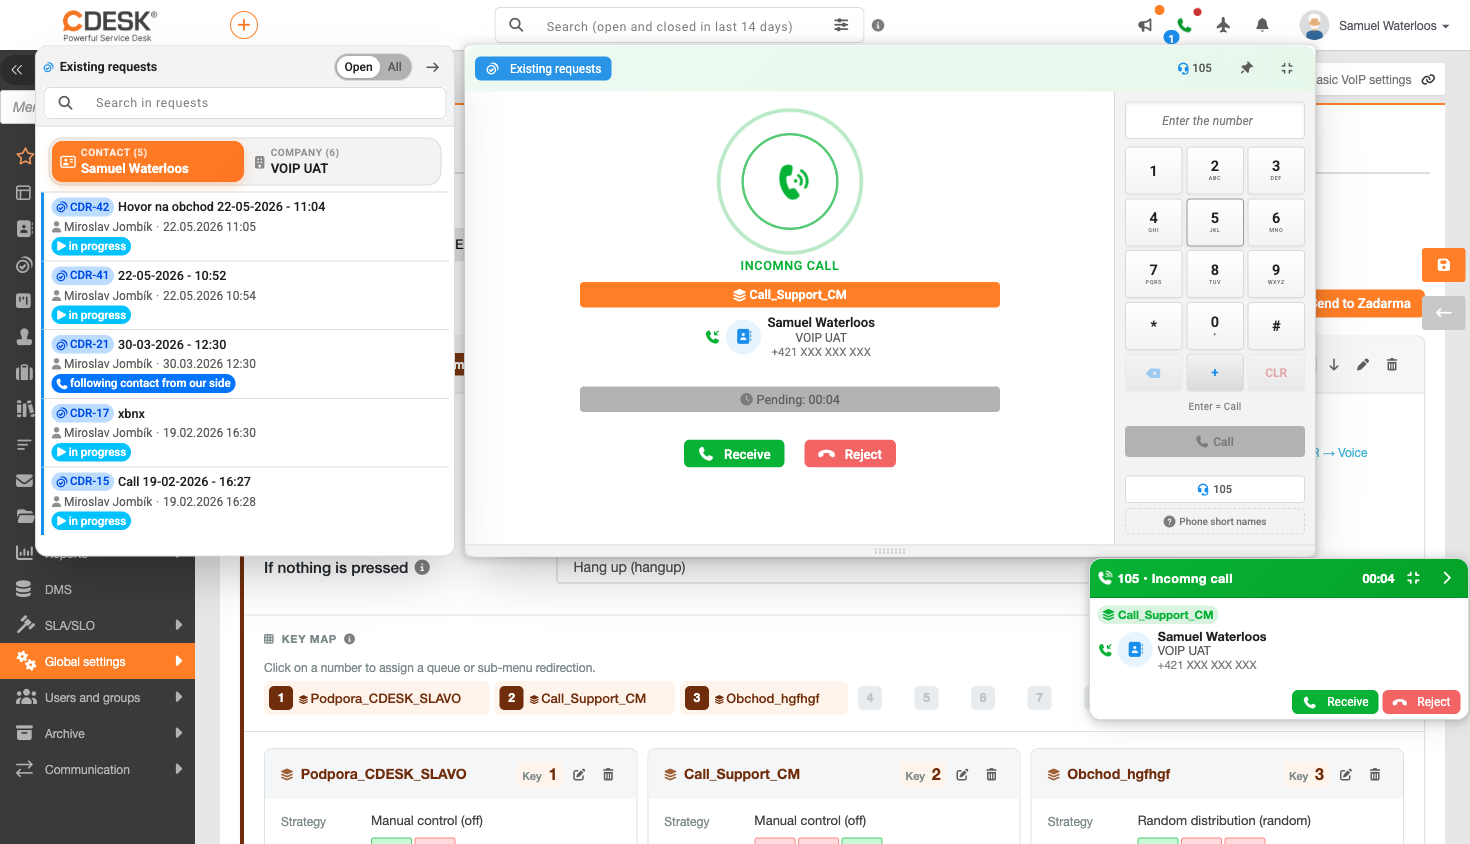
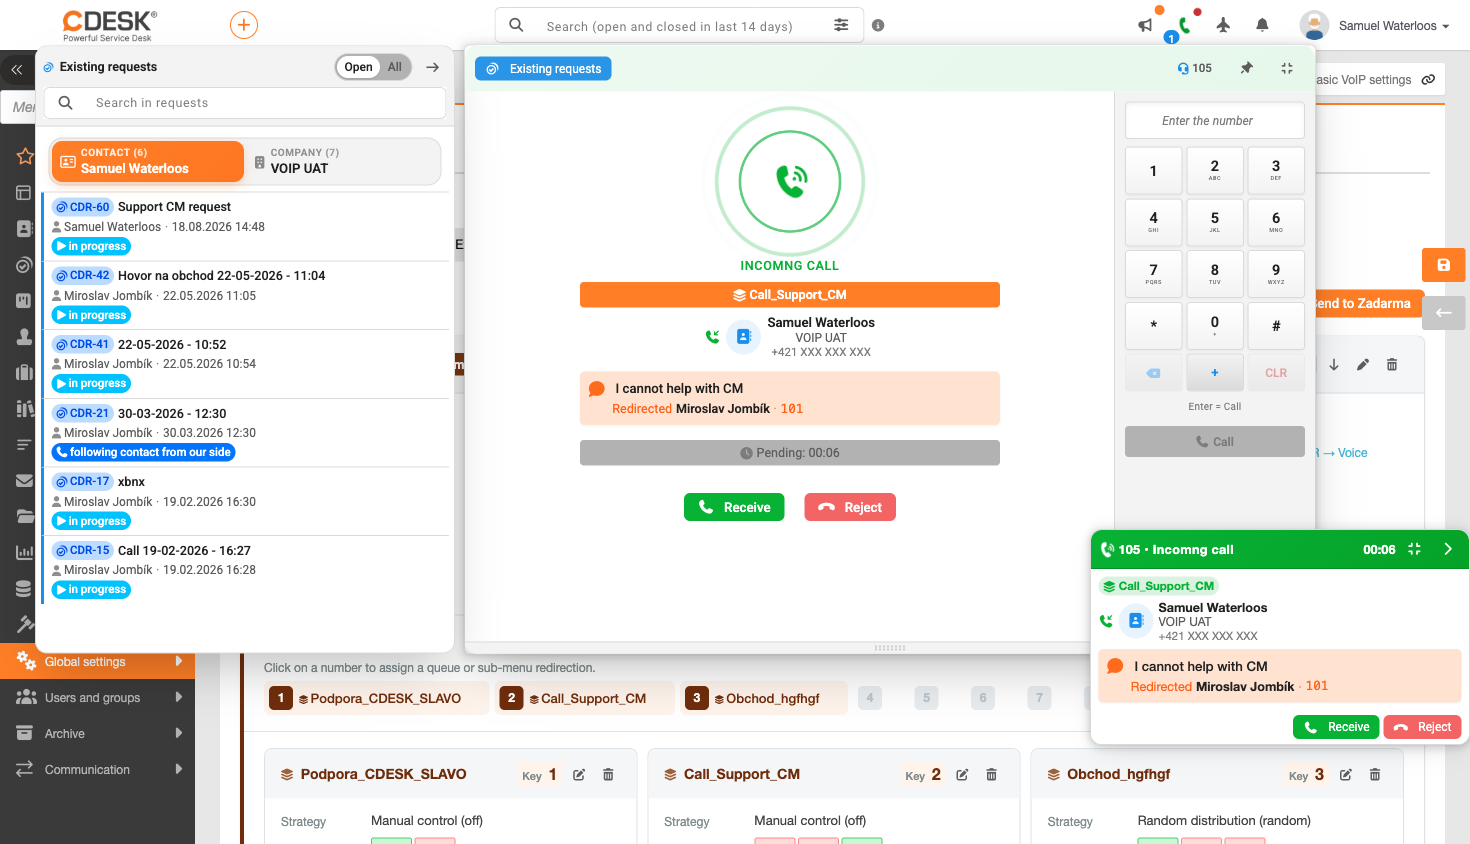
When the phone rings, the incoming call panel is displayed, showing the caller’s number. If the number is linked to a contact or user account in CDESK, you will also see the name and company, so you know who is calling before you pick up. You can answer, reject or open the call in the large panel.
Once the call is answered, the panel changes colour and starts counting the call duration. If call handling is enabled for that line, a form for creating a request or fulfilment will appear.
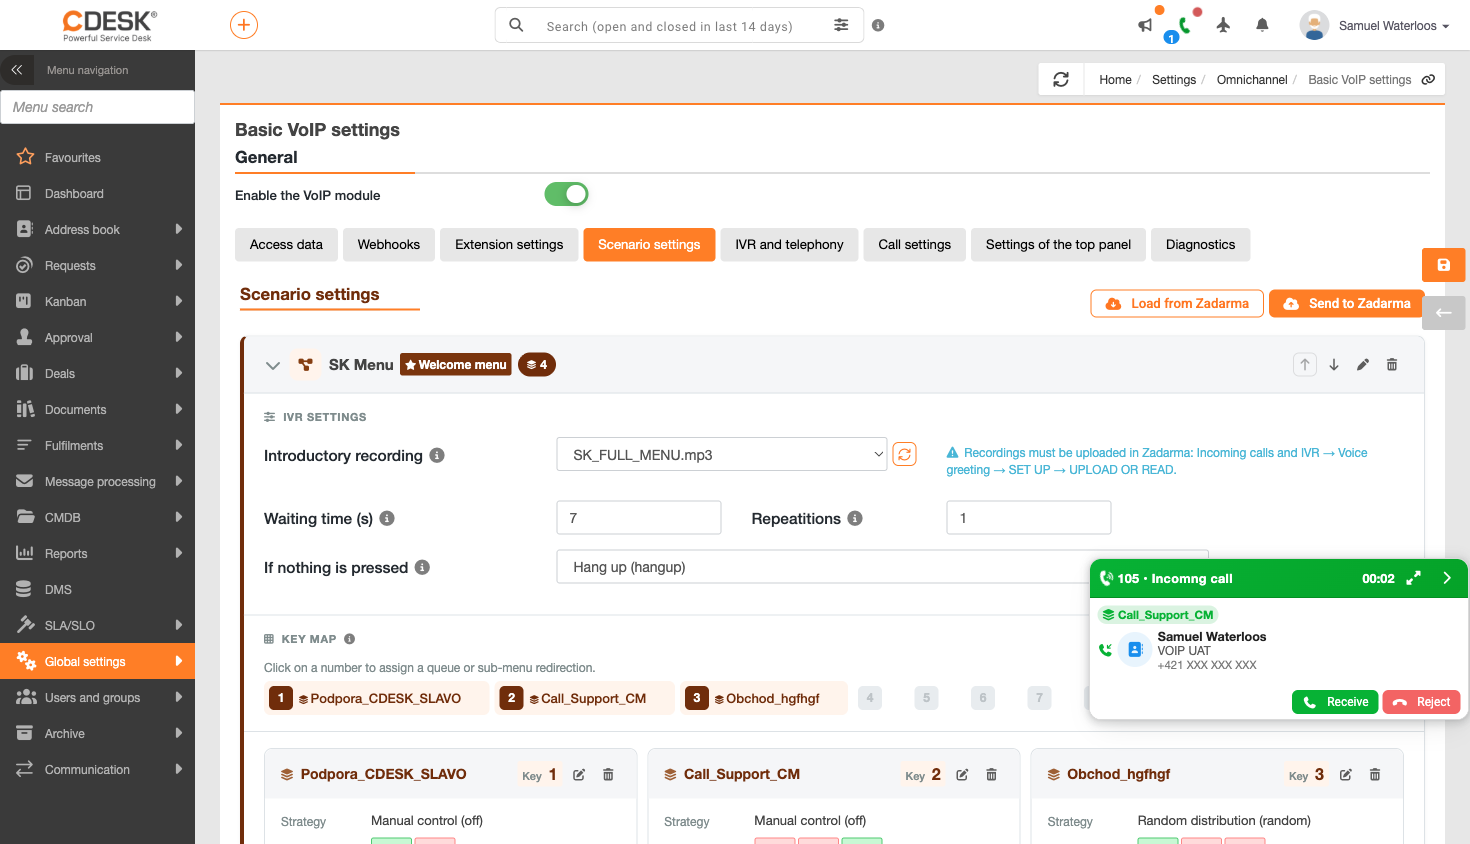
By default, each call is viewed in a small panel at the bottom right, and its colour indicates the call’s status. When ringing, it is green and contains buttons to accept or decline the call. Once received, it turns orange, starts counting the call duration and offers ‘Hold’, ‘Transfer’ and ‘Hang up’. In both statuses, it displays your extension number, the line and the caller’s identity.
If you receive a call in the large panel, the large panel remains open for the duration of the call; once minimised, the small panel is viewed. You can always open the large panel from the small panel, so you won’t lose the context of the call. It works the same way for outgoing calls – if you make a call from the large panel, the call will remain there.
The desktop notification views the caller’s name and the queue from which the call was received, so you can decide what to do even before switching to CDESK.
If another call rings whilst you’re handling one, you will be able to view the name and queue number in the small panel, and the form you’re working on will remain open. When you answer the new call, the form you were working on is automatically saved as a draft and you can complete it later from the call list; the panel switches to the new call. If you do not answer the new call, it is logged as pending.
As well as the number, the incoming call panel also displays the queue from which the call was received, the caller’s name and company, a queue timer, and buttons to accept or reject the call. At the same time, ‘Existing Requests’ panel opens on the left, displaying a list of open requests from that caller, so the operator can see the context before even answering.
You can accept a call using the ‘Accept’ button and decline it using the ‘Reject’ button. If you have a form for another call in progress, the button changes to ‘Accept and Save’ and the panel displays a warning – the form in progress is automatically saved as a draft when you receive the call, so you can return to it later.
Call in progress
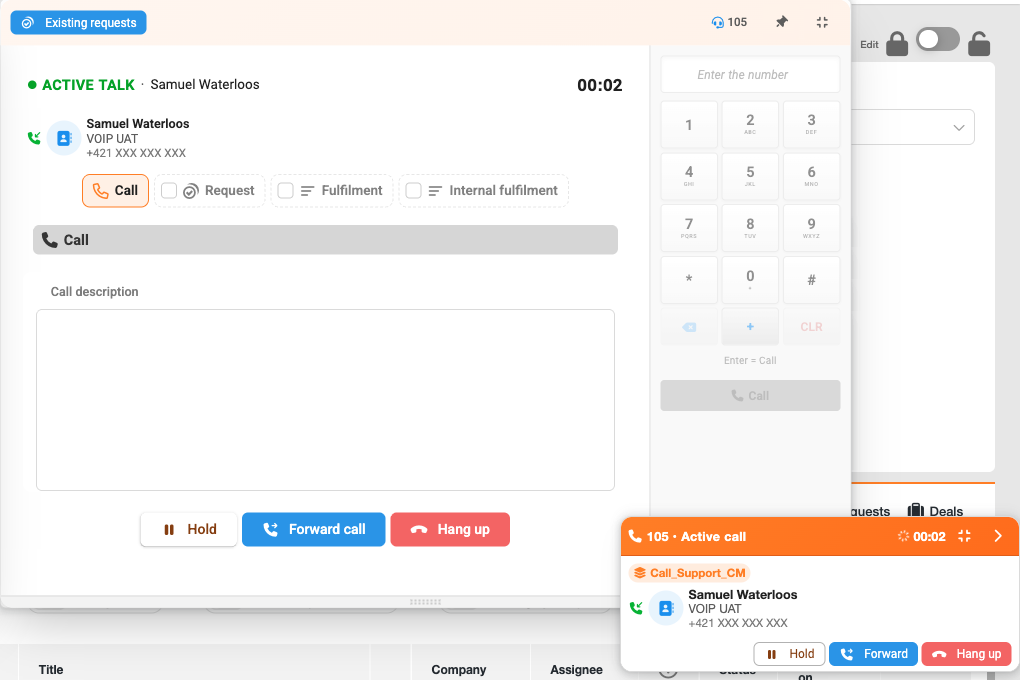
During a call, a status label appears above the form, which changes depending on the stage – ACTIVE CALL, ENDED CALL once the call has been quit, and COMPLETED CALL once it has been processed. Call control is the same in both the small and large panels:
- Hold / Resume – holds the call and restores it. A call on hold is selected as Pause in the header of the small panel. It is advisable to apply this before you start looking for a colleague for call forwarding.
- Forward call – opens the call forwarding panel – the procedure is described below.
- Hang up – ends the call. If call handling is enabled for the relevant line, a form for processing the call opens immediately after hanging up.
When a call is made between two extensions, the receiving operator will view an ‘Internal Call’ tab instead of the usual form, indicating that the call is being handled by the caller.
Call forwarding
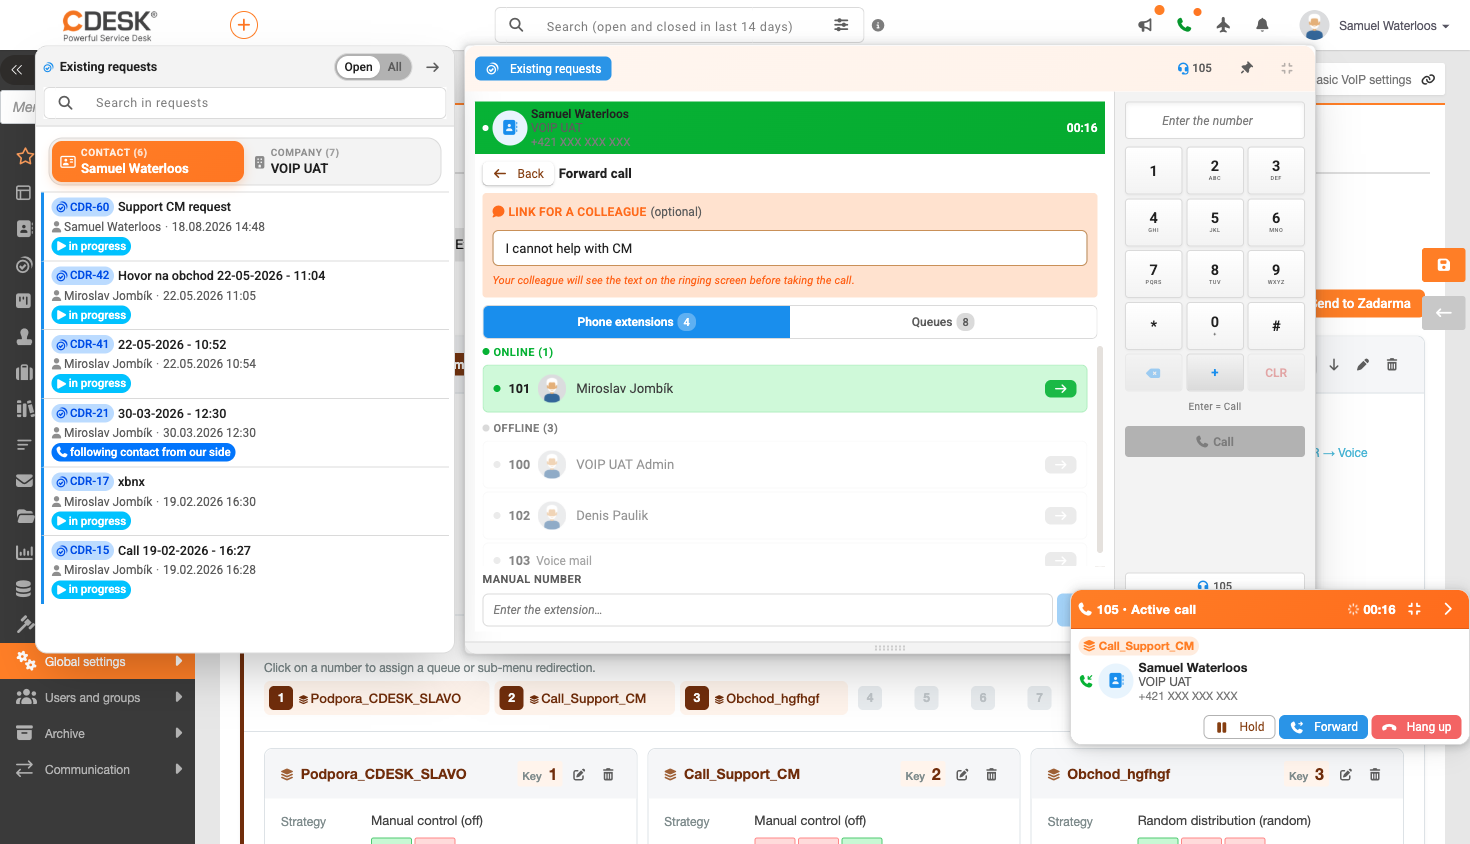
To start call forwarding, click the Forward Call button – this is available in both the small and large panels. You can put the call on hold before forwarding it, so that the caller cannot hear you looking for a colleague. The call panel switches to the destination selection screen and displays a context banner throughout the call forwarding process, so you know the status of the call.
You select the destination from two tabs. On the Extensions tab, extensions are divided into Online and Offline sections; each shows the CDESK username of the user assigned to that extension; if an extension is not assigned to anyone, its name from Zadarma is displayed and the extension number is always shown. Clicking on an extension forwards the call. On the Queues tab, you’ll find queues listed with the number of members and how many of them are online; expand a queue to select a specific member. If the destination is unavailable, CDESK will not allow call forwarding and will indicate that the extension is not online.
The third option is Manual Number – you enter the extension manually and press the Forward Call button to transfer the call. Press the Back button to cancel call forwarding and return to the call.
Before transferring the call, it is advisable to fill in a Link for your colleague. This is optional, and your colleague will see the text on their call screen before answering the call – on their end, it will appear as a Link from the previous operator, along with the name of the person who forwarded the call and the extension from which it was forwarded. This is the quickest way to pass on the context without having to say it out loud.
Call forwarding does not discard anything you have managed to enter into the form. The call in progress, the request and the task details are retained – on both sides. The receiving agent will see these pre-filled during the call, including enabled sections and completed fields; if they have started typing themselves in the meantime, their details will not be overwritten. Your work-in-progress form will be saved as a draft, so you can return to the call even after it has been handed over.
Once the call has been successfully forwarded, CDESK will confirm that the call has been forwarded and issue a warning that your comments have been saved – you can return to the call later via Process Call in the call list. If call forwarding fails, you’ll be notified by a message.
Outgoing calls and click-to-call
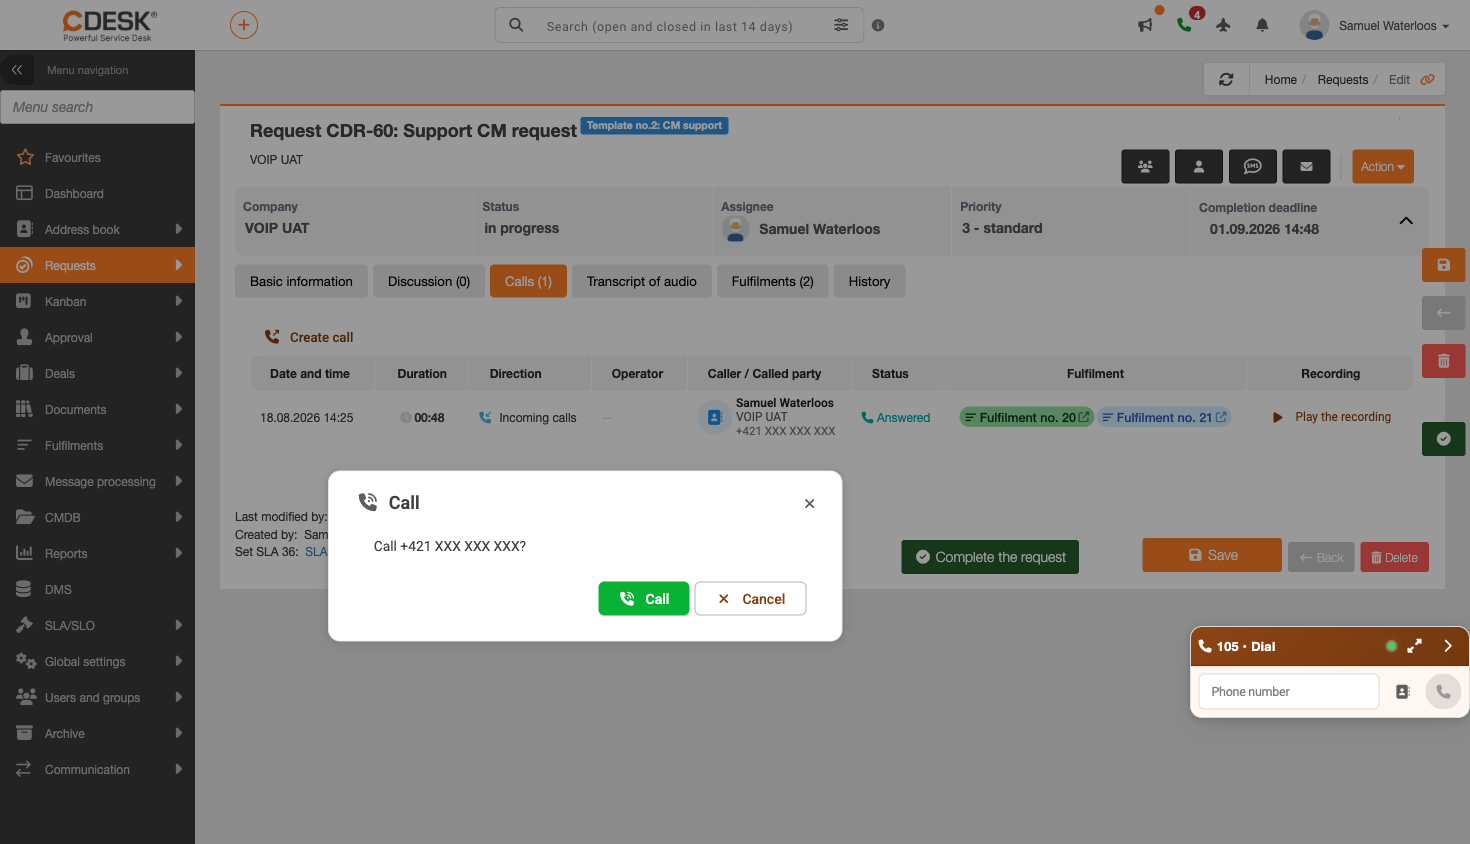
There are three ways to dial a number. The most straightforward is the selection list in the top panel, where you enter the number and make the call; the panel also displays recent calls and contacts. The second option is the phone book and the dial button next to each entry. The third is click-to-call, which involves clicking on the telephone icon or on a link with a number directly where you are working with the information – in the ‘Requested By’ field, ‘Requested For’ field, and ‘Assignee’ field, or in your contacts.
With click-to-call, CDESK first checks whether you have an extension assigned. A confirmation dialogue then views the number being dialled and the ‘Call’ and ‘Cancel’ buttons – the call is only made after confirmation, so a number clicked by mistake won’t make a call. Once the other party picks up, the main panel with call details opens. If you are not logged into Zadarma SIP, the dial button is unreachable and CDESK will provide a warning.
If you are calling directly from a request – using the button to initiate a call or by clicking on a number in the ‘Requested By’ field, ‘Requested For’, ‘Handler’ or ‘Responsible person’ – the call handling screen will open with this request already linked and pre-filled. The connection is currently only a draft, so it can be amended or cancelled; it will only be permanently saved once the call has been completed.
For calls between extensions, dial the extension number directly without the country code. An internal call is handled by the caller – a form opens for them. The person who received the call sees ‘Internal Call’ tab with the colleague’s name and call controls; the form does not open for them.